• Skip to primary navigation
  • Skip to main content
  • Skip to primary sidebar
  • Spring Recipes
  • Recipes
  • Order Meal Prep
  • Healthy Gut Baby Food Course
  • About

Allianna's Kitchen

menu icon
go to homepage
  • Spring Recipes
  • Recipes
  • Order Meal Prep
  • Healthy Gut Baby Food Course
  • About
    • Facebook
    • Instagram
    • Pinterest
    • Twitter
  • search icon
    Homepage link
    • Spring Recipes
    • Recipes
    • Order Meal Prep
    • Healthy Gut Baby Food Course
    • About
    • Facebook
    • Instagram
    • Pinterest
    • Twitter
  • ×
    Allianna's Kitchen » Recipes

    Blog

    fresh pesto in a jar

    April 2, 2024 Condiments

    Dairy Free Pesto

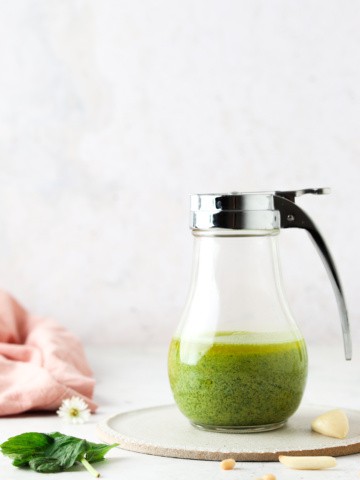
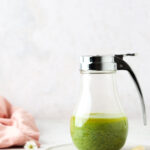
    This creamy Dairy Free Pesto is quite delicious. The fresh basil combined with the lemon and nutritional yeast gives this paleo basil pesto sauce a nice cheesy flavor without cheese. This pesto recipe only takes minutes to make! This is always a huge hit in my home when I make it! I love to make a batch and keep it in my refrigerator so that it is already in there for me to use with any meal. This is my favorite way to always have this delicious homemade pesto without having to make it each time.

    Fresh whole30 pesto in a jar surrounded by fresh garlic and basil.

    This recipe is so versatile and can be paired with multiple dishes. From seasoning proteins to using it as a spread on gluten free bread or rolls, you can’t go wrong! The taste is so refreshing it will remind you of summer but is a sauce you can make year round.

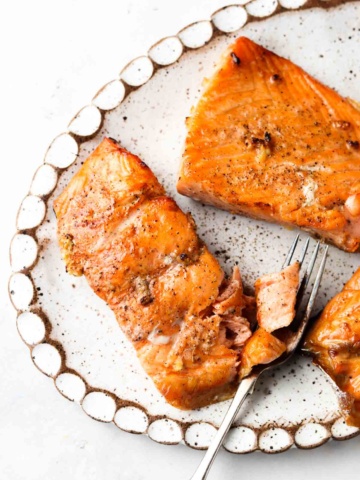
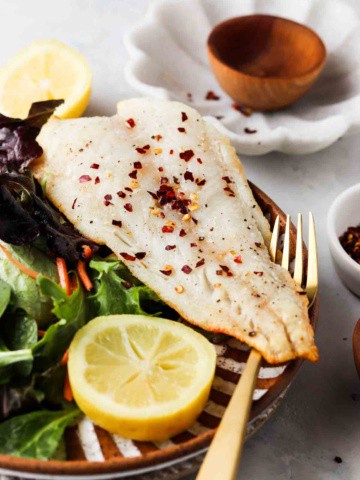
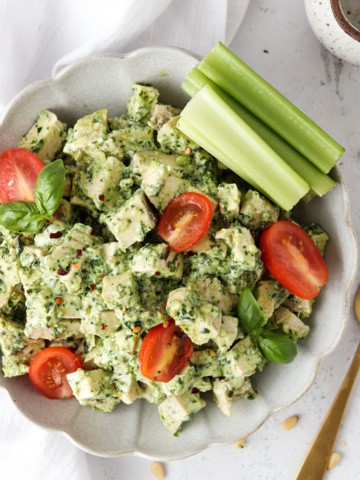
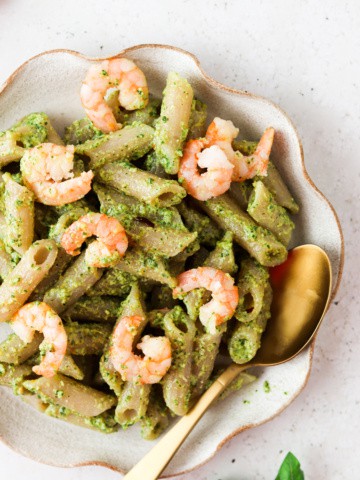
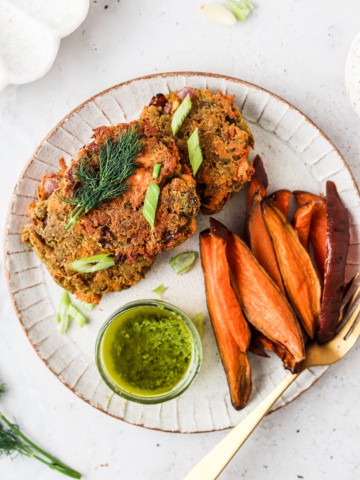
    I love to make a batch of it and use it on multiple dishes through out the week for easy weeknight dinners! I have used pesto on not just pasta, but in chicken salad and with salmon as well. The fresh flavor from the fresh herbs make it easy to pair with any protein and side. The delicious pesto sauce also doesn’t taste heavy like a cream based sauce would. Other sauces that I like to keep on hand are: Argentinean Chimichurri, AIP Nomato Sauce, Dairy Free Avocado Creama, Lemon Dill Aioli, and Red Chimichurri. If you love homemade pesto, but can’t have nuts, check out my Nut Free Pesto.

    [feast_advanced_jump_to]

    Why You’ll Love This Recipe

    • This easy dairy-free pesto recipe is so simple! You just dump all of the simple ingredients into your blender, blend it up, and it’s ready to eat.
    • Kids will love this recipe too!
    • This recipe is naturally Whole30, paleo, gluten free, dairy free, and soy free.
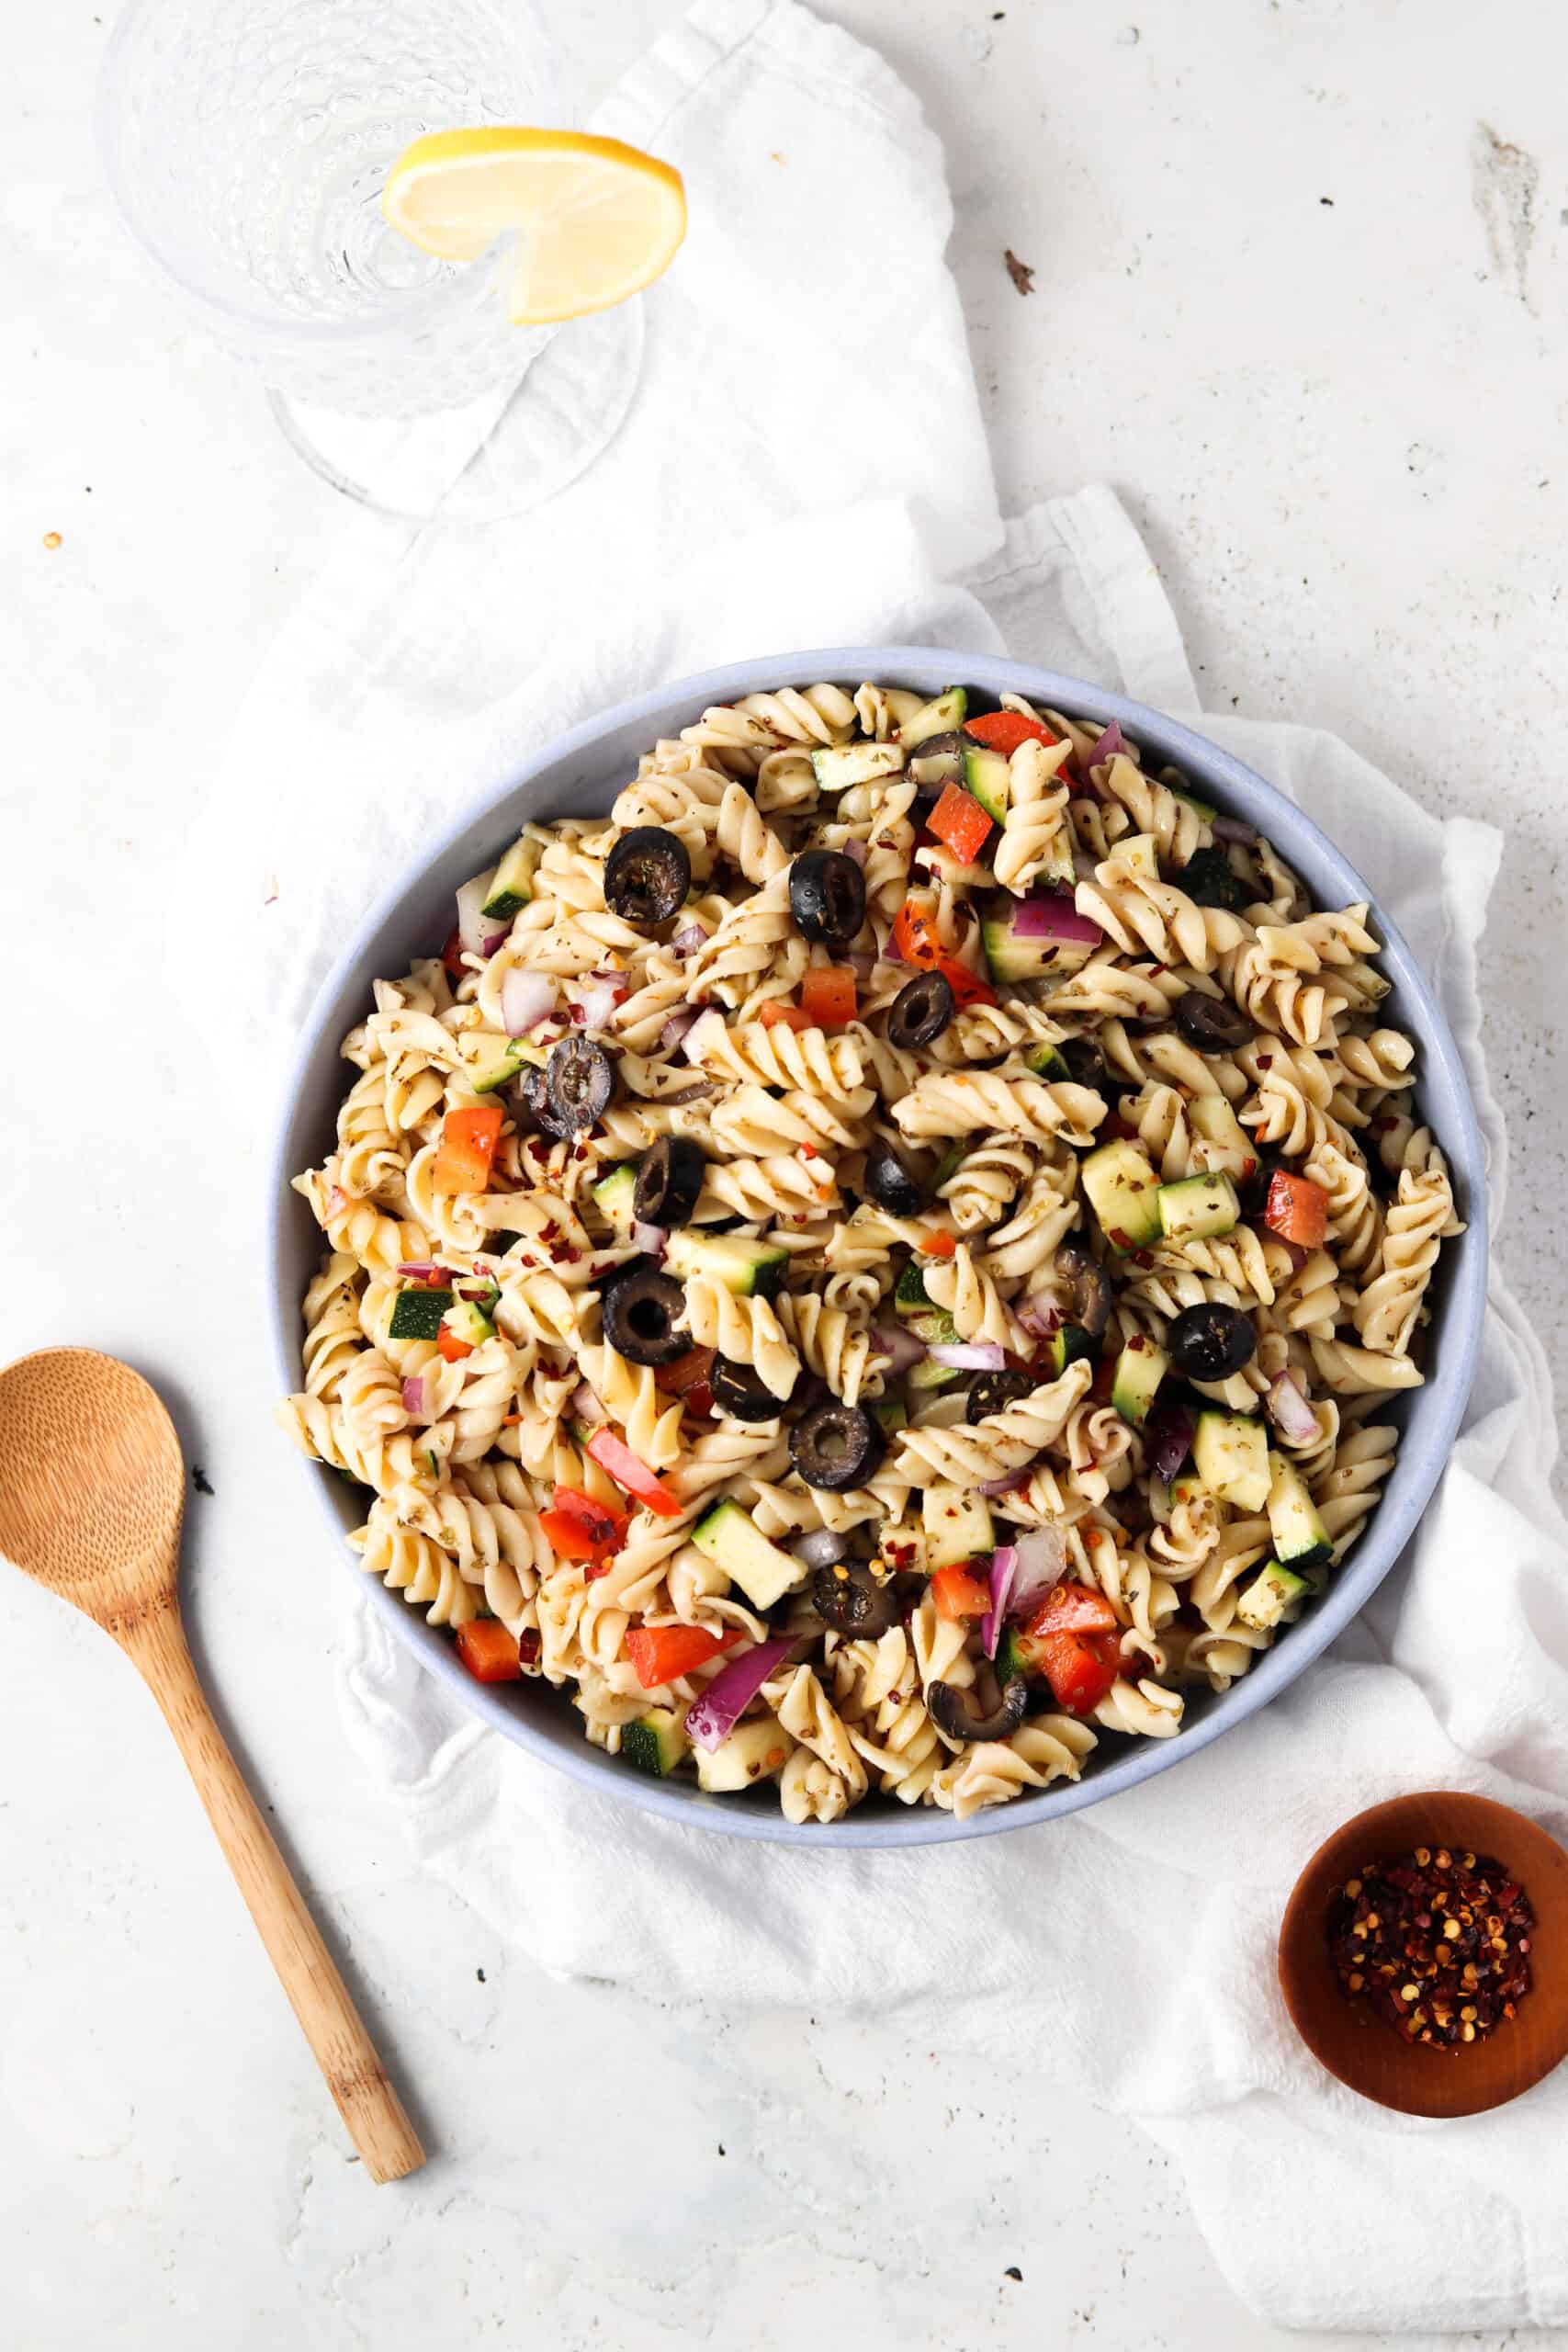
    • I love to make this recipe for my favorite pasta recipe, Whole30 Shrimp Pesto Pasta or my Pesto Orzo Salad. It is truly a perfect pairing and the classic pesto makes the perfect pasta sauce.
    • Even though it only has seven ingredients, it is packed with delicious flavor!
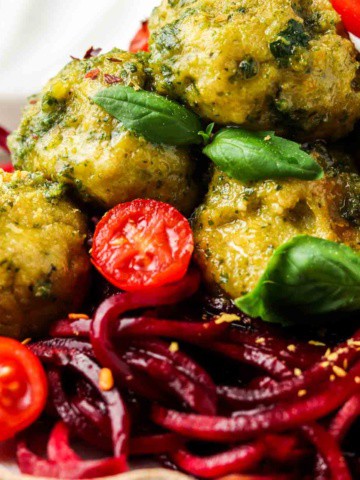
    • Any recipe that calls for traditional pesto you could use this recipe. Such as my Pesto Salmon, Gluten Free Pesto Meatballs, and my Pesto Chicken Salad.
    • This recipe will have more flavor and better consistency than store-bought pesto.

    Ingredients

    Whole30 pesto ingredients in small glass bowls.
    • Pine nuts-This gives the pesto a nice and creamy texture. You can use walnuts but the pesto will not come out as creamy as it would if you use pine nuts. 
    • Fresh basil leaves-I love using my fresh basil from my garden! If you have leftover basil that you bought, trim the stems some and place into a mason jar with water and cover with a plastic bag in your refrigerator to keep it fresh longer.
    • Extra Virgin Olive oil-My go to fat of choice.
    • Garlic cloves -To add some flavor.
    • Fresh Lemon juice-This makes this whole30 pesto, do not skip this!
    • Nutritional yeast-Nutritional yeast is widely used in dairy free/ paleo cooking because it gives dishes a nice cheesy flavor.

    See the recipe card below for a full list of ingredients and measurements.

    Substitutions and Variations

    • If you are not dairy free, you can use parmesan cheese instead of nutritional yeast. The nutritional yeast makes it so you don’t even realize the cheese isn’t in there though.
    • If you can not find pine nuts in a local grocery store, you can also substitute for another nut such as walnuts or pecans but it will change the consistency and flavor.
    • If you follow a vegan or autoimmune protocol (AIP) diet, you can refer to my AIP Pesto recipe for an AIP or vegan pesto sauce.
    • For a different consistency, you could substitute the pine nuts for seeds such as pumpkin seeds or sunflower seeds.

    This recipe has not been tested with other substitutions or variations. If you replace or add any ingredients, please let us know how it turned out in the comments below!

    Step by Step Instructions

    Whole30 pesto ingredients in a blender.

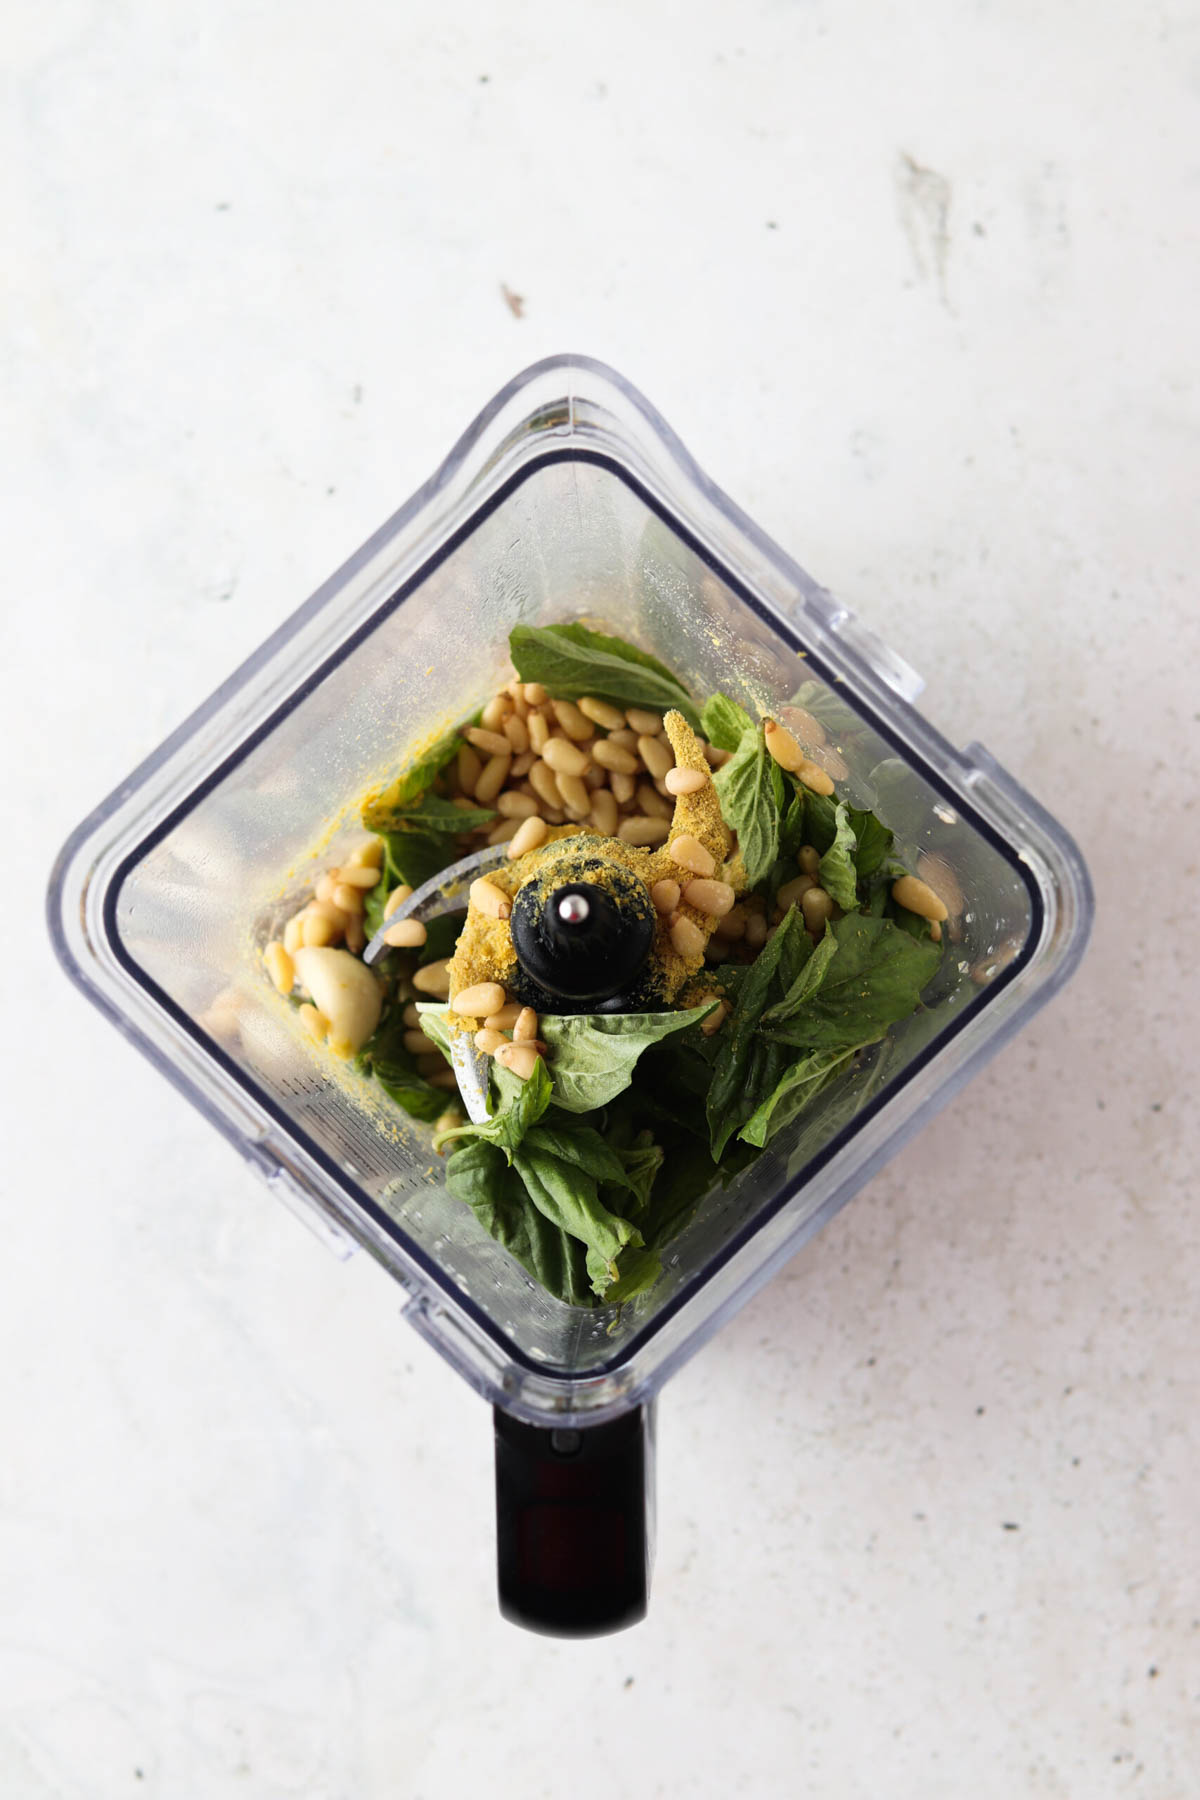
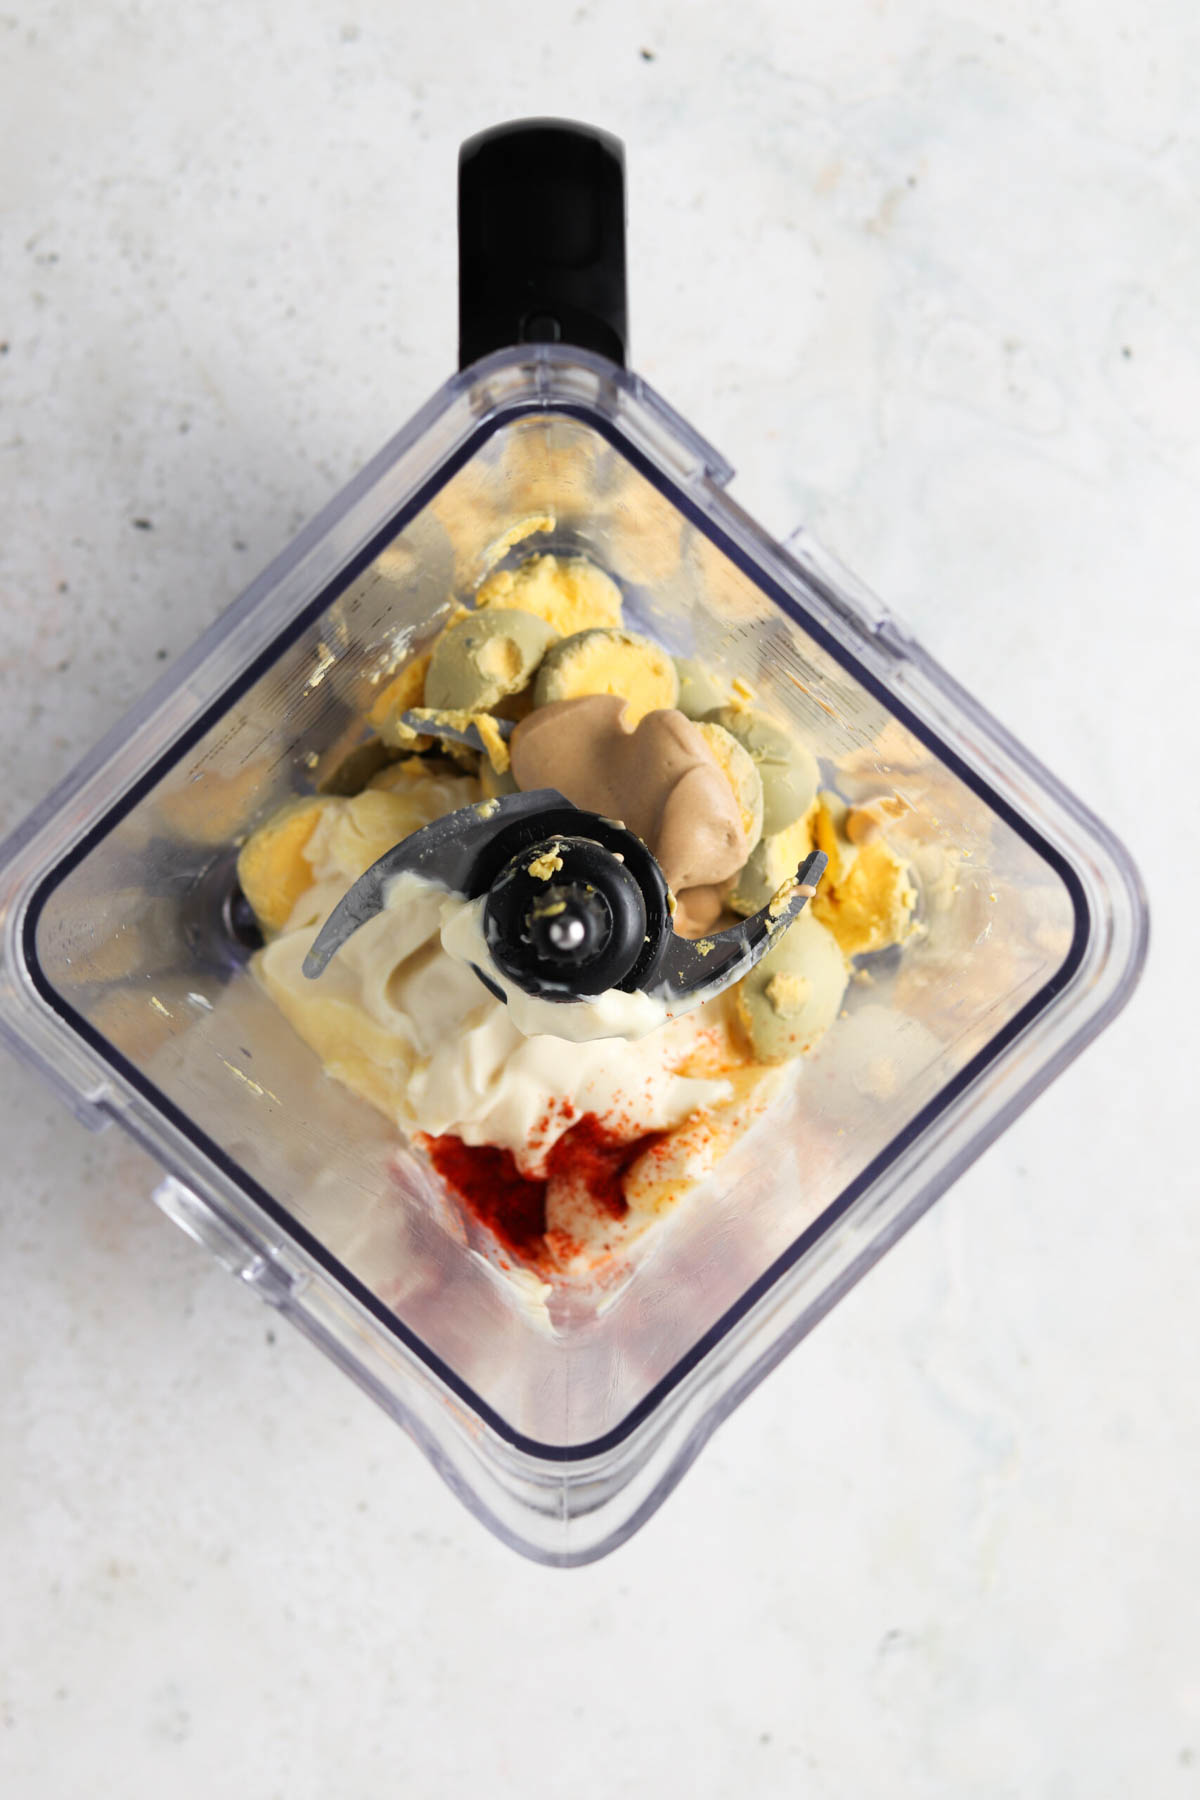
    Photo 1: First, place all of your ingredients into your blender.

    Whole30 pesto blended up in a blender base until smooth.

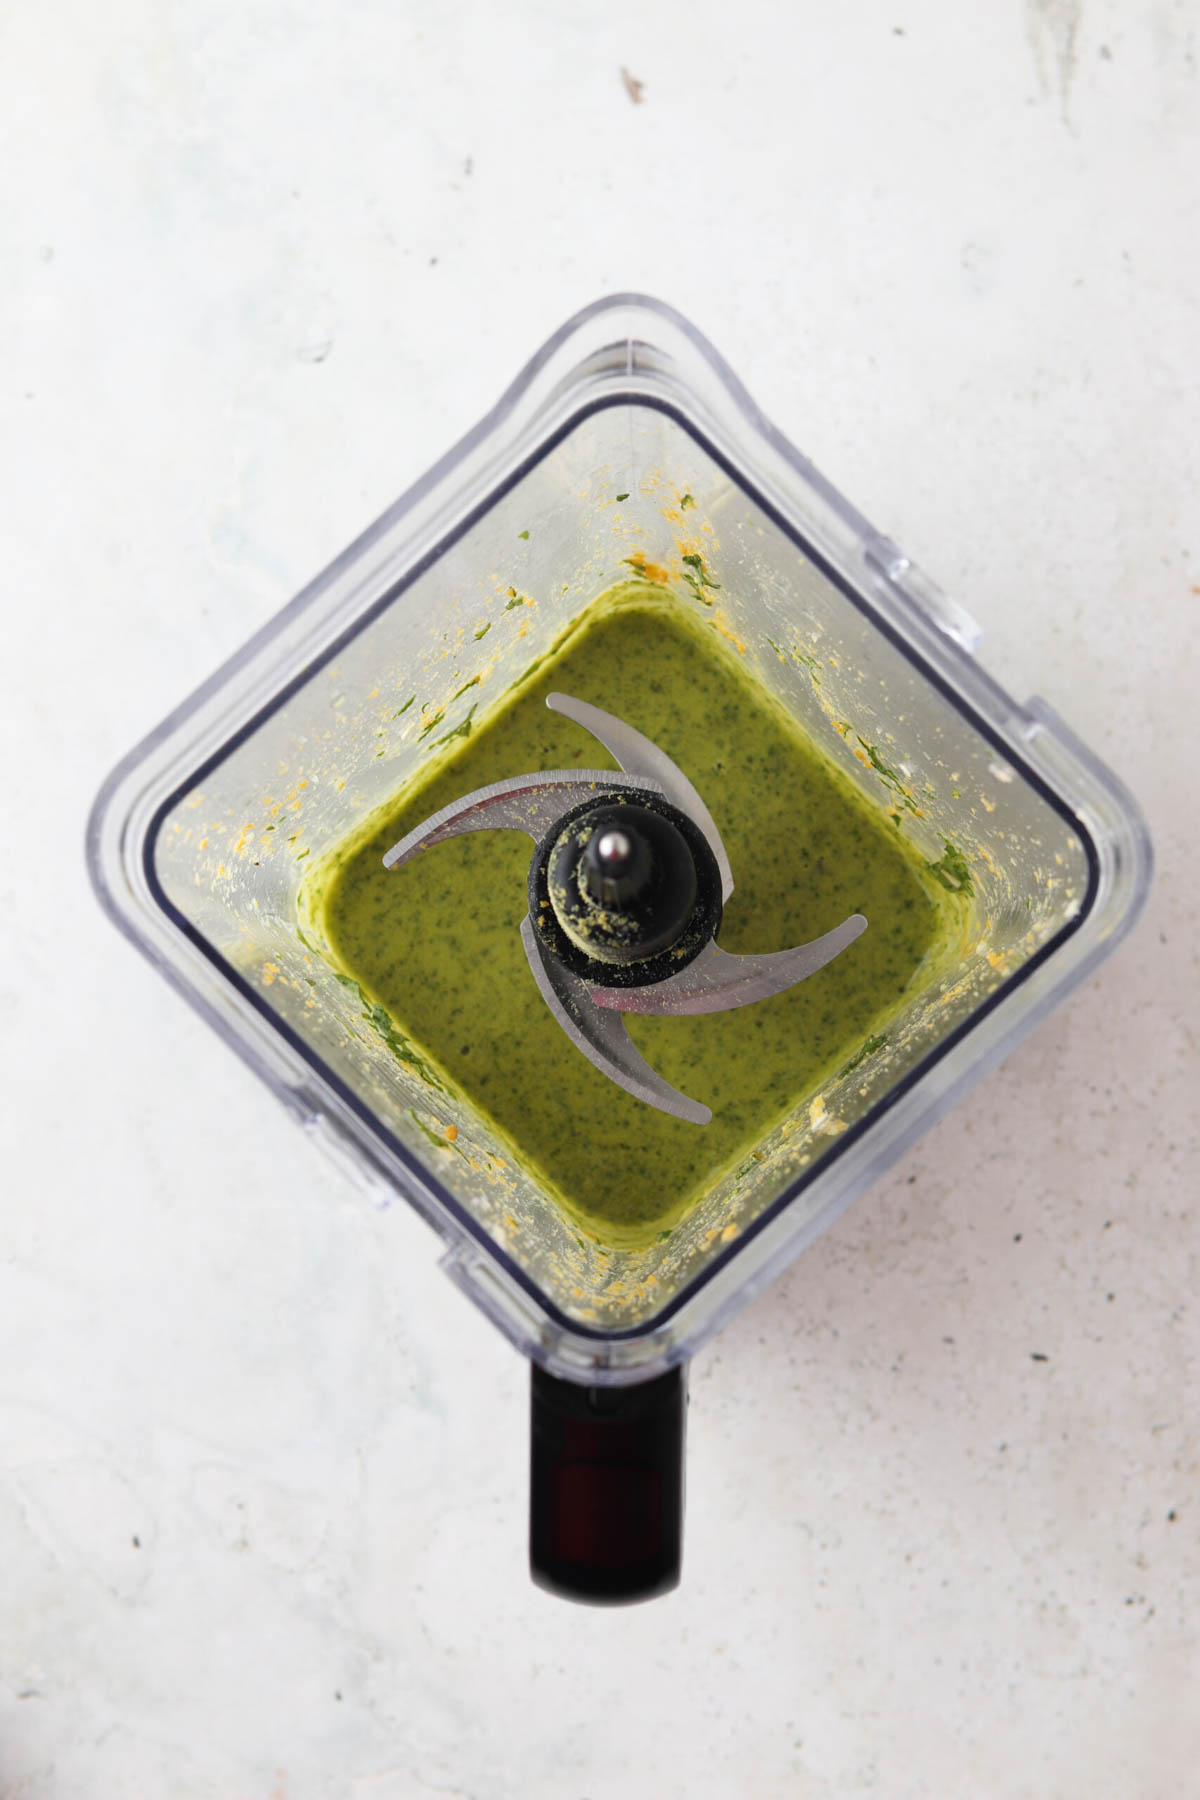
    Photo 2: Then, blend until smooth.

    Equipment Needed

    • Blender – I love my blender. I have had it for years and it still works great. All of the additional attachments that come with it make it an even better value.

    Expert Tips

    • Tip # 1: If you have left over fresh basil when you are done, trim the stems some and place stems into a jar with water in the refrigerator to keep the herbs fresh and green longer.
    • Tip # 2: If you are looking to buy pre-squeezed lemon juice at grocery stores, make sure that there are no additives on the ingredient labels. You will want to make sure they have not added any ingredients such as sugar or another artificial sweetener to it. When using fresh lemons, make sure they are at room temperature when you juice them to make it easier.
    • Tip # 3: Once your pesto is smooth, open your blender and scrape down the sides of the blender and mix a little more to make sure it is fully combined. When you first start to blend some of the ingredients will splash up higher on the sides of the blender and you don’t want to miss having those flavors incorporated.
    • Tip # 4: If you want a more thin pesto, you can add extra olive oil or lemon juice to help thin it out. Adding more liquid and not more basil will change the flavor of the pesto though.

    Recipe FAQ

    What should I serve this with?

    So many different things! I love fresh pesto on so many dishes from chicken salad, to my salads, steak, and even salmon. You can add additional lemon juice or oil to this mixture to make it into a delicious salad dressing.

    What kind of food processor do you use?

    I love my Ninja Food Processor! I have had it for years and it works super well. it is super simple to wash. I just rinse it and place it in the dishwasher. You can use either the blender base or the bowl of a food processor attachment for this recipe.

    How should I serve this dish?

    You can either serve the pesto in a container on the side for you and your guests to serve themselves. Or you could also mix it into your dish ahead of time.

    Can I make the sauce ahead of time and freeze it?

    I don’t recommending freezing pesto. When you thaw it, the consistency will change and will have additional liquid.

    dairy free pesto 5

    Storage Instructions

    • This recipe can be stored in the refrigerator for up to 5 days in an airtight container.
    • I love to keep mine in a mason jar and use it on recipes throughout the week!

    Other Dairy Free Pesto Recipes You Will Love

    • pesto chicken salad 18 scaled
      Pesto Chicken Salad Recipe
    • aip shrimp pesto pasta on a plate
      AIP Shrimp Pesto Pasta (Paleo)
    • close up photo of meatballs with pesto sauce over beet noodles
      Gluten Free Pesto Meatballs (Whole30, AIP Option)
    • far away shot of aip salmon cakes
      AIP Salmon Cakes With Fresh Pesto (Nut Free)

    Are you interested in getting a list of my go to healthy alternatives?

    download your FREE guide below

    download your free guide
    fresh pesto in a jar

    Whole30 Pesto

    Course Condiment, easy, quick, SAUCE
    Cuisine American
    Diet Gluten Free
    Prep Time 10 minutes minutes
    Total Time 10 minutes minutes
    Servings 4 servings
    Author Allianna Moximchalk
    321kcal
    Print Recipe Pin Recipe

    Equipment

    • high speed blender

    Ingredients

    • 2 cups fresh basil
    • 1/4 cup pine nuts
    • 4 cloves garlic
    • 1/2 cup olive oil
    • 1/4 cup nutritional yeast
    • 1 lemon juiced
    • 1/2 tsp sea salt

    Instructions

    • Place all ingredients in the food processor and blend.

    Notes

    Storage: This recipe can be stored in the refrigerator for up to 5 days in an air tight container.
    Nutrition: The nutrition for this recipe is an estimate and the calorie count is not guaranteed.  It is based on 4 servings. 
    Servings: This recipe should yield 4 servings. 
    Creamy and delicious whole30 and paleo pesto recipe.
    Serving: 1serving | Calories: 321kcal | Carbohydrates: 6g | Protein: 3g | Fat: 33g | Saturated Fat: 4g | Polyunsaturated Fat: 6g | Monounsaturated Fat: 21g | Sodium: 2mg | Potassium: 190mg | Fiber: 2g | Sugar: 1g | Vitamin A: 642IU | Vitamin C: 17mg | Calcium: 35mg | Iron: 1mg
    Tried this recipe?Tag me on instagram @alliannaskitchen!
    Pasta salad with olives, peppers and onions in a blue bowl with a white napkin under it.

    April 1, 2024 Allergy Friendly

    Easy Gluten Free Pasta Salad

    This Healthy Gluten Free Pasta Salad is everything pasta salad should be: crunchy, easy, quick, filling, and oh so delicious. The crunchy red bell pepper and onions combined with the oregano and red pepper flakes makes this salad so tasty.  This cold pasta salad makes for the perfect side dish for all of your summer gatherings. Although it is a summer favorite, it is one of my favorite recipes to eat all year long. 

    Paleo pasta salad in a blue bowl with a wooden spoon.

    I love to bring this easy pasta salad recipe to any BBQ I am invited to because it pairs well with anything! I love the crunch that the vegetables give with the tartness that the vinegar adds. This pasta salad will keep you coming back for more. If you are looking for other great summer cookout recipes, check out my other side dishes like my Thai Pasta Salad, Gluten Free Mac and Cheese, Gluten Free Pigs in a Blanket, Cucumber Watermelon Salad Easy Beetroot Dip, Gluten Free Coleslaw and Panera Inspired Strawberry Poppyseed Salad. 

    [feast_advanced_jump_to]

    Why You Will Love This Recipe

    • This recipe is so simple but has lots of flavor. I love the variety of texture that you get in this dish as well. From the soft pasta to the crunchy vegetables it is the full package.
    • Kids will love this recipe too! It’s a great way to get kids to eat additional vegetables.
    • You can bring this dish to any cookout along with my favorite Gluten Free Potato Salad. 
    • This vegan pasta salad is naturally paleo, vegan, gluten free, dairy free, grain free, autoimmune protocol (AIP), and soy free.
    • This is the traditional pasta salad you grew up eating with a healthy spin. Unlike traditional pasta salad, this recipe does not have a heavy mayo-dressing. 
    • The flavors of this recipe are simple but they pair well with any protein. You can easily add in hard-boiled eggs, a can of chickpeas or even grilled chicken.
    • We also have this pasta salad listed on my weekly meal prep menu. Right now, we deliver all over Pittsburgh, but we ship our chocolate chip cookies nationwide. 

    Ingredients

    Paleo pasta salad ingredients in glass mixing bowls on a metal tray.
    • Gluten-free pasta– I am obsessed with Jovial cassava noodles.They are Whole30, paleo and vegan friendly and oh so good! I get mine from Thrive Market. You can use my link and save $40 on your first order. 
    • Red wine vinegar-The red wine vinegar adds the perfect kick to this pasta salad.
    • Oregano-The adds the perfect amount of flavor. The Italian seasoning mix is a must for this recipe. 
    • Red peppers and sea salt-While I think these two ingredients are game changers you have to season this pasta salad to your liking. You can totally make the pasta salad without the red pepper flakes.
    • Black olives, zucchini, red pepper and red onions-This combination of vegetables add the perfect amount of crunch!
    • Extra virgin olive oil-This is what keeps the noodles moist and prevents them from sticking together.

    See the recipe card below for a full list of ingredients and measurements.

    Substitutions and Variations

    • If you prefer a different brand of gluten free noodle other than jovial cassava noodles, you can use your noodle of choice such as brown rice pasta, chickpea pasta, or even gluten free macaroni noodles. Lately I have been loving the Jovial Gluten Free Bow Tie Pasta.
    • This dish is versatile, so you can choose to add additional fixing like kalamata olives, fresh corn, pine nuts, parmesan cheese, juicy red tomatoes or even sun-dried tomatoes. 
    • Sometimes I like adding fresh herbs like fresh basil in my salad too. 
    • If you like your pasta salad to have a creamy texture and more added protein, you can add in some greek yogurt to make a creamy dressing. If you add some tomatoes too, it will make for a great greek pasta salad recipe.

    This recipe has not been tested with other substitutions and variations. If you replace or add any ingredients, please let us know how it turned out in the comments below!

    Step by Step Instructions

    Paleo pasta salad ingredients in a large mixing bowl.
    Step #1: First, cook the pasta according to the instructions on the box. Mix all of the Italian dressing ingredients together in a bowl. Pour the dressing over the cooked pasta and combine it with fresh veggies. Then store the salad in an airtight container in the refrigerator for up to 5 days. Keep in mind this delicious pasta salad needs to marinate for a little bit prior to eating so it is best to let the dressing set prior to digging in!

    Equipment Needed

    • Stock pot
    • Mixing bowl

    Expert Tips

    • Tip # 1: Once you strain your pasta, you will want to mix the red wine vinegar and EVOO in ASAP. This will prevent the pasta from sticking together.
    • Tip # 2: I love dried oregano! But if you do not like a strong oregano flavor, you can lessen the amount that you mix into the pasta salad to start and adjust from there.
    • Tip # 3: You will want to make sure to cook your pasta until it is al dente to prevent from having soft or soggy pasta in your salad especially since it will be sitting in a dressing.

    Recipe FAQ’s

    Does cassava flour pasta cook the same as regular pasta?

    No! Cassava flour pasta is different from regular pasta. When you are boiling cassava flour pasta you will want to make sure to not add EVOO to the boiling water because that can cause the pasta to get soggy.

    Will the pasta dry out if it sits in the refrigerator?

    It shouldn’t, but if you go to serve the pasta salad and it seems dry, you can add more EVOO and red wine vinegar to add moisture back in.

    How should I serve this dish?

    I love to just place it all in a servings bowl that comes with a lid. That way I can mix and serve the pasta salad in the same dish.

    Paleo pasta salad in a blue bowl with a glass and red pepper flakes.

    Storage Instructions

    • This dish can be stored in the refrigerator in an air tight container for up to 5 days.

    Other Gluten Free Cookout Recipes You Will Love

    • thai pasta salad in a blue bowl with a gold spoon
      Thai Pasta Salad (Whole30 Friendly)
    • Cucumber and watermelon salad on a plate with limes, pepper and honey drizzled on top.
      Cucumber Watermelon Salad
    • paleo potato salad on a plate with green onion on top
      Gluten Free Potato Salad Recipe
    • strawberry poppyseed salad 1 scaled
      Panera Inspired Strawberry Poppyseed Salad

    Want a free guide of my go to healthy alternatives?

     
    download your FREE guide here
    Pasta salad with olives, peppers and onions in a blue bowl with a white napkin under it.

    Gluten Free Pasta Salad

    Course Side Dish, Snack
    Cuisine American
    Prep Time 10 minutes minutes
    Cook Time 19 minutes minutes
    Total Time 20 minutes minutes
    Servings 8 people
    Author Allianna Moximchalk
    122kcal
    Cost $10
    Print Recipe Pin Recipe

    Equipment

    • stock pot

    Ingredients

    • 1 pound gluten free pasta I like Jovial. from Thrive Market. Use my link and save $40 on your first order.
    • 1 cup red pepper diced, omit for aip
    • 1 cup purple onion diced
    • 1 cup black olives
    • 1 small zucchini diced
    • 1/3 cup EVOO
    • 4 tbsp dried oregano
    • 1/4 cup red wine vinegar
    • 1/2 tsp pink sea salt

    OPTIONAL:

    • 1/2 tsp red pepper flakes omit for aip

    Instructions

    • Cook the pasta according to instructions on the box. Mix all ingredients in a bowl. Store the salad in an airtight container for up to 5 days.

    Notes

    Storage: This recipe can be stored in the refrigerator for up to 5 days in an air tight container.  If the pasta salad is dry you can add more liquid dressing to it when you serve it.
    Nutrition: The nutrition for this recipe is an estimate and the calorie count is not guaranteed.  It is based on 8 servings. 
    Servings: This recipe should yield 8 servings. 
    Quick and easy gluten free pasta salad alternative.
    Serving: 1.5cups | Calories: 122kcal | Carbohydrates: 4g | Protein: 1g | Fat: 12g | Saturated Fat: 2g | Sodium: 413mg | Potassium: 108mg | Fiber: 1g | Sugar: 2g | Vitamin A: 701IU | Vitamin C: 26mg | Calcium: 18mg | Iron: 1mg
    Tried this recipe?Tag me on instagram @alliannaskitchen!
    Watermelon mocktail margarita in a margarita glass with a lime and orange on top.

    April 1, 2024 Allergy Friendly

    The Best Watermelon Mocktail Recipe

    This Watermelon Mocktail Recipe is super easy to make and makes for the best hot summer day treat. The sweet watermelon combined with the tart lime juice is the perfect combination. You can make this refreshing drink in just under minutes using ingredients that you likely already have on hand in the Summertime! This is a 5 star resort worthy drink that you can make in the comfort of your own home.

    Watermelon mocktail margarita in a margarita glass with a lime and orange on top.

    Nearly 5 years ago I gave up alcohol for good. It was one of the best decisions I have ever made! I have so much more energy and my hormones are much more balanced ever since. I learned you can still enjoy a fun non-alcoholic drink but without the foggy brain the next day. On my blog, I share many of my favorite mocktail recipes that you can make easily at home too! A few of my favorite are my Healthy Raspberry Lemonade Recipe, My Rosemary Mocktail, Ginger Mocktail Recipe, Peach Mocktail, Blood Orange Mojito Mocktail, Paleo Fig Mocktail, Grapefruit Mocktail, Cherry Mocktail, Strawberry Simple Syrup and Strawberry Mint Mocktail. For me having a nice fun summer drink like this one on a hot summer day makes for the best kind of treat, especially drinks with watermelon considering they are one of the most hydrating fruits!

    This mocktail recipe has been a staple for me to make for summer gatherings along with my Gluten Free Pasta Salad, Rhubarb Gluten Free Cake Recipe, Cantaloupe Melon Salad, and Cucumber Watermelon Salad.

    [feast_advanced_jump_to]

    Why I Love This Recipe

    • This recipe takes less than 10 minutes to make!
    • You likely already have all of the ingredients on hand for this recipe. 
    • This recipe is naturally dairy free, gluten free, refined sugar free, alcohol free, paleo and vegan friendly. 
    • You can prepare this recipe ahead of time. 
    • This recipe is adult and kid friendly. 
    • You can make this recipe into homemade freeze pops or a watermelon popsicle using my Homemade Freeze Pop recipe.

    Ingredients

    Picture of watermelon mocktail ingredients laid out on the counter in bowls.
    • Cubed watermelon-You can put a large watermelon and cut it up, or you can buy the pre-cut cubed watermelon from the store. Just make sure whatever kind of watermelon you get, it is a seedless watermelon. 
    • Fresh lime juice-You will want to make sure your limes are ripe. Sometimes I also like keeping a bottom of lime juice in the fridge rather than juicing limes every time I need them. Sometimes it is hard to get all of the juice out of the lime, and the lime juice lasts a lot longer. The lime juice is essential to make this delicious watermelon lime mocktail. 
    • Honey-Raw honey is what gives this recipe a little bit of natural sweetness. 
    • Fresh mint leaves-This is a must to give this recipe that mojito like flavor! Make sure it is muddled.
    • Club soda or sparkling water-To give this drink a fizzy feeling in your mouth!
    • Garnishes-I like to garnish this recipe with watermelon slices, a salted rim, or a slice of lime.

    See the recipe card below with a full list of ingredients and measurements.

    Substitutions and Variations

    • Honey-You can also use agave syrup, agave nectar, or maple syrup if you are vegan or do not have honey on hand. 
    • Coconut water-If it is a day where it is really hot out, I like adding a little bit of coconut water for the extra electrolytes. 

    This recipe has not been tested with any other substitutions or variations. If you try something else out please let me know how it turns out in the comments below!

    How To Make The Best Watermelon Mocktail

    watermelon mocktail 4
    Step #1: Place all of the ingredients in the food processor and blend until smooth.
    watermelon mocktail 3
    Step #2: Place the drink in a cocktail shaker with a strainer or grab a strainer and strain the drink to remove all of the pulp.

    Tips and Tricks

    • Tip #1: While watermelons are most ripe during the summer time of year, you can also buy pre-cut and packaged watermelon in your grocery store all year round. A lot of grocery stores, import this in from places that have watermelon in season, it may not be the most fresh but it is still good! You could use that if you wanted to enjoy this treat all year round.
    • Tip #2: This watermelon margarita mocktail is best made fresh to ensure it is not flat! However, you can make it in advance if you leave out the sparkling water and add the sparkling water prior to serving.

    Frequently Asked Questions

    What does best with this Watermelon Mint Mocktail?

    We love making this drink for summer cookouts and outdoor parties! It pair so well with just about any cookout food. A few of my favorites on my blog are: Gluten Free Burgers, Gluten Free Potato Salad, and Whole30 Coleslaw. 

    What kind of blender do you use?

    I use my Ninja Blender. I have had it since college and it is one of my go tos!

    What do you use to strain a drink?

    I use this strainer to make this drink. It removes the pulp from your drink! You can also use a cocktail shaker with a strainer on top.

    Overhead photo of a watermelon drink in a glass with limes, mint and oranges on the side.


    Looking for healthy swaps? Be sure to check out my FREE go to anti-inflammatory swap guide!

    Download your free swap guide.

    Other Easy Mocktail Recipes

    • pineapple margarita mocktail 3 scaled
      Pineapple Margarita Mocktails
    • Overhead shot of a blood orange mojito in a glass with a dehydrated blood orange on the edge.
      Blood Orange Mojito Mocktail
    • key lime pie mocktail 5 scaled
      Key Lime Pie Mocktail
    • apple margarita mocktail4
      Apple Margarita Mocktail


    Overhead photo of a watermelon drink in a glass with limes, mint and oranges on the side.

    Watermelon Mocktail

    Course Drinks
    Cuisine American
    Diet Gluten Free
    Prep Time 10 minutes minutes
    Total Time 10 minutes minutes
    Servings 4 servings
    Author Allianna Moximchalk
    136kcal
    Cost $5
    Print Recipe Pin Recipe

    Equipment

    • Food processor

    Ingredients

    • 4 cups cubed watermelon
    • 1/4 cup lime juice This is about two ripe limes.
    • 4 mint leaves muddled
    • 1 cup club soda
    • 1/3 cup honey

    Garnishes

    • mint leaves, lime slices, orange slices

    Instructions

    • Place all ingredients in a food processor or blender. Blend until well mixed throughout. Strain the drink prior to putting in a glass to remove the pulp. Serve over ice. Garnish as desired.

    Notes

    Servings: This recipe yields approximately 4 mocktails.
    Nutrition: The nutrition on this recipe is just an estimate and cannot be guaranteed. 
    Storage: You can store this recipe in the fridge for up to 5 days. I suggest waiting to add the club soda prior to serving it to keep the bubbles alive!
    Refreshing summer mocktail that takes less than 5 minutes to make.
    Serving: 1glass | Calories: 136kcal | Carbohydrates: 36g | Protein: 1g | Fat: 0.2g | Saturated Fat: 0.03g | Polyunsaturated Fat: 0.1g | Monounsaturated Fat: 0.1g | Sodium: 13mg | Potassium: 209mg | Fiber: 1g | Sugar: 33g | Vitamin A: 915IU | Vitamin C: 17mg | Calcium: 19mg | Iron: 1mg
    Tried this recipe?Tag me on instagram @alliannaskitchen!
    Gluten free tart with a silky chocolate filling on a plate with fresh berries and mint on top.

    March 30, 2024 Dairy free

    The Best Gluten Free Tart Crust

    This easy yet fancy Gluten Free Tart Crust only takes minutes to prepare yet it is so delicious. This fancy treat will elevate any meal. This extra flaky gluten free crust combined with the silky chocolate tart filling topped off with fresh berries is to die for. This treat reminds me of something you would find in an European Bakery. This recipe requires only simple ingredients and less than 20 minutes of hands on time and is a great make ahead option! 

    Gluten free tart with a silky chocolate filling on a plate with fresh berries and mint on top.

    This recipe was inspired by a recent trip to Europe. I do not know about you, but there is just something special about European bakeries. The freshness, the energy, everything smells so good, not to mention the better quality ingredients there too. As someone who needs to eat gluten free for medical reasons, I know how difficult it can be find a treat that is safe for me to eat and does not disappoint. However, let me tell you this Homemade Gluten Free Tart will not disappoint. I have made it numerous times ever since my trip! If you are a big chocolate lover like me, you will want to check out my other delicious gluten free dessert recipes on my blog like my No Bake Vegan Chocolate Truffles, Gluten Free Red Velvet Cake, Chocolate Covered Pecans, Dairy Free Sugar Cookies, Gluten Free Smores Bars, Gluten Free Rice Crispy Treats, Vegan Buckeyes, and Vegan Reeces. I even have a dog treat recipe on my blog for your fur babies, check out my Liver Cake For Dogs Recipe on my blog. Dogs love this treat. I love making my dog a treat when I make us humans a treat too!

    This recipe was originally published in May of 2020 and updated in March of 2024 to help with user experience.

    [feast_advanced_jump_to]

    Why I Love This Recipe

    • This recipe is super easy to make!
    • While the chocolate filling is my favorite filling, you can use a lot of other fillings too. 
    • This recipe requires minimal ingredients which means you will likely already have everything on hand. 
    • My recipe is naturally gluten free, dairy free, soy free, paleo and refined sugar free. 
    • This tart crust is a great base for any kind of homemade gluten free tart.
    • No one will know this recipe is gluten free considering it tastes like your traditional tart crust.
    • While this recipe is already fancy, you can really jazz it up many ways. I love adding fresh fruit on top!

    Gluten Free Tart Crust Ingredients

    Gluten free tart ingredients laid out on the counter in bowls.

    For the flaky crust:

    • Almond flour-Almond flour is base flour for this Gluten-Free Tart Crust. This my go to gluten-free flour in most gluten free baking. I like using Bob’s Red Mill but any brand will work. I also love the Costco brand of almond flour.
    • Honey-This acts as the sweetener in this tart crust. I like using raw honey. 
    • Ghee-this helps create the flaky buttery crust. I have a recipe on my blog for how to make your own Homemade Clarified Butter. You can save so much money by making your own.
    • Egg yolk-This helps bind the crust together.
    • Cooking oil spray-This is for the tart pan to ensure it does not stick. I like using Avocado Oil Spray but any kind of spray will work. 

    For the silky chocolate filling:

    • Coconut cream-This is the firmer part of the canned coconut milk that is up at the top.
    • Chocolate-I am dairy free so I like using dairy free chocolate. Hu and Enjoy Life are my two favorite brands. 

    See the recipe card below with a full list of ingredients and measurements. 

    Substitutions and Variations

    • Almond four– While there are so many flours in the gluten free baking isle at the grocery store, It is important not to substitute this out for another gluten free flour like oat flour, coconut flour, gluten free all purpose flour or a gluten free flour blend as not all gluten free flours are equal. 
    • Honey-You can also use maple syrup or agave. 
    • Ghee-You can also use coconut oil, butter, olive oil, or vegan butter in this recipe. 
    • You can jazz up your tart by adding some fun toppings like fresh fruit or nuts. I like adding fresh raspberries, lemon slices, strawberries and blackberries. 

    This recipe has not been tested with any other substitutions or variations. If you replace or add any ingredients, please let us know by leaving a comment below!

    Step By Step Instructions

    gluten free tart crust 11
    Step #1: Preheat the oven to 350 degrees F. Place all of the crust ingredients in a large mixing bowl and mix until well mixed throughout.
    Gluten free tart crust in a tart pan with the crust having poked holes in it.
    Step #2: Spray the removable tart pan with cooking spray oil. Then, add in the crust to the pan evenly smoothing it out. Stick your fork in the crust in 10-20 spots to prevent it from rising up while cooking. Cook the tart for 18-20 minutes until golden brown. Allow the crust to cool before moving on to step #3.
    Coconut milk in a sauce pan.
    Step #3: Now add coconut milk to a sauce pan and bring to a boil.
    Chocolate and coconut milk whisked together in a pan.
    Step #4: Once the coconut milk was brought to a boil, remove it from the heat and add the chocolate in while constantly mixing it the chocolate becomes a ganache and is silky smooth.
    Silky chocolate ganache layered on top of tart crust.
    Step #5: Once the crust has cooled, layer on the chocolate sauce on top and smooth it over until smooth. Now allow it to sit in the fridge for a few hours prior to cutting.

    Bakers Tips

    • Tip #1: Allow the tart crust to complete cool and harden prior to cutting into it. 
    • Tip #2: If you have excess dough or want to make make this recipe into an individual treat, you can use these mini tart pans to make minis, how fun!
    • Tip #3: If you do not have a tart pan, you can make this into chocolate pie by using a pie pan.
    A slice of a chocolate tart on a grey plate.

    Recipe Frequently Asked Questions

    Why should you poke holes in a tart crust?

    This prevents the crust from boiling up and getting too tall if you would say. It allows the crust to breathe.

    Can I make this dessert in advance?

    Yes! You can prepare this treat in advance which I love. When you are hosting it is best to prep and make a bunch of stuff ahead of time as possible. Just allow this treat to cool then wrap it in plastic wrap to ensure freshness. 

    What other desserts do you love to serve with this?

    I love making this tart for special occasions like showers, birthdays and Mother’s Day. It pairs so well with my Gluten-Free Lemon Bars.

    How long does this recipe last?

    You can keep this recipe in the fridge covered with plastic wrap for up to 2 days. If you put it in an airtight container, it will last for up to 5 days in the fridge.

    Can I use this recipe to make a Gluten Free Pie Crust?

    Yes! This tart crust would be great for gluten-free pies too!

    What should I serve this on?

    Any sort of serving plate will work! I love using a 9-inch pie plate.

    What kind of pan should I use to make a tart?

    I like using this 9 inch tart pan with the removable bottom.

    A chocolate tart on a plate with one piece cut out.

    Other Gluten Free Dessert Recipes You Will Love

    • dairy free chocolate truffles 6 scaled
      Vegan Chocolate Truffles
    • stacked gluten free pumpkin bread on a cutting board
      Gluten Free Pumpkin Bread
    • A slice of Gluten Free Apple Cake on a white platter with green apples, a cinnamon stick and anise star on top.
      Gluten Free Apple Cake
    • apple crisp on a plate with whipped cream
      Gluten Free Apple Crisp

    Looking for healthy swaps? Be sure to check out my FREE go to anti-inflammatory swap guide! 

    Check out my free guide.


    Gluten free tart with a silky chocolate filling on a plate with fresh berries and mint on top.

    Gluten Free Tart Crust

    Course Dessert
    Cuisine American
    Prep Time 15 minutes minutes
    Cook Time 18 minutes minutes
    Total Time 33 minutes minutes
    Servings 8 servings
    Author Allianna Moximchalk
    525kcal
    Cost $10
    Print Recipe Pin Recipe

    Equipment

    • 9 inch tart pan

    Ingredients

    For the silky chocolate filling:

    • ½ cup coconut cream Or milk will work.
    • 2 cups dairy free chocolate I like this brand

    Crust:

    • 2 3/4 cups almond flour
    • 3 tbsp honey
    • ¼ cup ghee or coconut oil You can also use butter or vegan butter. This should be somewhat melted and not hard.
    • 1 egg
    • Cooking spray oil I like avocado oil. This is used to prevent the tart from sticking.

    Optional toppings:

    • Stawberries
    • Almond slivers
    • Blueberries
    • Pomegranate

    Instructions

    • Preheat the oven to 350. Mix all of the tart ingredients in a bowl or using your food mixer until well mixed. Spray the tart pan to prevnt the tart from sticking.
    • Add the mixture to your oiled tart pan. Evenly spread it out making sure the dough gets in the corners. Pinch the corners so it adheres to the ruffle shape.
    • With a fork, poke holes in the tart crust to prevent the crust from puffing up while baking. Bake in the oven for 18-20 minutes or until the crust is slightly golden brown.
    • Once the tarts are done, allow it to cool while keeping it in the pan. While the tart is cooling, add the coconut milk to a sauce pan on medium heat. Once it boils, remove from the heat and add in the chocolate chips making sure you are whisking non stop or it will burn. Make sure you whisk it until the milk disappears.
    • Once the silky chocolate sauce is formed, pour it over the tart crust and evenly spread it out. Place in the fridge for at least 2 hours so it can set prior to cutting.

    Notes

    Servings: This recipe yields approximately 8 slices of dessert. 
    Nutrition: The nutrition on this recipe is just an estimate and cannot be guaranteed. 
    Storage: You can store this recipe in the fridge for up to 5 days.
    This delicious yet simple Gluten Free Tart Crust with a Sikly Chocolate filling is to die for and so easy to make!
    Serving: 1slice | Calories: 525kcal | Carbohydrates: 43g | Protein: 12g | Fat: 40g | Saturated Fat: 15g | Polyunsaturated Fat: 0.2g | Monounsaturated Fat: 0.4g | Trans Fat: 0.003g | Cholesterol: 20mg | Sodium: 9mg | Potassium: 60mg | Fiber: 7g | Sugar: 29g | Vitamin A: 30IU | Vitamin C: 0.5mg | Calcium: 145mg | Iron: 5mg
    Tried this recipe?Tag me on instagram @alliannaskitchen!


    Close up picture of crispy chicken on a white scalloped plate.

    March 28, 2024 Allergy Friendly

    Crispy Gluten Free Fried Chicken Recipe

    This Perfectly Crispy Gluten Free Fried Chicken Recipe is like nothing else. This homemade breading is beyond amazing. The crispy golden brown breading combined with the tender chicken breast is to die for! The best part of this recipe is that it does not require deep frying, you can pan sear it and cook it on the stove. This gluten free dinner is something both you and your kids will love.  My Gluten Free Fried Chicken with the crispy coating is the real deal and will become a part of your weekly meal rotation!

    Close up picture of crispy chicken on a white scalloped plate.

    If you are like me and have been gluten free for some time now, you know how hard it can be to find a good gluten free breading that is not loaded with processed ingredients. A lot of gluten free bread crumbs have things like seed oils and corn in them which can be problematic for people who have sensitive bodies like myself. I know people with food sensitivities are far more likely to multiple sensitivities. Luckily on my website I have multiple ways to make breaded chicken. This recipe has coconut in it. If you are in need of a Gluten Free Breaded Chicken recipe without coconut, check out my Keto Chicken Tenders. I also have a Crispy Crack AIP Chicken and Gluten-Free Chicken Piccata on my website too! If you are looking for other easy dinners aside from chicken, check out my Blackened Pork Chop recipe.

    Why I Love This Recipe

    • This recipe is super easy to follow and make!
    • This recipe is both kid and adult friendly.
    • My Gluten Free Fried Chicken recipe is also dairy free, soy free, nut free, grain free, paleo and Whole30 friendly.
    • You can pair this dish with just about anything. I love making it with my Crockpot Gluten Free Mac and Cheese, Ninja Air Fryer Potato Wedges, and Honey Sriracha Brussel Sprouts. 
    • This Gluten-Free Dinner Recipe has become a staple in our home! We make it at least once a week. 
    • ​While this recipe has a healthier twist to it, it tastes like your traditional fried chicken recipe. 
    • You can use this recipe with both chicken breasts or chicken thighs! If you like your chicken juicer, I suggest using the thighs.
    • This recipe is also a great dairy-free option for those of you that are dairy free like myself! 

    Ingredients

    Recipe ingredients laid out in glass bowls on the counter top.
    • Chicken-You can use chicken breasts of chicken thighs for this recipe. If you like your chicken juicier, I suggest using the thighs over the breast meat. The breast meat is leaner. I like to get all of our protein from Butcher Box. If you use my Butcher Box link, you can save $50 on your first order!
    • Garlic powder, black pepper, and sea salt to taste. 
    • Eggs-This helps get the breading to stick.
    • Avocado oil-Instead of your traditional deep frying peanut oil, vegetable oil or canola oil, I prefer avocado oil. It is a lot better for you and no one will even be able to tell the difference. I have actually feel a lot better when using avocado oil vs. seed oils. If I eat seed oils, my face gets puffy and I feel inflamed. It also has a high smoke point which means it is a better oil for frying.
    • Cassava flour–This is part of the breading. This is one of my go to’s for gluten free cooking. I personally think it is the closest to wheat flour as it has a stretchy like texture when it is wet. I prefer this over a gluten-free flour blend. I only use the Otto’s Brand and I get this from Thrive Market. 
    • Siete tortilla chips-I like the ones in the green bag or blue bag. I get all of my Siete favorites form Thrive Market. Thrive Market is my one stop shop for all of my favorites. They carry all of my favorite brands at a fraction of the price. If you use my link to join, you can save $40 on your first order!

    See the recipe card below for a full list of ingredients and measurements.

    Recipe Variations and Substitutions

    • Ghee-You can also substitute for butter if you are not dairy free.
    • Siete chips-While the Siete chips are my favorite, you can also use corn chips for this recipe.
    • Eggs-You an also create a buttermilk mixture that is part egg, part buttermilk if you are used to making fried chicken with buttermilk. You can also use coconut milk and part egg if you like the buttermilk idea without actual buttermilk.

    This recipe has not been tested with any other substitutions or variations. If you try something else out please let me know how it turns out in the comments below!

    How To Make The Best Gluten Free Fried Chicken

    Crispy Gluten Free Fried Chicken 9
    Step #1: Preheat the oven to 400 degrees F. Pat dry the chicken. If you are using thighs, trim the thighs. If you are using breasts, I like to butterfly (cut my breasts so they are thinner.) Set the chicken aside. Now, place the tortilla chips in a zip block bag and roll a rolling pin over them to break them up. Now add the tortilla flour to 1/4 cup of the cassava flour. Mix the remaining cassava flour in a bowl with the salt and garlic powder.
    Crispy Gluten Free Fried Chicken 8
    Step #2: Now whisk together the eggs.
    Crispy Gluten Free Fried Chicken 7
    Step #3: Combined the Siete chips mixture with half of the cassava flour in a bowl, then mix the rest of the cassava flour with the spices in another bowl. Set the 3 bowls aside with the egg mixture as well and a baking sheet right next to it to hold the chicken.
    Crispy Gluten Free Fried Chicken 6
    Step #4: Dip each piece of chicken in the cassava flour mixture, then dip it in the egg mixture, then dip it in the Siete chips mixture. Once you have dipped in all 3 mixtures, add the chicken to the sheet pan.
    Crispy Gluten Free Fried Chicken 4
    Step #5: Add the ghee to a frying pan on medium-high heat. Add each piece of chicken to the pan for 4 minutes, then flip the chicken and pan sear for another 4 minutes on the back. Do this until you pan sear all of the chicken. Once the chicken is pan seared, add it to a sheet pan.
    Crispy Gluten Free Fried Chicken 5 1
    Step #6: Once all of the chicken is pan seared, toss the sheet pan in the oven for an additional 7 minutes or until the chicken reaches an internal temperature of 165 degrees F.

    Expert Tips

    • Tip #1: As the chicken cooks, add paper towels to a sheet pan to absorb any excess oil. This will keep the chicken lasting longer and crispy. 
    • Tip #2: The best way to tell of the chicken is done is to stick a meat thermometer in a piece of chicken to ensure it reaches an internal temperature of 165 degrees F. 
    • Tip #3: For best results, your pieces of chicken should be even and the same size. If the size varies too much, the pieces will not cook evenly. 

    Recipe FAQs

    How do I know if my chicken is done?

    The best way to know if chicken is fully cooked is by checking the internal temperature and ensuring it has reached 165 degrees F.

    How long does this recipe last?

    This recipe can last up to 5 days in the fridge in an airtight container. 

    How do I make sure that the chicken has a crunchy coating of breading on top?

    It is important that the breading has a single layer of breading. If you try to coat it on too thick, it will fall off in the pan. 

    Overhead shot of gluten free chicken on a white scalloped plate and a bowl of ketchup.

    Other Gluten-Free Chicken Recipes You Will Love

    • chicken tenders in a basket with ketchup
      Keto Chicken Tenders
    • cooked chicken thighs on a sheet pan
      Honey Garlic Sheet Pan Chicken Thighs Meal
    • Crispy Air Fried AIP Chicken Thighs 4
      Crispy Garlic AIP Chicken Thighs
    • buffalo chicken meatballs stacked on top of each other with whole30 ranch and parsley
      Buffalo Chicken Meatballs


    Looking for healthy swaps? Be sure to check out my FREE go to anti-inflammatory swap guide!

    Check out my free guide.
    Close up picture of crispy chicken on a white scalloped plate.

    Gluten Free Fried Chicken

    Course Dinner, Meals
    Cuisine American
    Diet Gluten Free
    Prep Time 14 minutes minutes
    Cook Time 16 minutes minutes
    Total Time 30 minutes minutes
    Servings 3 people
    Author Allianna Moximchalk
    686kcal
    Cost $15
    Print Recipe Pin Recipe

    Equipment

    • Pan
    • tongs
    • Sheet pan

    Ingredients

    • 5 ounces Siete chips I like the ones in the green or blue bag. I get mine from Thrive Market. If you use my link you can save $40 on your first order.
    • 1/3 cup Ghee or butter
    • 1 pound chicken Breast or thighs work. I get all of our chicken from Butcher Box.
    • 1/2 cup Cassava flour Split into two bowls with 1/4 cup in each cup. Do not try using another flour. I get all of my cassava flour from Thrive Market. Use my link and save $40.
    • 2 Eggs
    • 1 tsp Garlic powder
    • 1/4 tsp Sea salt

    Instructions

    • Preheat the oven to 400 degrees F. Pat dry the chicken. If you are using thighs, trim the thighs. If you are using breasts, I like to butterfly (cut my breasts so they are thinner.) Set the chicken aside.
    • Place the tortilla chips in a zip block bag and roll a rolling pin over them to break them up. Now add the tortilla flour to 1/4 cup of the cassava flour. Mix the remaining cassava flour in a bowl with the salt and garlic powder.
    • Now, whisk together an egg.
    • Grab a sheet pan and set the bowls out of the cassava tortilla mixture, eggs and cassava flour.
    • Dip the chicken into the cassava mixture first, then the egg mixture, then in the tortilla chip mixture. Be sure to make sure the whole piece of chicken is covered. Set the piece aside on the baking sheet. Reheat each step until all of the bread is dipped.
    • Now, add the ghee into the frying pan on medium high heat. Once the ghee is melted add the chicken to the pan for 4 minutes. Then, flip the chicken and cook for an additional 4 minutes.
    • Once each piece is done, put the chicken on a new sheet tray. Once you cook every piece of chicken, place the chicken in the oven for 7 minutes or until the chicken reaches an internal temperature of 165 degrees F.

    Notes

    Servings: This recipe yields approximately 2-3 servings. 
    Nutrition: The nutrition on this recipe is just an estimate and cannot be guaranteed. 
    Storage: You can store this recipe in the fridge for up to 5 days.
    Alternatives: If you are not dairy free, you can use butter. You can also use any corn chips if you do not have Siete chips. Just note, Siete are my favorite 🙂 
    Moist, juicy and tender Gluten Free Fried Chicken.
    Serving: 2pieces of chicken | Calories: 686kcal | Carbohydrates: 49g | Protein: 40g | Fat: 36g | Saturated Fat: 15g | Polyunsaturated Fat: 7g | Monounsaturated Fat: 11g | Trans Fat: 0.1g | Cholesterol: 257mg | Sodium: 568mg | Potassium: 702mg | Fiber: 3g | Sugar: 1g | Vitamin A: 205IU | Vitamin C: 3mg | Calcium: 105mg | Iron: 3mg
    Tried this recipe?Tag me on instagram @alliannaskitchen!
    Cucumber Apple Salad 3

    March 20, 2024 Allergy Friendly

    Cucumber Apple Salad

    My Homemade Cucumber Apple Salad is super easy to make and goes well with just about anything. This homemade fresh salad only takes 10 minutes to make! The fresh cucumbers combined with dill and apples makes for the most delicious fresh salad. I could literally eat this salad with just about anything! It puts a twist on your traditional green salad. 

    Cucumbers, apples and dill chopped up in a scalloped bowl.

    I love eating a nice big salad before every meal. It fills me up and I found that I eat less when I load up on fiber beforehand. As much as I love salads, sometimes I get tired of your traditional salads. This Cucumber Apple Salad puts a nice twist on a traditional salad without the greens and is something the whole family will eat! If you are a big salad person like me, be sure to check out my other favorite salad recipes on my blog like my Panera Inspired Strawberry Poppyseed Salad, Cantaloupe Melon Salad, Arugula Pear Salad, Cucumber Watermelon Salad, and my Acorn Squash Salad.

    [feast_advanced_jump_to]

    Why This Recipe Works

    • This recipe only requires 5 minutes of hands on time. 
    • This recipe is naturally dairy free, gluten free, soy free, nut free, paleo and can be made vegan.
    • You can serve this recipe with just about anything! I made this homemade salad when I make Salmon Filets. 
    • My Cucumber Apple Salad is so refreshing, especially during warm summer days! 
    • You can meal prep this recipe and eat it all week long. 

    Ingredients

    Cucumber apple salad ingredients laid out on the counter.
    • Honey crisp apples-They are my absolute favorite! In my opinion they are the best sweet apples. 
    • Persian cucumbers-I like the mini ones. I like to slice them into coins rather than cube them. 
    • Maple syrup-This adds some sweetness to the dressing!
    • Lemon juice-This adds a nice kick to the salad.
    • Fresh dill-I love fresh did! I cannot get enough of it. It adds so much flavor to a dish and smells so good too. 
    • Sea salt/ kosher salt and black pepper-For flavor. 
    • Extra Virgin Olive oil-This is the base for the salad dressing. 
    • Sunflower seeds-To add a nice crunch. 

    See the recipe card below with a full list of ingredients and measurements.

    Substitutions and Variations

    • Red onion-Most people either love or hate raw red onion. I love it! It adds another layer of flavor to this recipe and a nice kick. 
    • Lemon juice-You can also use lime juice or apple cider vinegar in its place.
    • Fresh herbs-While I love fresh dill, you can also use other fresh herbs like fresh parsley!
    • Persian cucumbers-I also love english cucumbers. You can also use regular cucumbers which are also going to be a bit wider. 
    • Apples-While honey crisp apples are my favorite, green apples or red apples will also work too! Pink lady apples are also a favorite of mine. Using ones with red in them will make this dish more colorful.

    Instructions

    Chopped cucumbers on a cutting board.
    Step #1: Wash and dry the cucumbers. Now, chop them into quarter sized pieces.
    Chopped apples on a cutting board.
    Step #2: Wash and dry the apples. Now, shop them into small bite-sized cubes.
    Chopped up cucumbers and apples in a glass bowl.
    Step #3: Now add the cucumbers and apples to a bowl.
    Dressing mixed in a bowl with a small whisk.
    Step #4: Mix the remaining ingredients together in a bowl.
    Cucumbers, apples, and dressing mixed together in a bowl.
    Step #5: Mix all ingredients together until well mixed throughout.

    Recipe Tips

    • ​Tip #1: If you are making this recipe for an event, I suggest making it a day in advance. This will ensure optimal freshness and make sure the english cucumber and apples do not get soggy.
    • Tip #2: If you like your salad to have a crunch, add nuts or sunflower seeds on top prior to serving. Almond slivers are my favorite salad topper.
    • Tip #3: Since this dish is made with a better quality oil so it will likely solidify in the fridge meaning get kinda hard. If that happens, it does not mean the salad is bad, you just need to let it sit out for 30 minutes or so to get to room temperature prior to eating. 
    • Tip #4: If you want your dish to be creamy, you can make a creamy cucumber salad by adding a little bit of avocado mayo.

    Recipe FAQs

    How long does this recipe last?

    This Cucumber Apple Salad lasts for up to 5 days in the fridge. While the acid in this recipe prevents the apples from turning brown, the cucumbers and apples will get softer as time goes on. 

    What goes well with this salad?

    This flavorful salad goes great with just about anything. I love making it when we have company and for date night. When we have it for date night I love pairing it with my New York Strip Date Night Dinner and Gluten Free Mac and Cheese. 

    How should I store this salad?

    This salad stores best in the fridge in an airtight container. 

    How big should I cut the apple pieces and cucumbers? 

     ​I like to slice the cucumbers into quarter sized pieces and the apples into little cubes. The size does not really matter, but make sure everything is cut into small bite-size pieces. 

    Can I use a mandoline to cut the cucumbers?

    Yes! The mandoline would make it easy to cut the cucumbers. I like this Mandoline linked here.

    Mixed apples and cucumbers in a scalloped bowl with a dill dressing over top.


    Looking for healthy swaps? Be sure to check out my FREE go to anti-inflammatory swap guide!

    Download the guide here.

    Other Vegetable Recipes You Will Love

    • roasted bok choy on a sheet pan with red pepper flakes on top
      Roasted Bok Choy
    • kale and mushrooms on a pretty plate
      Sauteed Kale And Mushrooms
    • instant pot zucchini with red pepper flakes in a bowl
      Instant Pot Zucchini
    • lemon cucumber pickles 2 scaled
      Lemon Cucumber Pickles
    Mixed apples and cucumbers in a scalloped bowl with a dill dressing over top.

    Cucumber Apple Salad

    Course Salad, Side Dish
    Cuisine American
    Diet Low Calorie
    Prep Time 10 minutes minutes
    Total Time 10 minutes minutes
    Servings 8 servings
    Author Allianna Moximchalk
    98kcal
    Cost 5
    Print Recipe Pin Recipe

    Equipment

    • cutting board
    • knife
    • mixing bowls

    Ingredients

    • 5 mini cucumbers washed
    • 2 honey crisp apples washed and cubed
    • 2 lemons juiced
    • 1/4 cup olive oil
    • 2 tbsp maple syrup
    • 1/4 cup fresh dill
    • 1/4 cup almond slivers
    • pinch sea salt

    Instructions

    • Set aside the washed and cut apples and cucumbers.
    • Place all other ingredients in a bowl except the almond and mix well throughout.
    • Toss the dressing with the apples and cucumbers. Chill until ready to serve. Add the almonds on top when you are ready to serve.

    Notes

    This recipe yields approximately 8 servings.
    The nutrition on this recipe is just an estimate and cannot be guaranteed. 
    Store this dish in an airtight container for up to 5 days.
    This super easy and delicious cucumber apple salad goes great with just about anything!
    Serving: 1serving | Calories: 98kcal | Carbohydrates: 15g | Protein: 0.4g | Fat: 5g | Saturated Fat: 1g | Polyunsaturated Fat: 1g | Monounsaturated Fat: 3g | Sodium: 2mg | Potassium: 97mg | Fiber: 2g | Sugar: 12g | Vitamin A: 186IU | Vitamin C: 9mg | Calcium: 11mg | Iron: 0.3mg
    Tried this recipe?Tag me on instagram @alliannaskitchen!
    Lemon garlic asparagus on a serving dish.

    March 19, 2024 Allergy Friendly

    Lemon Garlic Asparagus

    This roasted Lemon Garlic Asparagus recipe is quick, easy, and is a delicious side dish. It has the most perfect combination of garlic and lemon. This easy recipe is the perfect side dish because it goes great with just about anything! Asparagus doesn’t just taste great; it’s good for your body too! It is an excellent source of fiber, vitamin C, and folate, which can act as a brain booster.

    Lemon garlic asparagus on a plate with minced garlic on top.

    I love any simple recipe that I can just mix the ingredients together and bake! On a busy evening I will take any simplicity to my meals I can get. From dump and go oven meals to using air fryers, I enjoy finding sides such as these asparagus or my Air Fried Spaghetti Squash on those busy nights where I need to get the meal out quickly.

    Side dishes are a great way to get additional vegetables into your daily meals. Some of my favorite sides are: Blanched Broccoli, Roasted Cauliflower and Carrots, Roasted Beets and Carrots, Roasted Leeks, Roasted Bok Choy, Peas and Potatoes, and Air Fryer Frozen Brussel Sprouts with Bacon and Pomegranate.

    I love having fun sauces to dip my veggies in like my Lemon Dill Aioli.

    [feast_advanced_jump_to]

    Why You Will Love This Recipe

    • This recipe is made of simple ingredients and easy side dish! It takes just a few minutes to get it in the oven to bake.
    • Asparagus provides, vitamins, fiber, folate, and helps the body to get rid of excess salts.
    • The burst of lemon and garlic are the perfect combination to top off this healthy side dish!
    • This vegetable goes with almost any main dish! My favorite pairing is with my favorite crispy chicken thighs.
    • This smooth and crunchy side dish can be baked, grilled, or even blanched.
    • Spring is the best time to buy asparagus, and it is usually in season until June, making it the perfect springtime side dish to take along to a potluck dinner.

    Ingredients

    Asparagus ingredients in glass bowls on a metal tray.
    • Asparagus– Look for asparagus with plump, firm stalks with a smooth texture so that you get the freshest product.
    • Lemon – The fresh lemon juice adds a bright, citrusy flavor.
    • Garlic cloves – adds a wonderful flavor to the asparagus.

    See recipe card below for a full list of ingredients and measurements.

    Substitutes and Variations

    • Lemons– You can substitute lemon juice for fresh lemons, but bottled lemon juice does lack the full citrus flavor that fresh lemons provide.
    • Asparagus – can be cooked on the grill instead of the oven. Just be sure to watch the cooking time as the asparagus does come in closer contact with the flame.
    • Sea Salt- Any time of salt can be used, although I prefer the taste and texture of pink sea salt.
    • If you are not dairy free, adding freshly shredded parmesan cheese or feta cheese would add great flavor.
    • Another great addition to this garlic lemon asparagus recipe would be some fresh cracked black pepper, garlic powder, or red pepper flakes to add additional flavor to the fresh asparagus.

    This recipe has not been tested with other substitutions or variations. If you replace or add any ingredients, please let us know how it turned out in the comments below!

    Step by Step Instructions

    Asparagus in a clear glass bowl with garlic and oil on it.

    Photo 1: Preheat the oven to 400 degrees F. Trim asparagus by cutting the woody ends (ugly side) of the asparagus stalks on your cutting board, and place the asparagus as well as the other ingredients in a large bowl. Mix throughout.

    Lemon garlic asparagus on a plate with fresh garlic and a lemon slice.

    Photo 2: Lay the asparagus down on a baking sheet in a single layer, and bake for about 10 minutes. Flip the asparagus at the 5 minute mark with tongs.

    Expert Tips

    • Tip #1: To keep asparagus from getting soggy, be sure that you don’t overcook it for the best results. Asparagus is meant to be a bit crunchy yet smooth.
    • Tip #2: You can grill your asparagus instead, but you’ll only need to grill it for 5-10 minutes since it is so close to the flame. Be sure to flip it with tongs halfway through cooking.
    • Tip #3: Be sure to choose asparagus that is firm and has a smooth texture. The best time of the year to buy asparagus is during Spring.
    • Tip #4: For an easier way to mince garlic cloves, you can purchase a garlic press!

    Recipe FAQs

    How do I know when the asparagus is done cooking?

    The asparagus should be crisp, tender, and bright green.

    Can I blanch asparagus?

    Yes! Keep in mind that asparagus continues to cook even after you are done “cooking” it. Start off by bringing a large saucepan filled with water to a boil. Then, add the asparagus and cover for 1-2 minutes. Once the time is up, drain the water, and place the asparagus in an ice bath. This will prevent it from continuing to cook.

    What can I make to go with this recipe?

    This great side dish can be paired with almost any main dish. The perfect recipe to pair this side dish with is a chicken piccatta dish!

    How should I store leftovers of this recipe?

    Leftover asparagus side dish can be stored in an airtight container for up to 5 days in the refrigerator.

    What do you garnish this dish with?

    I love to garnish a platter of this simple side dish with fresh lemon zest, lemon slices, and even fresh garlic.

    A platter of lemon garlic asparagus on a plate with fresh garlic and a lemon slice.

    More Side Dish Recipes You Will Love

    • beets and carrots on a plate
      Roasted Beets and Carrots
    • Blanched broccoli in a bowl with red pepper flake garnish.
      Blanching Broccoli
    • air fried potato wedges on a plate with sauces
      Ninja Air Fryer Potato Wedges
    • close up photo of tomatoes in the air fryer with seasoning on top
      Air Fryer Roasted Tomatoes

    Are you interested in a guide of my go to healthy alternatives?

    Download your FREE guide below

    download here
    Lemon garlic asparagus on a serving dish.

    Lemon Garlic Asparagus

    Course Side Dish
    Cuisine American
    Diet Gluten Free
    Prep Time 5 minutes minutes
    Cook Time 10 minutes minutes
    Total Time 15 minutes minutes
    Servings 4 people
    Author Allianna Moximchalk
    54kcal
    Cost $3
    Print Recipe Pin Recipe

    Equipment

    • baking sheet or large pot

    Ingredients

    • 1 bunch asparagus
    • 1 tbsp EVOO
    • 1 whole lemon juiced
    • 1 pinch sea salt
    • 1 pinch black pepper
    • 6 cloves garlic minced

    Instructions

    • Preheat your oven to 400 degrees F. Cut off the bottoms (ugly end) of the asparagus, about 1 inch up. Add the asparagus and other ingredients to a bowl and mix the asparagus up allowing it to become evenly coated with the EVOO, garlic, lemon, sea salt, and pepper. Move the asparagus to a baking sheet and line up without over lapping on a baking sheet. Bake for 10 minutes. Flip the asparagus at the 5 minute mark with tongs, cook for remaining 5 minutes. See instructions above for blanching and grilling.

    Notes

    Storage: This recipe can be stored in an air tight glass container for up to 5 days.
    Nutrition: The nutrition for this recipe is an estimate, and the calorie count is not guaranteed.  It is based on 4 servings.
    Servings: This recipe should yield 4 servings.
    Quick and easy side dish.
    Serving: 1bunch | Calories: 54kcal | Carbohydrates: 4g | Protein: 2g | Fat: 4g | Saturated Fat: 1g | Sodium: 12mg | Potassium: 228mg | Fiber: 2g | Sugar: 2g | Vitamin A: 851IU | Vitamin C: 6mg | Calcium: 27mg | Iron: 2mg
    Tried this recipe?Tag me on instagram @alliannaskitchen!
    Close up photo of breaded fish on a plate with ketchup, french fries, lemon halves and fresh herbs.

    March 17, 2024 Air Fryer

    Easy Gluten Free Fish and Chips Recipe

    This Gluten-Free Fish and Chips Recipe is super easy to make and SO delicious. Even my gluten loving friends love this recipe. This easy fried fish recipe doesn’t even require deep frying! This recipe makes for a great weeknight or even lent dinner. With this recipe, you can have dinner on the table in under 30 minutes. The crispy and golden brown breaded fish combined with french fries makes for one crowd pleasing meal. This recipe has become a staple in our home!

    Close up photo of breaded fish on a plate with ketchup, french fries, lemon halves and fresh herbs.

    My husband does not eat fish during lent on Friday’s. He always takes one of the salmon meals from my meal prep company for lunch and then I make some sort of fish for dinner. Recently we have made a lot of Gluten Free Shrimp Scampi, Pan Seared Sea Bass in Lemon Caper Sauce, Gluten Free Salmon Cakes, Dairy Free Tuna Noodle Casserole, and my absolute favorite Gluten Free Fried Shrimp for Friday night dinners. But as of recently my husband has been craving fried fish, which is what inspired my Gluten Free Fish and Chips recipe! As someone who has celiac disease, I cannot have gluten. Gluten tends to be a standard in most fried fish recipes, but this one will shock you that it is completely gluten free!

    [feast_advanced_jump_to]

    Why This Recipe Is So Good

    • This recipe is made with super simple ingredients and no additives. A lot of gluten free breaded recipes have binders and things in them like xanthan gum which can cause an upset stomach, especially for those that are on a gluten-free diet because they have celiac disease or have a serve gluten intolerance. This recipe does not use any binders like gums. 
    • This recipe is naturally gluten free, dairy free, soy free, nut free, grain free, paleo, and Whole30 friendly.
    • ​Both kids and adults love this recipe!
    • This recipe pairs well with just about anything. 
    • ​Most people won’t even be able to tell this dish is gluten free.

    Recipe Ingredients

    Gluten free fish and chips ingredients laid out on the counter in small bowls.
    • Fresh fish of your choice-I used fresh cod fillets for this. I like to get all of our fish from Butcher Box. They have a nice selection of wild caught fish that we like to keep in our freezer. If you use my Butcher Box link, you can save $50 on your first order!
    • Garlic powder, black pepper, and sea salt to taste. 
    • Eggs-This helps get the breading to stick.
    • Avocado oil-I am really big on using healthy fats. As someone with an autoimmune disease I am sensitive to seed oils. I never use a deep fryer and canola oil when I “fry” something, I always use avocado oil. 
    • Cassava flour–This is part of the breading. I get this from Thrive Market.
    • Siete tortilla chips-I like the ones in the green bag. I get all of my Siete favorites form Thrive Market. Thrive Market is my one stop shop for all of my favorites. They carry all of my favorite brands at a fraction of the price. If you use my link to join, you can save $40 on your first order!

    For the “chips”

    • You can buy frozen french fries and cook according to the instructions on the back or make my Crispy Mini Potatoes or Air Fryer Home Fries.

    See the recipe card below for a full list of ingredients and measurements.

    Substitutions and Variations

    • Oil-I highly suggest avocado oil or ghee for this recipe. I have a recipe on my blog about How To Make Clarified Butter. I do not suggest using oilve oil. Olive oil has a low smoke point and becomes toxic during temperatures that are too high.
    • Fresh fish-You can also use mahi mahi for this recipe. Any kind of flaky white fish will work! If you want to make gluten-free fish sticks, make sure to cut the fish in a stick like form rather than using whole filets. 
    • Flour-Not all gluten-free flour is created equally therefore, I do not suggest trying to substitute out the cassava flour with something else. 

    This recipe has not been tested with any other substitutions or variations. If you try something else out please let me know how it turns out in the comments below!

    Recipe Instructions

    Crushed up chips in a bag with cassava flour being rolled out with a rolling pin.
    Step #1: Make sure the fish is completely thawed. Then, pat dry the dish with paper towels. Place the tortilla chips in a bag and crush, add 1/4 cup of the cassava flour to the bag and then set aside. 
    Cassava flour, sea salt, pepper and garlic powder in a clear bowl.
    Step #2: In a separate bowl, mix the remaining 1/4 cup of cassava flour, sea salt, pepper and garlic powder in a bowl. 
    Gluten Free Fish and Chips 5
    Step #3: In another bowl, crack the two eggs and whisk them.
    Gluten Free Fish and Chips 4
    Step #4: Now, set aside a sheet pan. Dip each piece of fish into the flour and spice mixture, then dip them into the egg mixture, then dip it into the flour/ tortilla mixture to coat. You will want to shake off any excess batter so it does not make the pan messy. Set each filet aside on the baking sheet until you are ready to pan sear. 
    Fried dish in a large frying pan.
    Step #5: ​Using a large frying pan, put it on the stove on medium-high heat. Add in your avocado oil to the pan and let the pan get real hot. Make sure you have enough oil in the pan to cover the bottom surface area. If you don’t add a little more oil. Add the fish fillets to the pan in a single layer and bake for 2-3 minutes on each side. This kind of dish does not need to cook very long. To get a perfectly fried fish, be sure to set your timer for just 2-3 minutes on each side.

    Expert Tips

    • Tip #1: Be sure to pat dry the fish prior to coating it. This will help the coating stick better!
    • Tip #2: Be sure not to over cook the fish. This dish truly needs 2-3 minutes on each side and that is it. If you are cooking even smaller pieces, it needs less than that.
    • Tip #3: This dish takes best hot.

    Recipe FAQs

    Is fish and chips healthy?

    Usually fish and chips are battered with all purpose flour, vegetable oil, and beer which doesn’t make for the healthiest meal. But with this recipe I strive to use the highest quality ingredients and better for you flours and oils.

    Can Celiacs eat battered fish?

    ​Yes! It just depends how it is made. It must be made with a gluten free batter, in a separate space from regular battered fish and without beer. 

    Can I freeze battered fish?

    I do not recommend freezing this recipe. Anytime a recipe is breaded, it will likely get mushy in the freezer. It is better to make this recipe fresh.

    How can I store this recipe?

    I suggest storing this recipe in an air tight glass container in the fridge for up to 4 days.

    What serves best with this recipe?

    How can you make battered fish without beer?

    Most battered dish is made with beet but in order to keep this recipe made with the best ingredients, I make it without. I can promise you it is just as good!

    Gluten free fish and chips on a plate with ketchup, lemons, and fresh herbs.

    Other Gluten Free Fish Recipes You Will Love

    • halibut fish tacos on a pale blue plate
      Halibut Fish Tacos
    • Air fried salmon filets on a white platter with freshly cracked pepper on top and a fork on the side.
      Easy Frozen Salmon In Air Fryer
    • air fried cod on a plate with mixed greens
      Easy Frozen Cod In Air Fryer
    • beautiful cajun cod on a plate
      Easy Blackened Cod

    Are you interested in a list of my go to healthy alternatives?

    Download your FREE guide below.

    download your free guide here.
    Close up photo of breaded fish on a plate with ketchup, french fries, lemon halves and fresh herbs.

    Easy Gluten Free Fish and Chips Recipe

    Course Main Course, Meals
    Cuisine American
    Diet Gluten Free
    Prep Time 15 minutes minutes
    Cook Time 6 minutes minutes
    Total Time 21 minutes minutes
    Servings 3 servings
    Author Allianna Moximchalk
    463kcal
    Cost $10
    Print Recipe Pin Recipe

    Equipment

    • Pan to make the dish in
    • Roasting/ baking tray for the fries

    Ingredients

    • 1 pound cod filets Thawed and dried. I get mine from Butcher Box. Use my link and save.
    • 5 ounces Siete tortilla chips I use the ones in the green bag. You can use any kind, just note the different flavors will change the taste. I get mine from Thrive Market. Use my link and save $40 on your first order.
    • 1/2 cup Cassava flour Split. You will split this into 2 bowls with 1/4 cup each. Do NOT try using another flour. I get this from Thrive Market too.
    • 2 Eggs
    • 1 tsp Garlic powder
    • 1/4 tsp Sea salt
    • 1/4 tsp Black pepper
    • 1/4 cup ghee Or butter if you are not dairy free.

    For the "chips"

    • 1 bag frozen fries Or you can make your own fries using my homemade home fries or crispy potatoes. You can find the recipes linked in the notes below.

    Instructions

    • Make sure the fish is completely thawed. Then, pat dry the dish with paper towels. 
    • Place the tortilla chips in a bag and crush, add 1/4 cup of the cassava flour to the bag and then set aside.
    • In a separate bowl, mix the remaining 1/4 cup of cassava flour, sea salt, pepper and garlic powder in a bowl. 
    • In another bowl, crack the two eggs and whisk them.
    • Now, set aside a sheet pan. Dip each piece of fish into the flour and spice mixture, then dip them into the egg mixture, then dip it into the flour/ tortilla mixture to coat. You will want to shake off any excess batter so it does not make the pan messy. Set each filet aside on the baking sheet until you are ready to pan sear.
    • ​Using a large frying pan, put it on the stove on medium-high heat. Add in your avocado oil to the pan and let the pan get real hot. Make sure you have enough oil in the pan to cover the bottom surface area. If you don't add a little more oil. 
    • Add the fish fillets to the pan in a single layer and bake for 2-3 minutes on each side. This kind of dish does not need to cook very long. To get a perfectly fried fish, be sure to set your timer for just 2-3 minutes on each side.

    For the "chips"

    • Follow the direction on the frozen bag or you can follow the directions in my Homemade Home Fries Recipe or Crispy Mini Potatoes below in the recipe notes.

    Notes

    Servings: This recipe yields approximately 3 servings. 
    Nutrition: The recipe card on this recipe is an approximate count and cannot be guaranteed.
    Important notes: You can make frozen french fries with this recipe or you can use my Homemade Home Fries recipe or Mini Crispy Potatoes. 
     
    Easy Gluten Free Fish and Chips recipe that your whole family will love.
    Serving: 1serving | Calories: 463kcal | Carbohydrates: 49g | Protein: 35g | Fat: 14g | Saturated Fat: 2g | Polyunsaturated Fat: 6g | Monounsaturated Fat: 4g | Trans Fat: 0.04g | Cholesterol: 174mg | Sodium: 474mg | Potassium: 769mg | Fiber: 3g | Sugar: 1g | Vitamin A: 221IU | Vitamin C: 3mg | Calcium: 122mg | Iron: 3mg
    Tried this recipe?Tag me on instagram @alliannaskitchen!
    whole30 deviled eggs 4 scaled

    March 17, 2024 Allergy Friendly

    Healthy Deviled Eggs

    These Healthy Deviled Eggs are perfect for every occasion! The creamy avocado mayonnaise combined with the dijon mustard and pickle juice makes for the most perfect filling. We like to top these eggs off with black olives and mini pickles. This recipe includes multiple variations to make your deviled eggs stand out during the holiday season.

    Deviled eggs on a plate with fresh herbs, olives, bacon and paprika on top.

    This Paleo Deviled Egg appetizer is perfect for all things! We love to make these for holiday brunches as well as get togethers and date nights. The classic recipe of deviled eggs are also a great source of protein and low carb snack.

    Appetizers are a great way to keep healthy snack options on hand. Some of my favorite appetizers are: Banana Chia Pudding, Whole30 Hummus, Simple Homemade Beetroot Dip, Gluten Free Pigs in A Blanket, Air Fryer Potato Skins, Bacon Wrapped Chicken Bites, Vegan Taco Dip, Gluten Free Pasta Salad and Keto Jalapeño Poppers.

    [feast_advanced_jump_to]

    Why You Will Love These Healthy Deviled Eggs

    • This healthy deviled egg recipe is full of flavor, super easy to make and can be made for many different occasions! The creamy texture of these healthy deviled eggs will make you want them for every party you host.
    • This recipe is naturally dairy free, gluten free, soy free, nut free, paleo, Whole30, and refined sugar free. This recipe is naturally a celiac safe recipe too!
    • This recipe is my go to recipe for Easter! I like to make it with my Gluten Free French Toast Casserole for brunch. Both adults and kids love it because they are made of simple ingredients.
    • Deviled eggs are a great alternative for traditional eggs for breakfast.

    Recipes To Pair With

    • Hashbrown Breakfast Casserole
    • Sweet Potato, Brussels Sprouts Bacon Sheet Pan Breakfast
    • Air Fryer Home Fries
    • Spinach Mushroom Frittata.

    Ingredients

    All ingredients laid out on a sheet pan in small glass bowls.
    • Avocado mayo-I like buying mine from Costco, you get the best bang for your buck there. Avocado mayo is made with avocado oil instead of inflammatory vegetable oils, this is why I prefer it over regular mayo but you can substitute it out if you are not Whole30 or do not have it. 
    • Dijon mustard-Adds a nice kick in combination with the avocado mayo. You can use yellow mustard if you do not have dijon. 
    • Pickle juice-The good old pickle juice from the jar adds a nice tangy kick. 
    • Paprika-The paprika adds a nice bit of spice. 

    See the recipe card below with a full list of ingredients and measurements.

    Substitutions And Variations

    • Mini dill pickles-I love the ones from Trader Joe’s. Make sure whatever brand you buy is Whole30 friendly. You could also use pickle relish.
    • Pitted black olives-Sliced and chopped. 
    • Bacon-I love using Butcher Box’s bacon on top. It is quite yummy! They send me a monthly box of all of my favorite meats. You can use my Butcher Box discount link to save on your first order.
    • Sriracha– If you want to make spicy deviled eggs, add a dash of sriracha on top!
    • If you are not dairy free, a great substitute would be any light mayonnaise or regular mayonnaise you prefer. You could also utilize full-fat greek yogurt as a substitution whether it contains dairy or is dairy free.
    • Another great addition to these healthier deviled eggs would be hot sauce and garlic powder for additional flavor.

    This recipe has not been tested with any other substitutions or variations. If you replace or add any ingredients, please let us know by leaving a comment below!

    Step By Step Instructions

    Eggs and water in an instant pot container.

    Photo #1: Put the metal trivet into the instant pot with 2 cups of cold water. Then add the eggs in on top. Close the instant pot and set the pressure to HIGH heat.

    Hard boiled eggs in an ice bath in a metal bowl.

    Photo #2: Once the time is up, carefully open the vent on top and add the eggs to a bowl of water with ice in it for 15 minutes.

    Egg yolks, avocado mayo, pickle juice and paprika inside a food processor.

    Photo #3: Once the hard-boiled eggs are cooled, peel eggs and cut the eggs in half. Then scoop out the middle yolk from the egg whites and add the yolk, pickle juice, paprika, and avocado mayo and blend until smooth.

    Decorated deviled eggs on a cutting board with fun garnishes on top.

    Photo #4: Using a pastry bag, add the egg yolk mixture from the food processor into the egg white halves and top off with optional garnishes.

    Alternative Cooking Process

    • Add the eggs to a pot with water and bring to a boil. Once the water is boiling turn off the heat and cover the pot for 10 minutes while it sits. 
    • Next, strain the water from the pan and set the eggs in an ice bath to prevent them from sticking. 
    • Now, follow the remaining steps above to decorate the eggs 🙂           

    Equipment Needed

    • Instant pot or soup pan.

    Expert Tips

    • Tip #1: Do not skip the ice bath, this ensures that the shells do not stick to the hard boil eggs!
    • Tip #2: Using a frosting piping bag will make stuffing these deviled eggs a lot easier. If you do not have an official frosting piping bag, you can use a plastic bag or ziplock bag and cut the corner off of the bag for a basic tip.
    • Tip #3: Do not place the eggs into hot water. You want to place the eggs into the pot with water before starting to heat up.

    Recipe FAQs

    How do I know if hard boiled eggs are done?

    If you follow this recipe for the instant pot version they are guaranteed to be done when the time is up.

    What is the best way to peel hard boiled eggs?

    The best way to peel hard boiled eggs is by placing the eggs immediately in an ice bath after cooking them. This helps the shell fall right off rather than the eggs falling apart as the shell is pulled off.

    What is the best way to serve deviled eggs?

    I love serving this recipe cold. This means you can make it in advance!

    What are traditional deviled eggs toppings?

    Most traditional deviled eggs are served with a sprinkle of paprika on top.

    Storage Instructions

    • Deviled eggs can last in the fridge for up to 5 days.
    • I like to serve this dish cold, so no need to worry about reheating.
    • Be sure to store the recipe in an airtight container for optional freshness.

    Other Paleo Brunch Recipes

    • pretty jello cut outs on a plate
      Homemade Healthy Jello
    • mint cookie bars on a baking sheet
      Healthy Mint Chocolate Bars
    • slice of carrot cake on a plate with a fork
      Healthy Gluten Free Carrot Cake
    • Untitled 576 scaled
      Carrot Apple Ginger Juice


    Looking for healthy swaps? Be sure to check out my FREE go to anti-inflammatory swap guide!

    download here
    whole30 deviled eggs 4 scaled

    Whole30 Deviled Eggs

    Course Appetizer, Snack
    Cuisine American
    Diet Gluten Free
    Prep Time 10 minutes minutes
    Cook Time 10 minutes minutes
    Ice bath time 15 minutes minutes
    Total Time 35 minutes minutes
    Servings 24 deviled eggs
    Author Allianna Moximchalk
    62kcal
    Cost $5
    Print Recipe Pin Recipe

    Equipment

    • instant pot or large pot

    Ingredients

    • 12 whole eggs
    • 1 cup avocado mayo
    • 1/2 tsp paprika
    • 1/4 cup pickle juice

    OPTIONAL TOPPINGS

    • 1/4 cup chopped pickles
    • 1/4 cup chopped olives
    • 1 pieced bacon cooked. I love Butcher Box! Use my link for $30 off.

    Instructions

    Instant pot version:

    • Place the metal instant pot trivet into the instant pot as well as 2 cups of cold water. Add the eggs in and set the instant pot to HIGH pressure for 5 minutes (be sure the vent is closed.) Once the time is up, carefully open the vent on top or let it vent naturally. Remove the eggs carefully (they will be hot so use a spoon) and place the eggs in a bowl of ice and water for 15 minutes.

    Stovetop version:

    • Place ingredients in a large pan with water. Bring the water to a boil, then turn off the heat and let the eggs sit in the hot water covered with a lid for 10 minutes. Once the ten minutes is up place the eggs in a bowl of cold water with ice for 15 minutes.
    • Once the eggs sit in the egg bath for 15 minutes, remove the shells, cut the eggs in half and remove the yolks. Place the yolks, avocado mayo, dijon, and paprika in a food processor and blend until smooth. Use either a piping bag or zip block bag to fill the eggs. Garnish on top with optional, bacon, olives, and pickles.

    Notes

    Servings: This recipe yields approximately 24 deviled eggs.
    Nutrition: The nutrition on this recipe is just an estimate and cannot be guaranteed. 
    Storage: You can store this recipe in the fridge for up to 5 days.
    Alternatives: If you are not dairy free, you can use any light mayonnaise or regular mayonnaise you prefer. You could also utilize greek yogurt as a substitution whether it contains dairy or is dairy free. 
    Quick and easy deviled egg recipe.
    Serving: 1deviled egg | Calories: 62kcal | Carbohydrates: 1g | Protein: 1g | Fat: 6g | Saturated Fat: 1g | Cholesterol: 2mg | Sodium: 91mg | Potassium: 1mg | Fiber: 1g | Sugar: 1g | Vitamin A: 6IU | Vitamin C: 1mg | Calcium: 1mg | Iron: 1mg
    Tried this recipe?Tag me on instagram @alliannaskitchen!
    strawberry poppyseed salad 1 scaled

    March 17, 2024 Allergy Friendly

    Panera Inspired Strawberry Poppyseed Salad

    This Panera Strawberry Poppyseed Salad is perfect for the warmer weather of summer and spring! It is light and full of the flavors of summer. It reminds me so much of the strawberry poppyseed from Panera, but even better! This recipe is paleo and Whole30 friendly. With only taking less than 15 minutes to prepare, you can have this salad on the table in no time. This recipe was inspired by my favorite salad at Panera!

    Strawberry poppyseed salad with oranges in a blue bowl.

    This recipe is a great lunch or dinner item but can also be a great dish to take with you to a summer gathering. The bright colors and fresh tastes make it a great addition to any food table.

    Tasty salads are a staple to my daily meal rotation. I like to top my salads off with my Chickpea Croutons recipe. I like to pair half salads with another small portion of meal such as a protein. Some of my favorites are: Kale Blueberry Salad wit Pecan Cheese, Cucumber Watermelon Salad, Arugula Pear Salad, The Best Fig Salad, Steak Taco Salad, Cucumber Apple Salad and Vegan Taco Salad.

    I also like pairing this strawberry salad with my Homemade Strawberry Simple Syrup. If you are looking for a good seasonal dessert to pair it with, check out my Gluten Free Zucchini Bread.

    [feast_advanced_jump_to]

    Why You Will Love This Recipe

    • This dish is so simple to make! The fresh strawberries and other fresh fruit make this the perfect summer salad.
    • This copycat Panera strawberry poppyseed salad recipe can be ready in no time.
    • Kids will love this dish as well.
    • This recipe is naturally paleo, gluten free, dairy free, soy free, and Whole30 friendly.
    • It will take you less than 10 ingredients to make this dish including the homemade dressing. If you enjoy this dressing, you would also enjoy my Whole30 Caesar Dressing as well!
    • If you like this salad, be sure to check out one of my other favorite salads: This Pear Arugula Salad is a fan favorite on my blog.
    • You can prep the ingredients in advance so that you can just combine them and serve when you are wanting to eat it.

    Ingredients

    Strawberry poppyseed salad ingredients in glass bowls on a silver tray.
    • Spinach-You can use any kind of greens here, but I like spinach best.
    • Clementines-Or mini mandarins. These little guys compliment the strawberries so well.
    • Almond slivers-I like the added crunch. If you have a nut allergy, you can totally skip the almonds!

    For the homemade poppyseed dressing

    • Lemon & apple cider vinegar-This compliments the sweetness in the salad oh so well. 
    • Extra virgin olive oil-This is my go to oil for making dressings. Avocado oil is also a pretty neutral oil, so you could use that too. 
    • Sea salt-A nice touch. 
    • Dijon mustard-Adds a nice tangy touch.
    • Onion powder-Onion and garlic powder always help to enhance flavor!
    • Poppy seeds-For the poppyseed dressing

    See the recipe card below for a full list of ingredients and measurements.

    Substitutions and Variations

    • If you like to have protein included in your salad, this recipe pairs well with chicken and you can make it even easier by purchasing ready chicken breast strips or rotisserie chicken.
    • If you do not like spinach, you can swap it out for your green of choice such as spring mix, mixed greens, or romaine lettuce.
    • Fresh pineapple, toasted pecans, and fresh blueberries would all make delicious additions to this salad as well.
    • If you can’t find clementines, you can substitute for mandarin oranges.
    • If you are not dairy free, you could also add a cheese to the salad such as feta cheese or goat cheese to this copycat panera poppyseed salad.

    This recipe has not been tested with any other substitutions or variations. If you replace or add any ingredients, please let us know how it turned out in the comments below!

    Step by Step Instructions

    Strawberry poppyseed dressing ingredients in a small white bowl with a small whisk.

    Photo 1: For the salad dressing, juice the lemons and add all of the ingredients into a bowl and whisk together. I like to serve the dressing on the side of the salad instead of pouring it over.

    Strawberry poppyseed salad in a white bowl.

    Photo 2: For the salad, wash the strawberries and cut them longways. Then, peel the clementines. Finally add the almond slivers and spinach to a large bowl with the fruit and mix.

    Equipment Needed

    • Mixing bowls
    • Lemon juicer

    Expert Tips

    • Tip #1: There are actually citrus peelers that can help you with peeling the clementines.
    • Tip # 2: I recommend serving the dressing on the side and waiting until last minute to add the fruit in so that the spinach does not wilt.
    • Tip # 3: If you are preparing the ingredients ahead of time, store them separately so that they stay fresh longer.
    • Tip # 4: You will want to make sure to use fresh strawberries for this recipe and not frozen. The frozen will not have the fresh crunch and will have added liquid.

    Recipe FAQs

    How long does this recipe last?

    I suggest waiting to assemble the salad until you are ready to eat it! This will prevent the dressing from making the spinach soggy. If you want to meal prep, I suggest adding all of the fruits on top, then adding a small container of dressing to the side. 

    What can I serve with this dish?

    This dish would be a wonderful side to any dish or you can add a simple protein and make it a meal. I would pair it with my Honey Lemon Garlic Chicken Drumsticks. I also like to make added protein to sprinkle on top, like this Frozen Salmon you can make in the air fryer!

    Can I use frozen strawberries?

    I would not recommend to use frozen strawberries as they will add a lot of moisture to the salad.

    Half of a bowl of strawberry poppyseed salad.
    panera strawberry poppyseed salad 5

    Storage Instructions

    • I recommend storing the ingredients in separate containers so that they stay fresh longer.
    • The ingredients separately can be stored in the refrigerator for up to 5 days.

    Other Salad Recipes You Will Love

    • paleo fig salad2
      Fall Salad With Fig Balsamic Salad Dressing
    • anti-inflammatory salad with kale
      Kale Blueberry Salad With Pecan Cheese (Vegan)
    • Cucumber and watermelon salad on a plate with limes, pepper and honey drizzled on top.
      Cucumber Watermelon Salad
    • lemon dill salmon salad 4
      Shredded Lemon Dill Salmon Salad (Paleo, AIP, Whole30, Keto)

    Are you interested in getting a list of my go to healthy alternatives?

    Download your FREE guide below

    download here
    strawberry poppyseed salad 8 scaled

    Strawberry Poppyseed Salad

    Course Salad
    Cuisine American
    Diet Gluten Free
    Prep Time 10 minutes minutes
    Total Time 10 minutes minutes
    Servings 4 people
    Author Allianna Moximchalk
    625kcal
    Cost $6
    Print Recipe Pin Recipe

    Equipment

    • A mini bowl
    • Mini whisk or fork
    • Large bowl to mix

    Ingredients

    For the salad:

    • 1 bag organic spinach
    • 2 cups fresh strawberries washed and diced
    • 4 whole clementines peeled
    • 1/3 cup almond slivers

    For the dressing:

    • 4 lemons juiced
    • 1/2 cup apple cider vinegar
    • 1 cup extra virgin olive oil
    • 1 pinch sea salt
    • 2 tbsp dijon mustard
    • 1 tsp onion powder
    • 1 tbsp poppyseeds

    Instructions

    For the salad:

    • Place all ingredients in a bowl and set aside.

    For the dressing:

    • Place all ingredients in a bowl and whisk with a fork or mini whisk. Serve the dressing on the side.

    Notes

    Storage: This recipe can be stored with each ingredient separated in air tight contianers for 5 days in the refrigerator.
    Nutrition: The nutrition for this recipe is an estimate and the calorie count is not guaranteed.  It is based on 4 servings. 
    Servings: This recipe should yield 4 servings. 
    Quick and easy refreshing simmer favorite!
    Serving: 1serving | Calories: 625kcal | Carbohydrates: 22g | Protein: 6g | Fat: 61g | Saturated Fat: 8g | Trans Fat: 1g | Sodium: 157mg | Potassium: 774mg | Fiber: 8g | Sugar: 7g | Vitamin A: 6695IU | Vitamin C: 120mg | Calcium: 175mg | Iron: 4mg
    Tried this recipe?Tag me on instagram @alliannaskitchen!
    Allianna Moximchalk in her garage.

    March 16, 2024 Blog

    Working With Inspired Closets Pittsburgh

    One of the things that was important to us from the start with our new home was eliminating clutter and staying organized as much as possible. We had only lived in our old home for less than 2 years, yet we accumulated so much stuff during that short period. Every time I would pull into our old garage, I would be afraid something was going to fall on me! There was stuff everywhere, and nothing had a place. 

    Allianna Moximchalk standing in her garage.

    That is why this time around we were so excited to work with Inspired Closets Pittsburgh to set up our organization system in our garage. I collaborated with Logan and Jenna, and they were a dream to work with! Jenna came out and measured the space. I told her what my vision was, and she sent me multiple layouts with suggestions for the plans. We ultimately wanted something to hide shoes, tools, and outdoor stuff like rakes, leaf blowers, etc. I didn’t want to see it or fear running over it when I pulled into the garage. I also wanted a small work space where I could plant things. 

    Inspired Closets working station in Allianna Moximchalks garage.
    I love this little working station we created. It is the perfect planting things and using as a work station.
    Shoe storage in Allianna Moximchalk's garage.
    I love having all of our shoes hidden. In our last house we had a shoe bin and somehow shoes would always get lost and we always had to dig in the bin to find a match. I love being able to have them all laid out.

    We opted for the Fort and Fieldstone finish and color. I wanted something that matched our home but also would hide the dirt. The surfaces are really easy to clean, just requiring you to wipe them down with a wet rag if they do get dirty. I also loved that all of the shelves in the units are adjustable, meaning I can change the heights and add hooks as needed. 

    Garage equipment storage.
    Allianna Moximchalk in the garage.

    With the changing of the seasons approaching, now is the perfect time to get the house organized. I am a big believer that, when you keep your spaces cleaned and organized, you just feel better. You deserve to feel good about the space you are in. My friends at Inspired Closets Pittsburgh were nice enough to offer all of you 10% off of your project just by mentioning my name! 


    You can check out their website or give them a phone call at (412) 443-4710.

    slice of carrot cake on a plate with a fork

    March 10, 2024 Dairy free

    Healthy Gluten Free Carrot Cake

    This moist Gluten-Free Carrot Cake is a staple in my house. We make it every year for Easter but would be appropriate for any special occasion. The moist and fluffy grain free cake combined with the sweet and smooth buttercream frosting is quite delightful. This gluten-free carrot cake recipe only requires 30 minutes of hands-on time and is perfect for Spring and is a carrot cake lovers dream. 

    One slice of gluten free carrot cake on a plate with a fork with shredded carrot on the side.

    My Dad has ways been obsessed with carrot cake for as long as I can remember. I make this gluten free carrot cake every year on Father’s Day, Easter and my Dad’s birthday! This is an easy recipe that is so simple to make and something everyone will love.

    I always have a large sweet tooth. I have developed numerous gluten-free cakes and baked good recipes. Some of my favorites are: Gluten Free Red Velvet Cake, Dairy Free Sugar Cookies, Mini Dairy Free Chocolate Cakes, Dairy Free Gluten Free Lemon Pound Cake, Gluten Free Banana Cake, Gluten and Dairy Free Cake, Gluten Free Orange Cake, Gluten Free Apple Cake, Gluten Free Zucchini Bread, and AIP Banana Bread. I even have a dog treat recipe on my blog for your fur babies, check out my Liver Cake For Dogs Recipe on my blog. Dogs love this treat. I love making my dog a treat when I make us humans a treat too!

    [feast_advanced_jump_to]

    Why You Will Love This Gluten Free Carrot Cake

    • First off, no one can even tell it is gluten free and full of simple ingredients!
    • We love this carrot cake so much that I make it for my dad every year on Father’s Day.
    • This recipe is naturally grain free, gluten free, dairy free, soy free, paleo, and refined sugar free. 
    • This is the best carrot cake and can be made as a sheet cake or cupcakes. I like to make this into a two layer cake. Baking time will vary on whether you make a layered cake, sheet cake, of cupcakes.
    • I love to prepare this cake in advance for dessert. It holds up so well in the fridge. 
    • While this is my go to recipe for Easter, it can work for any occasion!

    Healthy Carrot Cake Ingredients

    Paleo carrot cake ingredients laid out in small glass bowls.

    For the cake

    • Almond flour-This is the base of this recipe. Do not swap out almond flour for another gluten-free flour as not all gluten free flours are equal. I like to get my almond flour from Costco. They sell it in bulk and I have found I get the best bang for my buck there. 
    • Coconut flour-I bind this with the almond flour to get a nice gluten free flour blend. 
    • Shredded carrot-I put mine through the food processor to get it nice and fine. 
    • Nutmeg, salt  & cinnamon-For taste. 
    • Eggs-This is what binds this recipe together. 
    • Maple syrup-For sweetness. 
    • Almond milk-To keep this grain free cake nice and moist!
    • Vanilla Extract-For flavor.
    • Coconut oil-To keep the cake nice and moist. You can use olive oil here if desired. 
    • Raisins-In my opinion, the best part. However, you can omit it if you are not a fan. 
    Frosting ingredients laid out in small glass bowls.

    For the frosting recipe:

    • Palm shortening-This is the base for the frosting. 
    • Raw honey-To keep the frosting nice and sweet. You can use maple syrup here if desired. Keep in mind that the maple syrup may change the coloring a bit. 
    • Vanilla-For flavor. 
    • Arrowroot-To hold the frosting together. 
    • Coconut oil-To keep it nice and smooth.
    • Optional but highly recommended-almonds on top. 

    See the recipe card below for a full list of ingredients and measurements.

    Substitutions and Variations

    • If you can’t find palm oil shortening, you can substitute your preferred shortening.
    • You can use almonds as recommended for a topping or decorate the top of the cake with you choice of topping.

    This recipe has not been tested with other substitutions or variations. If you replace or add any ingredients, please let us know how it turned out in the comments below!

    Step By Step Instructions

    Carrot cake dry ingredients mixed in a bowl with a whisk.

    Photo #1: Preheat the oven to 350 degrees F. Then, mix all of the dry ingredients together in a large bowl with a whisk.

    Eggs, maple syrup, almond milk, and vanilla in a glass bowl.

    Photo 2: Mix all wet ingredients together in a large mixing bowl.

    Carrot cake dry ingredients mixed with the wet ingredients in a glass bowl with a whisk.

    Photo 3: Now mix all wet and dry ingredients together until smooth.

    Shredded carrots mixed into carrot cake cake batter.

    Photo 4: Mix in the shredded carrots.

    Raw carrot cake batter divided up into two 8 inch cake pans.

    Photo 5: Using cooking spray oil (I like avocado oil) Spray the 8-inch cake pans and add the cake batter in an even layer to the pan.

    Cooked round carrot cake in an 8 inch cake pan.

    Photo 6: Bake for 30 minutes or until you can stick a fork in and it comes out clear.

    Spatula mixing the dairy free frosting in a glass bowl.

    Photo 7: Add all of the frosting ingredients in a bowl and use a handheld mixer to mix until smooth.

    A person icing a carrot cake with a spatula on a pretty marble cake stand.

    Photo 8: Frost one cake layer, then add the second cake layer on top.

    A person sprinkling fresh sliced almond slivers on top or an iced gluten free carrot cake.

    Photo 9: Add optional garnishes on top like almond slivers or other fun festive treats!

    Equipment

    • I suggest using an 8-inch round pan.

    Expert Tips

    • Tip #1: For the best results, allow the entire cake to cool prior to frosting it on a cooling rack.
    • Tip #2: If you are traveling with your cake, I suggest refrigerating it prior to traveling. This will harden the icing and make it easier to travel with! Without chilling it beforehand, the icing may get messy in the container.
    • Tip # 3: Place small pieces of parchment paper along the edges of the cake when frosting. With the use parchment paper will mean that when you are done icing the cake you can remove the parchment paper and have a clean cake tray.
    • Tip # 4: It is best to allow all of your ingredients come to room temperature before mixing so that they combine better.

    Recipe FAQs

    How do I prevent cake from sticking to the pan?

    The best way to prevent the cake from sticking to the pan is by spraying it with oil. I like avocado oil. I also like to line my cake pans with parchment paper.

    Can I make this recipe into cupcakes?

    Absolutely! Just note that the cupcakes won’t need to cook as long as the cake because they are smaller so the cooking time will need to be adjusted accordingly. The best way to tell if the cupcakes are done is by sticking a fork in them and if it comes out clean, they are done!

    What is palm shortening?

    Palm shortening is pot oil with some of the fat removed. Palm shortening is a healthier option in comparison to vegetable shortening.

    Can I make this delicious gluten free carrot cake in advance?

    Yes! I like to make the cake layers in advance and wrap them in plastic wrap once they are fully cooled. This way I can still frost the cake the day of the event for a fresh icing appearance.

    Carrot cake on a cake stand with almond slivers on top and green flowers on the counter.

    Storage Instructions

    • This cake can last in the fridge for up to 5 days.
    • The best way to ensure freshness is by storing the cake in an airtight container.
    • If you are traveling with this cake, I like to store it in this travel cake container.

    Other Paleo Easter Recipes

    • whole30 deviled eggs 4 scaled
      Healthy Deviled Eggs
    • Untitled 576 scaled
      Carrot Apple Ginger Juice
    • pretty jello cut outs on a plate
      Homemade Healthy Jello
    • mint cookie bars on a baking sheet
      Healthy Mint Chocolate Bars

    Are you interested in a guide of my go to healthy alternatives? 

    Are you interested in getting a list of my healthy go to alternatives?

    download your FREE guide below

    download here


    slice of carrot cake on a plate with a fork

    Gluten Free Carrot Cake

    Course Dessert
    Cuisine American
    Prep Time 20 minutes minutes
    Cook Time 30 minutes minutes
    Total Time 50 minutes minutes
    Servings 10 servings
    Author Allianna Moximchalk
    638kcal
    Cost $10
    Print Recipe Pin Recipe

    Equipment

    • 2-8 inch cake pans
    • Large mixing bowl
    • whisk

    Ingredients

    For the cake:

    • 2 cups almond flour
    • 1/2 cup coconut flour
    • 1/2 cup shredded coconut
    • 1 tsp baking soda
    • 1 tbsp ground cinnamon
    • 1/2 tsp ground nutmeg
    • sprinkle of sea salt
    • 4 eggs
    • 1 cup maple syrup
    • 1/4 cup almond milk
    • 1 tsp vanilla
    • 1 cup shredded carrots you can shred in a food processor
    • 1/2 cup raisins

    For the frosting:

    • 2 cups palm oil shortening
    • 1 cup raw honey
    • 1 tbsp vanilla
    • 1 cup arrowroot powder
    • 2 tbsp coconut oil

    To serve:

    • 1 cup almond slivers to sprinkle on top

    Instructions

    For the cake:

    • Preheat the oven to 350 degrees. Place the dry ingredients in a bowl and the wet ingredients in a separate bowl. Then combine the two and mix well. Add oil of choice to a paper towel and wipe the edges and bottom of two 8 inch non-stick pans. *Note this is intended to be a layer cake, if you do not have two, you can bake it twice*I still add the oil despite being labeled as non-stick.
    • Pour half the batter into the pan and bake for 30 minutes OR until it passes the fork trick (sticking the fork in and it coming out clean.) Let the cake sit for 10 minute and flip upside down. The cake should fall out. Wipe the pan of any access crumbs and wipe the pan of oil of choice again and repeat baking steps.

    For the frosting:

    • Place all ingredients in a bowl except almonds and mix with a hand processor until the frosting consistency forms.

    To assemble:

    • Once both cakes are cooled add frosting to the top of one cake, stack the second cake and add frosting to the top and sides. Sprinkle with optional almond slivers.

    Notes

    Storage: This dish can be stored in an air tight container in the refrigerator for 5 days.
    Nutrition: The nutrition for this recipe is an estimate and the calorie count is not guaranteed.  It is based on 10 servings. 
    Servings: This recipe should yield 10 servings. 
    Moist soft gluten free carrot cake combined with a silky dairy free frosting.
    Serving: 1slice | Calories: 638kcal | Carbohydrates: 82g | Protein: 11g | Fat: 67g | Saturated Fat: 28g | Polyunsaturated Fat: 6g | Monounsaturated Fat: 20g | Trans Fat: 1g | Cholesterol: 65mg | Sodium: 183mg | Potassium: 314mg | Fiber: 8g | Sugar: 52g | Vitamin A: 2236IU | Vitamin C: 1mg | Calcium: 150mg | Iron: 2mg
    Tried this recipe?Tag me on instagram @alliannaskitchen!
    • « Go to Previous Page
    • Page 1
    • Interim pages omitted …
    • Page 4
    • Page 5
    • Page 6
    • Page 7
    • Page 8
    • Interim pages omitted …
    • Page 38
    • Go to Next Page »

    Primary Sidebar

    Allianna Headshots

    Hi, I'm Allianna! Allianna's Kitchen started by accident after battling an undiagnosed autoimmune disease for nearly my whole life.

    More about me →

    GLUTEN FREE DINNER RECIPES

    • steak date night dinner 1
      Steak Date Night Dinner with Garlic Aioli
    • gluten free fried shrimp 3 scaled
      Gluten Free Fried Shrimp
    • cooked frozen pork chops with chives on top on a white plate with a gold fork
      Easy Frozen Pork Chops In The Air Fryer
    • halibut fish tacos on a pale blue plate
      Halibut Fish Tacos

    EASY WHOLE30 RECIPES

    • Beetroot dip on a plate with crackers and fresh parsley on top.
      Simple Beetroot Dip Recipe
    • close up photo of ginger apple pork in a bowl
      Apple Ginger Pulled Pork
    • dairy free lobster bisque in a bowl with a gold spoon and garnished with lemon, fresh green herbs, and red pepper flakes.
      Dairy Free Lobster Bisque
    • juicy filet mignon on a plate
      Air Fryer Filet Mignon

    GLUTEN FREE APPETIZERS

    • peanut butter and jelly chicken wings on a plate with limes
      Peanut Butter And Jelly Wings
    • Stuffed mushrooms on a brown and white plate with fresh parsley on top.
      Gluten-Free Stuffed Mushrooms
    • Gluten free pigs in a blanket in a pile on a plate.
      Gluten Free Pigs In A Blanket
    • Pretty french onion dip in a silver bowl with potato chips and chives on top.
      Vegan French Onion Dip Recipe

    EASY MOCKTAIL RECIPES

    • honey simple syrup 2
      Honey Simple Syrup
    • orange lime cranberry mocktail 4
      Cranberry Mocktail Recipe
    • Clear glass with a brown drink and a cinnamon stick in it.
      Pear Cocktail Recipe
    • Grapefruit mocktail in a glass with jalapeño slice and grapefruit slice.
      Easy Grapefruit Mocktail Recipe

    Footer

    • Recipes
    • My Courses
    • Meal Prep Services
    • Accessibility Policy
    • Contact
    • About Me
    • Blog
    • Privacy Policy
    • Pinterest
    • Instagram
    • Facebook
    • Twitter

    Allianna’s Kitchen 2025 - All Rights Reserved

    Rate This Recipe

    Your vote:


    A rating is required
    A name is required
    An email is required