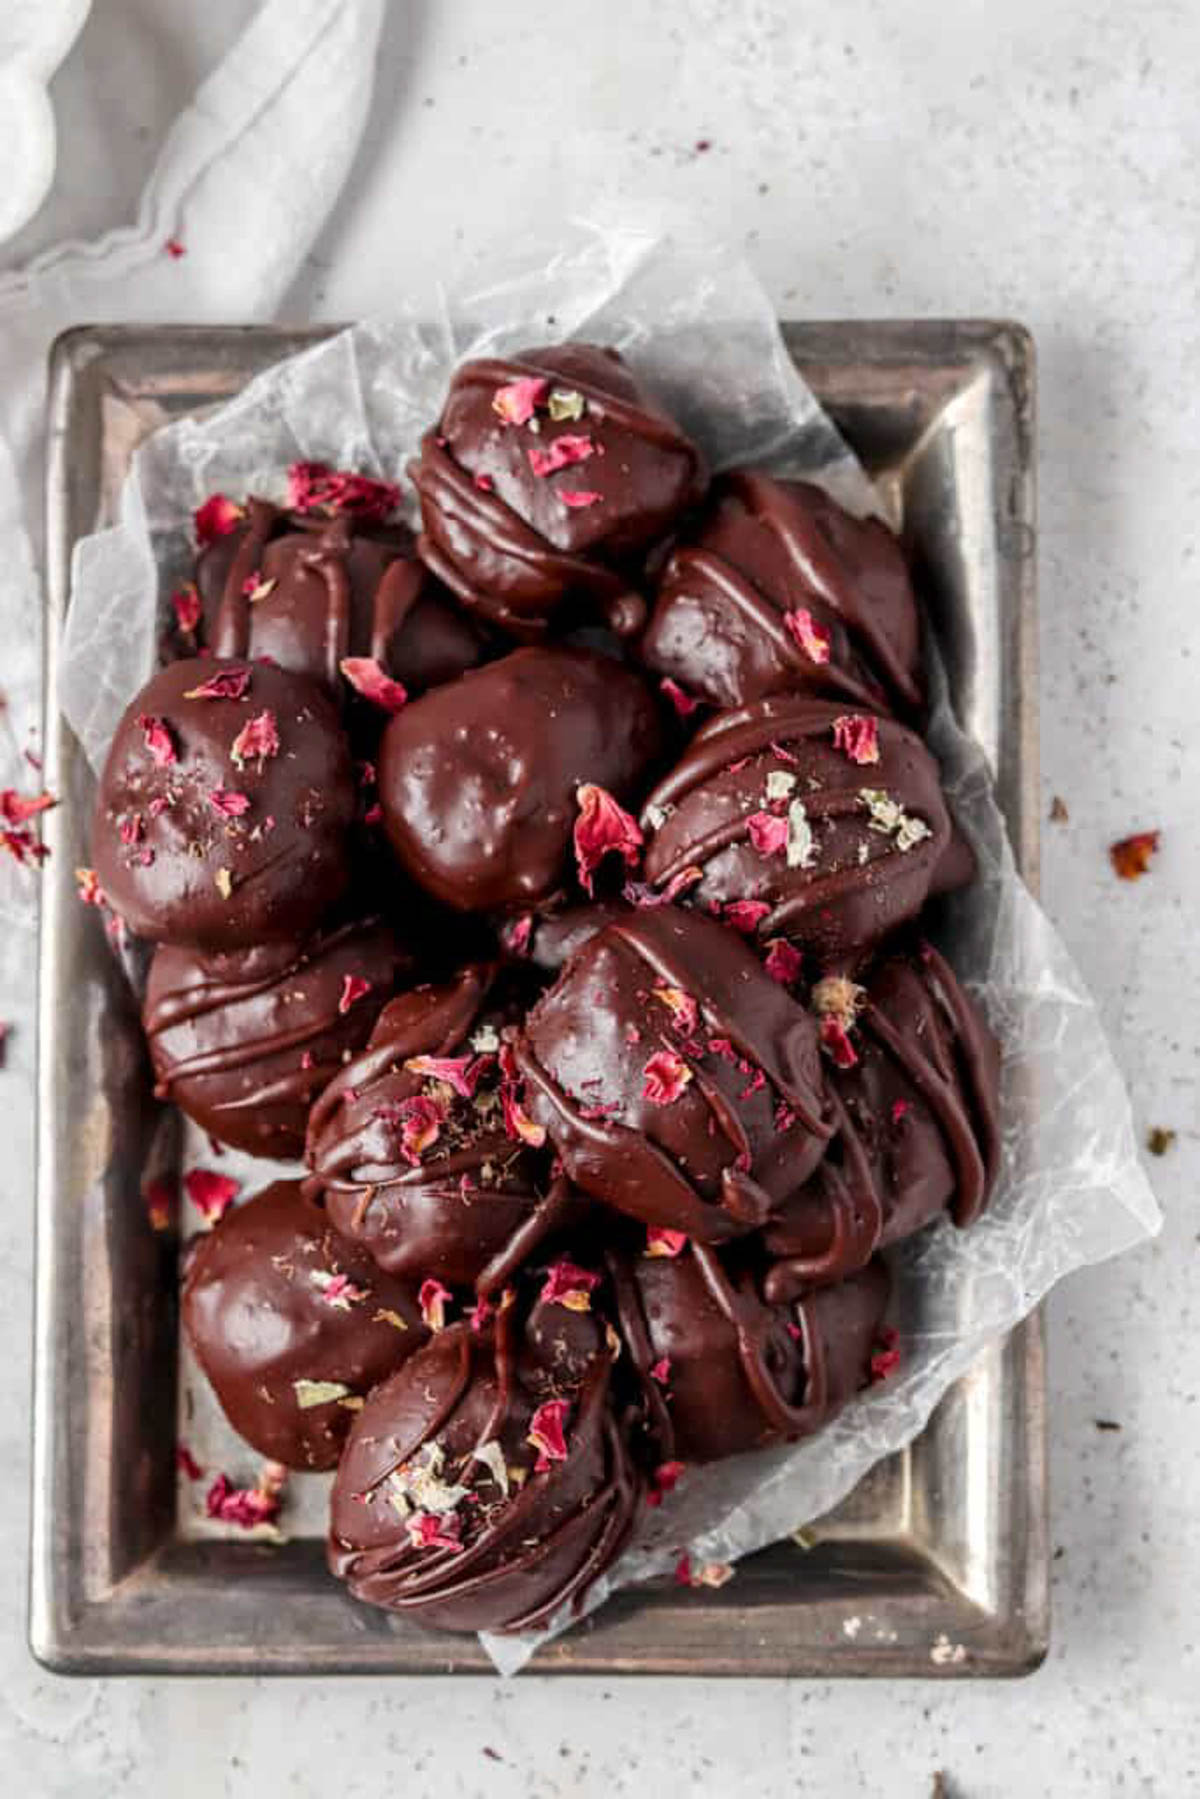
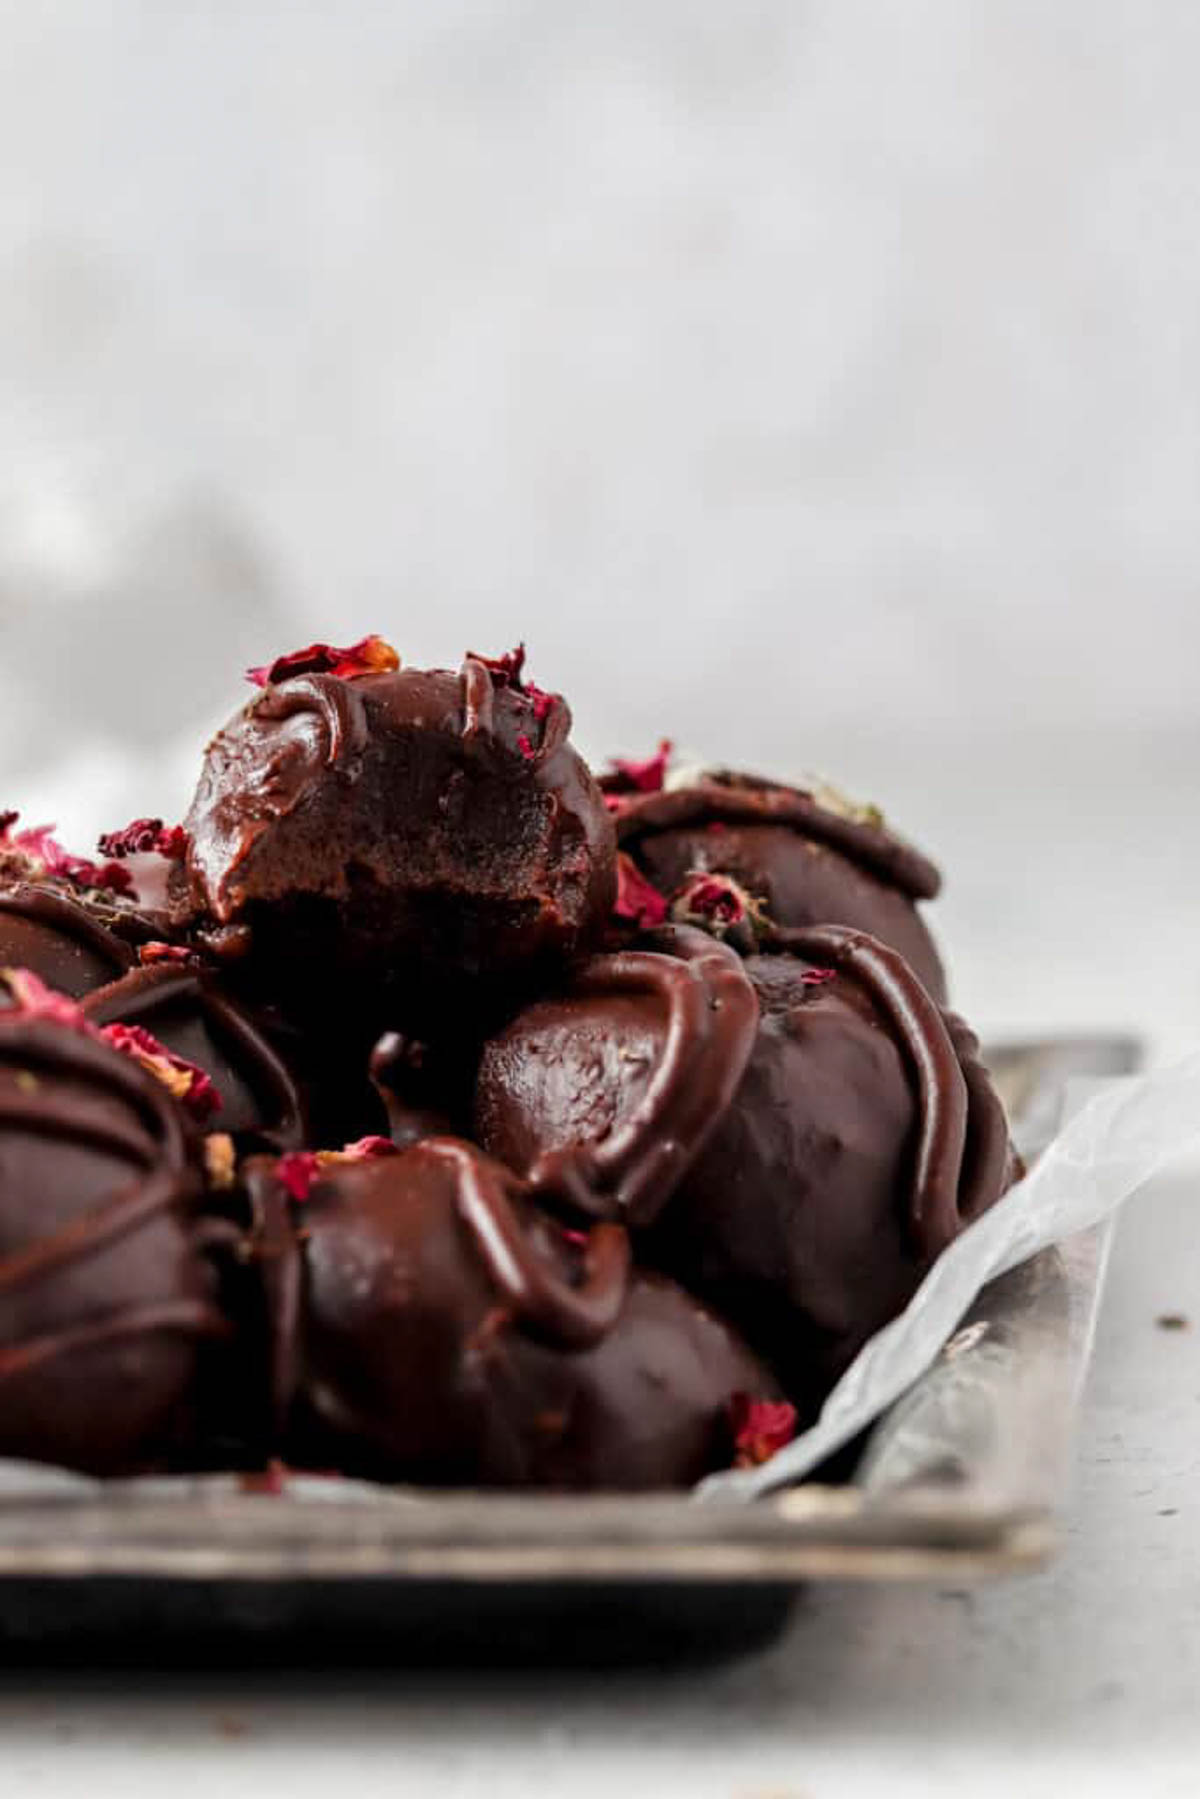
These easy Vegan Chocolate Truffles make for the most perfect special occasion treat. This recipe is quick and really only requires 15 minutes of hands on time. The creamy peanut butter combined with the coconut oil makes these truffles oh so silky. Topped off with shaved coconut or nuts adds the most perfect crunch.
I have such a big sweet tooth! I always love to have a perfect treat towards the end of my day or after dinner. These delicious truffles are the perfect bite to end your day. They are perfect for a quick treat for holidays or just to give someone special.
I have such a big sweet tooth! I always love to have a perfect treat towards the end of my day or after dinner. These delicious truffles are the perfect bite to end your day. They are perfect for a quick treat for holidays or just to give someone special. This easy vegan truffles recipe is quick for those nights I don’t have a desert on hand to satisfy me sweet tooth already readily available since they can be stored in your freezer. Some of my other favorite chocolate recipes on my blog are my Dairy Free Mint Chocolates, Mini Dairy Free Chocolate Cakes, Gluten Free Banana Chocolate Chip Muffins, Gluten Free Donuts, and Chocolate Covered Oranges.
[feast_advanced_jump_to]Why You Will Love This Recipe
- These chocolate truffles are such an easy recipe to make with both natural ingredients and basic ingredients you probably already have on hand!
- My homemade truffles are naturally gluten free, dairy free, refined sugar free, soy free, egg free, and vegan.
- Kids will love my vegan chocolate truffles recipe! This would be a great recipe to make it fun and get kids involved with helping you roll these truffles.
- These homemade chocolate truffles would be the perfect pairing with my Vegan Chocolate Covered Strawberries on Valentine’s Day or loved one this holiday season.
- Clean up is so simple with everything being cooked in two dishes.
- These truffles have only 4 ingredients.
- These decadent chocolate truffles are always a crowd favorite anytime I bring them to an event and make them for special occasions. They are a chocolate lovers dream!!
Ingredients
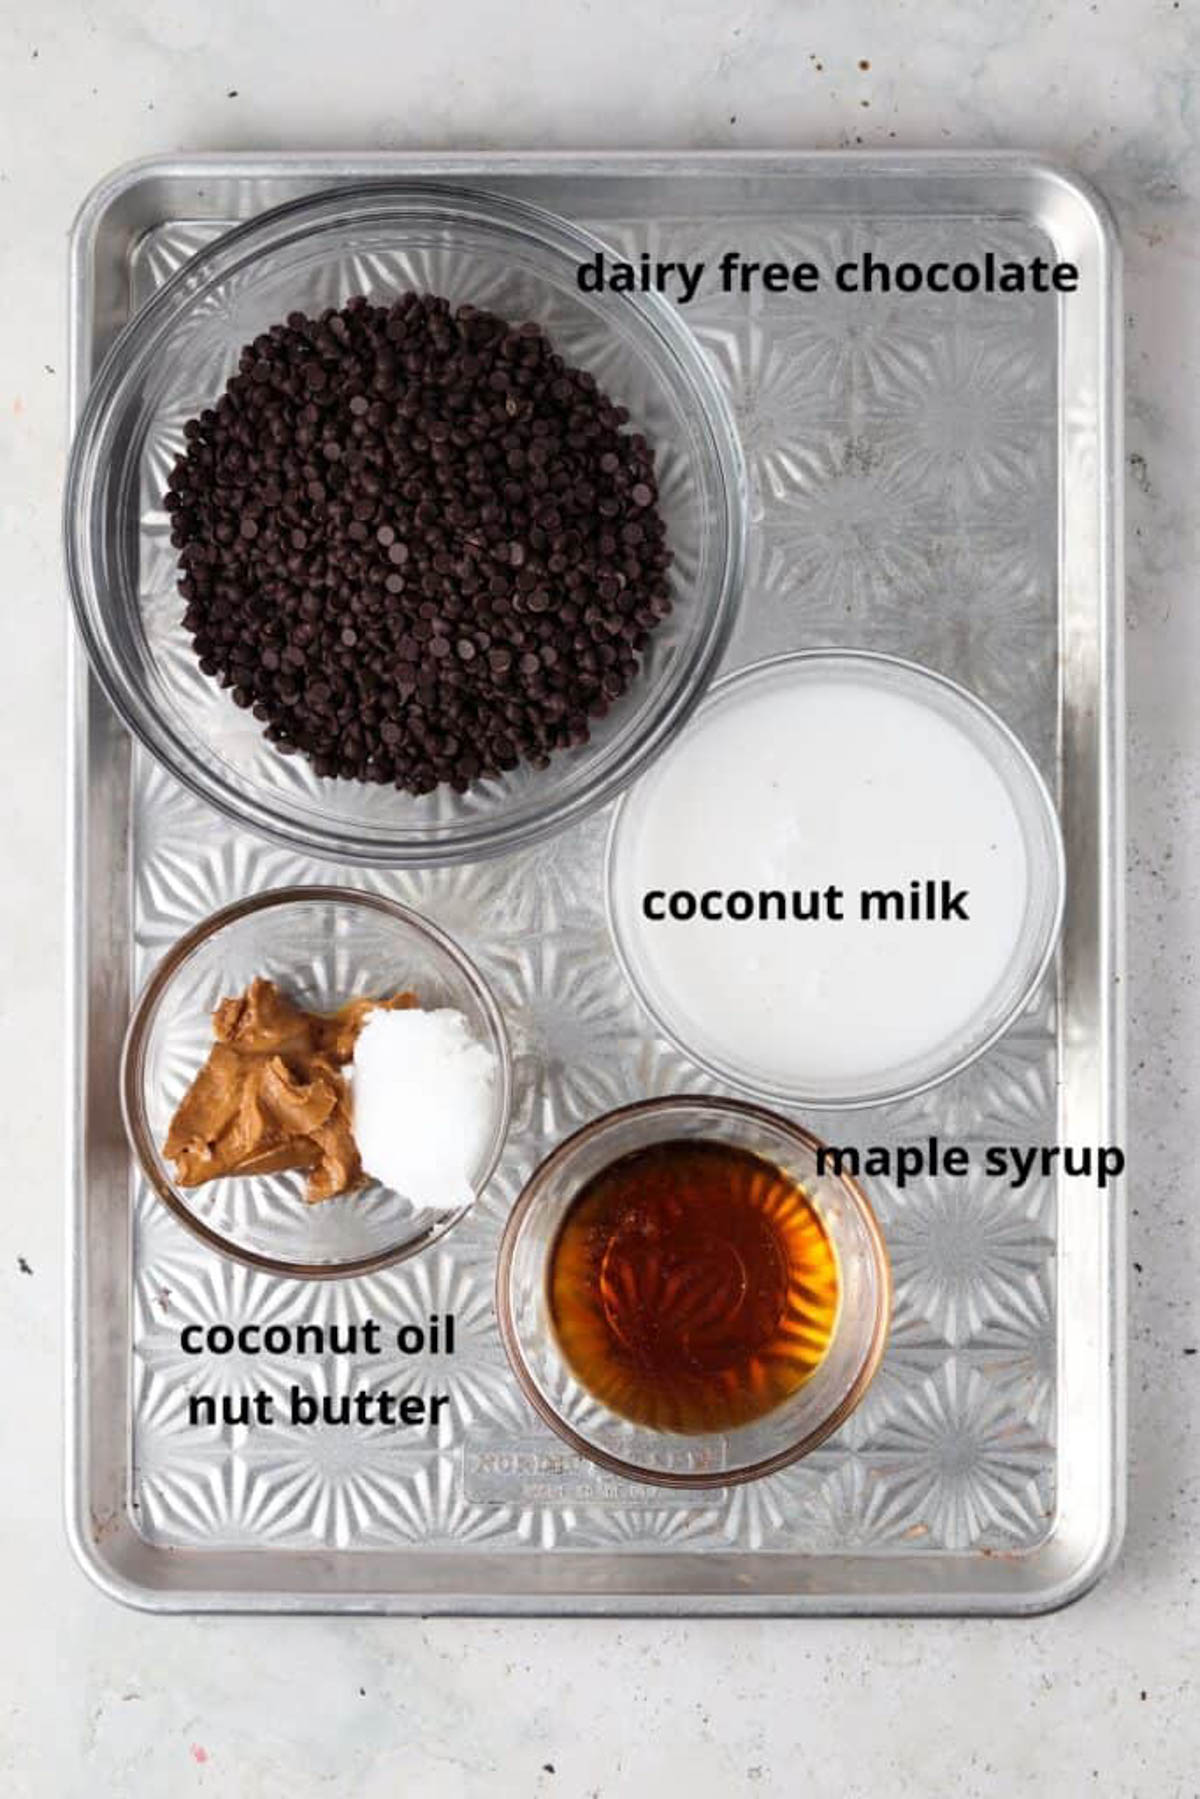
- Dairy-free chocolate–I like the Enjoy Life brand. You can also use the Hu brand. Each time I have made these for guests they never guessed everything was dairy free! I don’t suggest using regular chocolate as I have not tested this recipe with regular chocolate.
- Coconut milk-I prefer coconut milk over almond milk because almond milk can be overpowering.
- Coconut oil-Coconut oil gives these truffles the silky and smooth taste.
- Nut butter-This makes these truffles thicker. I like using Peanut Butter.
- OPTIONAL–edible rose petals to garnish.
See the recipe card below for full list of ingredients and measurements.
Substitutions and Variations
- I like to top off my truffles with maca powder, sea salt, edible rose petals, freeze-dried raspberries, chopped medjool dates, coconut sugar, and crushed nuts. You could top them off with any topping you prefer.
- If you do not like peanut butter, you could substitute for your nut butter of choice such as almond butter or cashew butter.
- You can make this recipe tree nut free by using sun butter.
- If you are not dairy free, you can choose to use regular dairy products instead of the dairy free one such as heavy cream or milk of your choice.
- If you want your truffles to be sweeter, you can add maple syrup or honey to the recipe.
- You can substitute coconut milk with whichever dairy free milk you prefer such as almond milk, soy milk, or oat milk.
This recipe has not been tested with other substitutions or variations. If you replace or add any ingredients, please let us know how it turned out in the comments below!
Step by Step Instructions
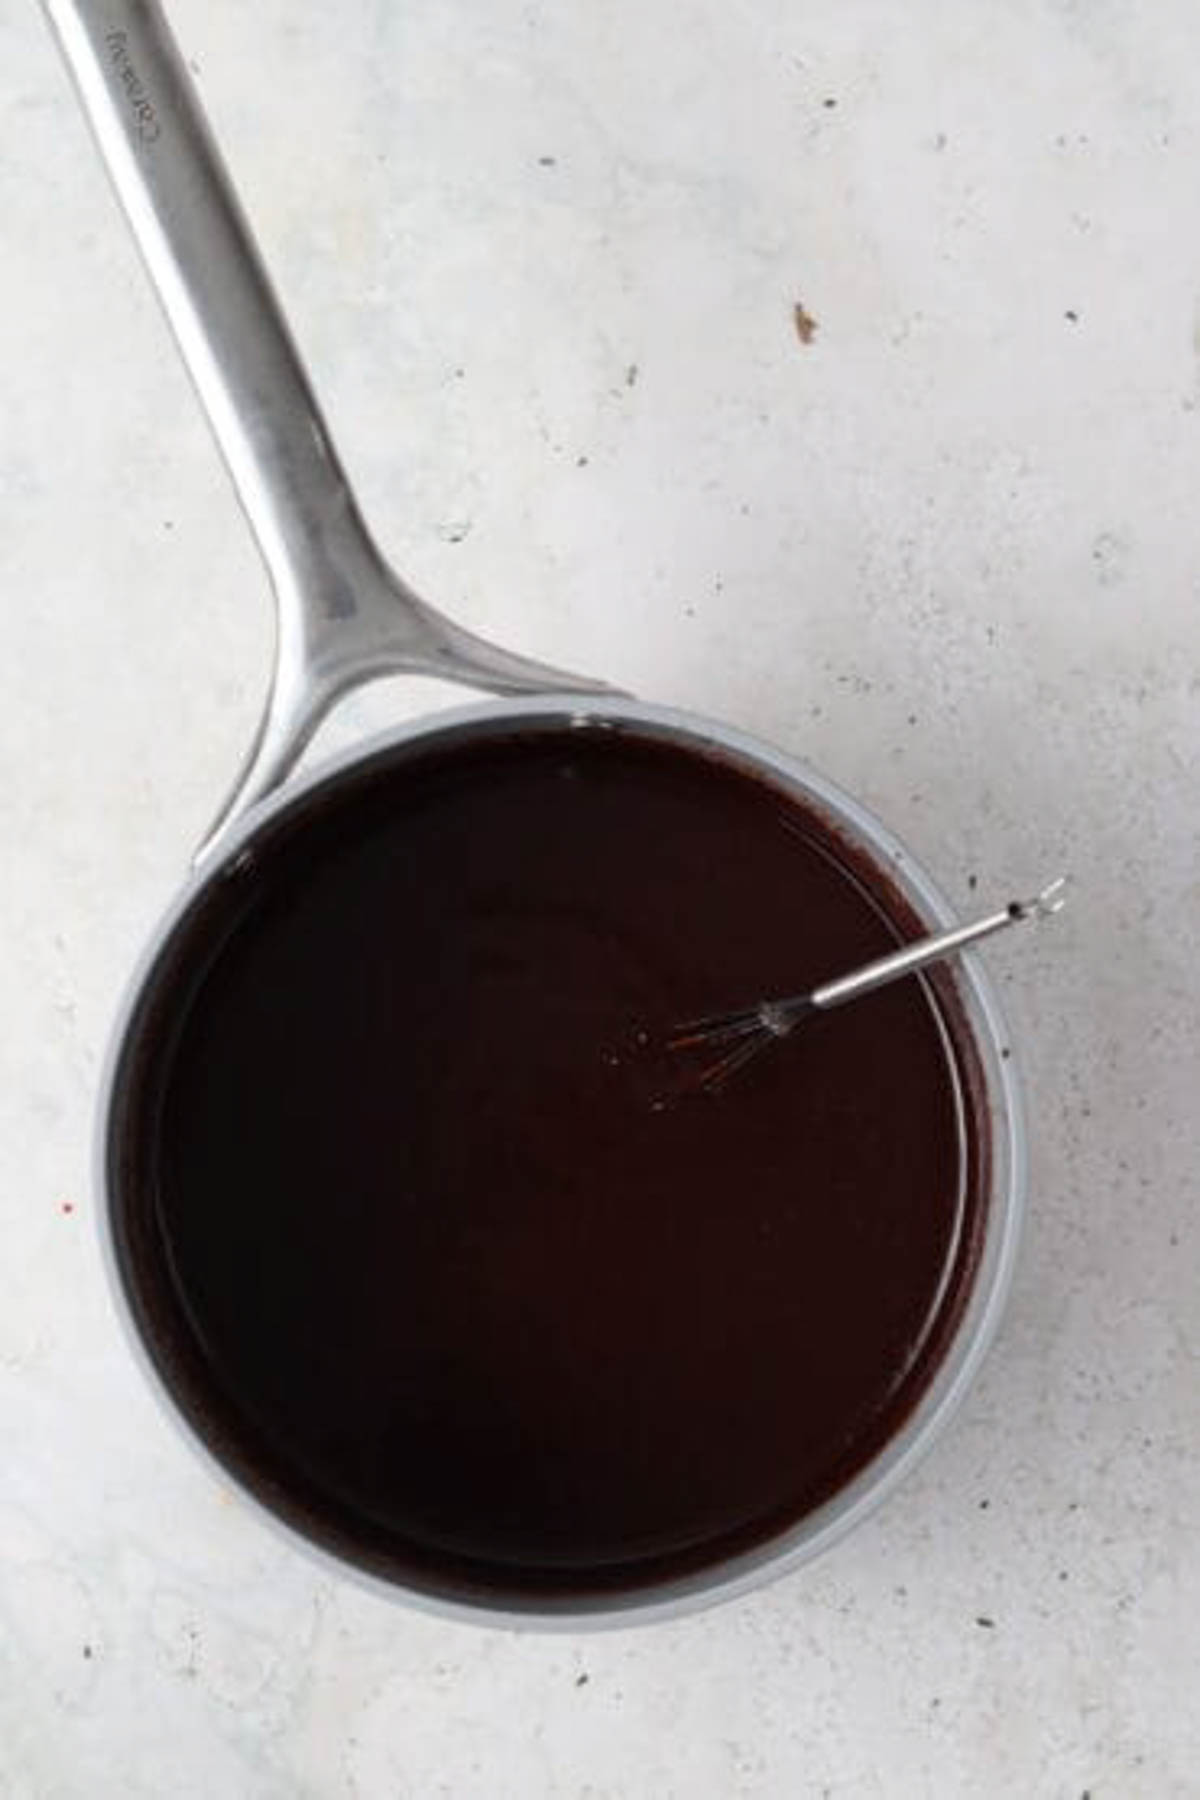
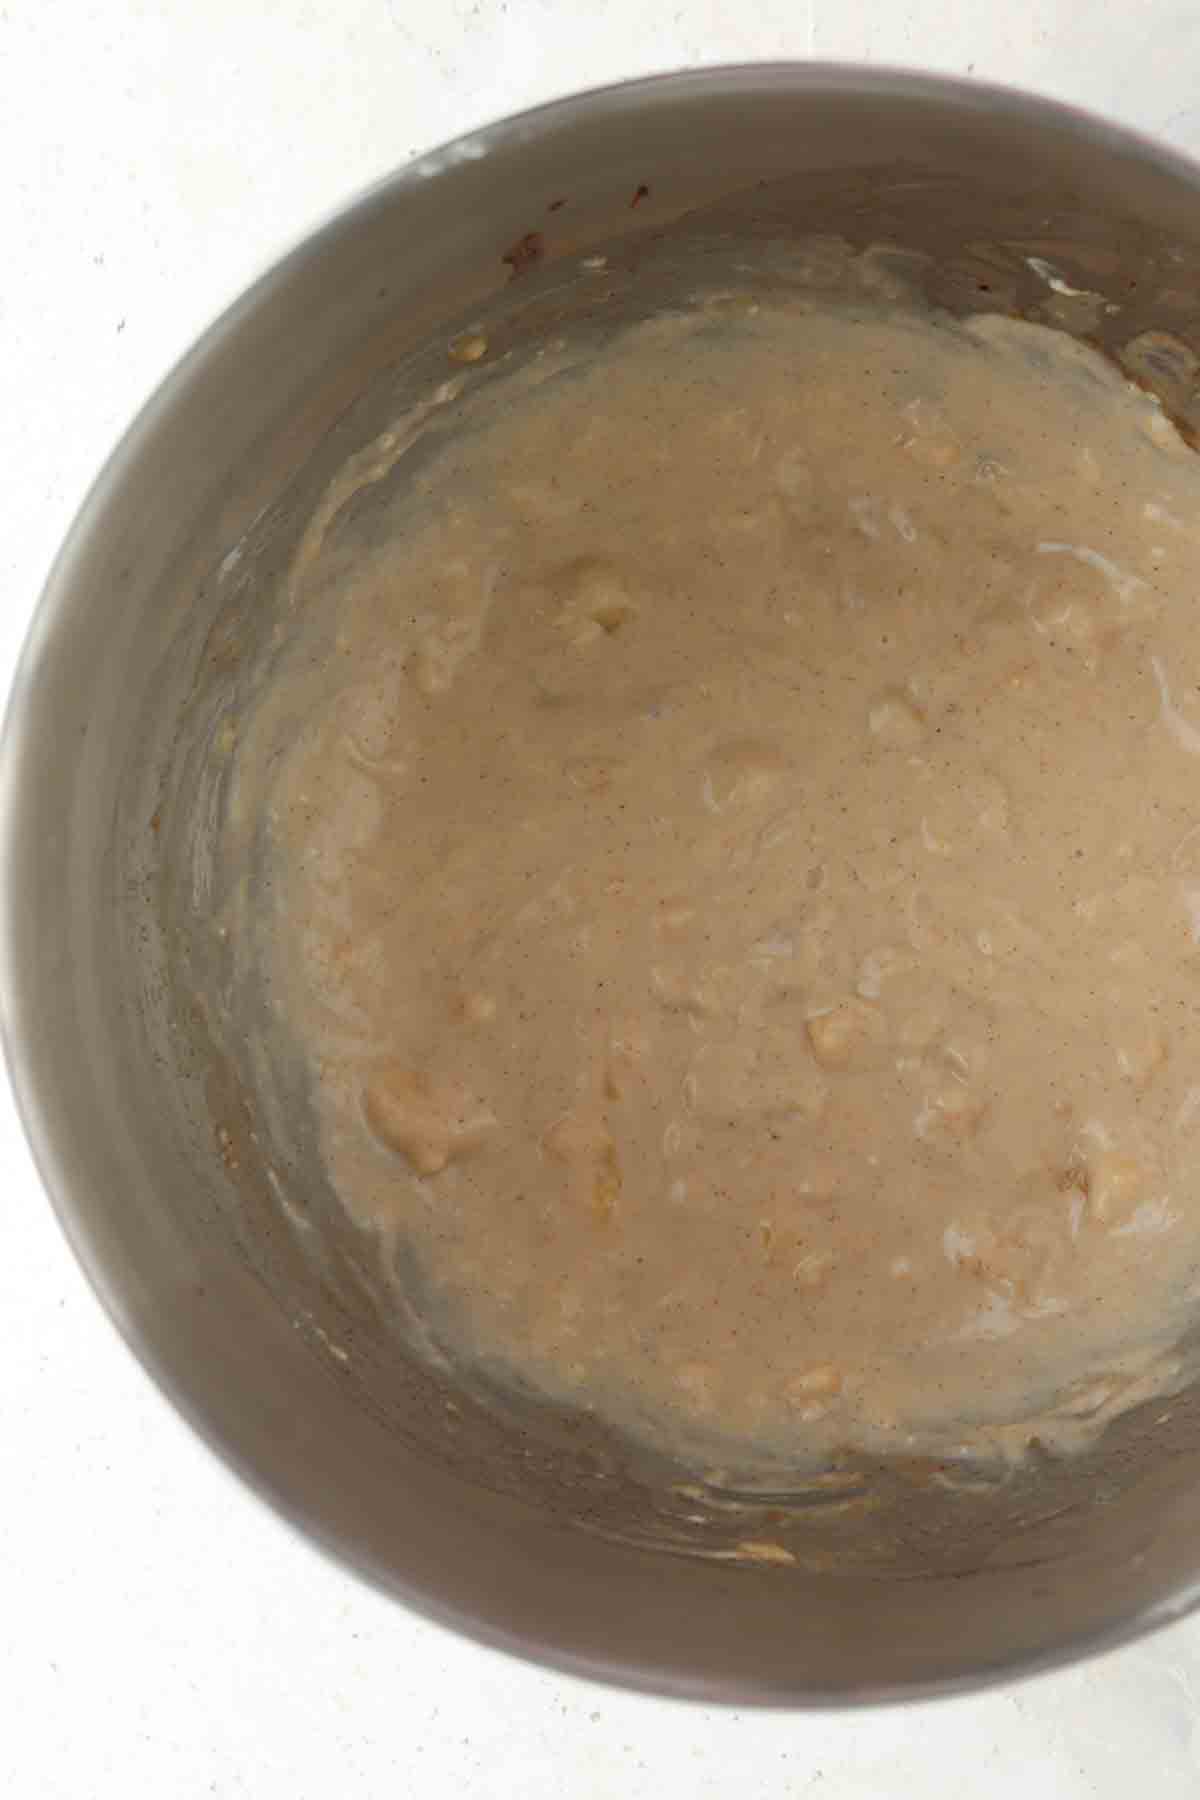
Photo 1: First, add the coconut oil, coconut milk, and chocolate to a small saucepan on very low temperature, you do not want the temperature to be too high or the melted chocolate will burn. Be sure to whisk or mix the chocolate every 30-60 seconds to prevent it from burning. Once the chocolate is mixed, set the chocolate mixture in the pot in the freezer to allow it to cool for 30-60 minutes.
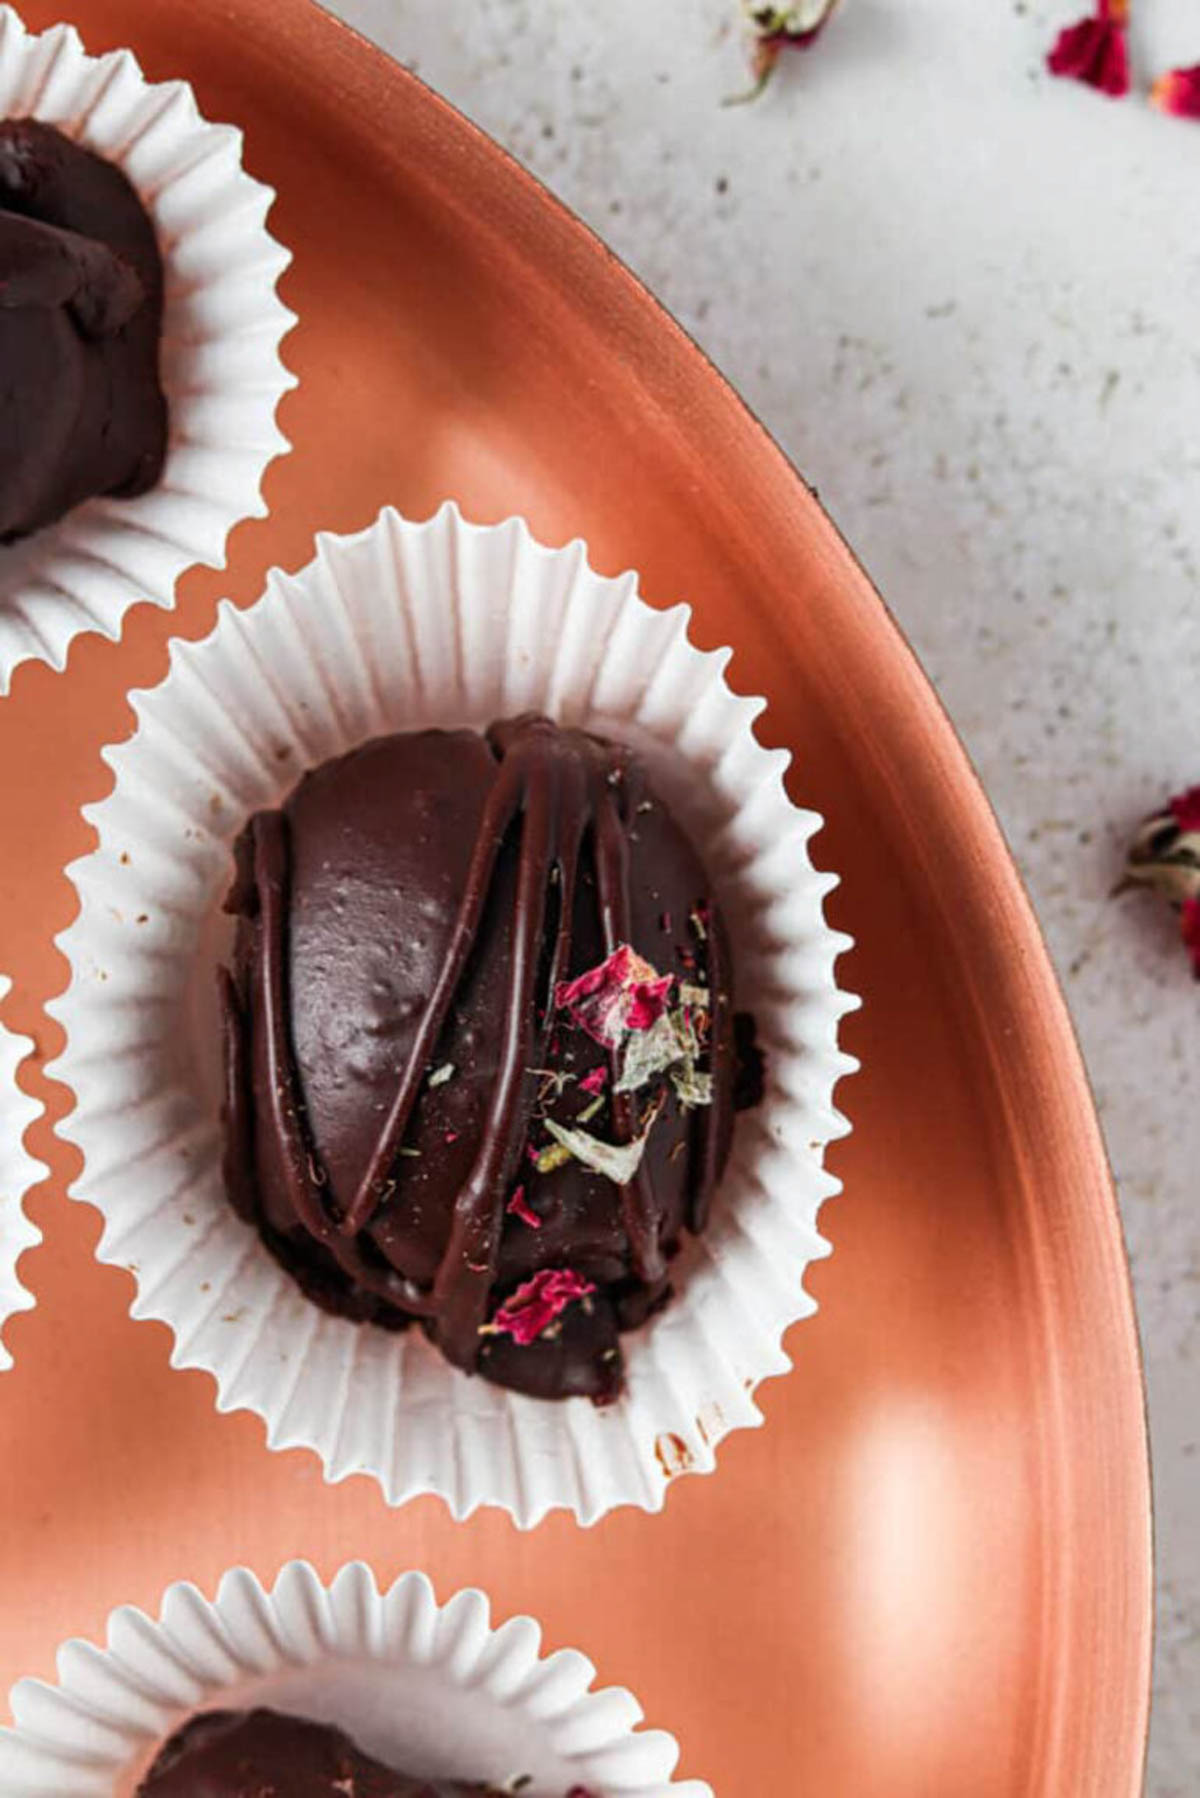
Photo 2: Once the time is up, roll the chocolate into 1 inch size chocolate balls. You can also roll the chocolate in the additional ganache sauce, peanuts, or shaved coconut. Add a piece of parchment paper to a baking sheet and lay the chocolates on there. While the truffles are in the freezer, put the ganache coconut milk in the microwave for 120 seconds (2 minutes.) When it comes out of the microwave add in the chocolate and continuously whisk. Now dip the truffles in the ganache and put back on the baking sheet. Add the optional nuts and coconut on top if desired. Store in the fridge. See freezing instructions below.
Expert Tips
- Tip # 1: Before placing your sauce pan in the freezer, either allow to cool slightly or place a hot pad on your freezer shelf.
- Tip # 2: If the truffle dough is too sticky to handle, you could lightly powder your hands with raw cacao powder or cocoa powder to prevent them from sticking.
- Tip # 3: Make sure to thoroughly stir your nut butter before adding so you don’t add additional liquid.
- Tip # 4: Make sure your nut butter is at room temperature to ensure it is easiest to work with.
- Tip # 5: If you prefer, you can use a double boiler to make your chocolate ganache instead of placing in the microwave.
- Tip # 6: Plan ahead for the holidays and bulk make these truffles to store in your freezer to save time.
Recipe FAQs
I suggest storing them in an airtight container in the freezer for up to one week.
I like to use a small cookie scoop! This will ensure they are all even in size.
I like to top off my truffles with maca powder, edible rose petals and crushed nuts. You could top them off with any topping you prefer or even just chopped chocolate or freeze dried raspberries.
Storage Instructions
- I suggest storing these truffles in an airtight container in the freezer for up to one week.
- You could also bulk make these truffles and store them in an airtight container for up to 3 to 6 months.
Other Dairy Free Chocolate Recipes You Will Love

Are you interested in a list of my go to healthy alternatives?
Download your FREE guide below

Dairy Free Chocolate Truffles
Equipment
- mixing bowl
- Saucepan
Ingredients
- 2 cups dairy free chocolate
- 3/4 cup coconut milk make sure it is full fat
- 3 tbsp coconut oil
- 1/3 cup nut butter I like peanut butter
- 1/4 cup maple syrup
Ganache:
- 1 1/2 cups dairy free chocolate
- 1/2 cup coconut milk
OPTIONAL:
- 1/2 cup edible rose petals to roll the truffles in
Instructions
- Add the coconut milk to a pan and bring to a boil, then turn off the heat. Add in the peanut butter, chocolate chips, maple syrup and coconut oil. Whisk together continuously so it does not burn or harden. Now, set the pot in the freezer for 1.5-2 hours to allow the truffles to harden. Place wax paper on a cookie sheet. Once the 2 hours are up, scoop the truffle filling with a 1 inch cookie scooper and lay on the sheet. Place in the freezer.
- While the truffles are in the freezer, put the ganache coconut milk in the microwave for 120 seconds (2 minutes.) When it comes out of the microwave add in the chocolate and continuously whisk. Now dip the truffles in the ganache and put back on the baking sheet. Add the optional nuts and coconut on top if desired. Store in the fridge. See freezing instructions above.