• Skip to primary navigation
  • Skip to main content
  • Skip to primary sidebar
  • Spring Recipes
  • Recipes
  • Order Meal Prep
  • Healthy Gut Baby Food Course
  • About

Allianna's Kitchen

menu icon
go to homepage
  • Spring Recipes
  • Recipes
  • Order Meal Prep
  • Healthy Gut Baby Food Course
  • About
    • Facebook
    • Instagram
    • Pinterest
    • Twitter
  • search icon
    Homepage link
    • Spring Recipes
    • Recipes
    • Order Meal Prep
    • Healthy Gut Baby Food Course
    • About
    • Facebook
    • Instagram
    • Pinterest
    • Twitter
  • ×
    Allianna's Kitchen » Recipes

    Blog

    Allianna in the pantry with glass mason jars behind her.

    January 31, 2024 Blog

    Kitchen Organization 101

    If you have been following along on Instagram you probably saw that my husband and I just finished building a new home. One of the things that was really important to me from the start was only having stuff in the house we really needed and loved. We lived in our last house for a year and a half and we accumulated so much stuff that we did not need within the short time span that we lived there. 

    Allianna in the pantry with glass mason jars behind her.

    The thing is when your space is cluttered, it makes you avoid the space! I especially noticed this in our kitchen of our apartment. As someone who really values the fuel I put into my body, making my kitchen warm and a fun place to be is essential.

    I was so excited to partner with Happy Lark Home Organizing this time around with our move. They came to help me purge a bunch of stuff in our apartment prior to the big day. They are a local to Pittsburgh organizational company that not only will organize your space, but also help you purge and unpack when moving! They are offering our blog readers a free initial consultation when you mention this post. They were a dream to work with.  When we purged, I made a point to get rid of anything that I had not used in a whole year. It felt so good donating so much stuff! This lifted such a mental weight when we were preparing to move into our home by getting rid of so much stuff.

    The day we moved in, Amber & Kara from Happy Lark Home Organizing came and helped me unpack. Our builder ended up getting us in our home 3 weeks early in time for Thanksgiving and my husband already had a meeting scheduled for the day of our move that he could not change. If it wasn’t for Kara and Amber, I definitely would not have survived! By the time my husband came home, the whole house was unpacked! He was just as shocked as I was. 

    Unpacking the stuff from our apartment was easy given we had already purged so much. Unpacking the stuff from storage that was in there for two years was far more difficult. We had so much stuff. I hadn’t used any of the stuff for over two years so I kinda forgot we had it. We donated a lot but it was also really nice to find some of my old favorites. We thoroughly went through everything as we unpacked. 

    As we unpacked everything we were really strategic about where things went. I also was really strategic about how I designed our kitchen making sure everything would have a place. We kept all of the things we used daily or often down low and reachable. Everything that we used on occasion or for the holidays got put higher in cabinets. 

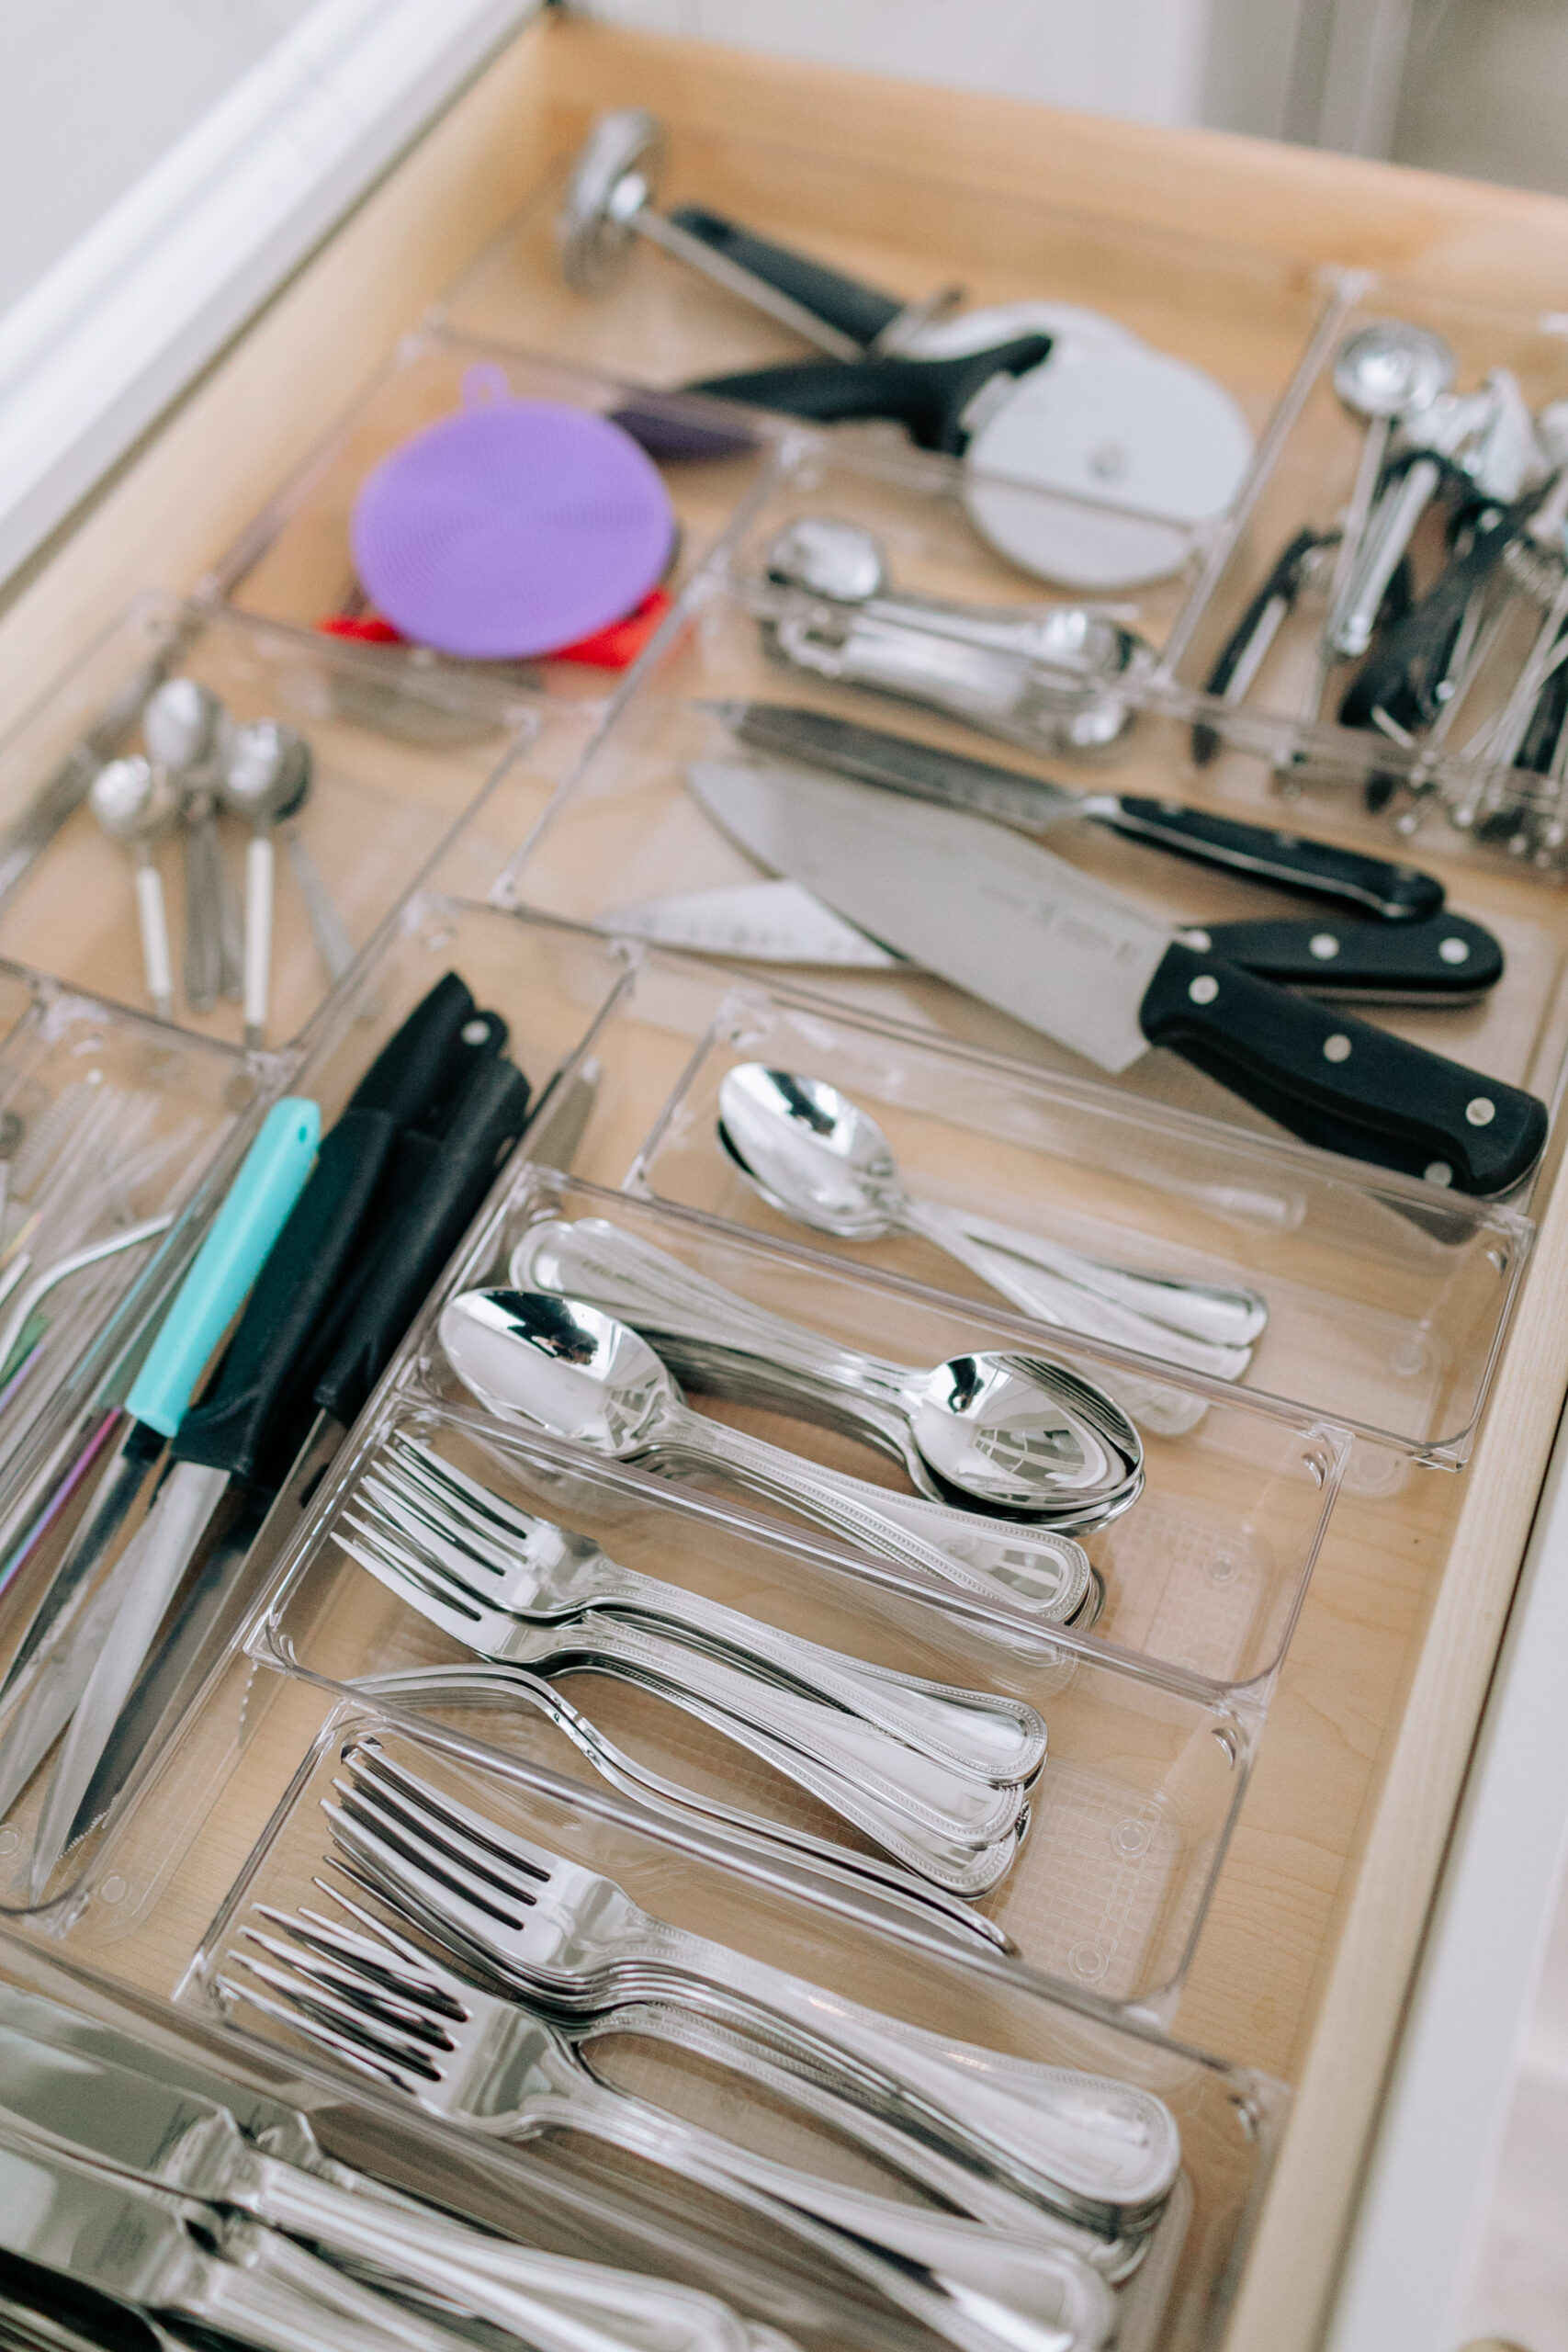
    My main two focuses in the kitchen with Happy Lark Home Organization were my pantry and utensil drawers. I was so tired of my utensil drawer getting caught every time I opened it. We use these clear cleanable drawer dividers to divide things up. What I love most about them is that they are super easy to pull out and clean. They are also clear so they have a clean look to them. Traditional custom drawer separators typically don’t fully come out which means it is easy for crumbs to pile up. If something spills, it is nearly impossible to clean without cleaning out the whole drawer. With the clear drawer dividers it makes it really easy to clean. They carry all shapes and sizes so you can really find a perfect arrangement for your drawer. 

    Glass pantry jars with wooden lids.
    I am obsessed with these glass jars with wooden lids. They are so pretty and help keep the pantry organized. I can easily see what we have on hand in the pantry.
    Clear drawer organization in a kitchen drawer
    I love these clear drawer organizers for the kitchen drawers. They are so easy to clean and help keep the drawers from jamming.

    I knew I wanted a pretty pantry, but most importantly I wanted it to be functional. Having large woven baskets at the bottom really helped me hide things but still keep everything together. We used the larger baskets for paper plates, pastas, chips, nuts and other snacks. 

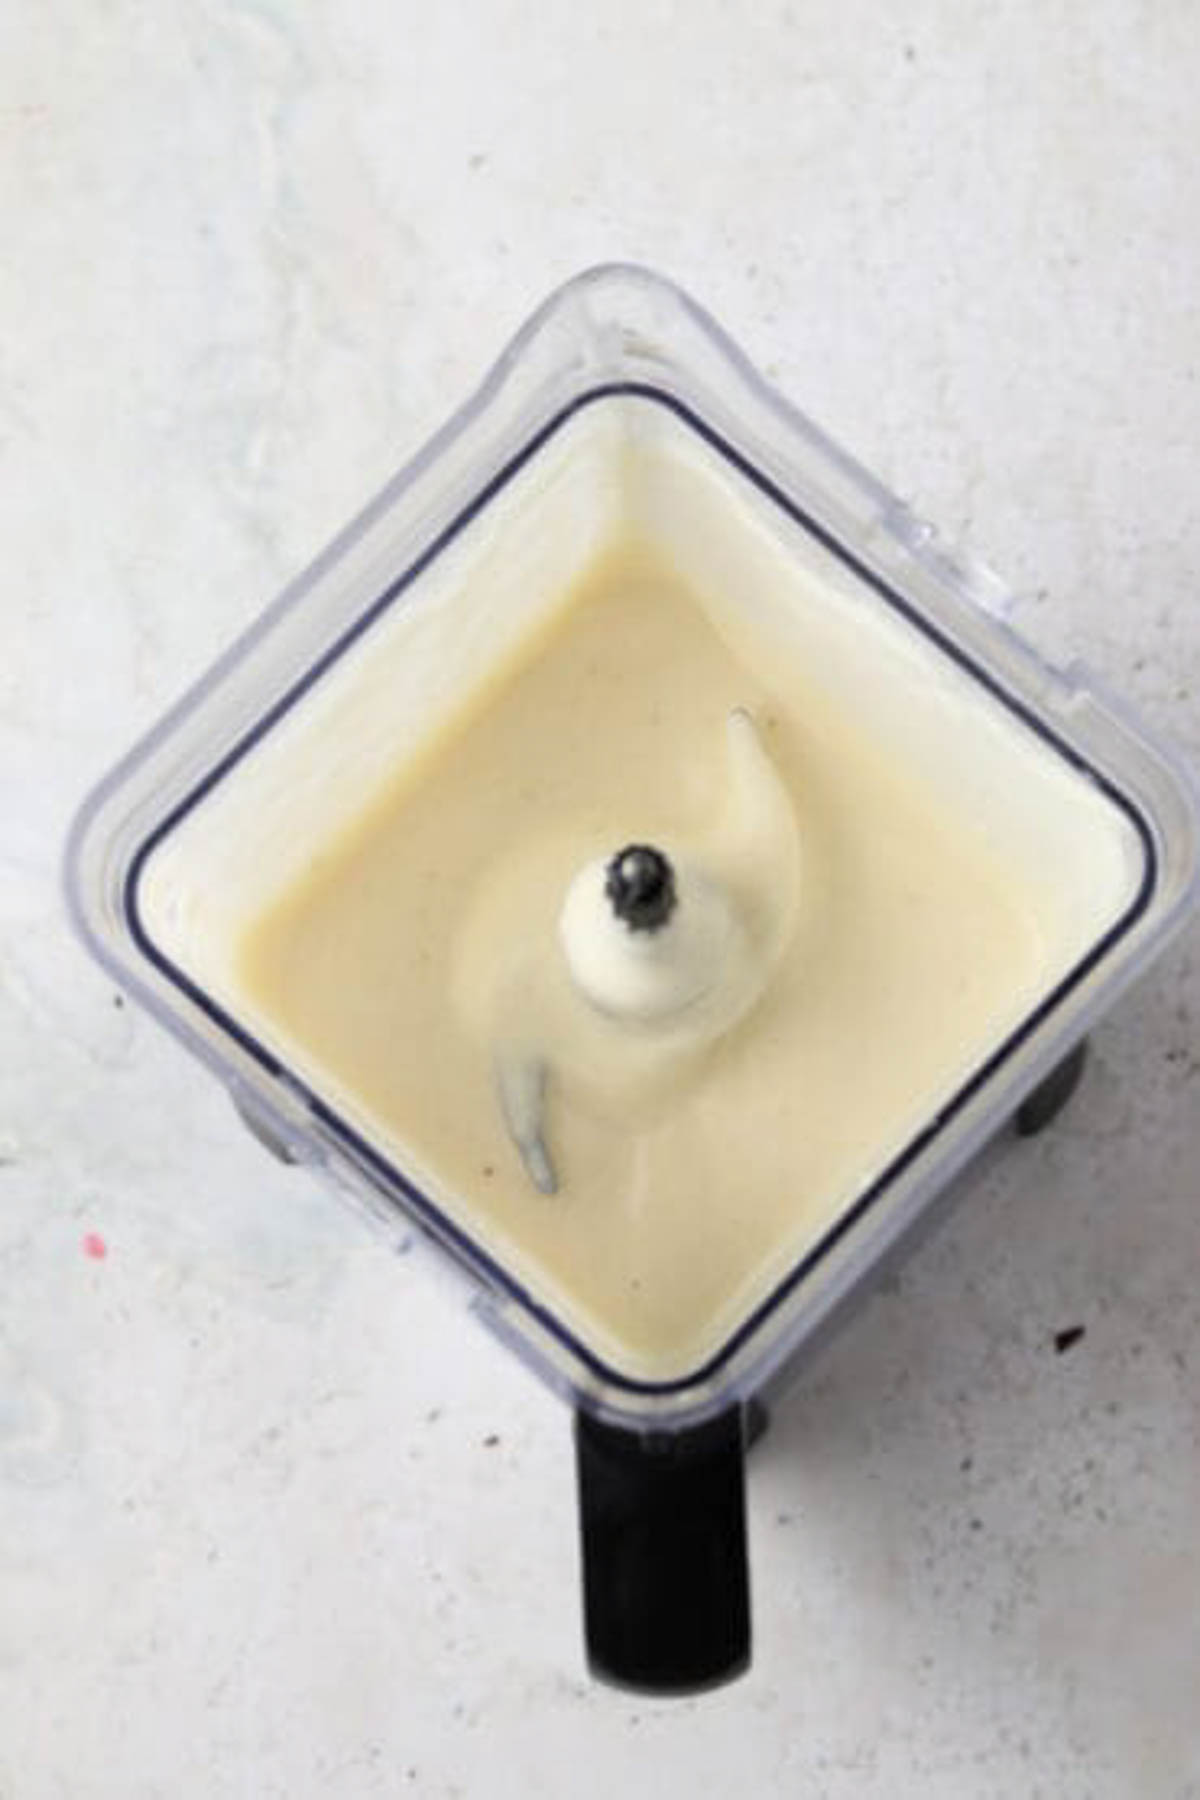
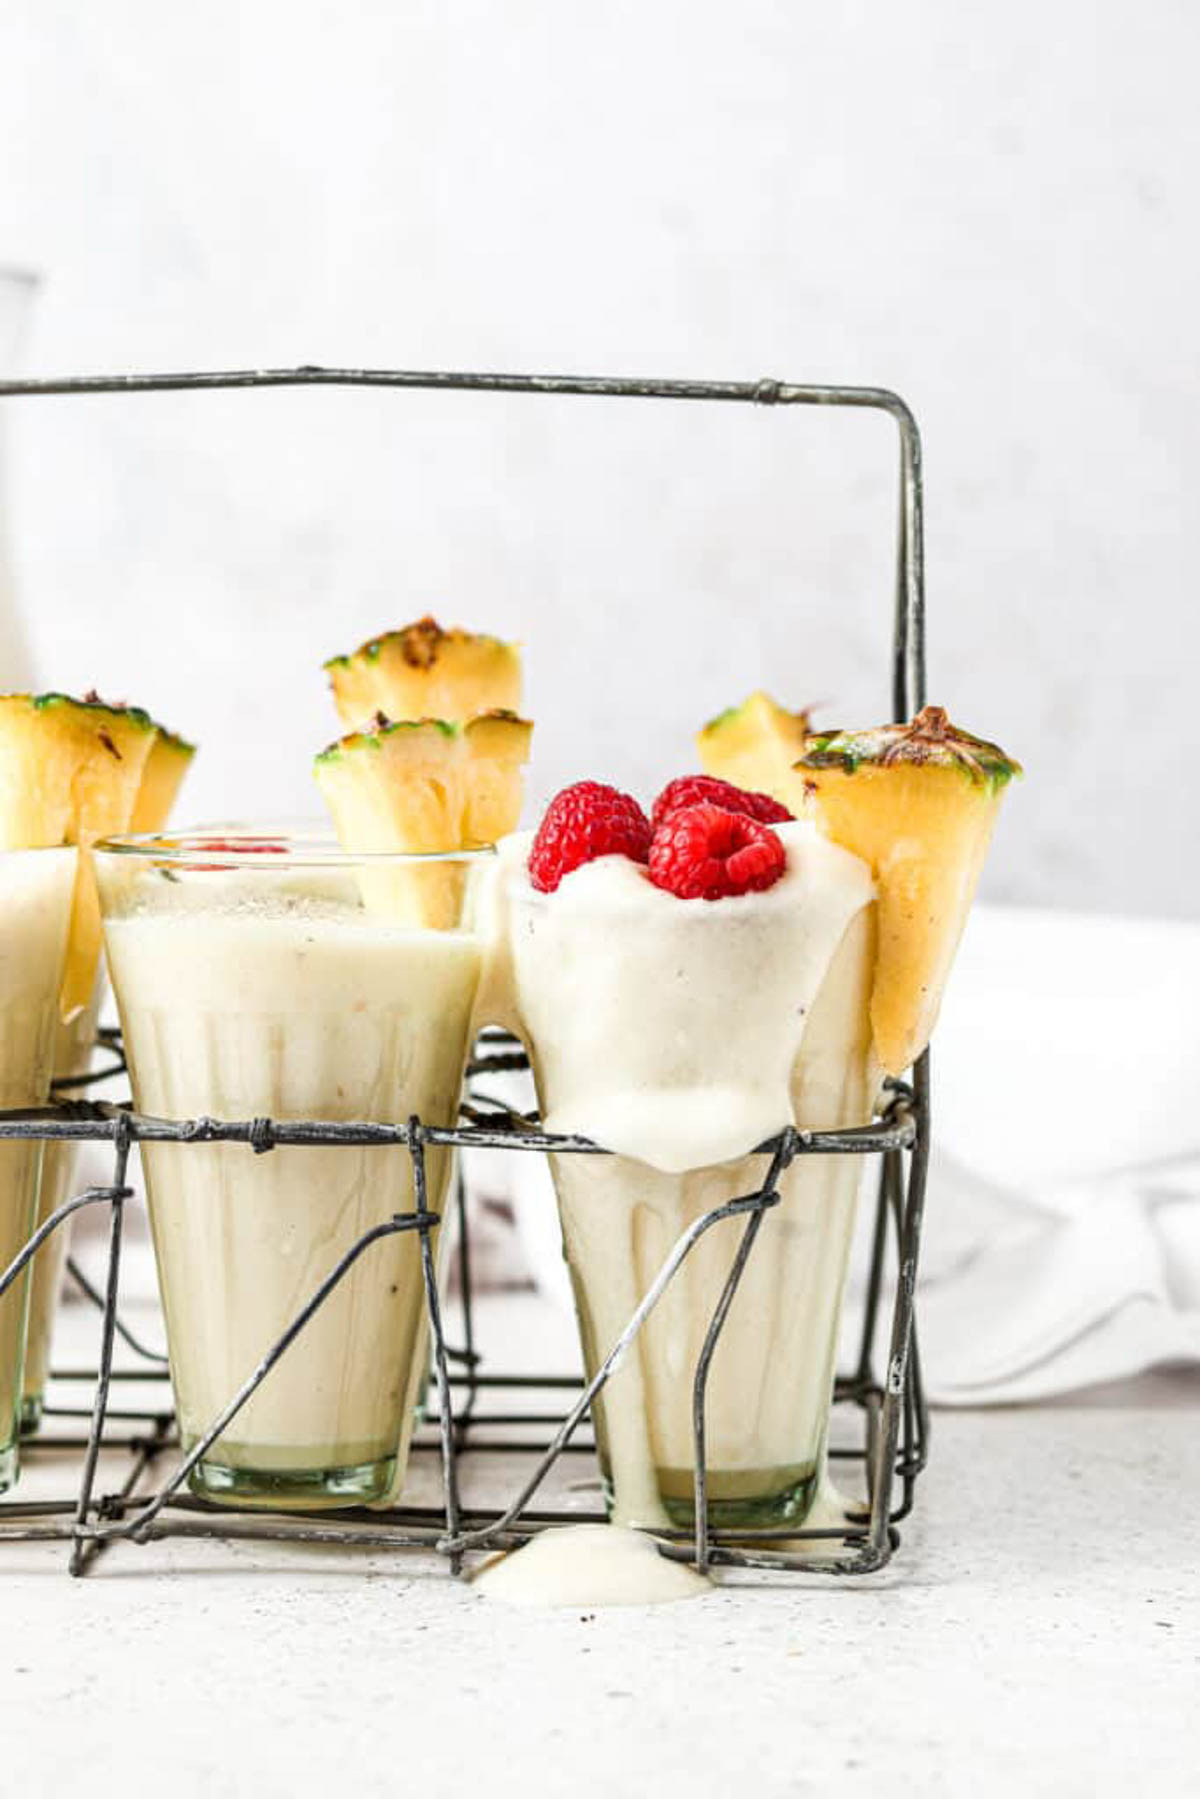
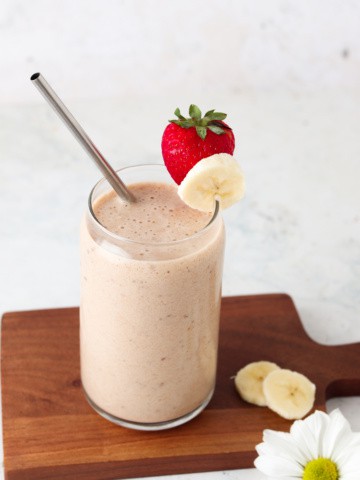
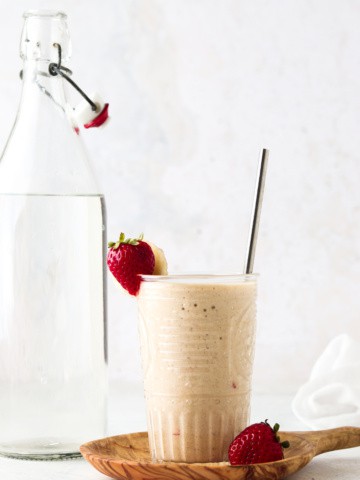
    On the counter of the pantry we put all of our essential small kitchen appliances. I am obsessed with my 11 in 1 Instant Pot. It has 11 different functions from crockpot to air fryer, yet it only takes up one spot. We also have a microwave on the shelf. We do not use it much for food but like to have it in there to heat up a heating pad on occasion. Last but not least, our Ninja food processor. We use it for smoothies and chopping things like onions. It makes life a lot easier!

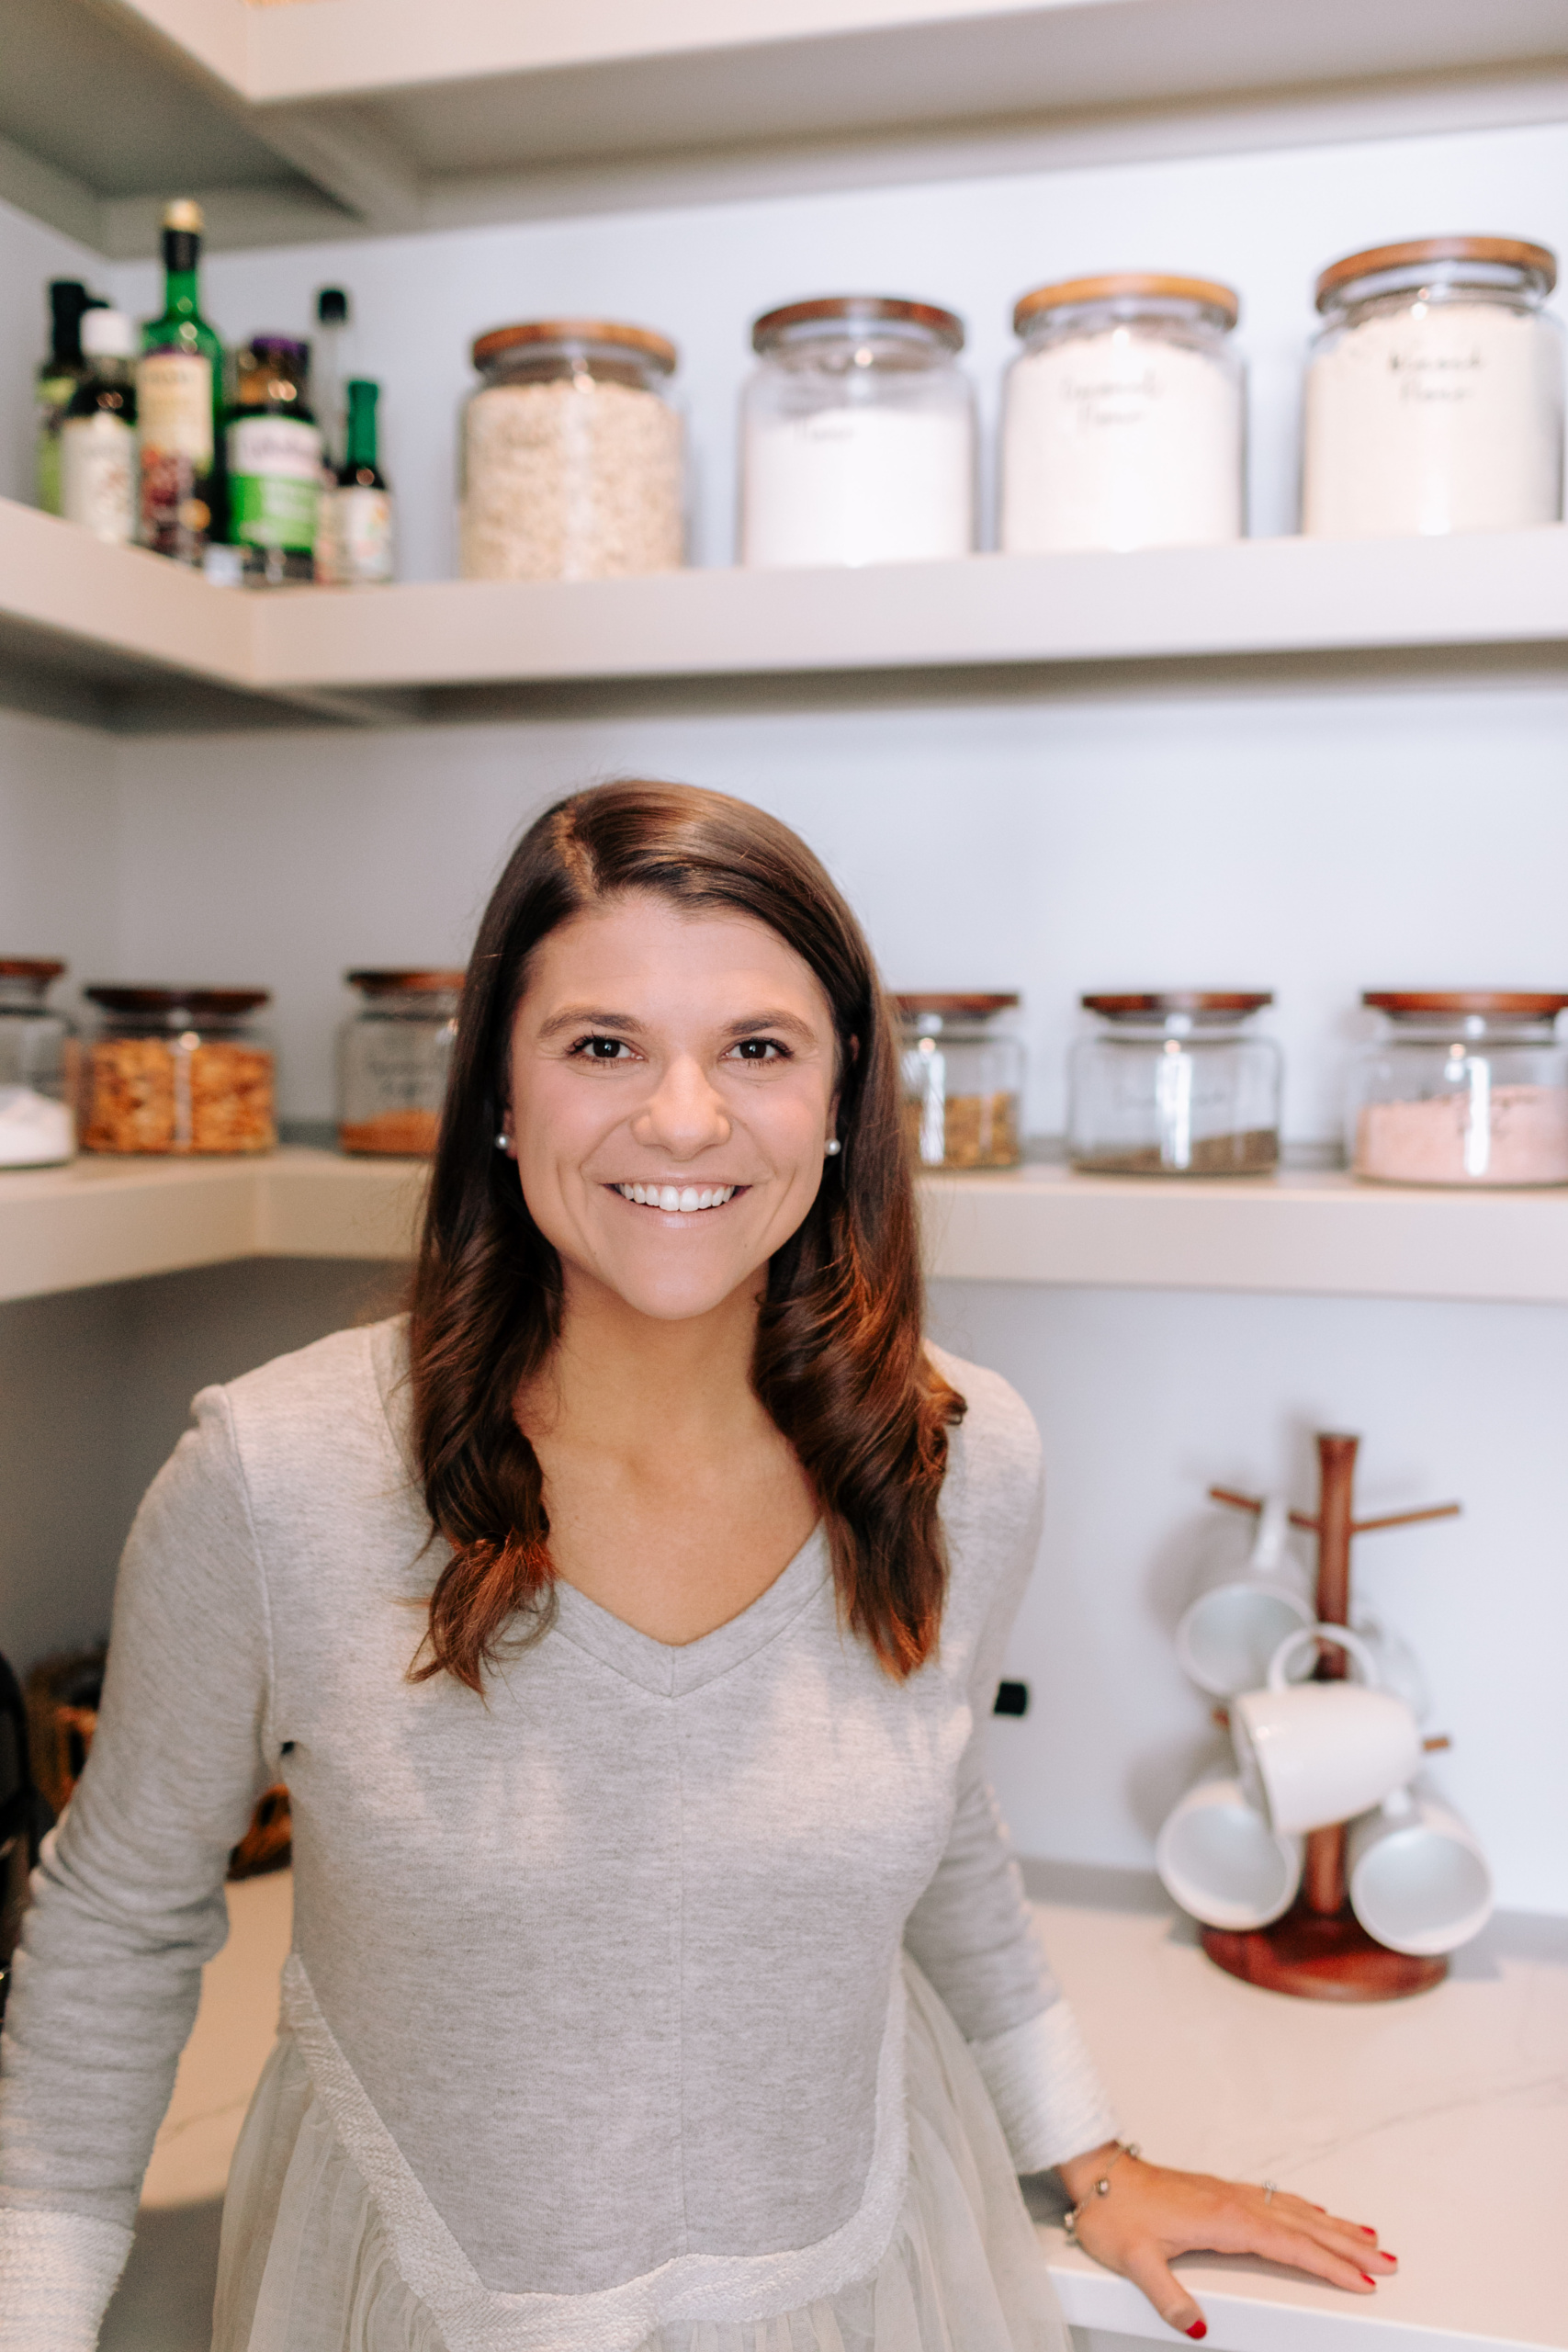
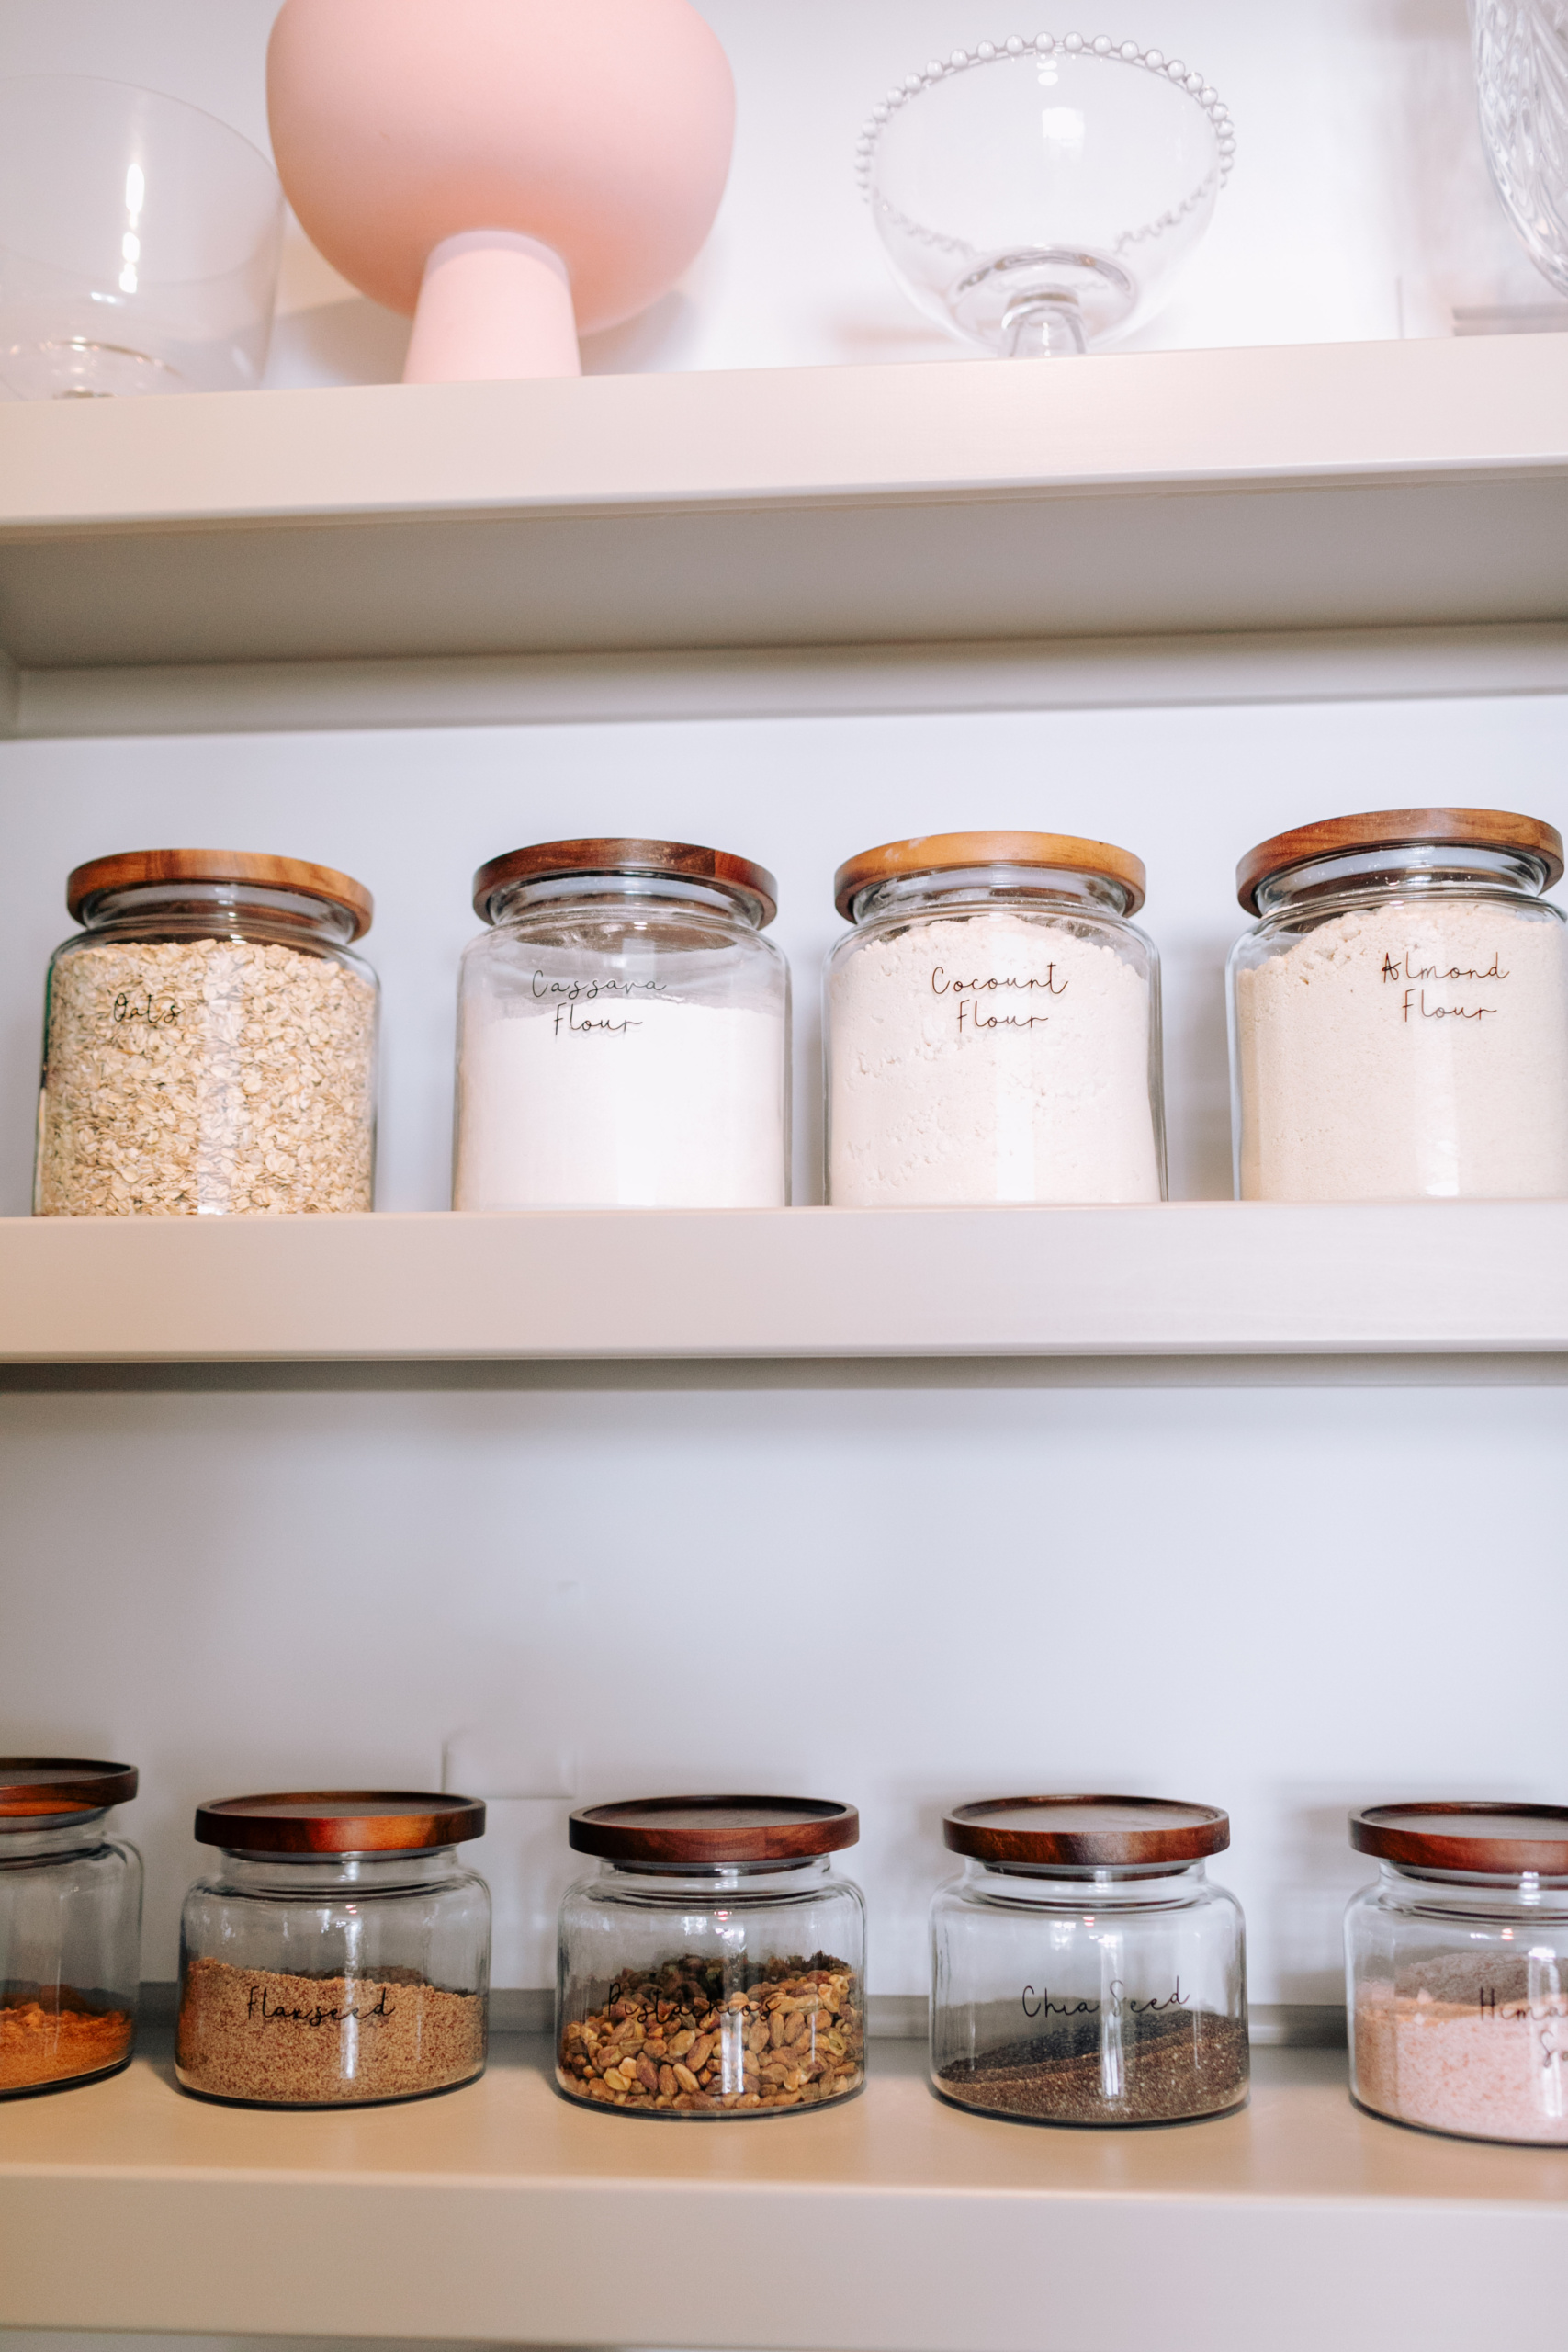
    On the upper shelves, we used clear jars with wooden tops that matched the wood in our home. It added warmth to the space and it was nice to be able to see in the jars. Kara labeled all of the jars in a pretty font so I knew what was in each one. 

    I feel like we are spending less on groceries having everything clearly labeled and organized. In the past I would just submit a quick Instant Cart order when I couldn’t find something. I also believe when you have a more organized and clean space, it makes you want to use it!

    Xo 

    Allianna 

    banana peach smoothie 1 scaled

    January 25, 2024 Allergy Friendly

    Banana Peach Smoothie Without Yogurt

    This Banana Peach Smoothie recipe is creamy, sweet and loaded with protein! This smoothie is naturally dairy free, whole30 friendly, and autoimmune protocol friendly. You can have breakfast ready to go in 5 minutes with this recipe and you would never know it can be made without yogurt! This recipe is not only healthy and nutritious but is also refreshing and can help satisfy that sweet tooth.

    Peach banana smoothie in a glass with flowers in the background.

    This recipe was inspired by my hubby. The banana peach combo is one of his favorite easy snack or easy breakfast. The ripe bananas and healthy fats give this smoothie the perfect creamy texture. You could make these ahead of time and keep them in the refrigerator for a quick breakfast in the car or an easy delicious snack for both adults and kids.

    Any easy recipe that I can dump and go is a favorite of mine! I’m always looking for healthy snacks for on the go and this is one of the best things to take with me. If it is a hot day, I will use frozen fruit so that it comes out like a thicker smoothie and will eat it from a bowl to get the same refreshing and cooling effect as the sorbet from my childhood without all of the added sugar and fillers. If you choose to use fresh peaches, you could also make my Vegan Peach Cobbler with the extra or freeze them for the next time you want this smoothie. Check out some of my other smoothie recipes: Healthy Pina Colada Smoothie, Pineapple Banana Smoothie, Mango and Pineapple Smoothie, Strawberry Blueberry Smoothie, Mint Smoothie, Broccoli Smoothie, Homemade Elderberry Syrup, Strawberry Banana Smoothie Bowl, and Gingerbread Smoothie.

    [feast_advanced_jump_to]

    Why You’ll Love This Recipe

    • It is so simple! You just dump everything in a blender, blend it up until smooth, and enjoy!
    • This recipe is paleo, gluten free, dairy free, whole30 friendly, autoimmune protocol friendly, and soy free.
    • Kids will love this recipe too. The whole family will!
    • This easy recipe is a great way to satisfy your sweet tooth without having to turn on your oven and has plenty of nutritional benefits you can feel good about
    • You can switch this recipe up by also using it for homemade popsicles or a smoothie bowl.
    • Not only is it easy to make but the clean up is just as simple! It takes just a little bit of time to pull this one together!

    Ingredients

    Banana peach smoothie ingredients in small glass bowls.
    • Dairy free milk-I like the canned coconut milk from Trader Joe’s. It doesn’t have any additives and is delicious. If you are not dairy free or doing the whole30 or AIP you can use regular milk.
    • Fresh peach-Make sure it is ripe for best results and optimal peach flavor! The best way to tell if a peach is ripe is if it is soft. Frozen peaches will typically go through the freezing process at the peak of freshness. This recipe is great for peak peach season!
    • Ripe banana-I like to eat my bananas with a few brown spots. The riper they are, the sweeter they are. You could also use a banana that you previous froze. You will just want to allow the banana to thaw completely before blending.
    • Collagen peptides-I use collagen peptides over protein powder. Whey protein contains dairy and I do not do well with dairy nor do I do well with pea protein. If you are not doing the Whole30 or do not have dietary issues, you can use regular protein powder. I like these collagen peptides HERE. 
    • Optional-Mixed greens to get more vegetables in. If you are doing the Whole30 or autoimmune protocol, be sure to add the veggies! I love to add spinach to my smoothies!

    See the recipe card below for a full list of ingredients and measurements.

    Substitutions and Variations

    • If you do not have fresh banana and peach, you can use frozen! It will change the consistency of the smoothie though since the fruit will be frozen. You can allow the fruit to thaw first so that you can ensure there is no change to the consistency and no added liquid.
    • You can use your favorite dairy-free milk of choice! I prefer almond or coconut milk. You can use soy milk, oat milk, or any other vegan options. You just want to make sure that you choose a milk that is unsweetened and unflavored.

    This recipe has not been tested with other substitutions or variations. If you replace or add any ingredients, let us know how it turned out in the comments below!

    Step by Step Instructions

    Banana peach smoothie ingredients in a blender base.

    Photo 1: First, place all of your ingredients in your blender. Then, blend until smooth.

    Expert Tip

    • Tip # 1: To save additional time, you can pre-measure your fruit and place in individual bags so that all you need to do is dump your fruit, add your liquids, and blend!
    • Tip # 2: Make sure you scrape down the sides of the blender and then blend more to ensure the smoothie is fully combined.
    • Tip # 3: You can change the consistency of the smoothie to smoother by adding additional liquid. Or you can have it be more of a slushy consistency by using frozen fruit or adding ice.

    Recipe FAQ

    Can I have smoothies on the autoimmune protocol and Whole30?

    Yes! What matters is what you put in your smoothies. Typically we suggest staying away from fruit based smoothies when doing both of these diets, however if you add the collagen peptides and greens, you are good to go!

    Can I meal prep smoothies?

    For sure! I made them at the start of the week for my husband to drink on his way to work. We put them in mason containers, I like these containers. I suggest storing them in the fridge for up to 5 days.

    Can I add additional nutrients to this recipe?

    Yes! You can add frozen cauliflower or fresh spinach to the smoothie without changing the flavor of the smoothie.

    How else can I enjoy this smoothie?

    You can either drink this smoothie, or you can turn it into a smoothie bowl and top with your favorite fresh fruit, nuts, nut butters, seeds, and more!

    What is your favorite blender for this recipe?

    This high speed blender is my number one recommendation to all of my friends and family! It is a great value for what you get and is also great quality. I have had mine for years and it still works great.

    Banana peach smoothie in a glass with flowers in the background.

    Storage Instructions

    • This recipe can be stored in the refrigerator for up to 5 days in an air tight container.
    • I like to store mine in mason jars so that they have air tight lids and I can also just grab and go. Just make sure you use a freezer safe container and airtight container.

    Other Smoothie Recipes You Will Love

    • banana cream smoothie 4 scaled
      Banana Cream Smoothie (Dairy Free Option)
    • orange creamsicle smoothie 4 scaled
      Orange Creamsicle Smoothie
    • mint smoothie 11 scaled
      Mint Smoothie
    • strawberry banana smoothie bowl in a bowl with berries on top
      Strawberry Banana Smoothie Bowl

    Are you interested in getting a list of my go to healthy alternatives?

    download your FREE guide below

    download your free guide
    banana peach smoothie 1 scaled

    Banana Peach Smoothie

    Course Breakfast, Snack
    Cuisine American
    Prep Time 5 minutes minutes
    Total Time 5 minutes minutes
    Servings 2 servings
    Author Allianna Moximchalk
    232kcal
    Cost $3
    Print Recipe Pin Recipe

    Equipment

    • high speed blender

    Ingredients

    • 1 whole peach make sure it is ripe
    • 1 whole banana peeled, frozen if you want your smoothie to be thicker
    • 1 cup coconut milk Regular milk if you drink dairy. Trader Joe's canned milk if you are doing the Whole30 or AIP.
    • 2 scoops collagen peptides Regular protein powder is ok if you are not doing the Whole30 or AIP. If you are doing it, collagen peptides are the best alternative.

    Optional:

    • handful mixed greens This is a must if you are doing the Whole30 or AIP!

    Instructions

    • Place all ingredients in the blender and blend until smooth.

    Notes

    Storage: This recipe can be stored in an air tight container in the refrigerator for up to 5 days. 
    Nutrition: The nutrition for this recipe is an estimate and the calorie count is not guaranteed.  It is based on 2 servings.
    Servings: This recipe should yield 2 servings.
    This banana peach smoothie makes for a perfect breakfast or snack alternative.
    Serving: 1serving | Calories: 232kcal | Carbohydrates: 5g | Protein: 26g | Fat: 14g | Saturated Fat: 11g | Polyunsaturated Fat: 1g | Monounsaturated Fat: 1g | Cholesterol: 50mg | Sodium: 52mg | Potassium: 217mg | Fiber: 1g | Sugar: 2g | Vitamin A: 82IU | Vitamin C: 1mg | Calcium: 108mg | Iron: 4mg
    Tried this recipe?Tag me on instagram @alliannaskitchen!
    Gluten free mac and cheese in a white casserole dish with a metal serving spoon.

    January 22, 2024 Appetizers

    Crockpot Gluten Free Mac and Cheese

    This Gluten Free Crockpot Mac and Cheese has become a staple in my house. It is so easy to make and it is something your whole family will love! This recipe is loaded with flavor and only requires 15 minutes of hands on time. It makes for a great weeknight dinner for the nights where you are running the kids around to activities. Not only is this recipe gluten free, but it can also be made allergy friendly for those with food allergies. 

    Crockpot gluten free mac and cheese in a white bowl on a plate plate with a fork in it.
    [feast_advanced_jump_to]

    My husband travels a lot during the week for work. When he gets home he is always starving! It is like he almost forgets to eat when he is not with me, ha. This is something I truly do not understand because I never skip a meal. Anyways, I love having one of his favorite dishes waiting for him as soon as he walks in the door. Creamy mac and cheese has been his favorite comfort food since he was a kid. In fact, he said this is the Best Mac and Cheese he has ever had! You can use this dish as a main dish or use it as a side dish. When using this recipe as a side, I like to make it with my Homemade Gluten Free Chicken Nuggets, Gluten Free Pigs in a Blanket recipe, Gluten Free Crab Cakes, Gluten-Free Stuffed Mushrooms, Gluten Free Pasta Salad for cookouts! If you are looking for a fun appetizer to serve it with you could serve it with my Homemade Beetroot Dip, it is so good! If you enjoy this recipe, you will also enjoy my Gluten Free Ravioli as well!

    Why I Love This Recipe

    • This Gluten Free Mac n Cheese is oh so creamy yet not too heavy.
    • This recipe only requires 15 minutes of hands on time and requires minimal ingredients. 
    • Naturally this recipe is gluten free, soy free, and nut free.
    • While this recipe is my go to for Gluten Free Mac and Cheese, I have a dairy free, gluten free, and nut free version on my blog. This Paleo Mac and Cheese is super easy to make and is quite delicious too!
    • You can easily add vegetables to this dish by pureeing vegetables like butternut squash and broccoli and mixing it in. Blanching Broccoli is the quickest way to add your vegetables in. If you prefer your vegetables on the side, you can also serve this with my Arugula Pear Salad.
    • This dish is the best choice for when you are hosting kids. It is a little more elevated than traditional boxed mac and cheese, yet super kid friendly. I haven’t met a kid that isn’t a big fan of mac and cheese. 
    • While this mac and cheese recipe is intended for the crockpot, you can also use an all purpose instant pot too!
    • My other favorite comfort foods that go well with this recipe are: Jalapeno Wrapped Bacon Poppers and Air Fryer Potato Skins.

    Ingredients

    Crockpot gluten free mac and cheese ingredients in glass bowls on the counter.
    • Gluten-free pasta– I like the Macaroni noodles. I get mine from Thrive Market. If you use my link to sign up for Thrive you will save money on your first order. Jovial noodles are made with brown rice. Jovial is my go to pasta brand ever since I found out I have celiac disease. 
    • Milk-I used almond milk because we do not have regular milk in our house. However, any kind of milk will work. 
    • Onion powder, garlic powder, salt & pepper: For flavor. 
    • Sour cream-This adds to the creaminess and texture. 
    • Sharp cheddar cheese- I had sharp cheddar on hand so that is what I used. 
    • Arrowroot-This helps thicken the creamy cheesy sauce. 
    • Butter-This helps with the creaminess and flavor.

    See the recipe card below for a full list of ingredients and measurements.

    Substitutions and Variations

    • Pasta-If you are not gluten free, you can use regular pasta noodles or whole wheat noodles. Regardless of what kind of pasta you use, I do suggest elbow macaroni. 
    • Spices-If you like extra spices like myself, you can add a little bit of paprika to give this dish a kick but that is not necessary. 
    • Milk-If you like your mac and cheese thicker and creamier, you may want to use whole milk or heavy cream, although it is no completely necessary. 
    • Cheese-While sharp cheddar is the best cheese for this recipe. White cheddar, monterey jack, pepper jack cheese (my husband’s favorite) are also great options too. I do not suggest using american cheese, I only suggest using pre-shredded cheese in this recipe. Keep in mind, different cheeses will give this dish a different flavor. I know a lot of people use velveta cheese, but I do not suggest using that. It is highly processed and filled with a lot of unnecessary ingredients. Regular cheese does the trick and is a lot better for you!
    • Arrowroot-In my opinion, is the best gluten-free flour for binding things. However, you can also use corn starch or potato starch if you are not too sensitive to those foods. 
    • Lobster-My husband loves lobster mac and cheese. I added a little bit of lobster to this recipe for fun! Totally not necessary but adds a nice elevated touch.
    • Butter-You can also use ghee or clarified butter.

    This recipe has not been tested with any other substitutions or variations. If you try something else out please let me know how it turns out in the comments below!

    How To Make Crockpot Gluten Free Mac and Cheese

    Gluten free noodles in a big pot of water.
    Step #1: Boil the noodles on the stovetop according to the instructions on the box. Cook them more on the al dente side. This will help prevent them from not getting mushy in the crockpot.
    Noodles being strained in a colander.
    Step #2: Strain noodles in a colander.
    All mac and cheese ingredients in the instant pot insert.
    Step #3: Place all of the mac and cheese ingredients in the instant pot or crockpot insert.
    Gluten free mac and cheese in the crockpot being mixed with a spoon.
    Step #4: Bake the mac and cheese on low in the crockpot for 3 hours. Be sure mix it throughout the baking process.

    Expert Tips

    • Tip #1: Do not over cook your noodles! Gluten free noodles especially are known for getting mushy. I suggest cooking the noodles to a little bite and al dente.
    • Tip #2: Do NOT forget to give this creamy pasta dish a good stir while it is in the crockpout. Without that, it will likely burn at the bottom.

    Recipe FAQs

    What is gluten-free macaroni and cheese like?

    According to my husband who is the pickiest eater, you cannot even tell this recipe is gluten free. I think a lot of it comes down to the kind of pasta you use, but you cannot tell with the Jovial Gluten Free noodles. They taste just like regular pasta. This dish is oh so creamy and full of flavor.

    Do you have any other crockpot recipes you love?

    Yes! I love a good crockpot recipe. I have a few crockpot recipes on my blog like Slow Cooker Pumpkin Soup, Dairy Free Buffalo Chicken Dip, and AIP Bone Broth.

    Can I use evaporated milk in this recipe instead of milk?

    Yes you can! Evaporated milk gives a dish a creamy and buttery like taste but without heavy cream.

    What does this pair well with?

    I love serving this gluten-free mac and cheese with my Air Fryer Turkey Burgers and my famous Gluten Free Crack Chicken.

    What kind of crockpot do you use?

    I love using my instant pot! My instant pot has 13 different functions. One of the functions is the slow cooker and crockpot. I love having one kitchen gadget that does multiple things. It takes up less room on the counter.

    Gluten free mac and cheese in a white casserole dish with a metal serving spoon.

    Storage Instructions

    • This recipe lasts for up up to 5 days in the fridge. If you are adding lobster or other seafood, I would only keep it for 3 days.
    • To ensure freshness, be sure to store this recipe in an air tight container.

    Other Gluten Free Side Dishes

    • potato skins on a plate with cheese, green onions and sour cream
      Air Fryer Potato Skins
    • air fried potato wedges on a plate with sauces
      Ninja Air Fryer Potato Wedges
    • crispy potatoes on a plate
      Air Fryer Home Fries
    • IMG 3764
      Air Fryer Frozen Brussel Sprouts

    are you interested in a list of my go to healthy alternatives?

    Download your FREE guide below

    download here
    Gluten free mac and cheese in a white casserole dish with a metal serving spoon.

    Gluten Free Crockpot Mac and Cheese

    Course Side Dish
    Cuisine American
    Diet Gluten Free
    Prep Time 15 minutes minutes
    Cook Time 3 hours hours
    Total Time 3 hours hours 13 minutes minutes
    Servings 8 servings
    Author Allianna Moximchalk
    455kcal
    Cost $10
    Print Recipe Pin Recipe

    Equipment

    • crockpot or multi-purpose instant pot

    Ingredients

    • 16 ounces sharp cheddar cheese See notes about using other kind of cheeses.
    • 12 ounces gluten free macaroni noodles I use the Jovial brand. Use my Thrive Market link and save on your first order! They carry all of the Jovial products that are often times hard to find in stores.
    • 3 tbsp arrowroot Or corn starch or potato starch.
    • 2 cups milk I typically use almond milk since we do not buy regular milk at home.
    • 1 stick butter or half cup. You can also use ghee.
    • 1/2 cup sour cream
    • 1/2 tsp garlic powder
    • 1/2 tsp onion powder
    • pinch of salt and pepper
    • 1 cup lobster meat pre-cooked, this is optional

    Instructions

    • Step 1: Fill up a pot with water and cook the pasta according to the box. Cook the noodles al denete so they have a bit of a bite to them. If you over cook them, they will end up soggy when the mac and cheese is done.
    • Step #2: Drain the noodles.
    • Step #3: Add all ingredients to your crockpot or multi-purpose instant pot. Give it a good mix.
    • Step #4: Cook the mac and cheese in the crockpot on low for 3 hours, mixing the mac and cheese throughout in between.

    Notes

    Servings: This recipe yields approximately 8 servings. 
    Nutriton: The nutriton on this recipe is just an estimate and cannot be guaranteed. 
    Storage: This recipe can last for up to 5 days in the fridge. If you add in lobster, I would only suggest keeping it for 3 days. 
     
    Easy, quick, cheesy and delicious gluten-free mac and cheese your whole family will love.
    Serving: 1serving | Calories: 455kcal | Carbohydrates: 39g | Protein: 19g | Fat: 25g | Saturated Fat: 14g | Polyunsaturated Fat: 1g | Monounsaturated Fat: 5g | Cholesterol: 73mg | Sodium: 422mg | Potassium: 157mg | Fiber: 1g | Sugar: 4g | Vitamin A: 757IU | Vitamin C: 0.2mg | Calcium: 492mg | Iron: 1mg
    Tried this recipe?Tag me on instagram @alliannaskitchen!
    paleo pina colada 3 1 scaled

    January 20, 2024 Autoimmune Protocol

    Healthy Pina Colada Smoothie

    This paleo Pina Colada Smoothie is one of our newfound favorites in our house. The creamy banana combined with the frozen pineapple is oh so delicious. This quick and easy dairy free drink will make you feel like you are on the beach! This drink is naturally paleo, Whole30, and AIP friendly.

    Six pina colada smoothies in a rack with the final one still being poured into.

    This delicious sweet but refreshing smoothie is perfect for anytime of the day and year with the tropical flavors. It is the perfect addition to any dinner party for those that are alcohol free are still able to enjoy as well. I love to make pre measured smoothie bags for this healthy pina colada smoothie recipe to keep in my freezer so I can enjoy this smoothie within little to no prep.

    Smoothies are a great snack to have on the go or a sweet treat to end your day as a healthy dessert. If you love this recipe, you will love the other healthy drinks and mixers I have on my blog like my Strawberry Simple Syrup, Grapefruit Mocktails, Mango and Pineapple Smoothie,Mint Smoothie, Orange Creamsicle Smoothie, Banana Cream Smoothie, Homemade Elderberry Syrup, and Pineapple Banana Smoothie.

    [feast_advanced_jump_to]

    Why You Will Love This Pina Colada Smoothie

    • It is so simple! It is simple to make and has simple ingredients. You just dump all of your ingredients into a blender, blend it up, and enjoy!
    • Kids will love this recipe too! They will think they are enjoying a sweet treat while they are getting additional nutrients.
    • This recipe is naturally gluten free, dairy free, nut free, soy free, added sugar free, whole30, AIP friendly, and paleo.
    • If you enjoy this smoothie recipe, you will also enjoy my pineapple margarita mocktail recipe as well!
    • You will be able to enjoy this tropical smoothie recipe in five minutes or less!

    Ingredients

    pina colada smoothie 2
    • Frozen pineapple– I like buying my frozen fruit from Costco! They sell a huge bag and I like to keep it in the freezer so I can eat pineapple all year round 🙂
    • Coconut milk-This recipe uses coconut milk because it is AIP friendly, however, if you are not doing AIP you can use almond milk. I like the Trader Joe’s canned coconut milk. It is AIP friendly and is delicious. Whatever brand you end up buying, make sure there are not any crazy additives.
    • Banana-the creamy banana combined with the frozen pineapple makes for one silky drink.
    • Collagen peptides-I like this brand. Collagen peptides are an approved form of protein powder for both AIP and Whole30. I also sometimes use this protein powder for my finance. While it is not 100% paleo friendly because it contains dairy, I have found he can tolerate it.

    See the recipe card below for a full list of ingredients and measurements.

    Substitutions and Variations

    • If you do not like coconut milk, you can substitute for liquid of choice such as almond milk, soy milk, oat milk, coconut cream, plant-based milk, or whole milk.
    • You can choose to add a protein powder to the smoothie as well for additional nutrients. If you do not use coconut milk, you will want to use a very small amount of coconut extract or add coconut flakes so you still get the coconut flavor.
    • For additional nutrients, you can also add chia seeds or flax seeds to the smoothie mixture as well. You can also add additional fresh fruit such as frozen banana or healthy fats.
    • If you use a yogurt such as coconut yogurt or cream of coconut, you will need to add additional liquid such as pineapple juice or orange juice to help thin the smoothie some.

    This recipe has not been tested with other substitutions or variations. If you replace or add any ingredients, please let us know how it turns out in the comments below.

    Step by Step Instructions

    pina colada smoothie 3

    Photo 1: Place all of the ingredients into the blender. Then, blend the mixture until smooth.

    Expert Tips

    • Tip # 1: You can use either frozen or fresh pineapple for this recipe. If you use fresh, I would recommend adding some ice to the blender so you achieve the right smoothie consistency.
    • Tip # 2: Make sure to scrape down the sides of the blender and pulse the blender again to make sure the smoothie is fully combined.
    • Tip # 3: If you over pour the liquid into the smoothie, you can add more frozen pineapple or ice to thicken the smoothie to the desired creamy texture consistency.

    Recipe FAQs

    How long does this smoothie last?

    I suggest drinking this smoothie within 4 days of making! Be sure to shake it up prior to drinking.

    What blender do you recommend?

    I have had this blender for years and it still works great! I love how versatile it is.

    What are the health benefits of collagen peptides?

    Collagen peptides are great to help improve skin health and also can help reduce joint pain.

    How should I store this recipe?

    I recommend storing any leftovers in an air tight container in the refrigerator for up to 4 days.

    Six pine colada smoothies in class cups garnished with fresh pineapple wedges and raspberries.

    Other Dairy Free Smoothie Recipes You Will Love

    • straweberry peach smoothie 15 scaled
      Strawberry Peach Smoothie Without Yogurt
    • mango and pineapple smoothie 12
      Mango And Pineapple Smoothie
    • strawberry banana smoothie bowl in a bowl with berries on top
      Strawberry Banana Smoothie Bowl
    • strawberry banana and mango smoothie 12 scaled
      Mango Strawberry Banana Smoothie

    Are you interested in a guide of my go to healthy alternatives?

    Download your FREE guide below

    download here
    paleo pina colada 1 scaled

    Paleo Pina Colada Smoothie (AIP, Whole30)

    Course Breakfast, Dessert, Snack
    Cuisine American
    Diet Gluten Free
    Prep Time 5 minutes minutes
    Total Time 5 minutes minutes
    Servings 4 servings
    Author Allianna Moximchalk
    405kcal
    Cost $5
    Print Recipe Pin Recipe

    Equipment

    • blender

    Ingredients

    • 3 cups frozen pineapple chunks I like the ones from Costco
    • 1 whole banana
    • 2 cups coconut milk I like Trader Joe's
    • 2 scoops vital proteins collagen peptides see notes above about protein powder
    • handful of spinach to make this AIP and whole30 friendly We are all about the extra veggies!

    Instructions

    • Place all ingredients in the blender and blend!

    Notes

    Storage: This recipe can be stored in the refrigerator for up to 4 days in an air tight container. 
    Nutrition: The nutrition for this recipe is an estimate and the calorie count can not be guaranteed.  It is based on 4 servings. 
    Servings: This recipe should yield 4 servings.
    Quick and easy paleo pina colada alternative!
    Serving: 1glass | Calories: 405kcal | Carbohydrates: 22g | Protein: 28g | Fat: 26g | Saturated Fat: 22g | Cholesterol: 50mg | Sodium: 61mg | Potassium: 474mg | Fiber: 2g | Sugar: 14g | Vitamin A: 152IU | Vitamin C: 60mg | Calcium: 134mg | Iron: 6mg
    Tried this recipe?Tag me on instagram @alliannaskitchen!
    close up photo of dairy free broccoli smoothie

    January 15, 2024 Allergy Friendly

    Broccoli Smoothie

    This dairy free Broccoli Smoothie is super simple to make and a great way to get all of your vegetables in without eating a plateful! This recipe is sweet, full of flavor and naturally dairy free. The frozen pineapple combined with the sweet and smooth banana is oh so delicious, you cannot even taste the broccoli! 

    Dairy free broccoli smoothie in a glass cup on a cream plate and tray and garnished with broccoli florets.

    The bright green coloring of this creamy broccoli smoothie will make it only more appealing to drink! If you give it to someone unknowing, I wouldn’t be surprised if they didn’t even realize they were drinking vegetables because of having no broccoli taste for picky eaters!

    Smoothies are an easy way to get additional nutrients into your daily diet. They are also a great option as a quick grab and go snack or a quick healthy breakfast on busy mornings. Some of my other favorite smoothie and drink recipes are: Mango and Pineapple Smoothie, Mango Strawberry Banana Smoothie, Strawberry Blueberry Smoothie, Strawberry Peach Smoothie, Banana Cream Smoothie, Grapefruit Mocktails, Homemade Elderberry Syrup, and Orange Creamsicle Smoothie. If you are looking for another easy grab and go meal, check out my Banana Chia Pudding.

    [feast_advanced_jump_to]

    Why You Will Love This Recipe

    • This easy broccoli smoothie tastes more sweet than it tastes like vegetables! It is full of flavor and nutrients.
    • This dairy free smoothie recipe is a great way to get those added vegetables in without your kids even knowing it!
    • It is a great snack on the go and as easy as dumping everything into the blender, blending it up, and enjoy!
    • This recipe is naturally gluten free, dairy free, soy free, and nut free made with simple ingredients.
    • Kids will love this recipe! This would be a great healthy snack for after school.
    • It is a refreshing drink for a warm day.

    Ingredients

    Dairy free broccoli smoothie ingredients in small glass bowls.
    • Broccoli-Frozen or fresh will work! I like to keep the stems on. The stems are loaded with nutrients and there is no need to waste them!
    • Frozen pineapple-This helps make this smoothie sweet! I love keeping a nice big from Costco in my freezer at all times. It is great for smoothies!
    • Ripe Banana-This is what makes the smoothie taste creamy and gives it natural sweetness from natural sugars! The more ripe the bananas the more sweetness it will provide.
    • Collagen peptides-For protein. If you are vegan you can use pea protein powder. 
    • Coconut milk – Helps to make the smoothie consistency thinner.
    • Coconut oil-To get those healthy fats in. MCT oil will also work. 
    • Spinach-For added nutrients. 

    See the recipe card below for a full list of ingredients and measurements.

    Substitutions and Variations

    • You can add additional nutrients to this healthy broccoli smoothie recipe by adding additional fruits and vegetables to the green smoothies mixture.
    • You can switch out the coconut milk with a different liquid if you don’t like coconut milk. Oat milk, soy milk, or unsweetened almond milk would both make great options as well as any plant-based milk.
    • You could add additional seeds and nuts such as chia seeds or peanut butter for added nutritional value and protein.
    • If you don’t have fresh fruit, you can use frozen fruit instead.
    • If you don’t have spinach or baby spinach on hand, any leafy greens or green vegetables will work.
    • You could also add greek yogurt to this recipe for additional nutrients and protein.

    This recipe has not been tested with any other substitutions or variations. If you try something else out please let me know how it turns out in the comments below!

    Step By Step Instructions

    Coconut oil, collagen peptides, frozen pineapple, coconut milk, banana, spinach, and broccoli florets all in a blender.

    Photo 1: Place all of the ingredients into the high-speed blender.

    Blended broccoli smoothie in the blender base.

    Photo 2: Blend until smooth

    Expert Tips

    • Tip # 1: If you don’t have fresh broccoli, you could use frozen broccoli florets but would need to add additional liquid to gain the correct consistency.
    • Tip # 2: If by accident you over pour your liquids and the smoothie is too thin, you can add more frozen pineapple to help thicken.
    • Tip # 3: To make this even easier, you could pre measure the ingredients into zip lock bags in the freezer so that you can dump into the blender, add the coconut milk, and blend.

    Recipe FAQs

    How Much Dairy Free Milk Should I Add?

    If you like your smoothies thinner, be sure to add in a 1/2 cup more of dairy free milk.

    What Meal Could I Serve This For?

    This would be great with breakfast but could also be a great snack on the go!

    What Else Could I Serve This With?

    This smoothie would pair great with my AIP Breakfast Muffins or my Blueberry Maple Sage Turkey Breakfast Sausage.

    What high speed blender do you recommend?

    I love this blender! I have had it for years with no issues.

    What nutritional benefits does broccoli have?

    Broccoli is a cruciferous vegetable that has the health benefits of being a great source of fiber, is high in vitamin c, and also contains protein.

    Broccoli smoothie in a glass with small bowl of broccoli florets next to it.

    Storage Instructions

    • I suggest drinking this smoothie within 3 days! Be sure to shake it up before you drink it.

    Other Dairy Free Smoothies You Will Love

    • pineapple banana smoothie 1 scaled
      Pineapple Banana Smoothie (Dairy Free)
    • strawberry banana smoothie bowl in a bowl with berries on top
      Strawberry Banana Smoothie Bowl
    • dairy free pumpkin smoothie in a cup
      Dairy Free Pumpkin Spice Smoothie
    • mango and pineapple smoothie 12
      Mango And Pineapple Smoothie

    Are you interested in a list of my go to healthy alternatives?

    Download your FREE guide below

    download here


    close up photo of dairy free broccoli smoothie

    Broccoli Smoothie

    Course Snack
    Cuisine American
    Diet Gluten Free
    Prep Time 5 minutes minutes
    Total Time 5 minutes minutes
    Servings 2 servings
    Author Allianna Moximchalk
    572kcal
    Cost $3
    Print Recipe Pin Recipe

    Equipment

    • blender

    Ingredients

    • 2 tbsp coconut oil Or MCT oil
    • 2 scoops collagen peptides pea protein if you are vegan
    • 1 cup frozen pineapple I like mine from Costco
    • 1 cup coconut milk I like Trader Joe's brand. Add in 1/2 more cup if you like your smoothies thinner!
    • 1 banana peeled
    • 2 cups spinach
    • 1/2 cup broccoli florets fresh or frozen

    Instructions

    • Place all ingredients in a blender and blend until smooth.

    Notes

    Storage: This dish is best if eaten within 3 days and stored in an airtight container in the refrigerator.
    Nutrition: The nutrition for this recipe is an estimate and the calories count is not guaranteed.  It is based off of 1 serving. 
    Servings: This recipe should yield 1 serving.
    This broccoli smoothie is loaded with flavor and nutrients! No one will even know it is loaded with broccoli.
    Serving: 1smoothie | Calories: 572kcal | Carbohydrates: 33g | Protein: 30g | Fat: 41g | Saturated Fat: 34g | Polyunsaturated Fat: 1g | Monounsaturated Fat: 2g | Cholesterol: 50mg | Sodium: 92mg | Potassium: 879mg | Fiber: 4g | Sugar: 18g | Vitamin A: 3120IU | Vitamin C: 74mg | Calcium: 172mg | Iron: 7mg
    Tried this recipe?Tag me on instagram @alliannaskitchen!
    potato skins on a plate with cheese, green onions and sour cream

    January 13, 2024 Air Fryer

    Air Fryer Potato Skins

    These Air Fryer Potato Skins are super simple to make and make for the most perfect appetizer! These TGIF copycat potato skins are super crispy on the outside and loaded with flavor on the inside. The warm bacon combined with the green onions, sour cream and cheese is to die for!

    Air fryer potato skins on a place and garnished with fresh green onions and green chives.

    This delicious potato skin recipe will be perfect as a go to appetizer for any get together or for your next game day treat. These are made even easier by utilizing the air fryer so there is no oven use hassle involved! I love to top this recipe off with my Mexican Pickled Onions.

    I love to develop different appetizer and small bite recipes. Some of my favorite appetizer recipes are: Bacon Wrapped Chicken Bites, Dairy Free Buffalo Chicken Dip, Air Fryer Pork Belly, Easy Keto Salsa, Gluten Free Crab Cakes, Gluten Free Pigs in a Blanket, Keto Jalapeño Poppers, Roasted Grapes, Gluten Free Coleslaw, Crockpot Gluten Free Mac and Cheese, Cranberry BBQ Meatballs, Pork Belly on the Grill, and Whole30 Hummus.

    If you are looking for another good air fryer recipe, check out my Air Fryer Turkey Burgers.

    [feast_advanced_jump_to]

    Why You Will Love These Air Fryer Potato Skins

    • This recipe is so simple! With less than 10 ingredients you have and easy appetizer for your game day treat.
    • Kids will love this recipe too! It’s an added bonus that it is a dish the whole family can enjoy.
    • This recipe is naturally gluten free, paleo, dairy free option, and soy free.
    • Easy clean up by being able to make everything in your air fryer base!
    • This recipe would be perfect finger food for game day served next to buffalo chicken wings.
    • You can serve the toppings on the side to make it customizable for all of your guests.

    Ingredients

    Air fryer potato skin ingredients in small glass bowls.
    • Russet Potatoes-I like the big russet kind! Make sure they are washed and holes are poked so they cook well. You want to ensure they are white potatoes.
    • Sour cream-If you are dairy free, I suggest using the Kite Hill kind!
    • Shredded cheese-Colby jack is best, but any kind will work. If you are dairy free I suggest using the Siete dairy free queso. 
    • Green onions-This is a must to garnish!
    • Bacon-Make sure it is precooked, you can also use bacon bites!
    • Cooking oil spray-I like olive oil or avocado oil spray.
    • Salt & pepper-To taste. 

    See recipe card below for a full list of ingredients and measurements.

    Substitutions and Variations

    • If you are dairy free, ensure to use diary free products for both the sour cream and shredded cheese options. If you are not dairy free, you can use the products of your choice.
    • I like to use shredded cheddar cheese for this dish but you can substitute for your preferred cheese of choice.
    • If you are not a fan of russet potatoes, you can use the potato of your choice.
    • I sometimes like to put chopped green onions on top or even Roasted Leeks to add a nice crunch.

    This recipe has not been tested with other substitutions and variations. If you replace or add any ingredients, please let us know how it turned out in the comments below!

    Step by Step Instructions

    Two whole white potatoes uncooked in an air fryer basket.

    Photo 1: Start by preheating your air fryer to 400 degrees F. Then, wash off your potatoes and poke small holes throughout with a fork. Next, spray your potatoes with cooking oil spray and sprinkle with sea salt and black pepper. Place in air fryer basket and cook for 20 minutes, flip your potatoes and spray with more cooking oil spray, and cook for an additional 20 minutes or until fork tender.

    Halved baked potato skins in an air fryer basket.

    Photo 2: Once your potatoes are done, cut in half, and scoop out half of the mashed potatoes. Make sure not to scoop out too much potatoes, we want to make sure the skins don’t break. Place your potato skins back into the air fryer basket skin side down.

    Halved potato skins in an air fryer basket with shredded cheese on top.

    Photo 3: Then, sprinkle in the cheese and break apart one piece of cooked bacon per potato skin. Cook in the air fryer for an additional 7 minutes. Finally, remove from the air fryer basket, add sour cream, optional green onions or any of your favorite toppings to serve.

    Expert Tips

    • Tip # 1: Potato cooking time can vary depending on the size and thickness of the potato. It is helpful to check periodically during cooking process to see if they are fork tender.
    • Tip # 2: Prior to cooking, ensure to wash the potato well. There are numerous health benefits within the potato flesh so you want to make sure they are nice and clean to enjoy!
    • Tip # 3: If you are in a crunch for time, you can cook your potatoes in the microwave instead of the air fryer. You will want to follow the same directions just instead microwave for about 5 minutes, flip your potatoes, and cook for an additional 7 minutes or until fork tender.

    Recipe FAQs

    What kind of bacon do you use?

    I love Butcher Box! Every month they send me a monthly supply of all of my favorite meats and proteins. If you use my link HERE you can save in your first month. 

    What kind of air fryer do you recommend?

    Any kind of air fryer would work but this is the one I have! It is super simple to work with and I have had it for years! It has multiple functions too. 

    How can I make these lower in carbs and healthier?

    Substitute the white potatoes for sweet potatoes!

    How can I reheat potato skins in the air fryer?

    First, off I suggest keeping the sour cream off until you are ready to eat. They will make the potatoes soggy when reheated. To reheat them, put them in the air fryer for 5-10 minutes on 400. This will give you crispy potato skins even with leftovers.

    Air fryer potato skins on a plate and garnished with bacon, sour cream, and fresh green herbs.

    Storage Instructions

    • This recipe can be stored in an airtight container in the refrigerator for up to 5 days. You will want to wait to top with sour cream so that they can be reheated.
    • A great option is to bulk make your potato skins ahead of time. You will want to ensure not to add toppings and allow to cool completely before freezing. Place the leftover potato skins in a single layer in a ziplock bag or airtight container and store in the freezer for up to 6 months.

    Other Air Fryer Recipes You Will Love

    • honey lemon chicken wings in a bowl with green onions
      Honey Lemon Pepper Wings
    • steak bites on a plate with garlic aioli
      Air Fryer Steak Bites With Garlic Aioli
    • peanut butter and jelly chicken wings on a plate with limes
      Peanut Butter And Jelly Wings
    • air fried cod on a plate with mixed greens
      Easy Frozen Cod In Air Fryer

    Are you interested in a guide of my go to healthy alternatives?

    Download your FREE guide below

    download here
    tgif loaded potato skins on a plate

    Air Fryer Potato Skins

    Course Appetizer, Snack
    Cuisine American
    Diet Gluten Free
    Prep Time 10 minutes minutes
    Cook Time 50 minutes minutes
    Total Time 1 hour hour
    Servings 4 large skins
    Author Allianna Moximchalk
    230kcal
    Cost $3
    Print Recipe Pin Recipe

    Equipment

    • Air fryer

    Ingredients

    • 2 large russet potatoes poke holes with a fork or knife
    • 4 slices bacon cooked. I like Butcher Box, use my link to save!
    • 1/3 cup sour cream kite hill dairy free is my favorite dairy free brand
    • 1/2 cup shredded cheese siete dairy free queso for whole30 and dairy free
    • cooking oil spray I like avocado oil
    • salt and pepper to taste

    To serve: (OPTIONAL)

    • green onions

    Instructions

    • Preheat your air fryer to 400 degrees F. Wash off your potatoes and poke small holes with a fork. Spray the potatoes with cooking oil spray and sprinkle with salt and pepper. Place the potatoes in the air fryer for 20 minutes, then flip, spray again with oil and place in the air fryer for another 20 minutes. Once the potatoes are done, cut in half and scoop out half of the mashed potato (not too much because we don't want them to break.) Then, sprinkle in the cheese and break apart one piece of bacon per potato skin. Place back in the air fryer with the cheese facing up for 7 minutes. Remove from the air fryer and add sour cream and optional green onions.

    Notes

    Storage: This recipe can be stored in an airtight container in the refrigerator for up to 5 days.  
    Freezer: You can bulk make the potato skins and freeze in a single layer in an airtight container for up to 6 months in the freezer. 
    Nutrition: The nutrition for this recipe is an estimate and the calorie count is not guaranteed.  It is based on 4 servings. 
    Servings: This recipe should yield 4 servings. 
    Restaurant copycat potato skins!
    Serving: 1potato skin | Calories: 230kcal | Carbohydrates: 33g | Protein: 7g | Fat: 8g | Saturated Fat: 4g | Polyunsaturated Fat: 1g | Monounsaturated Fat: 2g | Cholesterol: 22mg | Sodium: 116mg | Potassium: 814mg | Fiber: 4g | Sugar: 2g | Vitamin A: 218IU | Vitamin C: 37mg | Calcium: 114mg | Iron: 2mg
    Tried this recipe?Tag me on instagram @alliannaskitchen!
    close up photo of pork belly in a bowl

    January 7, 2024 Air Fryer

    Air Fryer Pork Belly

    Air Fryer Pork Belly is seriously the best kind of pork belly! This pork belly is crispy on the outside and nice and juicy on the inside. I love this recipe because it requires minimal clean up and you do not have to worry about ingredients splattering everywhere.

    Air fryer pork belly in a bowl with fresh herbs and red pepper flakes sprinkled on top.

    We love making this recipe for all occasions! Any air fryer recipe allows you to enjoy it year round. The pork belly also allows for multiple versions by changing your seasonings to match the flavor profile you are wanting.

    I have developed numerous pork recipes throughout the years. Some of my go to pork dishes are: Blackened Pork Chops, Instant Pot Pork Butt with Honey Mustard, Whole30 Pork Tenderloin With Herb Crust, Frozen Pork Chops In The Air Fryer, and Apple Ginger Pulled Pork. If you do not have an air fryer, you can also check out my Pork Belly on the Grill.

    If you are looking for another good air fryer recipe, check out my Air Fryer Turkey Burgers and Gluten Free Pigs in a Blanket recipe.

    [feast_advanced_jump_to]

    Why You Will Love This Recipe

    • This recipe reminds me so much of the pork belly that I like to put on top of my guacamole in my Whole30 Guacamole With Pork Belly!
    • Pork belly is a great snack for game day. I also love including my Crockpot Gluten Free Mac and Cheese in my game day line up.
    • This recipe only requires 10 minutes of hands-on time which makes it a great snack to make for those nights when you want something super delicious but you do not have much time on hand. 
    • You can use this crispy and juicy pork belly as an appetizer that can be topped off on just about anything or you can even eat it alone, which I love doing! I love putting a toothpick in it and eating it as an appetizer!
    • This recipe is naturally gluten free, dairy free, grain free, paleo, AIP (Autoimmune protocol friendly) and can be made Whole30 friendly too when you omit the coconut sugar. 
    • When I am not eating this recipe on a toothpick as an appetizer I love adding my pork belly to Homemade Deviled Eggs. 
    • This pork belly has so much flavor, it is sweet yet salty and savory at the same time! It literally melts in your mouth. 

    Ingredients

    Air fryer pork belly ingredients in small glass bowls.
    • Pork belly-You can get this anywhere but I love getting mine through Butcher Box! When you order with my link you can get a monthly discount on all of the best quality meats and proteins out there. 
    • Coconut sugar-This adds a nice sweet touch to this savory snack. You can also use brown sugar if that is your thing, too! If you are doing the Whole30, you can skip this. 
    • Avocado oil-This helps get the seasonings and sugar to really soak in. While you do not have to use avocado oil, it is my favorite oil to use for high temperature baking and cooking because it has a high smoke point. 
    • Pepper & sea salt-For flavor. If you are doing the Autoimmune Protocol skip the pepper part as pepper is one of the things you cannot have on the autoimmune protocol. 

    See the recipe card below for a full list of ingredients and measurements.

    Substitutions and Variations

    • For additional flavor, you can add additional dry spices to create a dry rub on the pork exterior. Garlic powder, chili powder, paprika, onion powder, and dry herbs would all be wonderful additions.
    • You can allow the pork to marinate in a dry rub overnight to infuse more flavor from the spices into the raw meat before cooking.

    This recipe has not been tested with other substitutions or variations. If you replace or add any ingredients, please let us know how it turned out in the comments below!

    Step by Step Instructions for Air Fryer Pork Belly

    Pork belly sauce ingredients in a glass bowl.

    Photo # 1: Place all ingredients except the pork belly in a large bowl and mix until well mixed throughout.

    1 inch cubes of pork belly in a glass bowl.

    Photo # 2: Pat the pork belly with a paper towel. Chop the pork belly with a sharp knife on a cutting board into 1 inch cubes. Then, place the pork belly into a glass bowl.

    Marinated belly in a glass bowl with a pink spatula mixed well throughout.

    Photo # 3: Mix the marinate in a glass bowl with the cubed pork belly until it is well mixed throughout.

    Marinated pork belly inside an air fryer.

    Photo # 4: Add the marinated pork belly pieces into the air fryer basket in single layers.

    Cooked pork belly cubes inside of the the air fryer.

    Photo # 5: Cook the pork belly in the air fryer at 400 degrees F for 10 minutes. Then toss the pork belly around with tongs and cook for an additional 10 minutes.

    Expert Tips

    • Tip # 1: Be sure to eat your pork belly warm. This pork belly does not taste very good when eaten cold. To reheat it, pop it back in the air fryer at 400 degrees F for 10 minutes. 
    • Tip # 2: Be sure to only cook the pork belly in a single layer, if you stack it on top of each other it won’t cook well and be crispy! 
    • Tip # 3: Ensure you are using a sharp knife when slicing your pork belly into one inch cubes to prevent risk of accidentally getting hurt.

    Recipe FAQs

    What is pork belly?

    Pork belly is made from a pig and very similar to bacon. It comes from the underside of a pig right just like pork tenderloin. While the dish does not have much flavor alone, when you keep the fat cap on it and really season it, it becomes so juicy and flavorful!

    Which kind of air fryer do you use?

    I use this 11 in 1 air fryer. It is so easy to use and has more than one function which I love. It takes up only one spot on the counter vs. having multiple different things set up. Who else hates clutter on the counter like me? HA!

    How do I know if the pork belly is cooked throughout?

    Pork belly should reach an internal temperature of 145 degrees F which can be checked with an internal meat thermometer.

    How should I store the leftovers?

    The leftover pork belly can be stored in an airtight container for up to 5 days in the refrigerator.

    How should I reheat leftover Air Fryer Pork Belly?

    It is so simple! For the best results you will simply place the desired amount of leftovers in your air fryer or oven at 350 degrees F for 5-10 minutes or until desired crispiness is achieved.

    Air fryer pork belly in a clay bowl on a clay plate garnished with red pepper flakes and fresh green herbs.

    Other Air Fryer Recipes You Will Love

    • air fried turkey burger on a plate with french fries
      Air Fryer Turkey Burgers
    • salmon bites on a plate
      Air Fryer Salmon Bites
    • close up of cooked frozen shrimp
      Easy Frozen Shrimp In The Air Fryer
    • potato skins on a plate with cheese, green onions and sour cream
      Air Fryer Potato Skins

    Are you interested in a guide of my go to healthy alertnatives?

    Download your FREE guide below

    download here
    close up photo of pork belly in a bowl

    Air Fryer Pork Belly

    Course Appetizer, Snack
    Cuisine American
    Diet Gluten Free
    Prep Time 10 minutes minutes
    Cook Time 20 minutes minutes
    Servings 20 bite size pieces
    Author Allianna Moximchalk
    132kcal
    Cost $5
    Print Recipe Pin Recipe

    Equipment

    • Air fryer

    Ingredients

    • 1 pound pork belly patted dry
    • 2 tbsp avocado oil
    • 1 tbsp coconut sugar skip for Whole30
    • 1 tsp sea salt
    • 1 tsp black pepper skip for AIP

    To top off: (optional)

    • red pepper flakes
    • fresh chives

    Instructions

    • Preheat your air fryer to 350 degrees F. Dry pat the pork belly and cut into 1/2 inch cubes. In a separate bowl, mix all other ingredients then stir in the pork belly with the coconut sugar mixture.
    • Lay the pork in the air fryer in a single layer (you may need to do multiple batches of the pork belly) and air fry for 10 minutes, then flip and air fry for an additional 10 more minutes. Remove from the air fryer and serve warm.

    Notes

    Storage: This recipe should be stored in an airtight container in the refrigerator for up to 5 days. 
     
    Nutrition: The nutrition for this recipe is an estimate and the calorie count is not guaranteed.  It is based on 20 servings. 
     
    Servings: This recipe should yield 20 servings. 
    Quick, easy, delicious pork belly that is mess free made in the air fryer!
    Serving: 1piece | Calories: 132kcal | Carbohydrates: 1g | Protein: 2g | Fat: 13g | Saturated Fat: 5g | Polyunsaturated Fat: 1g | Monounsaturated Fat: 7g | Cholesterol: 16mg | Sodium: 125mg | Potassium: 43mg | Fiber: 1g | Sugar: 1g | Vitamin A: 3IU | Vitamin C: 1mg | Calcium: 2mg | Iron: 1mg
    Tried this recipe?Tag me on instagram @alliannaskitchen!
    air fried turkey burger on a plate with french fries

    December 26, 2023 Air Fryer

    Air Fryer Turkey Burgers

    The air fryer is my favorite cooking method, so why not try my homemade Air Fryer Turkey Burgers? The preparation for this recipe is so easy and the air fryer does the rest. With only a few ingredients, you can have my delicious and juicy turkey burgers that you can dress-up as you please with your favorite toppings. This is perfect for a weeknight dinner in a time crunch. My Air Fryer Hamburgers have become a family favorite in my house. 

    An air fried turkey burger on a plate with french fries.

    This is a great recipe to keep stocked in the freezer for a quick weeknight meal. An added bonus is that you can keep it on hand for all of your upcoming cook outs as well by freezing these turkey patties! I love making these Turkey Burgers for get togethers with things like my Gluten Free Pasta Salad and my Cucumber Watermelon Salad. My My homemade Lemon Dill Aioli or Nut Free Pesto goes well on top of these burgers!

    I love developing easy and quick weeknight dinner options. Some of my favorite are my: Cajun Sausage Sheet Pan Dinner, Easy Sausage Sheet Pan Dinner, Paleo Cashew Chicken Sheet Pan Style, Honey Garlic Chicken Sheet Pan, Easy Blackened Pork Chops, Keto Everything Bagel Chicken.

    [feast_advanced_jump_to]

    Why You Will Love This Recipe

    • Who doesn’t love a good burger? These juicy air fryer turkey burgers will be a new essential for your family dinners. 
    • Prep is so simple. Combine everything in a mixing bowl, form your patties, and pop in the air fryer. 
    • I love the combo of garlic, Worcestershire sauce, and dijon but the seasoning combinations are endless! Burgers are so easy to customize.  
    • The air fryer keeps these burgers nice and juicy.
    • These burgers are naturally gluten free, dairy free, soy free, Whole30 friendly, keto, low carb, refined sugar free, flourless, grain free, and paleo! 
    • My Gluten Free Potato Salad, Crockpot Gluten Free Mac and Cheese, Air Fryer Home Fries, would be a great side dish with this Air Fryer Turkey Burger. 
    • If you live in the Pittsburgh area, check out my weekly meal prep menu. We deliver allergen friendly meals right to your door- saving you time on your next meal.
    • You can eat this like a regular hamburger on a bun or you can eat it as a Deconstructed Burger Bowl.
    • Kids will love this recipe!

    Ingredients

    Ground turkey, dijon mustard, garlic, worcestershire sauce, sea salt, and black pepper in glass bowls.
    • Fresh ground turkey– You can swap for your meat of choice, if you prefer. Turkey burgers are a nice change from typical ground beef. I love to get my meat from Butcher Box. It is the BEST quality and you can tell! Use my Butcher Box link to get some free additional items every month with your order. 
    • Worcestershire sauce- Takes a basic burger recipe to the next level. You can also use steak sauce if you would prefer. 
    • Garlic– Minced finely to blend well with the ground turkey. 
    • Dijon– This is my secret ingredient to make the best burgers. It adds that tangy, mildly spicy flavor. Dijon pairs so well with the Worcestershire sauce.
    • Salt & pepper- Extra seasoning. Don’t skimp on the salt, salt is essential when cooking meat. It adds so much more flavor. 

    See the recipe card below for a full list of ingredients and measurements.

    Substitutions and Variations

    • You can swap out ground turkey for your preferred meat of choice. I like to use lean ground turkey for this recipe.
    • You can add additional spices and seasonings to change the flavor profile – onion powder would be a great addition to these burgers.
    • Switching up your burger toppings will also allow for varying flavor profiles for these healthy turkey burgers.

    This recipe has not been tested with any other substitutions or variations. If you try something else out please let me know how it turns out in the comments below!

    Step By Step Instructions

    Ground turkey, garlic, Worcestershire sauce, dijon mustard, sea salt, and black pepper in a glass mixing bowl.
    Photo 1: First, in a mixing bowl, combine the ground turkey mixture, Worcestershire sauce, garlic, dijon mustard, sea salt, and black pepper.
    Combined turkey burger mixture in a glass mixing bowl.
    Photo 2: Shape the meat mixture into four patties. Keep them about 1/2 – 3/4 inch thick (they will shrink in the air fryer). You can also a burger press if you would prefer smash burgers. Keep in mind, the thinner the patty the less time it will take to bake them.
    Shaped turkey burger patties on a white plate.
    Photo 3: Add two patties at a time to the air fryer. Cook for 7 minutes at 350 degrees F. Flip the patties and continue to cook for about 7 more minutes, or until the patties reach an internal temperature of 165 degrees F.
    Cooked turkey burgers in an air fryer base.
    Photo 4: Serve on a bun or if you are gluten free like me use a gluten free bun.

    Expert Tips

    • Tip # 1: Using a different type of meat other than ground turkey will impact the cooking time.
    • Tip # 2: Ground turkey does not have as much fat content as ground beef. You will want to make sure to season well to add additional flavor.
    • Tip # 3: Depending on how big your air fryer is, you may be able to cook more than 2 patties at a time. But don’t overcrowd the air fryer – you want to make sure they are spaced out. It is also helpful to spray the bottom of your air fryer with cooking spray to prevent sticking.

    Recipe FAQ’s

    Can I Make These Ahead of Time?

    You sure can. Form into patties and line a sheet pan with parchment paper. Separate each layer of burger patties with another sheet of parchment. Pop them in the freezer and they will keep for up to 3 months. When ready to cook, thaw overnight in the refrigerator or add 5 more minutes to cook time.

    Do Burgers Shrink When Cooking?

    They do shrink. To help avoid this, use your thumb to create an indent in the center of each patty prior to cooking.

    How Do I Know When Turkey Burgers Are Done?

    Every air fryer is different so be sure to use a meat thermometer to check for doneness. Once turkey burgers reach an internal temperature of 165 degrees F, they are done. Using a meat thermometer will allow the prevention of overcooking so that you get a juicy burger.

    How Think Should The Patties Be?

    I recommend 1/2 – 3/4 inch thick. Remember, the thicker the burger, the longer it takes to cook.

    What Gluten Free Bun Do You Like?

    My go-to is the Gluten Free Udi’s brand. I also love Trader Joe’s brand. If you shoot for lower carb options, check out my Deconstructed Burger Bowls.

    Do You Ever Buy Pre-made Frozen Patties?

    You can but I prefer fresh ones. If you are opting for pre-made, I like the ones from Trader Joe’s. They are just ground turkey and rosemary!

    What should I serve with these juicy burgers?

    I like to serve mine with Sweet Potato Fries or any french fries I have available. My husband likes to add a slice of cheese on top of his plus a slice of red onion. I like making lettuce wraps with mine and using lettuce as the bun instead of bread. You can also serve homemade turkey burgers on a bed of crisp lettuce. We sometimes like to put Roasted Tomatoes on top too!

    Can I Use This Recipe To Make Beef Burgers?

    Yes! You can use this recipe to make a beef burger patty. Just swap the turkey out for beef. You can also use ground chicken instead.

    An air fried turkey burger on a plate with a toothpick holding it together and french fries.

    Storage Instructions

    • This recipe can be stored in the refrigerator for 5 days in an airtight container.

    Other Air Fryer Recipes You Will Love

    • air fried potato wedges on a plate with sauces
      Ninja Air Fryer Potato Wedges
    • close up photo of pork belly in a bowl
      Air Fryer Pork Belly
    • IMG 3764
      Air Fryer Frozen Brussel Sprouts
    • chicken nuggets on a plate with ketchup
      Chicken Nuggets In The Air Fryer

    Are you interested in a list of my go to healthy alternatives?

    Download your FREE guide below

    download here
    air fried turkey burger on a plate with french fries

    Air Fryer Turkey Burgers

    Course Dinner, easy, Main Course, Meals
    Cuisine American
    Diet Gluten Free
    Prep Time 5 minutes minutes
    Cook Time 15 minutes minutes
    Total Time 20 minutes minutes
    Servings 4 patties
    Author Allianna Moximchalk
    136kcal
    Cost $6
    Print Recipe Pin Recipe

    Equipment

    • mixing bowl
    • Air fryer

    Ingredients

    • 1 lb ground turkey
    • 3 cloves garlic minced
    • 1 tbsp dijon mustard I recommend 365 brand from Whole Foods
    • 1 tbsp worcestershire sauce
    • salt & pepper as desired

    Instructions

    • Combine all ingredients in a mixing bowl.
    • Form into 4 patties, about 1/2 inch thick.
    • Add 2 patties to the air fryer basket and cook at 360 degrees F for 7 minutes. When the 7 minutes is up, flip, and cook for another 7 minutes, or until fully cooked. Once burgers reach an internal temperature of 165 degrees F, they are done.

    Notes

    Storage: This dish can be stored in an airtight glass container for up to 5 days in the refrigerator.
    Nutrition: The nutrition for this recipe is an estimate and the calorie count is not guaranteed.  It is based off of 4 servings.
    Servings: This recipe should yield 4 servings.
    Juicy and seasoned to perfection!
    Serving: 1patty | Calories: 136kcal | Carbohydrates: 2g | Protein: 27g | Fat: 2g | Saturated Fat: 1g | Polyunsaturated Fat: 1g | Monounsaturated Fat: 1g | Trans Fat: 0.02g | Cholesterol: 62mg | Sodium: 155mg | Potassium: 383mg | Fiber: 0.2g | Sugar: 1g | Vitamin A: 35IU | Vitamin C: 1mg | Calcium: 14mg | Iron: 1mg
    Tried this recipe?Tag me on instagram @alliannaskitchen!
    Air fried salmon filets on a white platter with freshly cracked pepper on top and a fork on the side.

    December 21, 2023 Air Fryer

    Easy Frozen Salmon In Air Fryer

    Do you love cooking salmon, but hate waiting for it to thaw? This Easy Frozen Salmon in the Air Fryer recipe won’t keep you waiting! This recipe is delicious and super easy to follow. It takes under 20 minutes to make. We love it so much that it has become a staple in our house. We use it every week for meal prep. The dijon mustard combined with the lemon juice as some nice flavor without too much kick!

    Air fried salmon filets on a white platter with freshly cracked pepper on top and a fork on the side.

    Are you like me and always feel like your meats and seafood go bad just sitting in the fridge? This recipe is for you! You can take the salmon directly out of the freezer and cook it in the air fryer. This recipe will have your salmon coming out nice and moist and the salmon will literally melt in your mouth. I love pairing salmon with fun sauces like my Lemon Dill Aioli or Nut Free Pesto.

    I have developed a variety of salmon dishes. Some of my favorite salmon dishes are: pesto salmon, maple crusted salmon, herb crusted salmon, honey sriracha salmon, Gluten Free Fish and Chips, Salmon Cakes and shredded lemon dill salmon salad. This recipe also pairs really well with my simple Blanched Broccoli recipe and Pineapple Pico de Gallo or my Mango Pico de Gallo recipe that is on my blog too!

    If you are looking for another good air fryer recipe, check out my Air Fryer Turkey Burgers.

    [feast_advanced_jump_to]

    Why I Love This Air Fryer Salmon Recipe

    • This recipe only takes 5 minutes to prepare and under 20 minutes to bake and uses simple ingredients.
    • You can use this salmon for nearly anything. It goes great on salads, tacos, and so much more! My favorite recipe to pair this with is the Fig Honey Mustard Salad on my blog. It is so good with salmon.
    • This recipe is naturally keto, Whole30, paleo, gluten free, dairy free, nut free, soy free, low carb friendly, and a great way to get in fatty acids into your diet.
    • Salmon filets like this make for the best kid friendly food option. It is easy to chew and not too many over powering flavors.

    Ingredients

    Recipe ingredient pictures in small glass clear bowls laying on the counter.
    • Salmon-While any salmon will work I prefer wild caught salmon. It has the most nutrients in it and it literally melts in your mouth. I do suggest making sure that the salmon you use is already filleted. It is easier to cook it this way in the air fryer and it also makes it easier to just grab one portion.
    • Oil-I prefer to only cook with healthier oils like olive oil, avocado oil, ghee or coconut oil. While any oil in this recipe will work, I like using olive oil.
    • Dijon and lemon juice-This adds so much flavor to the salmon! However, you can totally leave it off and make the salmon more plain.

    See recipe card below for a full list of ingredients and measurements.

    Substitutions & Variations

    • Oil-If you are looking for the same flavor profile, I suggest either olive oil or ghee. I have a Homemade Ghee Recipe on my blog. The ghee will give the salmon a “buttery” flavor without the milk proteins. For people like me with a dairy sensitivity, ghee is a staple in my house.

    This recipe has not been tested with other substitutions or variations. If you replace or add any ingredients, please let us know how it turned out in the comments below!

    Step by Step Instructions

    Frozen salmon filets in a glass bowl with seasonings being poured overtop.

    Photo 1: If the salmon is not already cut into filets, cut the salmon into 5-6 ounce pieces. Mix the seasonings together in a small bowl and sprinkle over the salmon filets. Brush the wet ingredients (lemon juice, dijon and olive oil) on top.

    Salmon filets cut up in the air fryer facing up with seasoning and herbs on top.

    Photo 2: Place the salmon skin side down in the bottom of the air fryer basket on 390 degrees F for 18 minutes or until the salmon reaches an internal temperature of 145 degrees F which can be verified with a meat thermometer.

    Expert Tips

    • Tip # 1: Leave the skin on it is the best part! The skin is so good for you. If you like your skin crispier, be sure to flip it in the air fryer and cook it for at least 5 minutes with the skin facing up to get it nice and crispy.
    • Tip # 2: Be sure to cut your salmon into small filets. This helps the salmon cook more evenly. I suggest doing this before you put the salmon in the freezer. This will allow you to portion out your salmon so if you only want to bake 1 portion rather than a whole fish, you can do that!
    • Tip #3: If you dread air fryer clean up, there are parchment paper basket liners you can now get that allow for clean up to be minimal. I would still make sure to spray with cooking spray to prevent the skin from sticking.

    Recipe FAQs

    Can I use thawed salmon?

    Yes! You will need to adjust the cooking time. It will take approximately 5 minutes less. Salmon should be cooked to 145 degrees F.

    Where do you get your salmon?

    I love getting my salmon from Butcher Box. They have the best salmon it is always wild-caught!

    Have you tried Costco salmon?

    I have. While I always prefer wild-caught fish, Costco brand would work too.

    Should I use skinless salmon or skin on salmon?

    Either works! I love the skin, especially in the air fryer because it gets nice and crispy meaning the best results. Plus, the skin is loaded with nutrients!

    What if I like my salmon skinless?

    I highly recommend removing the skin prior to freezing it! It will be hard to remove while it is frozen.

    How long should I cook thawed salmon in the air fryer?

    If your salmon is already thawed, I suggest cooking it for 15 minutes or until the internal temperate reaches 145 degrees F. The best way to check is by using a meat thermometer to verify the internal temperature of the fish.

    How to serve

    • I like to serve salmon over salads like this Kale Blueberry Salad with Pecan “Cheese.”
    • Pesto is one of my favorite sauces to serve with salmon. It adds so much flavor! The homemade pesto recipe on my blog is naturally dairy free and Whole30 friendly too! You can mix together the pesto sauce while the salmon cooks.
    • You can also use this recipe to make tacos, like this Halibut Fish Taco recipe, except substitute the halibut for salmon.
    • You can also just eat this recipe plain and serve it with a side like my Air Fried Lemon Dill Green Beans or easy Blanched Broccoli.
    Salmon on a white platter with sriracha sauce on top and fresh herbs.

    Storage instructions

    • I suggest using leftover salmon within 3-4 days for optimal freshness. To ensure freshness, store the salmon in an airtight container. I prefer to use glass containers for meal prep!

    Other Air Fryer Recipes You Will Love

    • air fried potato wedges on a plate with sauces
      Ninja Air Fryer Potato Wedges
    • air fried turkey burger on a plate with french fries
      Air Fryer Turkey Burgers
    • juicy filet mignon on a plate
      Air Fryer Filet Mignon
    • air fried cod on a plate with mixed greens
      Easy Frozen Cod In Air Fryer

    Are you interested in a guide of my go to healthy alternatives?

    Want to get all of the details on my latest recipes? Be sure to hop on my email list. When you subscribe, you will get a copy of my FREE anti-inflammatory swap guide with all of my favorite healthy swaps.

    download your FREE guide
    Cooked salon filets with pepper on top on a scalloped white tray with a fork on the side.

    Easy Frozen Salmon in the Air Fryer

    Course Dinner, easy, Lunch, Main Course, Meals, quick
    Cuisine easy, gluten free
    Diet Gluten Free
    Prep Time 5 minutes minutes
    Cook Time 10 minutes minutes
    Total Time 15 minutes minutes
    Servings 2 people
    Author Allianna Moximchalk
    389kcal
    Cost $12
    Print Recipe Pin Recipe

    Equipment

    • Air fryer
    • measuring spoons

    Ingredients

    • 1 lb wild-caught salmon cut into desired filets
    • 1 tbsp olive oil
    • 1 garlic clove minced
    • ½ tbsp lemon juice
    • 1 tsp dijon mustard
    • ¼ tsp sea salt
    • ¼ tsp black pepper

    Instructions

    • If the salmon is not already cut into filets, cut the salmon into 5-6 ounce pieces.
    • Mix the seasonings together and sprinkle over the salmon filets. Brush the wet ingredients (lemon juice, dijon and olive oil) on top.
    • Bake the salmon in the air fryer at 390 degrees F for 18 minutes or until the salmon reaches an internal temperature of 145 degrees F.

    Notes

    Servings: This recipe yields approximately 2-3 servings. 
    Nutritional info: The nutrition info in this recipe is an estimate and not a guarantee. 
    Storage: You can store this recipe in the fridge for up to 3-4 days. 
    Quick and delicious!
    Serving: 1filet | Calories: 389kcal | Carbohydrates: 1g | Protein: 45g | Fat: 21g | Saturated Fat: 3g | Polyunsaturated Fat: 7g | Monounsaturated Fat: 10g | Cholesterol: 125mg | Sodium: 418mg | Potassium: 1128mg | Fiber: 0.2g | Sugar: 0.1g | Vitamin A: 94IU | Vitamin C: 2mg | Calcium: 33mg | Iron: 2mg
    Tried this recipe?Tag me on instagram @alliannaskitchen!
    Gelatin and water in a glass mixing bowl with a small whisk.

    December 20, 2023 Allergy Friendly

    How To Make A Gelatin Egg | AIP Egg

    This AIP Gelatin Egg alternative is my go to when making AIP treats and using in any egg-free baking. This allergy friendly alternative is quick, easy, and can be made with ingredients that you likely have on hand at home making it for egg replacement recipes. This is the perfect alternative for anyone with egg allergies or following the autoimmune protocol.

    AIP gelatin egg in a small glass bowl on a cream plate with a small whisk in the bowl.

    This recipe may take a few tries to get the hang of making but is definitely worth it! Once you have mastered the gelatin egg recipe it opens up additional recipe opportunities even when following strict diets such as the autoimmune protocol (AIP) diet with this egg substitute.

    This is a great way to make jello eggs in various colors using my healthy jello recipe around spring time or for jello easter eggs using plastic eggs as molds. You can also help turn a recipe into AIP recipes or vegan recipes by using this substitution for eggs to allow for egg free baking.

    [feast_advanced_jump_to]

    Why You Will Love This Recipe

    • This recipe is simple and only has two ingredients.
    • This is a great alternative for those with an egg sensitivity or allergy as well as those following the autoimmune (AIP) protocol.
    • This is great to keep in your recipe box for any cooking or baking as an alternative for when you have guests that have dietary restrictions.
    • This recipe allows you to have complete control of the quality of ingredients going into your recipes that call for this alternative.
    • You can utilize this alternative even if you don’t have any allergies or sensitivities but run out of eggs!
    • I like to use this recipe to make healthy jello!

    Ingredients

    AIP gelatin egg ingredients on a tray in small glass bowl.
    • Gelatin-This is my go to brand of use for gelatin eggs. I have not tested out any other kind of brands with this recipe and in any of my baked goods. I also like to use vital proteins.
    • Water-I like to be sure I use purified water.

    See the recipe card below for a full list of ingredients and measurements.

    Substitutions and Variations

    • You can use this recipe as an egg substitution in both cooking and baking recipes.
    • The different recipes you would use this gelatin egg in would allow for it to take on different flavors.

    This recipe has not been tested with any other substitutions or variations. If you try something else out please let me know how it turns out in the comments below!

    Step By Step Instructions

    Gelatin and water in a glass mixing bowl with a small whisk.

    Photo 1: First, you will warm up the water in the microwave or stovetop so it becomes warm to the touch. Add the gelatin to a bowl, and slowly add in the water. Start whisking right away with either a fork or a mini whisk until the collagen is dissolved. Let the egg sit for 2 minutes allowing it to set prior to using.

    Expert Tips

    • Tip # 1: In my experience I have only been able to use 4 gelatin eggs max in a baking recipe or it gets too clumpy.
    • Tip # 2: Egg free baking is different from regular baking. Oftentimes the egg replacement is paired with another wet or binding ingredient like tapioca and/or applesauce.
    • Tip # 3: If you are planning to use this alternative for an event that you are hosting, I recommend trying out the recipes in advance to see how the gelatin effects the recipe so you can adjust the recipe as needed ahead of time.

    Recipe FAQ

    What Brand of Gelatin Do You Use?

    I always use Great Lakes! See the picture below.

    What is Gelatin?

    Gelatin is made from ground up animal tissues – the bones, tendons, and ligaments. Gelatin is one of those ingredients that is highly recommended on the Paleo Autoimmune Protocol.

    Can I Use This Egg As An 1:1 Egg Replacement?

    The short answer is no. Yes, this egg replacement does work like an egg in recipes but it does not always work out to be 1:1.

    If I heat the water on the stove, what temperature should I use?

    I recommend heating the water over medium heat so that it doesn’t reach boil level.

    My go to brand of gelatin on a silver tray.

    Storage Instructions

    • This recipe can be stored in the refrigerator for 5 days in an air tight container.

    If you like this recipe, you will LOVE these recipes using gelatin eggs:

    • 4 aip paleo bread rolls stacked on a plate
      AIP Bread Roll
    • aip pie 19 scaled
      AIP Pie Crust With Berries (Paleo, Egg Free, Allergy Friendly)
    • AIP Banana Bread
    • aip christmas cupcakes 6
      AIP Holiday Cupcakes (Paleo, Allergy friendly)

    Are you interested in a list of my go to healthy alternatives?

    Download your FREE guide below

    download here
    Gelatin and water in a glass mixing bowl with a small whisk.

    Gelatin Egg | AIP Egg Alternative

    Course Condiment
    Cuisine American
    Diet Gluten Free
    Prep Time 5 minutes minutes
    Total Time 5 minutes minutes
    Servings 1 egg
    Author Allianna Moximchalk
    23kcal
    Cost $1
    Print Recipe Pin Recipe

    Equipment

    • mini whisk
    • Bowl

    Ingredients

    • 1 tbsp gelatin
    • 3 tbsp hot purified water

    Instructions

    • Warm up water in the microwave on the stovetop so it becomes warm to touch. Add the gelatin to a bowl, slowly add in the water. Start whisking right away with either a fork or a mini whisk until the collagen is dissolved. Let the egg sit for 2 minutes allowing it to set prior to using.

    Notes

    Storage: This dish can be stored in an air tight glass container for up to 5 days in the refrigerator.
    Nutrition: The nutrition for this recipe is an estimate and the calorie count is not guaranteed.  It is based off of 1 serving.
    Servings: This recipe should yield 1 serving.
    Quick and easy egg alternative.
    Serving: 1egg | Calories: 23kcal | Protein: 6g | Fat: 1g | Sodium: 14mg | Potassium: 1mg | Calcium: 4mg | Iron: 1mg
    Tried this recipe?Tag me on instagram @alliannaskitchen!
    peanut butter and jelly chicken wings on a plate with limes

    December 20, 2023 Air Fryer

    Peanut Butter And Jelly Wings

    These Peanut Butter and Jelly Wings are seriously the most amazing thing! The creamy peanut butter combined with grape jelly, sriracha and lime has a combination of the most amazing flavors. Topped off with red pepper flakes, green onion and crusted peanuts these wings are to die for! These are a great addition to your next wing night.

    Peanut butter and jelly chicken wings on a plate with limes and garnished with red pepper flakes and scallions.

    Although this combination may seem strange to some in the beginning, once you taste them you will know exactly why they work and will be hooked on these jelly chicken wings! It may sound like your childhood classic jelly sandwich but it won’t taste like it. you love finger foods and snacks like me, check out my other favorite snack recipes like my Gluten Free Pigs in a Blanket recipe, Roasted Grapes, Simple Beetroot Dip and Pork Belly on The Grill.

    [feast_advanced_jump_to]

    Why You Will Love This Recipe

    • These wings are crispy, sweet and savory all in one! Perfect for date night at home or a weekend appetizer.
    • This recipe is naturally gluten free, dairy free, and soy free.
    • Kids will love this recipe.
    • For the balance of sweet and salty, you can pair this recipe with my Air Fryer Brussel Sprouts with Bacon and Pomegranate. I also like making these wings for football Sundays with my Crockpot Gluten Free Mac and Cheese.
    • This recipe is something unique that you won’t find on every wing menu.
    • This recipe is simple and has less than ten ingredients!

    Ingredients

    Peanut butter and jelly wing ingredients in small glass bowls.
    • Chicken wings–I like using frozen ones from Butcher Box. Butcher Box sends me a monthly supply of all of my favorite proteins. I love using their stuff because I never have to run out or worry about it going bad in the fridge since their stuff comes frozen. If you use my link HERE you can get free bacon for life. 
    • Peanut butter-Make sure it is creamy and not crunchy. 
    • Jelly-I like using grape jelly in this recipe but raspberry jelly would also be delicious.
    • Apple cider vinegar-Adds a nice kick with the creamy peanut butter. 
    • Sriracha-Adds a nice asian twist.
    • Chopped peanuts-Do not skip! These add a nice crunch.
    • Fresh lime-Adds even more flavor. 
    • Green onions-I love a nice smooth crunch.
    • Red pepper flakes-If you like your wings spicy!

    See the recipe card below for the full list of ingredients and measurements.

    Substitutions And Variations

    • You can try different flavors of jelly to change the taste of the wings.
    • Depending on the brand of peanut butter it could cause for the wings to have a different flavor or consistency.

    This recipe has not been tested with any other substitutions or variations. If you try something else out please let me know how it turned out in the comments below!

    Step By Step Instructions

    Frozen chicken wings in an air fryer basket.
    Photo 1: First, turn the air fryer on to 350 degrees F. Then, add the frozen wings and bake for 20 minutes. After 20 minutes, turn up the air fryer to 400 and bake for an additional 20-25 minutes.
    Peanut butter, lime juice, grape jelly, apple cider vinegar, sriracha, and ginger in a glass mixing bowl with a light pink spoon.
    Photo 2: While the wings are cooking, mix together the sauce in a large bowl.
    Air fried chicken wings in a glass mixing bowl.
    Photo 3: When the wings are done, place wings into a large mixing bowl with the sauce.
    Air fried chicken wings and peanut butter and jelly sauce in a glass mixing bowl.
    Photo 4: Garnish with the green onions, chopped peanuts, and red pepper flakes.

    Expert Tips

    • Tip # 1: You can serve the wings as an appetizer or as a meal.
    • Tip # 2: If the wings are thawed, you will want to cook them for 10 minutes less.
    • Tip # 3: Wait until you are ready to serve to toss in the sauce so the wings stay crispy.

    Recipe FAQ

    How Can I Reheat These?

    I recommend reheating in the oven or air fryer at 350 degrees F for 5-10 minutes. If wings are already tossed in sauce, you will want extra sauce to keep them from being dry once reheated.

    How Can I Serve This Dish?

    You can serve this dish as an appetizer with tongs or on a platter as a meal.

    What Can I Do If The Sauce Is Too Sweet?

    You can cut the sweet by adding more sriracha or apple cider vinegar.

    Peanut butter and jelly wings on a plate and garnished with green onions, red pepper flakes, and lime.

    Storage Instructions

    • This recipe can be stored in an air tight container for 5 days in the refrigerator.

    Other Chicken Wing Recipes You Will Love

    • IMG 2626
      Cilantro Lime Chicken Wings (PALEO | WHOLE 30 | KETO)
    • honey mustard chicken wings 5
      Crispy Honey Mustard Chicken Wings (Paleo)
    • crispy buffalo wings 3
      Crispy Buffalo Chicken Wings (Paleo, Whole30)
    • side pic of wings
      Everything Bagel Seasoned Chicken Wings

    Are you interested in a list of my go to healthy alternatives?

    Download your FREE guide below

    download here


    peanut butter and jelly chicken wings on a plate with limes

    Peanut Butter And Jelly Wings

    Course Appetizer, Meals, Snack
    Cuisine American
    Diet Gluten Free
    Prep Time 10 minutes minutes
    Cook Time 45 minutes minutes
    Total Time 55 minutes minutes
    Servings 4 people
    Author Allianna Moximchalk
    898kcal
    Cost $10
    Print Recipe Pin Recipe

    Equipment

    • Air fryer

    Ingredients

    • 3 pounds chicken wings frozen, cook for 10 minutes less if they are fresh
    • 1/2 cup peanut butter make sure it is creamy
    • 2 limes juiced
    • 1 cup grape jelly
    • 1/4 cup apple cider vinegar
    • 2 tbsp sriracha
    • 1 tsp fresh ginger grated

    To garnish:

    • 1/4 cup peanuts chopped
    • 3 green onions diced
    • 1 tbsp red pepper flakes
    • 2 limes sliced

    Instructions

    • Turn the air fryer on to 350 degrees F. Add the frozen wings and bake for 20 minutes. After 20 minutes is up turn up the air fryer to 400 and bake for an additional 20-25 minutes (about 10 minutes less if the wings are thawed.) While the wings are cooking, mix together the sauce. When the wings are done, add them to a bowl with the sauce. Garnish with the green onions, chopped peanuts and red pepper flakes.

    Notes

    Storage: This dish can be stored in an air tight container for up to 5 days in an air tight container.
     
    Nutrition: The nutrition for this recipe is an estimate and the calorie count is not guaranteed.  It is based off of 5-6 servings.
     
    Servings: This recipe should yield 5-6 servings. 
     
    Modern twist on a childhood favorite!
    Serving: 7wings | Calories: 898kcal | Carbohydrates: 68g | Protein: 45g | Fat: 50g | Saturated Fat: 12g | Polyunsaturated Fat: 13g | Monounsaturated Fat: 22g | Trans Fat: 1g | Cholesterol: 141mg | Sodium: 518mg | Potassium: 713mg | Fiber: 5g | Sugar: 45g | Vitamin A: 963IU | Vitamin C: 15mg | Calcium: 77mg | Iron: 4mg
    Tried this recipe?Tag me on instagram @alliannaskitchen!
    Stack of pancakes on a plate with fruit on top with maple syrup.

    December 15, 2023 Autoimmune Protocol

    AIP Pancakes

    These AIP Pancakes are everything pancakes should be: soft and fluffy! The combination of banana with a little bit of maple syrup adds the perfect amount of sweetness. There are different additions you can make into the batter such as blueberries to change up the recipe each time you make it as well. With this recipe only taking 20 minutes to make and prepare these AIP pancakes are the perfect weekend treat without breaking your AIP diet. 

    A stack of AIP pancakes on a plate with fresh strawberries and blueberries.

    These healthy pancakes would be a great weekend breakfast to make with your family! Let the little ones get involved for some early morning fun or to surprise someone with breakfast in bed. If you want to change up your usual toppings, you could top your pancakes with my blueberry maple jam or Seedless Raspberry Jam to add additional variety to you breakfast! I love to pair this dish wish a side of fruit as well, such as my easy winter fruit salad. It add additional freshness to your breakfast plate.

    I have developed numerous AIP diet friendly recipes. Some of my favorite are: bacon wrapped chicken bites, vegan peach cobbler, gluten free pesto meatballs, vegan Reese’s, and tigernut cookies.

    [feast_advanced_jump_to]

    Why You Will Love This Recipe

    • This recipe is super easy and simple to make with start to finish taking 20 minutes.
    • Kids will love this recipe! Make it even better by adding some dairy free chocolate chips!
    • This recipe is great for a weekend morning pancake breakfast.
    • These pancakes are naturally gluten free, dairy free, soy free, nut free, and autoimmune protocol friendly.
    • This recipe is great for meal prep so that you are prepared for busy mornings!
    • I love making this recipe with my Raspberry Paleo Jam!

    Ingredients

    AIP pancake ingredients in small glass bowls on a silver plater.
    • Cassava flour-Cassava flour is the closest flour to wheat flour. It is sticky and has a similar texture, however not all brands are created equally. That is why I only use Otto’s Cassava Flour. This recipe has only been tested with Otto’s brand of cassava flour therefore I do not suggest using another brand. 
    • Tapioca flour-Tapioca flour is a great thickening agent in paleo cooking. Think of it as similar to corn starch. 
    • Baking soda-Baking soda will help these pancakes stay fluffy!
    • Banana-Banana will help keep these pancakes moist, you can substitute for canned pumpkin if desired. 
    • Apple cider vinegar-ACV is a good texture enhancer. 
    • Maple syrup-Maple syrup is my sweetener of choice when it comes to AIP baking. 
    • Coconut milk-Coconut milk will help keep these pancakes moist. 
    • Water-Water will help prevent the pancakes from getting too thick.

    See the recipe card below for a full list of ingredients and measurements.

    Substitutions And Variations

    • You can change up the toppings and sides for this recipe to change the flavor combinations. Take note of what combinations you do and don’t like so that the next time you have a variety of AIP pancake recipes.
    • By pairing this recipe with something salty like bacon, you can have both sweet and savory in the same meal!

    This recipe has not been tested with any other substitutions or variations. If you try something else out, please let me know how it turns out in the comments below!

    Step By Step Instructions

    AIP pancake ingredients in a glass mixing bowl with a gold spoon.
    Photo 1: First, place all ingredients in a food processor and blend until smooth. If the mixture is too thick, add more water to the batter. Spray a nonstick skillet with avocado oil or AIP cooking oil of your choice. Add two tablespoons of batter to the pan and flatten with a spatula. Cook for 2 minutes on the first side and then flip over and cook for an additional 2 minutes on the other side over medium heat. Continue until all batter is used up.

    Expert Tips

    • Tip #1: The best way to know that the pancakes are ready to be flipped other than a 2 minute timer is to look for the bubbles in the batter.
    • Tip #2: Make sure that the batter mixes thoroughly by scrapping down the sides of the food processor.
    • Tip #3: Re-spray the non-stick pan with cooking oil each time you put new batter into the pan to prevent sticking.

    Recipe FAQ

    Can I Save These Pancakes For Later?

    Yes! You can store them in the refrigerator in an airtight glass container for up to 5 days.

    Can I Freeze The Pancakes?

    Yes! I suggest freezing them in a single layer on a baking sheet for 2 or so hours, then stacking them in a glass container with wax paper between each layer.

    What Kind Of Toppings Should I Use?

    I love using fresh berries, homemade AIP jams, and AIP whipped cream.

    What Can I Serve This With?

    These would pair great with other jams such as my blueberry maple jam or having fresh juice on the side such as my carrot apple ginger juice. You could also pair this with my AIP Breakfast Muffins with Bacon and Apples.

    A stack of AIP pancakes on a white plate and topped with syrup and fresh strawberries and blueberries.

    Other AIP Breakfast Recipes You Will Love

    • 4 aip paleo bread rolls stacked on a plate
      AIP Bread Roll
    • meat muffins 2 scaled
      AIP Breakfast Muffins
    • strawberry banana smoothie bowl in a bowl with berries on top
      Strawberry Banana Smoothie Bowl
    • aip waffles 6 scaled
      AIP Waffles (Egg Free, Paleo, Allergy Friendly)

    Are you interested in a list of my go to healthy alternatives?

    Download your FREE guide below

    download here
    aip pancakes 2 scaled

    AIP Pancakes

    Course Breakfast
    Cuisine American
    Diet Gluten Free
    Prep Time 5 minutes minutes
    Cook Time 15 minutes minutes
    Total Time 20 minutes minutes
    Servings 6 pancakes
    Author Allianna Moximchalk
    389kcal
    Cost $4
    Print Recipe Pin Recipe

    Equipment

    • spatula
    • blender

    Ingredients

    For the pancakes:

    • 1 cup cassava flour
    • 1/3 cup tapioca flour
    • 1 tsp baking powder
    • 2 whole mashed banana canned sweet potato or pumpkin works too
    • 1 cup coconut milk
    • 1 tsp vanilla extract alcohol free
    • 1 tsp cinnamon
    • 1/4 cup pure maple syrup
    • 1/4 cup water purified
    • 1 tsp avocado oil to oil pan

    For the coconut whipped cream: optional

    • 1 cup coconut cream
    • 1/4 cup maple syrup

    Instructions

    For the pancakes:

    • Place all ingredients in a food processor and mix until mixture forms. If the mixture is too thick, add 1 tbsp of water until desired consistency forms. Heat up a non-stick pan to medium heat and add avocado oil to the pan. Add one tablespoon of the pancake mixture to the pan to form one pancake (DO NOT ADD MORE THAN 1 tbsp OR IT WILL CRUMBLE). Cook for two minutes, then flip with a spatula. Do this until you are done with the batter.

    For the coconut cream:

    • Using a handheld mixer, mix the whip cream and maple syrup until a whip forms. Add optional berries or jam on top to garnish.

    Notes

    Storage: This recipe can last for up to 5 days in an air tight glass container in the refrigerator. 
    Nutrition: The nutrition for this recipe is an estimate and the calorie counts is not guaranteed.  It is based on 6 servings.
    Servings: This recipe should yield approximately 6 servings.
    Quick and easy AIP pancake alternative.
    Serving: 2mini pancakes | Calories: 389kcal | Carbohydrates: 47g | Protein: 3g | Fat: 23g | Saturated Fat: 20g | Sodium: 193mg | Potassium: 324mg | Fiber: 2g | Sugar: 18g | Vitamin A: 8IU | Vitamin C: 4mg | Calcium: 71mg | Iron: 3mg
    Tried this recipe?Tag me on instagram @alliannaskitchen!
    • « Go to Previous Page
    • Page 1
    • Interim pages omitted …
    • Page 6
    • Page 7
    • Page 8
    • Page 9
    • Page 10
    • Interim pages omitted …
    • Page 38
    • Go to Next Page »

    Primary Sidebar

    Allianna Headshots

    Hi, I'm Allianna! Allianna's Kitchen started by accident after battling an undiagnosed autoimmune disease for nearly my whole life.

    More about me →

    GLUTEN FREE DINNER RECIPES

    • steak date night dinner 1
      Steak Date Night Dinner with Garlic Aioli
    • gluten free fried shrimp 3 scaled
      Gluten Free Fried Shrimp
    • cooked frozen pork chops with chives on top on a white plate with a gold fork
      Easy Frozen Pork Chops In The Air Fryer
    • halibut fish tacos on a pale blue plate
      Halibut Fish Tacos

    EASY WHOLE30 RECIPES

    • Beetroot dip on a plate with crackers and fresh parsley on top.
      Simple Beetroot Dip Recipe
    • close up photo of ginger apple pork in a bowl
      Apple Ginger Pulled Pork
    • dairy free lobster bisque in a bowl with a gold spoon and garnished with lemon, fresh green herbs, and red pepper flakes.
      Dairy Free Lobster Bisque
    • juicy filet mignon on a plate
      Air Fryer Filet Mignon

    GLUTEN FREE APPETIZERS

    • peanut butter and jelly chicken wings on a plate with limes
      Peanut Butter And Jelly Wings
    • Stuffed mushrooms on a brown and white plate with fresh parsley on top.
      Gluten-Free Stuffed Mushrooms
    • Gluten free pigs in a blanket in a pile on a plate.
      Gluten Free Pigs In A Blanket
    • Pretty french onion dip in a silver bowl with potato chips and chives on top.
      Vegan French Onion Dip Recipe

    EASY MOCKTAIL RECIPES

    • honey simple syrup 2
      Honey Simple Syrup
    • orange lime cranberry mocktail 4
      Cranberry Mocktail Recipe
    • Clear glass with a brown drink and a cinnamon stick in it.
      Pear Cocktail Recipe
    • Grapefruit mocktail in a glass with jalapeño slice and grapefruit slice.
      Easy Grapefruit Mocktail Recipe

    Footer

    • Recipes
    • My Courses
    • Meal Prep Services
    • Accessibility Policy
    • Contact
    • About Me
    • Blog
    • Privacy Policy
    • Pinterest
    • Instagram
    • Facebook
    • Twitter

    Allianna’s Kitchen 2025 - All Rights Reserved

    Rate This Recipe

    Your vote:


    A rating is required
    A name is required
    An email is required