• Skip to primary navigation
  • Skip to main content
  • Skip to primary sidebar
  • Spring Recipes
  • Recipes
  • Order Meal Prep
  • Healthy Gut Baby Food Course
  • About

Allianna's Kitchen

menu icon
go to homepage
  • Spring Recipes
  • Recipes
  • Order Meal Prep
  • Healthy Gut Baby Food Course
  • About
    • Facebook
    • Instagram
    • Pinterest
    • Twitter
  • search icon
    Homepage link
    • Spring Recipes
    • Recipes
    • Order Meal Prep
    • Healthy Gut Baby Food Course
    • About
    • Facebook
    • Instagram
    • Pinterest
    • Twitter
  • ×
    Allianna's Kitchen » Recipes

    Blog

    Nut free bright green pesto in a bowl.

    May 28, 2024 Allergy Friendly

    Nut Free Pesto

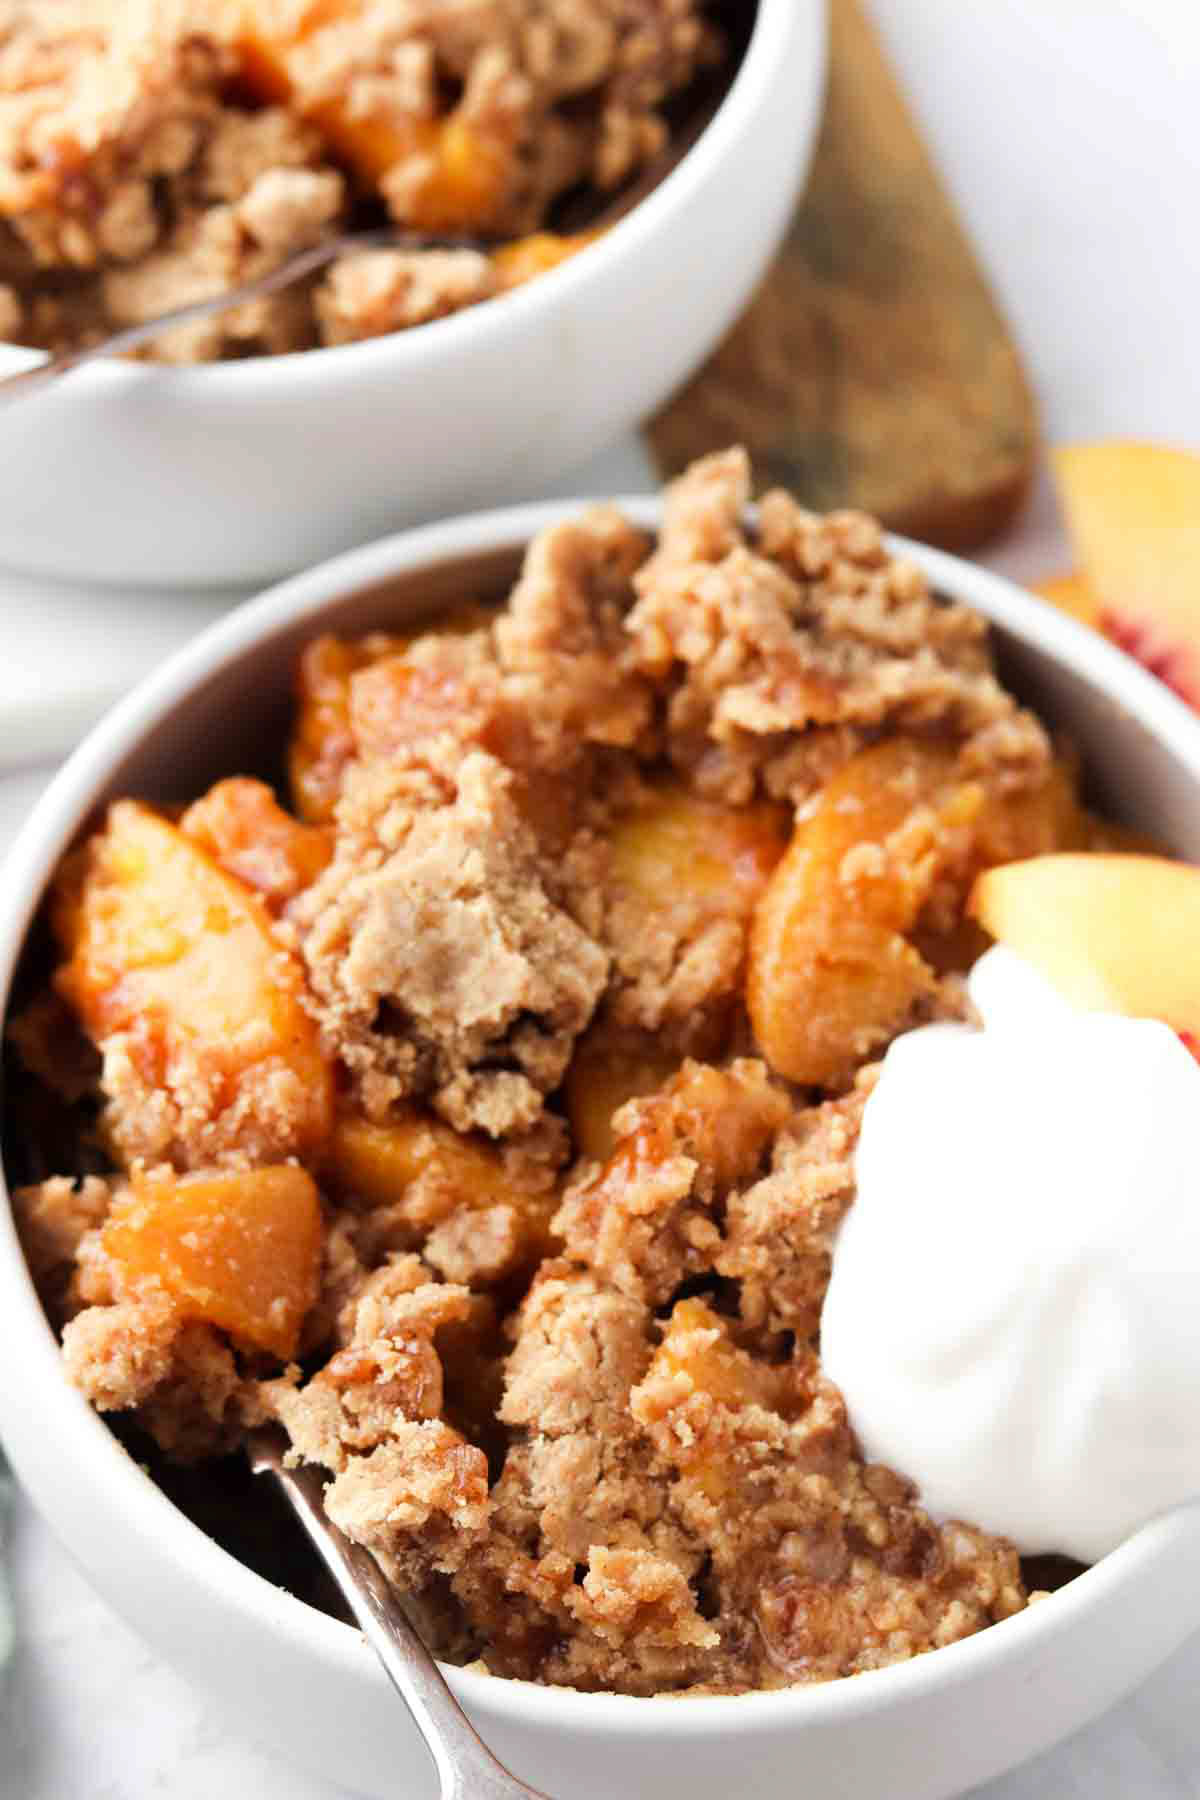
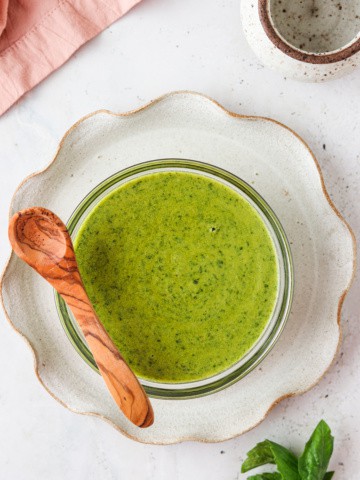
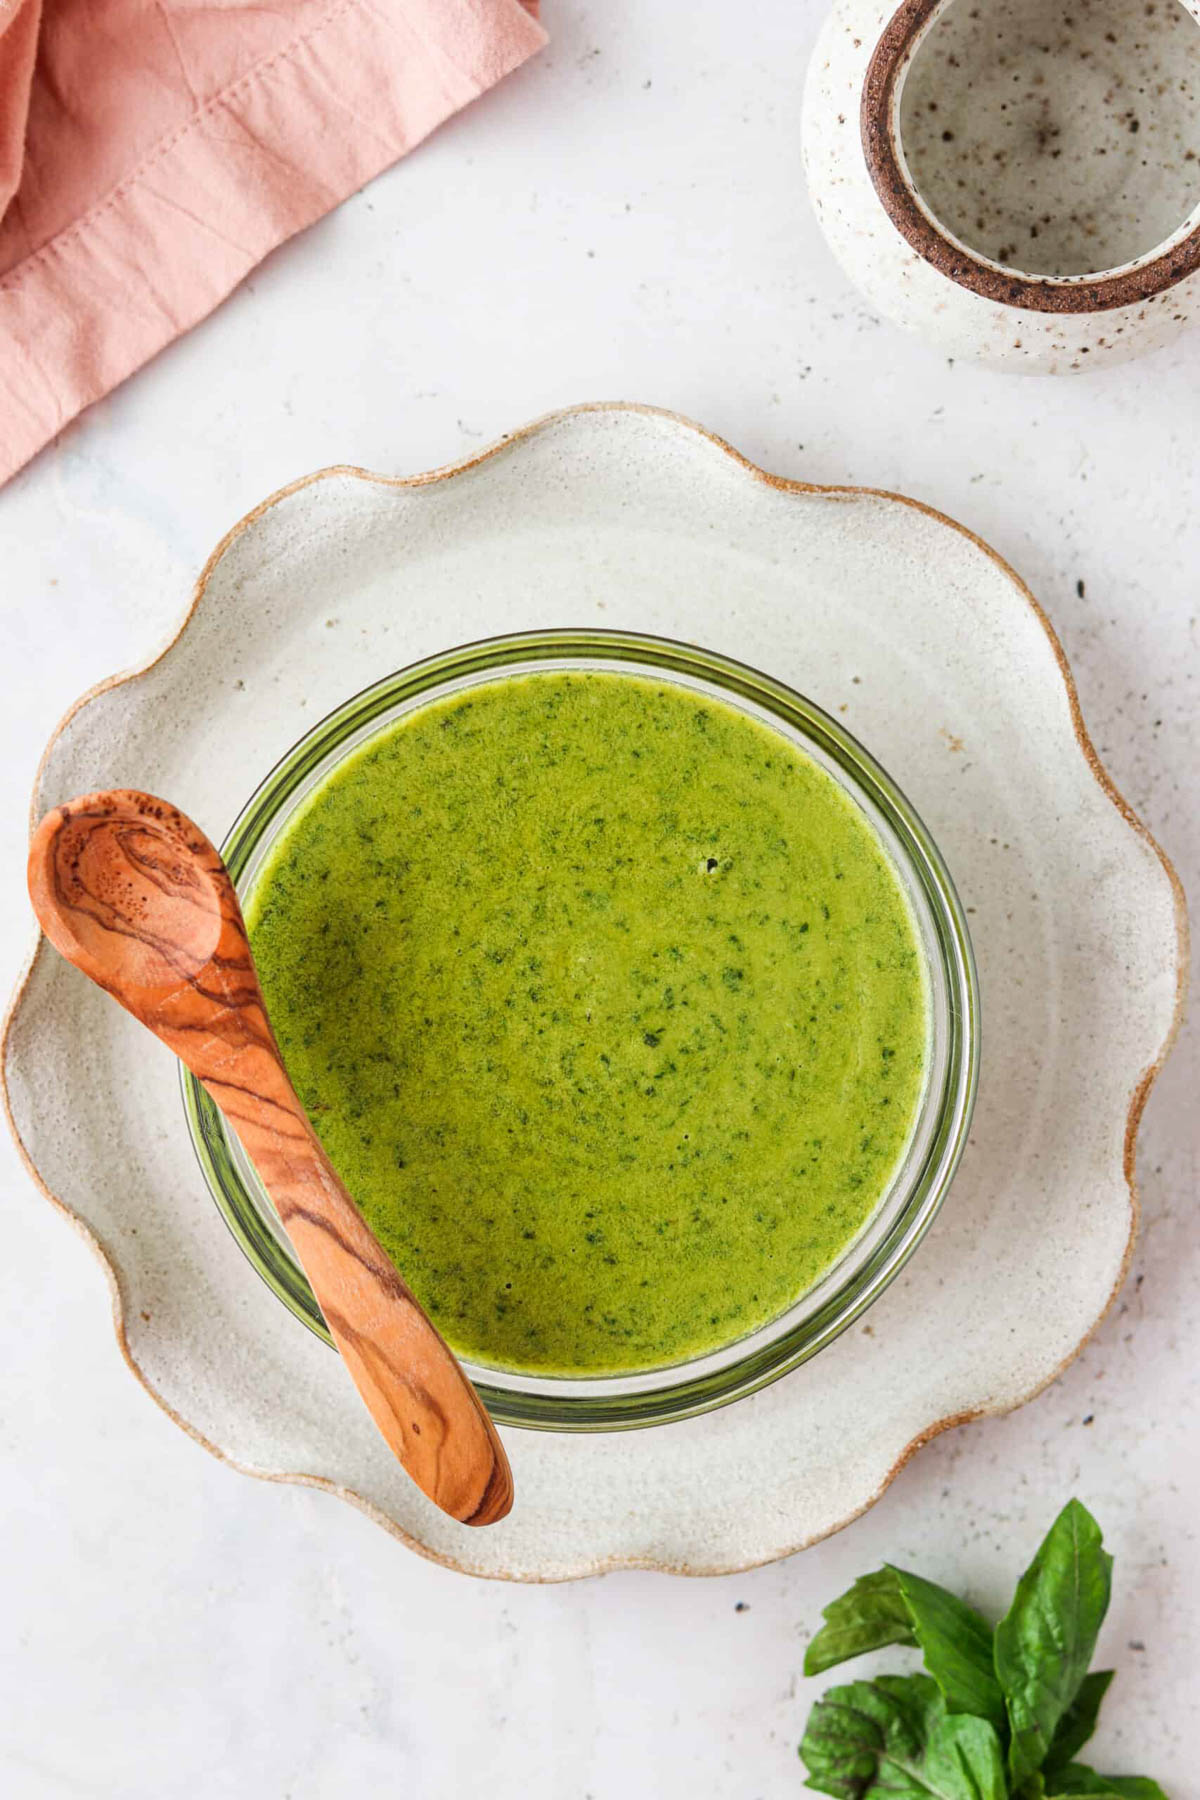
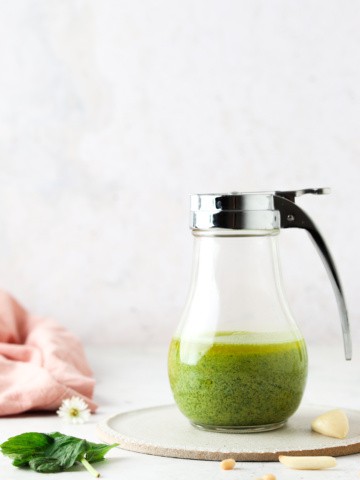
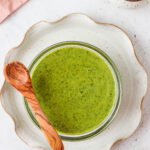
    This creamy Homemade Nut Free Pesto Sauce Recipe is full of flavor and super delicious. This easy pesto recipe is loaded with flavor and packed with nutrients. I keep a stash of this homemade sauce in my freezer at all times! You can have a delicious batch of fresh pesto ready to go in less than 10 minutes. 

    Nut free pesto in a bowl with a wooden spoon laying across bowl.

    Years ago I did the autoimmune protocol and really struggled with finding ways to make food more flavorful. On the protocol I could not have a variety of things like nuts or dairy. Adding sauces into the mix made my meals so much more flavor! If you like this nut free sauce, check out my other nut free sauces on my blog like my Garlic Aioli, Lemon Dill Aioli, Red Chimichurri, AIP Nomato Sauce, Breakfast Burrito Sauce, and Whole30 BBQ Sauce.

    [feast_advanced_jump_to]

    Why I Love This Recipe

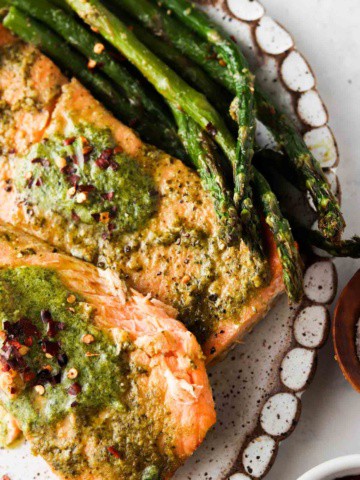
    • This delicious pesto is such a versatile sauce, it goes well with just about anything! From fish, chicken, to tacos. I sometimes even like to use it as salad dressing or sauce to go over hot pasta like I did in my AIP Pesto Shrimp Recipe or my Orzo Pesto Salad.
    • Unlike traditional pesto sauce, this recipe is naturally dairy free, gluten free, soy free, nut free, grain free, vegan, paleo,  Whole30 friendly and free of pine nuts. It is a perfect recipe for those with nut allergies! 
    • If you have a surplus of basil, you can make extra and freeze leftover pesto. I like to put in it in an ice cube tray in a zip-lock bag so I can pop out a cube at any time, especially during the winter months when basil is not in season.
    • Years ago I did the autoimmune protocol and really struggled with finding ways to make food more flavorful. On the protocol I could not have a variety of things like nuts or dairy. Adding sauces into the mix made my meals so much more flavor! If you like this nut free sauce, check out my other nut free sauces on my blog like my Garlic Aioli, Lemon Dill Aioli, Red Chimichurri, AIP Nomato Sauce, Breakfast Burrito Sauce, and Whole30 BBQ Sauce.

    Vegan Pesto Ingredients

    Nut free pesto ingredients in small glass bowls.
    • Fresh basil leaves-I like to use fresh basil from my garden. You can also buy basil plants at places like Trader Joe’s to have a large batch of fresh basil at all times. It grows rapidly and it is so much cheaper to have at home. 
    • Nutritional yeast-A popular ingredient used in dairy free cooking. Nutritional yeast makes this recipe taste cheesy without cheese.
    • Fresh garlic-Adds a nice touch.
    • Lemon juice-Do NOT skip this key ingredient. 
    • Extra virgin olive oil-My go to fat for making homemade pesto. 

    See the recipe card below for a full list of ingredients and measurements.

    Recipe Substitutions and Variations

    • Fresh herbs-You can add other fresh herbs like parsley into the mix. 
    • Spinach pesto-If you would like to add spinach into the mix you can add baby spinach to the blender. You may need to add more oil to get everything well mixed. 
    • Parmesan cheese-If you are not dairy free, you can add parmesan cheese instead of nutritional yeast. 
    • ​Pumpkin seeds or sunflower seeds-If you miss that nut like texture, you can throw some seeds into the mix. 
    • Avocado oil-You can use in place of olive oil, note this will change the flavor a little bit. 

    This recipe has not been tested with any other substitutions or variations. If you try something else out please let me know how it turns out in the comments below!

    How To Make Nut Free Pesto

    Pesto ingredients in a food processor.

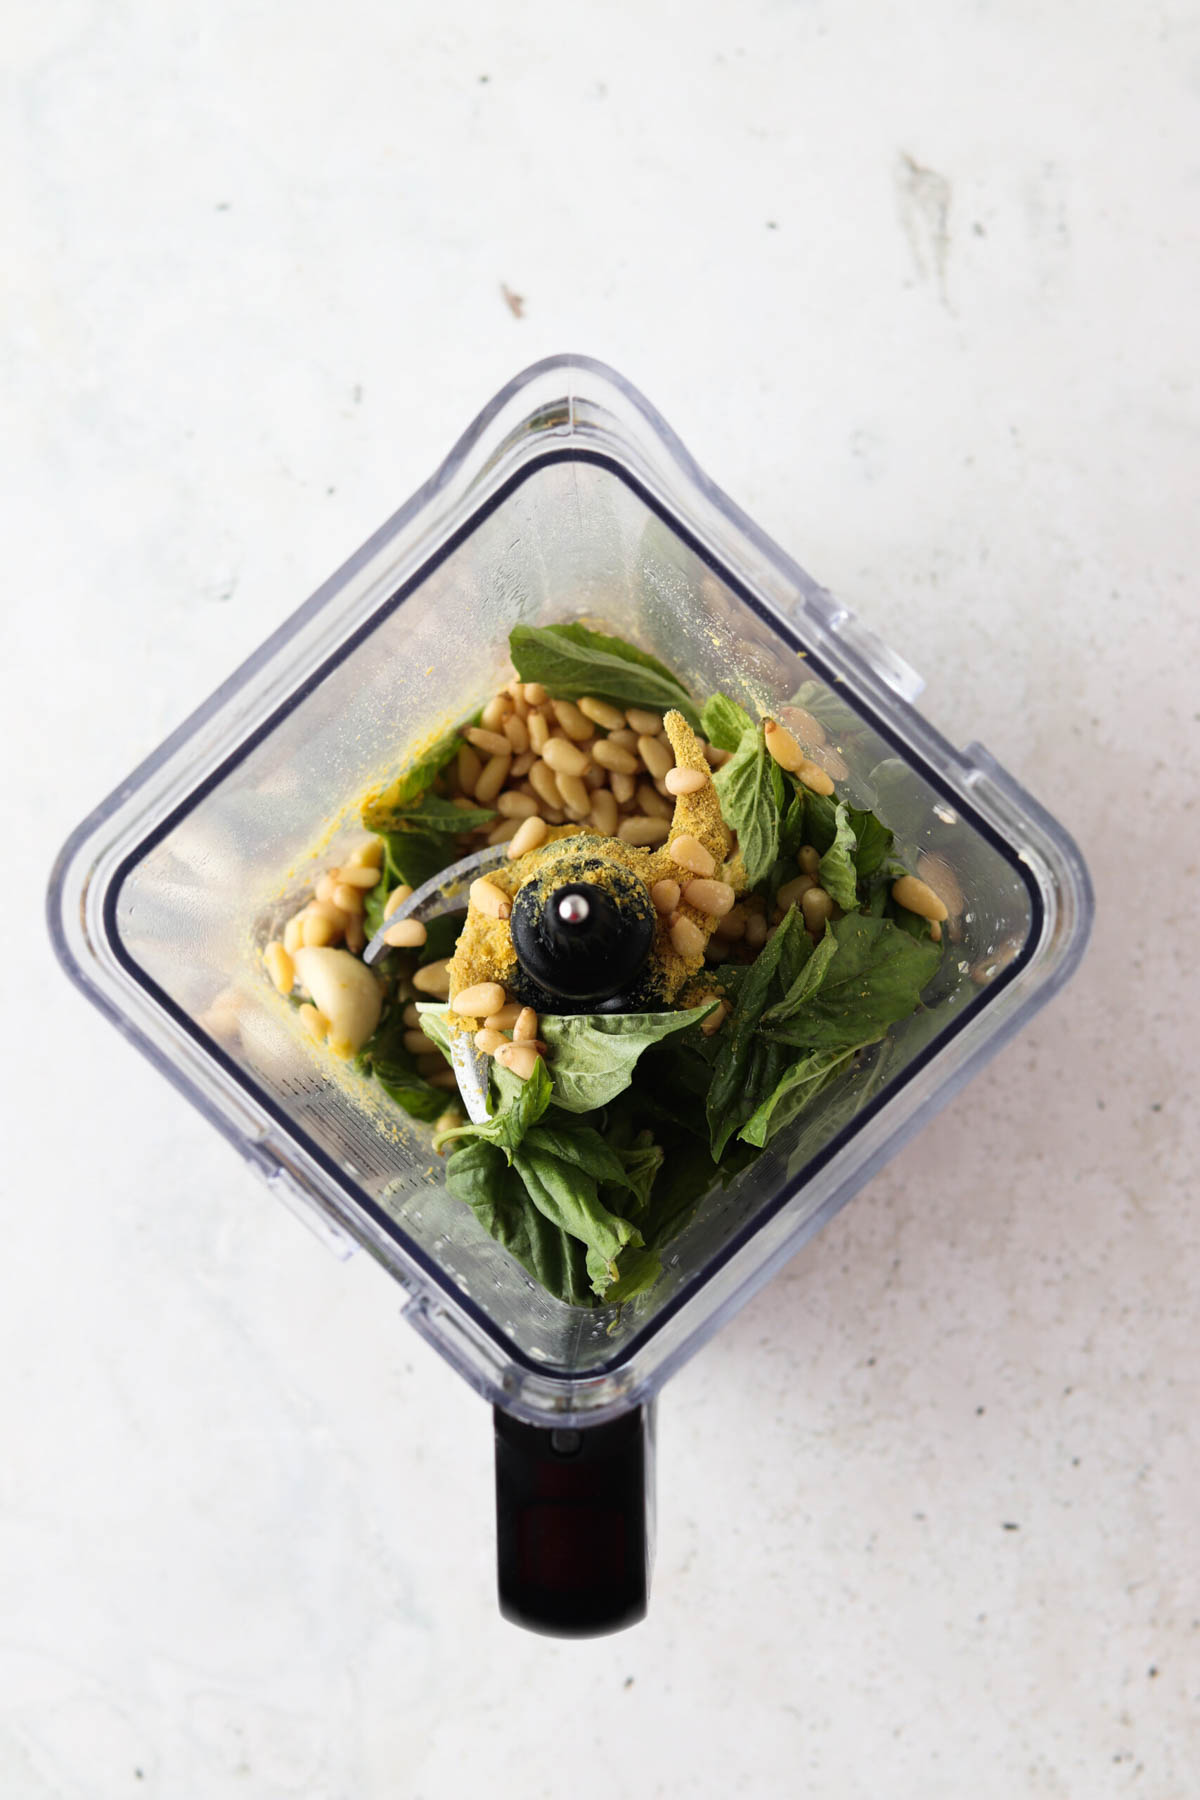
    Step #1: Place all ingredients in a food processor and blend until smooth.

    Chef’s Tips

    • Tip #1: I like to make homemade pesto and freeze it. To do that I use these big silicone ice cube trays. I pour in the sauce then cover the tray with a ziplock bag and place it in the freezer. 
    • Tip #2:To thaw-Pop the cube out prior to using and place in a skillet or in the fridge overnight.

    Recipe FAQs

    What kind of food processor do you use?

    I love my Ninja Food Processor. I have had it for years and love it. 

    How can I store it?

    You can store this nut-free pesto recipe in an airtight container for up to one week int the fridge or three months in the freezer. 

    Nut free bright green pesto in a bowl.

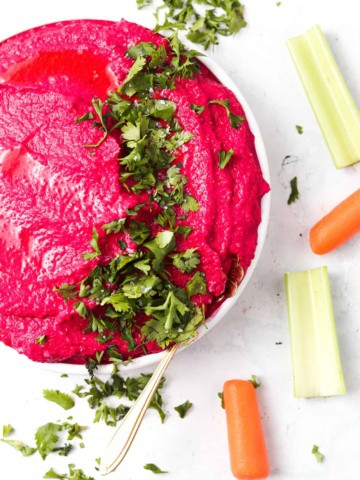
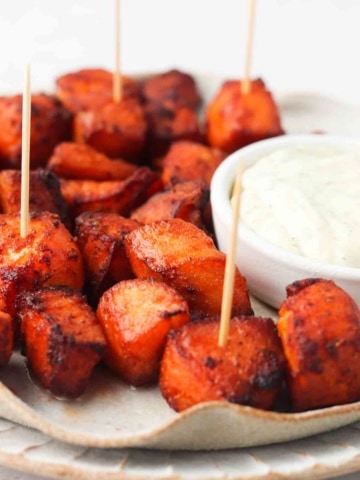
    Other Nut Free Recipes You Will Love

    • Dill aioli in a small bowl on a scalloped plate.
      Lemon Dill Aioli
    • fresh pesto in a jar
      Dairy Free Pesto
    • paleo aioli 1
      Paleo Aioli With Garlic (Whole30 Friendly, Dairy Free)
    • Red chimichurri 1 scaled
      Red Chimichurri Sauce Recipe

    Are you interested in a list of my go to healthy alternatives?

    Download your FREE guide below.

    Download your free guide.
    Nut free bright green pesto in a bowl.

    Nut Free Pesto

    Course Condiment, Side Dish
    Cuisine American
    Diet Gluten Free
    Prep Time 5 minutes minutes
    Total Time 5 minutes minutes
    Servings 4 servings
    Author Allianna Moximchalk
    263kcal
    Cost $2
    Print Recipe Pin Recipe

    Equipment

    • high speed blender

    Ingredients

    • 2 cups fresh basil
    • 1/4 cup nutritional yeast You can use parmesan cheese if you are not dairy free.
    • 1/2 cup olive oil
    • 4 cloves garlic
    • 1 lemon juiced

    Instructions

    • Place all ingredients in the food processor and blend until smooth.

    Notes

    Storage: This dish can be stored in an air tight glass container for up to a week in the refrigerator or three months in the fridge. 
    Nutrition: The nutrition for this recipe is an estimate and the calorie count is not guaranteed.  
    Servings: This recipe should yield 4 servings. 
    Creamy and delicious homemade nut free pesto recipe.
    Serving: 1serving | Calories: 263kcal | Carbohydrates: 4g | Protein: 3g | Fat: 27g | Saturated Fat: 4g | Polyunsaturated Fat: 3g | Monounsaturated Fat: 20g | Sodium: 2mg | Potassium: 148mg | Fiber: 2g | Sugar: 1g | Vitamin A: 639IU | Vitamin C: 16mg | Calcium: 29mg | Iron: 1mg
    Tried this recipe?Tag me on instagram @alliannaskitchen!
    blueberry and strawberry smoothie 14 scaled

    May 27, 2024 Allergy Friendly

    Strawberry Blueberry Smoothie

    This Strawberry Blueberry Smoothie is loaded with nutrients and full of flavor! The sweet berries combined with the ripe banana are oh so delicious. This recipe only takes 5 minutes to make and is perfect for snacks and breakfast.

    Strawberry blueberry smoothie in a glass cup with a bowl with fresh blueberry behind it.

    Smoothies are a great quick and easy recipe that is an easy way to get additional nutrients in.  I have developed a variety of smoothie recipes, some of my favorite are: Pina Colada Smoothie, Banana Cream Smoothie, Strawberry Banana Smoothie Bowl, Mint Smoothie, Orange Creamsicle Smoothie, Mango Strawberry Banana Smoothie, and Broccoli Smoothie.  

    [feast_advanced_jump_to]

    Why You Will Love This Recipe

    • This strawberry blueberry smoothie recipe is so simple with simple ingredients but also so delicious!  
    • This recipe is naturally gluten free, dairy free, soy free, and refined sugar free.
    • Kids will love this recipe too!
    • My husband loves to eat this smoothie for a healthy breakfast on hot summer days.
    • If you like this easy smoothie recipe, you should also try my strawberry banana smoothie bowl!  It is delicious and refreshing.
    • Vegetable and fruit smoothies are a great way to get a bunch of nutrients in with a ton of health benefits. 

    Healthy Strawberry Blueberry Smoothie Recipe Ingredients

    Strawberry blueberry smoothie ingredients in small glass bowls.
    • Mixed berries-Fresh strawberries and blueberries. You can use frozen if you like your smoothies to be cooler! 
    • Mixed seeds-I like using chia and flax seeds. 
    • Dairy free yogurt-I love Cocoyo! It is dairy free and free of any funny ingredients. 
    • Coconut milk-I like the Trader Joe’s canned milk. It is clean and free of any additives.
    • Fresh Basil -I love the smell of fresh basil.
    • Collagen peptides-To get some added protein in.
    • Fresh or frozen banana-If you like your smoothies sweet. 

    See the recipe card below for a full list of ingredients and measurements. 

    Substitutions and Variations

    • You can use fresh berries or frozen berries for this recipe. If you have other fresh fruit on hand, you can throw that in too! 
    • I like to use coconut yogurt for this recipe but you can choose to use the almond yogurt if you prefer. If you are not dairy free, you could use plain greek yogurt or regular plain yogurt instead. Adding greek yogurt would give this recipe a boost of protein. You can also use vanilla protein powder. 
    • If you do not like coconut milk, you can substitute almond milk, oat milk, or soy milk instead.  If you are not dairy free, you could also use whole milk. 
    • You can add additional ingredients for more nutrients.  I love to use peanut butter, almond butter, cashew butter, hemp seeds, flax seeds, healthy fats, or chia seeds to the mix.
    • Spinach-to get in some extra greens.  
    • If you want a sweeter smoothie, you could add a small amount of maple syrup to the mixture as well.  

    This recipe has not been tested with other substitutions or variations. If you replace or add any ingredients, please let us know how it turned out!

    How to make the Best Blueberry Banana Smoothies

    Strawberry blueberry smoothie ingredients in a blender base unblended.

    Photo 1: Place all ingredients in a high-speed blender.

    Strawberry blueberry smoothie ingredients blended together in a blender base.

    Photo 2: Blend until smooth.

    Expert Tips

    • Tip # 1: After blending, you will want to scrap down the sides of your high-powered blender and blend for additional time to fully combine.
    • Tip # 2: You can use fresh or frozen berries for this recipe.  If you use fresh berries, you can add ice cubes to the blender for a creamy texture or thicker consistency.
    • Tip # 3: To make preparation easier, you can bulk measure ingredients and add into storage bags for the freezer so that the measuring is already complete.

    Recipe FAQs

    How long does this smoothie last?

    This blueberry and strawberry smoothie will last for 4 days in the refrigerator in an airtight container. I suggest shaking it up prior to drinking.

    What kind of blender do you use?

    I love the Ninja blender. I have had it since college and it works so well!

    How can I make a thick smoothie?

    Try adding in some avocado, extra banana or more yogurt. 

    What can I do if I have extra berries?

    I love making mocktails or simple syrups with fresh berries. Check out my Blueberry Lavender Lemonade recipe!

    Strawberry blueberry smoothie in a glass cup garnished with seeds, fresh blueberries, and a fresh white flower.

    Other Smoothie Recipes You Will Love

    • pineapple banana smoothie 1 scaled
      Pineapple Banana Smoothie (Dairy Free)
    • straweberry peach smoothie 15 scaled
      Strawberry Peach Smoothie Without Yogurt
    • banana peach smoothie 1 scaled
      Banana Peach Smoothie Without Yogurt
    • banana cream smoothie 4 scaled
      Banana Cream Smoothie (Dairy Free Option)

    Are you interested in a guide of my go to healthy alternatives?

    Download your FREE guide below

    download here
    blueberry and strawberry smoothie 14 scaled

    Blueberry Strawberry Smoothie

    Course Breakfast, Snack
    Cuisine American
    Diet Gluten Free
    Prep Time 5 minutes minutes
    Total Time 5 minutes minutes
    Servings 2 servings
    Author Allianna Moximchalk
    368kcal
    Cost $3
    Print Recipe Pin Recipe

    Equipment

    • high speed blender

    Ingredients

    • 1/2 cup blueberries frozen or fresh are ok.
    • 1/2 cup strawberries frozen or fresh are ok.
    • 1 tbsp Mixed seeds I like using a mix of flax and chia seeds.
    • 1 cup coconut milk regular milk ok if you tolerate it. I like Trader Joe's canned coconut milk.
    • 1 cup dairy free yogurt Cocoyo yogurt is my favorite! You can use regular yogurt if you tolerate that.
    • 2 basil leaves
    • 1 scoop vital proteins collagen peptides
    • 1 banana If you like your smoothies sweet like I do!

    Instructions

    • Place all ingredients in a blender and blend until smooth.

    Notes

    Storage: This recipe can be stored in the refrigerator for up to 4 days in an air tight container.
    Nutrition: The nutrition for this recipe is an estimate and the calorie count is not guaranteed.  It is based on 2 servings. 
    Servings: This recipe should yield 2 servings. 
    Quick and easy berry smoothie!
    Serving: 1cup | Calories: 368kcal | Carbohydrates: 26g | Protein: 16g | Fat: 26g | Saturated Fat: 22g | Polyunsaturated Fat: 1g | Monounsaturated Fat: 1g | Cholesterol: 25mg | Sodium: 39mg | Potassium: 590mg | Fiber: 3g | Sugar: 14g | Vitamin A: 123IU | Vitamin C: 31mg | Calcium: 81mg | Iron: 5mg
    Tried this recipe?Tag me on instagram @alliannaskitchen!
    whole30 crab cakes on a black plate with aioli dipping sauce green herb garnish and a lemon wedge

    May 27, 2024 Appetizers

    Easy Keto Crab Cakes

    These are the Best Keto Crab Cakes. I could make this recipe daily! The old bay seasoning combined with buffalo sauce makes for a nice kick. The creamy garlic aioli combined with the old bay is oh so delicious. These maryland-style crab cakes makes for a great summer dinner or appetizer plus you can make extras and freeze this recipe! This recipe requires less 15 minutes of hands on time.

    Crab cakes on a platter with green onions and red pepper flakes on top.

    This recipe was inspired by my favorite Whole30 Salmon Cakes! Both recipes are so easy to make and the best part is, they freeze well. You can easily prepare this recipe in advance for date night or when you are hosting. This recipe will have everyone coming back for seconds! I love dipping these homemade crab cakes into my Lemon Dill Aioli or Garlic Aioli. 

    [feast_advanced_jump_to]

    Why This Recipe Works

    • Unlike traditional crab cakes this recipe is naturally gluten free, grain free, dairy free, soy free, Whole30 friendly, paleo, and refined sugar free.
    • You can prepare this recipe in advance and thaw it prior to your date night dinners!
    • This great recipe makes for a perfect appetizer or even main dish. I love pairing it with my other favorite appetizers like my Dairy Free Crab Dip, Air Fryer Salmon Bites, Vegan Taco Salad, Gluten-Free Pigs in A Blanket, Gluten Free Pigs in a Blanket and Bacon Wrapped Asparagus. 
    • These seafood cakes only take 15 minutes to prepare.
    • You can make these low-carb crab cakes in two different sizes-mini and large! I love the mini ones for event gatherings or happy hours.
    • These crab cakes are crispy on the outside but nice and soft on the inside!
    • This recipe is one the entire family will love, even people who aren’t really into fish tend to love this recipe because it is loaded with flavor.

    Simple Ingredients

    Crab cake ingredients laid out in small glass bowls on the counter.
    • Jumbo lump crab meat-You can get this in the seafood counter of your grocery store. Fresh crab meat or canned meat will work. If you are using canned crab be sure to drain the water.
    • Almond flour-This helps hold all of the ingredients together. Not all gluten free flours are created equal. I would stick to almond flour here. Do not try coconut flour or keto breadcrumbs. 
    • Chopped celery-This gives these salmon cakes a nice crunch.
    • Purple onions-Add to the flavor and add a nice crunch, if you are not an onion person skip the onions and double the celery for the crunch. 
    • Buffalo sauce-Adds a nice kick!
    • Old bay seasoning-This is essential for the rich flavor! This is my go to seafood seasoning.
    • Garlic-Garlic always enhances the flavor!
    • Avocado mayo-This adds a layer of creaminess! 

    See the recipe card below for a full list of ingredients and measurements.

    Substitutions and Variations

    • If you love a good dipping sauce like I do, I love my Dill Aioli with this recipe as well as homemade tartar sauce, Worcestershire sauce, dijon mustard or even yellow mustard.
    • You can use this same recipe to make shrimp cakes or crab cakes. 
    • I love sprinkling fresh parsley, fresh black pepper, and lemon juice on top to serve.

    This recipe has not been tested with any other substitutions or variations. If you try something else out please let me know how it turns out in the comments below!

    Step By Step Instructions

    Crab cake ingredients in a glass bowl with a silicone spatula.

    Step #1: Preheat the oven to 350 degrees F. Add the lump crabmeat and all other ingredients into a large bowl.  Mix the crab mixture until well mixed throughout. 

    Crab cakes laid out on a baking sheet with a silicone liner.

    Step #2: Place a piece of parchment paper on a cookie sheet. Using a 2 inch cookie scooper, scoop the crab cake batter and bake for 20 minutes. Allow the crab cakes to sit for 10 minutes prior to serving.

    Equipment Needed

    • Baking sheet.
    • 2 inch cookie scoop.
    • Mixing bowl.

    Chefs Tips

    • Tip #1: Be sure to mix all ingredients well throughout prior to scooping.
    • Tip #2: Fresh crab lump meat is your best bet. Any other kind of crab meat may not mix as well and taste as juicy and soft on the inside.
    • Tip #3: Crab cakes can be fragile. If you need to, you can chill the meat for an hour prior to baking or air frying them.

    FAQs

    Is imitation crab meat keto?

    Imitation crab meat is not keto. I suggest sticking to lump jumbo crab meat in this recipe. You can also use canned crab meat in water if you would like a cheaper and more economical choice.

    Can I make these gluten free crab cakes in the air fryer?

    Yes! Air fryer crab cakes are even easier because you do not have to heat up the oven. 

    Can I use another protein?

    Yes! I like using this same recipe with salmon and tuna too.

    Can I make this recipe without almond flour?

    Yes! you can substitute the almond flour for ground pork rinds.

    Keto crab cakes on a platter with green herbs and a lemon slice.

    Storage Instructions

    • This recipe can last for up to 3 days in the fridge.
    • If you want to freeze this recipe, be sure to allow the crab cakes to completely cool, then place in an air tight container in the freezer for up to 1 month.
    • Be sure to store this recipe in an air tight container, I like using a glass airtight container for storage!

    Other Low Carb Snacks You Will Love

    • buffalo chicken meatballs stacked on top of each other with whole30 ranch and parsley
      Buffalo Chicken Meatballs
    • lemon cucumber pickles 2 scaled
      Lemon Cucumber Pickles
    • close up photo of pork belly in a bowl
      Air Fryer Pork Belly
    • whole30 guacamole 7 scaled
      Whole30 Guacamole With Pork Belly (Paleo, Keto)

    Are you looking to eat healthier?

    Be sure to download my go to anti-inflammatory swap guide.

    download your guide NOW!


    whole30 crab cakes 13 scaled

    Keto Crab Cakes

    Course Appetizer, Meals, Snack
    Cuisine American
    Diet Gluten Free
    Prep Time 10 minutes minutes
    Cook Time 20 minutes minutes
    Total Time 30 minutes minutes
    Servings 12 crab cakes
    Author Allianna Moximchalk
    203kcal
    Cost $20
    Print Recipe Pin Recipe

    Equipment

    • baking sheet
    • Large ice cream scooper

    Ingredients

    • 2 whole eggs
    • 1/2 cup avocado mayo
    • 1/4 cup new bae seasoning or old bay
    • 1/2 cup red onion chopped small
    • 6 cloves garlic minced
    • 1/2 cup celery chopped
    • 2 cups almond flour
    • 1 pound lump crab meat
    • 1/4 cup buffalo sauce
    • avocado oil spray

    Instructions

    For the crab cakes:

    • Preheat the oven to 350. Mix all ingredients (except the spray) together in a bowl. Spray the bottom of a non-stick baking sheet with the avocado oil. Using a large cookie scooper, scoop the crab cakes and release on to the baking sheet. Do this until you are out of the mix. Bake the crab cakes for 20 minutes. Let the crab cakes sit for 10 minutes prior to serving.

    Notes

    Storage: You can store these crab cakes in the fridge for up to 3 days or in the freezer for up to one month.
    Nutrition: The nutrition on this recipe is just an estimate and cannot be guaranteed. 
    Servings: This recipe yields approximately 12 crab cakes. 
    Easy healthy crab cake alternative.
    Serving: 1cake | Calories: 203kcal | Carbohydrates: 6g | Protein: 11g | Fat: 16g | Saturated Fat: 1g | Polyunsaturated Fat: 1g | Monounsaturated Fat: 1g | Cholesterol: 16mg | Sodium: 527mg | Potassium: 104mg | Fiber: 2g | Sugar: 1g | Vitamin A: 29IU | Vitamin C: 4mg | Calcium: 63mg | Iron: 1mg
    Tried this recipe?Tag me on instagram @alliannaskitchen!
    peach cobbler in two bowls

    May 27, 2024 Allergy Friendly

    Vegan Peach Cobbler

    This Gluten Free Vegan Peach Cobbler is so easy and delicious! The natural sugars in the fresh peaches in this juicy peach filling combined with this gluten free shortbread crust is seriously to die for. This recipe comes together so fast and is thrown right into the oven. Out comes this delectable dessert!

    Peach cobbler in a white bowl with utensil inside dish.

    I love a warm, fruity dessert topped with some coconut whipped cream – your family will too! This recipe was inspired by Georgia Peach truck. Every Summer I order 50 pounds of peaches from them. The peaches are beyond sweet and oh my gosh they are so good. I always make a batch of this Peach Cobbler as soon as my order arrives. When I make this I also love to make my Peach Freeze Pops, Peach Basil Mocktails, and my go to Banana Peach Smoothie. One of my other favorite vegan recipes on my blog is my Vegan Milkshake.

    [feast_advanced_jump_to]

    Why You Will Love This Vegan Peach Cobbler Recipe

    • This recipes little time, it is easy to make, and requires simple ingredients.It truly makes for the best summer dessert.
    • You can serve this with dairy free ice cream, coconut cool whip, or topped with some cinnamon.
    • Unlike traditional peach cobbler, this recipe is not loaded with white sugar or brown sugar.
    • This recipe is can accommodate a lot of food allergies. It is naturally gluten free, dairy free, soy free, nut free, paleo, flourless, refined sugar fee, and autoimmune protocol (AIP) friendly too!
    • This recipe was inspired by my Gluten Free Apple Crisp and Gluten Free Blackberry Crisp. It is my favorite fall dessert recipe and I wanted one I loved just as much for Summer. If you would like to get this and other tasty treats delivered right to your front door, check out my Pittsburgh-based paleo meal prep menu. A new menu is live every Wednesday.

    Ingredients

    Ingredients for vegan peach cobbler in glass bowls on table with names of each item type on pictures.
    • Sliced peaches– These make a great, fruity dessert! The other ingredients in the peach filling make these extra sweet and delicious. When picking peaches, make sure you pick ripe peaches. Pick one that is slightly soft and has some golden-hues to it, this means you are getting juicy peaches! You can also use frozen peaches here, but be sure to allow them to fully defrost prior to baking so they aren’t holding on to extra moisture. If you have an abundance of peaches, I suggest checking out my Strawberry Banana Peach Smoothie on my blog, you can use any extra peaches for smoothies! If you are using canned or frozen peaches, I suggest making sure to drain any extra liquid to ensure the crisp is not soggy.
    • Coconut Sugar– A great natural, plant-based sweetener. Coconut sugar is great for baking. 
    • Arrowroot– A thickening agent. This helps the peach filling become thick, as well as holds the ingredients together for the cobbler topping. 
    • Lemon juice & cinnamon– Brightens the flavors of the peach filling.
    • Cassava flour– The base of the cobbler topping. I highly recommend Otto’s Cassava Flour. It is the only kind I use; it’s the best I’ve found. Cassava flour creates a nice, crispy topping. Bob’s red mill cassava flour also works too. 
    • Baking powder, coconut oil, coconut milk, vanilla extract- This will create the best cobbler topping when combined with the cassava flour. It’s sweet, crumbly, and crispy – all the best qualities of a cobbler.

    See recipe card below for a full list of ingredients and measurements.

    Substitutions and Variations

    • You can make this dessert with different fruits such as apples, blueberries, or even strawberries. It would be similar to my Healthy Apple and Blueberry Crumble Recipe!
    • There are so many options to serve alongside this dessert including dairy free ice cream, coconut cool whip, or a sprinkle of cinnamon.
    • You can use vegan butter instead of coconut oil if desired. 
    • You can substitute frozen peaches instead of fresh ones as long as you fully defrost them ahead of time.
    • Scoop of vegan ice cream-this is totally optional and can be a fun thing to serve it with!
    • Dairy free milk-You can use any other dairy free milk if you would like. Soy milk, almond milk, and oat milk work well too.

    This recipe has not been tested with other substitutions or variations. If you replace or add any ingredients, please let us know how it turned out in the comments below!

    Step by Step Instructions

    Vegan peach cobbler ingredients in a bowl.
    Photo 1: Preheat oven to 375 degrees F. Grease an 8×8 casserole dish with coconut oil. To make the peach filling, combine the peach slices, coconut sugar, arrowroot, lemon juice, and cinnamon. Cook over medium heat for 5-7 minutes. Then, transfer to the greased baking dish.
    Vegan peach cobbler crumble ingredients in a bowl.
    Photo 2: Make the cobbler topping by combining almond flour, arrowroot, baking powder, coconut sugar, and a pinch of sea salt.
    Vegan peach cobbler crumble ingredients mixed together in a glass mixing bowl.
    Photo 3: Add the solid chunks of coconut oil to the flour mixture until crumbly. Then stir in the coconut milk and vanilla extract until a dough forms.
    Vegan peach cobbler in a white baking dish.
    Photo 4: Scoop up the dough in small handfuls, flatten it with your hands, and lay it all over the peach filling. Bake for 30-40 minutes or until the top is golden brown. For best results, allow to cool for at least 10 minutes prior to serving.

    Recipe FAQs

    How do I pick the best peaches to use for this recipe?

    When picking fresh peaches, you want them to be semi-soft. Too hard means that they are not ready. There should also be some golden-hues to the peach. Peaches that have white hues are not ready. Peach season runs from June-August. This is when you will find the best peaches!

    Can I use frozen peaches for this recipe?

    Yes! If you choose to use frozen peaches, be sure that they are fully defrosted prior to using so that they don’t hold onto extra moisture.

    Can I use a different size baking dish?

    If you are using a baking dish larger than 8×8, keep in mind that it may change the baking time.

    Can I use canned peaches for this recipe?

    While you can use canned, I prefer fresh! Canned peaches often times are loaded with sugar and other processed ingredients. My biggest suggestion is to just be mindful if you do chose canned, be sure to read the ingredients!

    What is the difference between a vegan peach crisp and cobbler?

    Crispy recipes (like my blueberry apple crisp) have oats in them. Cobblers on the other hand are made from flour.

    Expert Tips

    • Tip #1: To prevent the cobbler from browning too much, you can loosely cover it with foil after about 20 minutes.
    •  Tip #2: I love serving this warm topped with vegan cool whip.
    • Tip #3: Be sure to choose peaches that are semi-soft with golden-hues so that the finished product is flavorful.
    Peach cobbler in a serving dish with a spoonful of dairy free whipped cream and a peach slice.

    Storage Instructions

    • Store leftovers in an airtight container for up to 5 days.
    • To reheat in the air fryer, cook at 350 degrees F for 3-5 minutes.
    • To reheat in the oven, cook at 350 degrees F for 10 minutes.

    Other Vegan Desserts You Will Love

    • straweberry peach smoothie 15 scaled
      Strawberry Peach Smoothie Without Yogurt
    • freeze pops with peaches laid out on ice cubes
      Homemade Peach Freeze Pops
    • Close up photo of a milkshake in a milkshake glass with a red straw.
      Easy Vegan Milkshake Recipe
    • dairy free chocolate truffles 6 scaled
      Vegan Chocolate Truffles

    Want a free guide of my go to healthy alternatives?


    download your FREE guide


    side shot of peach cobbler

    Vegan Peach Cobbler

    Course Dessert, easy
    Cuisine American
    Diet Gluten Free
    Prep Time 15 minutes minutes
    Cook Time 40 minutes minutes
    Total Time 55 minutes minutes
    Servings 6 people
    Author Allianna Moximchalk
    386kcal
    Print Recipe Pin Recipe

    Equipment

    • 8×8 baking dish

    Ingredients

    Peach Filling

    • 2 pounds peaches peeled & sliced
    • ½ cup coconut sugar
    • 2 tbsp arrowroot
    • 1 tbsp lemon juice
    • 1 tsp cinnamon

    Cobbler Topping

    • 1 ½ cups cassava flour Otto's brand
    • ½ cup arrowroot
    •  ⅓ cup coconut milk
    • ¼ cup coconut sugar
    • 1 ½ tsp baking powder
    • ¼ tsp sea salt
    • ¼ cup coconut oil
    • 1 tsp pure vanilla extract

    Instructions

    • Preheat oven to 375 degrees F. Grease an 8×8 baking dish with coconut oil.
    • Make the peach filling. In a medium-sized saucepan, combine the peaches, coconut sugar, arrowroot, lemon juice, and cinnamon. Cook over medium heat for 5-7 minutes. Then, transfer to the greased baking dish.
    • Make the cobbler topping. Combine almond flour, arrowroot, baking powder, coconut sugar, and a pinch of sea salt.
    • Add the solid chunks of coconut oil to the flour mixture until it becomes crumbly. Then, stir in the coconut milk and vanilla extract until a dough forms.
    • Scoop up the dough in small handfuls, flatten with your hands, and lay it all over the peach filling.
    • Bake for 30-40 minutes, or until the top is golden brown. Allow to cool for at least 10 minutes prior to serving.

    Notes

    Storage: This recipe can be stored in an airtight glass container for up to 5 days.
    Nutrition: The nutrition for this recipe is an estimate, and the calorie count is not guaranteed.  
    Servings: This recipe should yield 6 servings.
    If you choose to use frozen peaches, be sure that they are fully defrosted prior to using so that they don’t hold onto extra moisture.
     
    A sweet peach filling with the best cobbler topping
    Serving: 1serving | Calories: 386kcal | Carbohydrates: 70g | Protein: 3g | Fat: 12g | Saturated Fat: 10g | Polyunsaturated Fat: 0.3g | Monounsaturated Fat: 1g | Sodium: 265mg | Potassium: 225mg | Fiber: 4g | Sugar: 27g | Vitamin A: 494IU | Vitamin C: 9mg | Calcium: 121mg | Iron: 3mg
    Tried this recipe?Tag me on instagram @alliannaskitchen!
    •  
    overhead shot of red soup in a bowl

    May 22, 2024 Allergy Friendly

    Gluten Free Tomato Soup

    This Homemade Easy Gluten Free Tomato Soup is a classic dish and has become a favorite in my house. It can be enjoyed any time of the day- a light lunch, snack, or side with dinner. This homemade vegan tomato soup is loaded with flavor, creamy, thick, and super easy to make. It has great health benefits, it is known to boost immunity and is super rich in antioxidants. You will love this hot soup during the upcoming chilly summer and fall months. 

    Tomato soup with red pepper flakes and fresh parsley on top.

    I love making homemade tomato soup when I have a ton of extra ripe tomatoes on hand. This recipe is so easy to make that it literally only takes 10 minutes to prepare! My family will eat this recipe with just about anything but my favorite thing to eat it with is my Red Lobster Copy Cat Grain Free Biscuits.

    If you enjoy this recipe, you would also like my Dairy Free Lobster Bisque, Gluten Free Italian Wedding Soup, Cauliflower Leek Soup, Carrot and Butternut Squash Soup, or Pumpkin Slow Cooker Soup as well. My husband and I love to sprinkle my Homemade Gluten-Free Croutons on top and add some dairy free parmesan cheese and sour cream! If you have a lot of tomatoes leftover, check out my Air Fryer Roasted Tomato Recipe, this recipe makes the most perfect topper for soups, salads and more!

    [feast_advanced_jump_to]

    What Makes This Recipe Work

    • This homemade, Gluten Free Tomato Soup is SO easy! 
    • This is the perfect comfort food for Summer and Fall!
    • This recipe doesn’t require much work and is so much better than canned soup!
    • This creamy soup is naturally gluten free, grain free, dairy free, vegan, plant based, paleo, soy free, and refined sugar free. 
    • This soup freezes super well, so if you have a ton of tomatoes on hand cook them down and throw in some soup! My husband loves tomato soup and thinks it is such a treat.It is one of our favorite things to eat in our house.
    • If you are a tomato lover like me, you will love my Air Fryer Tomato recipe, too!

    Simple Ingredients

    Tomato soup ingredients laid out in small bowls on the counter top.
    • Fresh Tomatoes– I used Roma large tomatoes. These are the elongated, egg-shaped tomatoes. They have meaty flesh and a little amount of seeds. They have a low moisture content, compared to other tomatoes, making them perfect for cooking down into a soup. You can also used canned tomatoes, but in my opinion I think fresh taste better!
    • White onion- These have a sweet, mild flavor. If you are swapping for a different onion, I recommend yellow. These two onions are great for cooking, including soups, sauces, and stir frys. 
    • Coconut milk– Has a mild, creamy flavor that adds a rich undertone to a soup. Trader Joe’s coconut milk is my favorite! 
    • EVOO– Any cooking fat will work- including avocado oil and ghee. This is used to toss the tomatoes and onion with the seasonings, prior to baking. 
    • Garlic powder, onion powder, black pepper & sea salt– My go-to seasoning for nearly everything. This combination seasons a Gluten Free Tomato Soup perfectly. 

    See the full recipe card below with a full list of ingredients and measurements.

    Substitutions and Variations

    • Coconut milk-If you are not dairy free like me you can use regular milk for this recipe or even heavy cream. If you are dairy free and do not have coconut milk, you can use other dairy free alternatives like coconut cream or almond milk.
    • Fresh herbs-Totally optional but I like to sprinkle on top! I love fresh basil leaves.

    This recipe has not been tested with any other substitutions or variations. If you replace or add any ingredients, please let us know by leaving a comment below!

    Step By Step Instructions

    Diced up tomatoes and onions on a sheet pan.

    Step #1: Preheat the oven to 400 degrees F. Chop the onions and tomatoes and drizzle with EVOO, garlic powder and salt. Bake in the oven for 25-30 minutes.

    Coconut milk and tomatoes in a soup pot.

    Step #2: Add the roasted tomatoes and onions to a soup pan with coconut milk and bring to a medium boil.

    Coconut milk, garlic powder, onions, and salt in a soup pan.

    Step #3: Mix the contents for 5-10 minutes while it simmers.

    Tomato soup ingredients in the food processor.

    Step #4: Add all of the ingredients to a food processor.

    Smooth gluten free tomato soup in a blender.

    Step #5: Blend the soup on high speed until smooth.

    Equipment Needed

    • Ninja food processor or an immersion blender. Either work well!
    • Sheet pan.
    • Cutting board.
    • Knife.

    Chef’s Tips

    • Tip #1: Always line your roasting pan with parchment paper to prevent ruining your pan.
    • Tip #2: Ripe tomatoes make for the best tomato soup! You can tell if your tomatoes are ripe by touching them. When they are ripe they will be slightly soft to touch.
    • Tip #3: If you are eating this dairy-free tomato soup as your main course, consider adding in shredded chicken to get some added protein.
    • Tip #4: You can store this homemade gluten-free tomato soup in the fridge for up to 5 days in an airtight container. If you would like to freeze it, be sure to freeze it in a freezer-safe container for up to 3 months. Be sure to allow the soup to completely cool and get to room temperature prior to storing. 

    FAQs

    What pairs well with tomato soup?

    I love eating tomato soup with homemade garlic bread. My Homemade Vegan Garlic Bread is my favorite! This recipe also pairs so well with my Grain Free Biscuits. My husband also loves to eat his creamy tomato soup with a grilled cheese sandwich, cheese sandwiches or gluten free bread.

    What is an immersion blender?

    An immersion blender is a handheld blender. It makes life so much easier for making soups and sauces. Instead of having to pour everything in the blender, you can leave everything in a bowl and using the handheld blender to blend it.

    Is tomato soup naturally gluten free?

    Kind of. If you are buying pure ingredients, then yes it is gluten free. However, so many products have hidden additives in them and secret names of ingredients like gluten. Be sure to read your labels!

    Tomato soup in a pretty braided bowl with fresh parsley on top.

    Storage Instructions

    • If you are like me and love to enjoy homemade tomato soup all year round, you will want to freeze this homemade soup in small batches so you can enjoy it all year around. This soup will last for up to 2 months in the freezer.
    • This recipe can last in the fridge for up to 7 days.
    • To ensure freshness, be sure to store this soup in an air tight container. It is best to allow it to cool prior to placing it in the fridge and or freezer.

    Other Gluten Free Soup Recipes You Will Love

    • dairy free lobster bisque in a bowl with a gold spoon and garnished with lemon, fresh green herbs, and red pepper flakes.
      Dairy Free Lobster Bisque
    • close up photo of turkey soup in a bowl
      Instant Pot Turkey Soup
    • cauliflower and leek soup in a bowl with fresh herbs on top
      Cauliflower Leek Soup
    • Thai Creamy Coconut Chicken Soup2
      Thai Creamy Chicken Soup

    Do you need help with finding healthier foods?

    Be sure to download my go to anti-inflammatory guide with all of my favorite healthy swaps!

    Download your guide HERE!
    close up photo of tomato soup

    Gluten Free Tomato Soup

    Course Main Course, Meals, Soup
    Cuisine American
    Diet Gluten Free
    Prep Time 10 minutes minutes
    Cook Time 1 hour hour
    Total Time 1 hour hour 10 minutes minutes
    Servings 4 people
    Author Allianna Moximchalk
    169kcal
    Cost $7
    Print Recipe Pin Recipe

    Equipment

    • large pot
    • Food processor
    • Sheet pan

    Ingredients

    • 3 lbs Roma tomatoes cut into 4ths
    • 1 white onion chopped
    • 1/4 cup coconut milk or regular milk will work
    • 2 tbsp EVOO
    • 1 tbsp garlic powder
    • 1 tsp sea salt

    Instructions

    • Preheat oven to 400 degrees F.
    • Chop the onions. Cut the tomatoes into halves or fourths. Add to a lined sheet pan. Drizzle EVOO and sprinkle garlic powder & sea salt over the tomatoes and onions.
    • Place sheet pan in the oven for 25-30 minutes. Dump the tomatoes and onions into a pot over medium heat on the stove. Add the coconut milk. Stir together and bring to a boil.
    • Pour contents into the food processor. Pulse for 10 seconds or until you reach your desired thickness.

    Notes

    Storage: You can store this recipe in the fridge for up to 5 days or in the freezer for up to 2 months. 
    Nutrition: The nutrition in this recipe is an estimate and cannot be guaranteed. 
    Servings: This recipe yield approximately 4 servings. 


    A classic soup to warm up on a chilly day
    Serving: 1bowl | Calories: 169kcal | Carbohydrates: 18g | Protein: 4g | Fat: 11g | Saturated Fat: 4g | Polyunsaturated Fat: 1g | Monounsaturated Fat: 5g | Sodium: 603mg | Potassium: 902mg | Fiber: 5g | Sugar: 10g | Vitamin A: 2834IU | Vitamin C: 49mg | Calcium: 45mg | Iron: 2mg
    Tried this recipe?Tag me on instagram @alliannaskitchen!
    Grapefruit mocktail in a glass with jalapeño slice and grapefruit slice.

    May 20, 2024 Allergy Friendly

    Easy Grapefruit Mocktail Recipe

    Who doesn’t love a good mocktail? This Easy Grapefruit Mocktail Recipe is super easy to make and SO delicious! I love the tart yet sweet grapefruit combined with the spicy jalapeño . These homemade drinks make for a great summer treat. You can make this drink fresh or prep it in advance which makes it a great option for when you have company! 

    Grapefruit mocktail in a glass with a straw and fresh flowers.

    This recipe was inspired by dry January! If you love mocktails like I do, you will love the other refreshing mocktails on my blog like my Watermelon Mocktail, Ginger Mocktail Recipe, Peach Mocktail, Pineapple Margarita Mocktail, Key Lime Mocktail, Blood Orange Mojito Mocktail, Cranberry Mocktails, and my Fig Lime Mocktail. 

    [feast_advanced_jump_to]

    What Makes This Recipe So Good?

    • This recipe is SO easy, it requires less than 5 minutes of hands on time. 
    • This recipe requires simple ingredients that you will likely already have at home. 
    • This mocktail can easily be adjusted into a cocktail with a simple splash of tequila or vodka.
    • If you have been following along you know I am the mocktail queen, I have dozens of other delicious yet simple mocktail recipes on my website. 
    • This refreshing mocktail is naturally refined sugar free, paleo friendly, Whole30 friendly, and gluten free.
    • You can make this as a one serving drink or you can make this in big batches! 
    • You can prepare this recipe ahead of time and drink it all week long. 
    • I have a variety of simple syrups that are featured on my weekly meal prep menu. We deliver to the Pittsburgh area, directly to your front door.

    Recipe Ingredients

    Grapefruits sliced in a half.
    • Fresh grapefruit juice- Make sure you roll the grapefruit beforehand to get the juices flowing. Grapefruits are the most perfect combination of sweet and atrt, A ripe grapefruit will be slightly red in color. The deeper the color, the more intense their flavor. It should also be plump. Make sure you do not mistake an orange for a grapefruit, I have done that before, ha! Oranges are slightly smaller than grapefruits. 
    • Fresh Jalapeno– jalapeño slices are used as a garnish. However, the natural flavor will absorb into the beverage and provide a mild kick. This goes so well with the grapefruit, I promise! 
    • Soda water– This is your mixer of choice. You can use sparkling water, club soda, anything that you like. I also love it with pellegrino. 

    See the recipe card below for a full list of ingredients, measurements and the full recipe.

    Substitutions and Variations

    • Alcohol-If you would prefer liquor in your drink, you can make this into a tequila-based cocktail or a vodka based one. 
    • Agave syrup-If you like a touch of sweetness in your drink, add a splash of agave, maple syrup, coconut sugar, or any other added sugar of your choice.If you are looking for a sugar replacement to make this drink sweet, you can use stevia.
    • Fun garnishes-I love garnishing this drink with fresh herbs and fruits like fresh rosemary/ rosemary sprigs, wedge of lime/ lime wedge,  or a grapefruit wedge. You can also use just about any other citrus fruits too!
    • Salt rim or pinch of salt-If you like the salty touch to your drinks! You can even put the salt on the rim of the glass to jazz it up.
    • Fresh lime juice-This adds a little more flavor to the recipe but is totally optional!
    • Other fruit-You can add strawberries into the mix to make a Strawberry Grapefruit Mocktail. If you like grapefruit but find it to be kinda bitter, try adding the strawberries! This is personal preference and based off of your taste buds!

    This recipe has not been tested with any other substitutions or variations. If you try something else out please let me know how it turns out in the comments below!

    How To Make This Healthy Mocktail

    Grapefruit juice and club soda in a glass bowl.

    Step #1: Cut your grapefruits in half, juice the fruit and add to a cup. Add your mocktail ingredients to a blender and blend until smooth.

    Chef’s Tips

    • I recommend placing a strainer in the bowl, when juicing the lemons. This will catch any seeds or lingering pulp that falls.
    • If you plan on making this drink ahead of time, wait to mix the club soda until you are ready to serve it. Place the grapefruit juice into an airtight container and place in the fridge for up to 5 days.

    Recipe FAQs

    What can I serve with this?

    I would recommend some appetizers! For example, Vegan Taco Dip or Air Fryer Potato Skins. 

    How can I turn this into a cocktail?

    Super easy. First, decide what alcohol you want to use. Then, pour a shot of choice liquor into a cocktail glass. Fill with ice and your freshly squeezed grapefruit juice. Garnish with fresh jalapeno slices. I suggest starting out with 1 shot.

    How can I turn this into a paloma?

    Absolutely! All you need to do is juice one lime and add a splash of simple syrup. I love using my homemade Honey Simple Syrup on my blog. 

    What is a paloma?

    Palomas are typically made from grapefruit flavored soda with lime juice and simple syrup. This recipe offers a healthier alternative! 

    Can I add sweetener?

    Absolutely! I prefer using a refined sugar free sweetener if I choose that route. My homemade Honey Simple Syrup is the best!

    Grapefruit juice in a glass with a jalapeno on top.

    Other Mocktail Recipes You Will Love

    • key lime pie mocktail 5 scaled
      Key Lime Pie Mocktail
    • Overhead shot of a blood orange mojito in a glass with a dehydrated blood orange on the edge.
      Blood Orange Mojito Mocktail
    • Watermelon mocktail margarita in a margarita glass with a lime and orange on top.
      The Best Watermelon Mocktail Recipe
    • pineapple margarita mocktail 3 scaled
      Pineapple Margarita Mocktails

    Are you interested in a list of my go to healthy alternatives?

    Download your FREE guide below.

    Download your free guide.


    Grapefruit mocktail in a glass with jalapeño slice and grapefruit slice.

    Grapefruit Jalapeno Mocktail

    Course Drinks
    Cuisine American
    Prep Time 5 minutes minutes
    Total Time 5 minutes minutes
    Servings 1 serving
    Author Allianna Moximchalk
    19kcal
    Cost $2
    Print Recipe Pin Recipe

    Equipment

    • Bowl

    Ingredients

    • 1 ½ grapefruits juiced (cut in half and squeeze over a bowl)
    • 1 Cup club soda
    • 1 sliced jalapeno for garnish

    OPTIONAL:

    • 1 tsp lime juice

    Instructions

    • Mix the juiced grapefruit and club soda in a cup with a cocktail mixing spoon. Add ice to a cocktail glass and pour into the glass.
    • Add a jalapeno on top.
      If you enjoyed this recipe it would mean the world to me if you rated it and left a comment below. It helps others find it on google.xoxo-Allianna

    Notes

    Storage: This drink can be stored in an airtight glass container for up to 5 days in the refrigerator. Do not add the sparking water until you are ready to serve it. 
    Nutrition: The nutrition for this recipe is an estimate and the calorie count is not guaranteed. 
    Servings: This recipe should yield 1 serving. 
    This semi- sweet clean mocktail is the perfect summer treat!
    Serving: 1glass | Calories: 19kcal | Carbohydrates: 0.4g | Protein: 0.02g | Sodium: 50mg | Potassium: 11mg | Fiber: 0.02g | Sugar: 3g | Vitamin A: 3IU | Vitamin C: 2mg | Calcium: 13mg | Iron: 0.02mg
    Tried this recipe?Tag me on instagram @alliannaskitchen!
    Gluten free pigs in a blanket in a pile on a plate.

    May 20, 2024 Allergy Friendly

    Gluten Free Pigs In A Blanket

    These Gluten Free Pigs In A Blanket are super fun and easy to make! This classic appetizer is a must for any get together, no one will even know they are grain and gluten free. The grass fed mini sausages combined with the crispy cassava flour crust is so delicious. These cocktail wieners can be made in advance for your gathering so it is literally one less thing you need to do the day of!

    Gluten free pigs in a blanket piled on a plate.
    [feast_advanced_jump_to]

    These fun cocktail weenies have become a go to for all friends and family gatherings along with my Bacon Wrapped Chicken Bites, Gluten Free Pasta Salad, Crockpot Gluten Free Mac and Cheese, Vegan French Onion Dip, Gluten-Free Stuffed Mushrooms, Keto Crab Cakes, Dairy Free Crab Dip, Gluten Free Crab Cakes, Gluten Free Salmon Cakes, Healthy Deviled Eggs, and Simple Beetroot Dip. I feel like the snacks are what makes the great together, ha!

    Why I Love This Recipe

    • First off, it only requires 30 minutes of hands-on time.
    • This fun recipe is so dang good and a must for any occasion. 
    • This recipe is super friendly for kids too, kids love them.
    • Unlike most gluten free crescent roll dough recipes you may find online, this one is free of xanthan gum and guar gum.
    • This recipe is naturally gluten free, dairy free, grain free,  Whole30, and paleo friendly. 
    • I love making this recipe for get-togethers or date nights. My husband loves them too. You can make this fun treat the day prior to your event and eat it the next day! This allows you to skip extra food prep the day of.  
    • This recipe pairs so well with ketchup, honey mustard and all of your favorite sauces. 
    • You can use pre-made dough and make the dough up to a week in advance. You would just want to put the dough in an airtight container or a small bowl and cover with plastic wrap.

    Recipe Ingredients

    Mini sausages, cassava flour, water, oil, garlic and salt in small bowls.
    • Cocktail sausages-I love the Teton waters ranch brand. Costco carries them. All of their hot dogs and sausages are grass fed and grass finished! No funky ingredients. You can locate the sausages with this store locator link. They have the best beef franks! I suggest calling your local grocery store to see see if they have them in stock prior to making a trip.
    • Cassava flour– Cassava flour is my go to with gluten free and grain free cooking. I find that it is the easiest to work with. The crust gets super crispy. Be sure to leave a little for the cutting board or counter you are working on so that it does not stick. Some grocery stores do not have cassava flour, I like to order mine online from Thrive Market for a fraction of the cost. Use my link and save on your first order.  Please not not all gluten free flours are created equally so do not try susituting this for another kind. 
    • Garlic powder & sea salt-For flavor. 
    • Water & olive oil-To moisten the flour. Note any kind of oil will work but olive oil is my favorite because of its flavor profile. 
    • Ghee-This is my go to fat of choice for making these little mini pigs in a blanket nice and crispy. While technically any kind of fat would work, I suggest sticking to butter or ghee. 

    See the recipe card below for a full list of ingredients, measurements and the full recipe.

    Substitutions and Variations

    • Everything bagel seasoning-You can dip the wrapped sausages crescent dough in an egg wash and then dip it in the everything bagel seasoning if you like the added flavor and texture on top of the sausages!
    • Sesame seeds-You can even sprinkle sesame seeds on top if everything bagel seasoning is not your thing!

    This recipe has not been tested with any other substitutions or variations. If you try something else out please let me know how it turns out in the comments below!

    Recipe Instructions

    Pigs in a banket batter in a large bowl.

    Step #1: First, place all ingredients aside from the sausages and ghee in a large mixing bowl and mix until smooth with with your hand Set the dough aside for 1 hour to allow it to set.

    Gluten free crust rolled into a ball.

    Step #2: Roll the dough into a disc like shape.

    Pizza dough ball cut into fifths.

    Step #3: Then, cut the disc into fifths using a pizza cutter.

    Gluten free dough rolled out on a cutting board.

    Step #4: Now, roll out the 5ths with a rolling pin. If the dough is sticking, sprinkle cassava flour on top to prevent it from sticking.

    Long gluten free dough strips.

    Step #5: Make sure you have enough strips to wrap around the dough.

    Wrapped hot dogs on a plate.

    Step #6: Set the sausages aside.

    Baked pigs in a blanket.

    Step #7: Place the wrapped hot dog in the air fryer at 400 degrees F for 15-20 minutes. Spray with cooking oil on top prior to cooking. You can also use a lined baking sheet with parchment paper if you do not have an air fryer, be sure to flip the gluten-free sausages halfway. Serve with your favorite dipping sauce.

    Bakers Tips

    • Tip #1: Be sure to leave some extra flour on the cutting board prior to rolling out the dough. This prevents the dough from sticking to the board.

    Recipe FAQs

    How can i make gluten free pigs in a blanket without yeast?

    Yeast makes flour rise, in this recipe we do not need much rising. It comes out perfect as is.

    Can I make this recipe in advance?

    Yes! This recipe will last in the fridge for up to 5 days. 

    How can I reheat?

    I suggest reheating in the oven or the air fryer or oven at 350 for 5-10 minutes. 

    Hand holding a mini sausage wrapped in breading.

    Other Gluten Free Finger Foods

    • grilled pork belly 1 2 scaled
      Pork Belly On The Grill
    • chicken nuggets on a plate with ketchup
      Chicken Nuggets In The Air Fryer
    • potato skins on a plate with cheese, green onions and sour cream
      Air Fryer Potato Skins
    • peanut butter and jelly chicken wings on a plate with limes
      Peanut Butter And Jelly Wings

    If you enjoyed this recipe it would mean the world to me if you rated it and left a comment below. It helps others find it on google.xoxo-Allianna

    Are you interested in a list of my go to healthy alternatives?

    Download your FREE guide below.

    Download the guide.
    Gluten free pigs in a blanket in a pile on a plate.

    Gluten Free Pigs In A Blanket

    Course Appetizer, Snack
    Cuisine American
    Diet Gluten Free
    Prep Time 15 minutes minutes
    Cook Time 15 minutes minutes
    allowing the dough to set 1 hour hour
    Total Time 1 hour hour 30 minutes minutes
    Servings 10 people
    Author Allianna Moximchalk
    243kcal
    Cost $6
    Print Recipe Pin Recipe

    Equipment

    • air fryer or baking sheet

    Ingredients

    • teton cocktail sausages One package
    • 2 cups cassava flour Plus some extra to roll
    • 1 1/3 cup water
    • 3/4 cup olive oil
    • 2 tsp sea salt
    • 1 tbsp garlic powder
    • cooking spray oil I like avocado oil

    Instructions

    • First, place all ingredients aside from the sausages and ghee in a large mixing bowl and mix until smooth with with your hand Set the dough aside for 1 hour to allow it to set. Now, roll the dough into a disc like shape.
    • Then, cut the disc into fifths using a pizza cutter. Now, roll out the 5ths with a rolling pin. If the dough is sticking, sprinkle cassava flour on top to prevent it from sticking.
    • Make sure you have enough strips to wrap around the dough. Wrap one layer of dough around each sausage and set the sausages aside until each one is rolled.
    • Place the wrapped hot dogs in the air fryer at 400 degrees F for 15-20 minutes. Spray with cooking oil on top prior to cooking. You can also use a lined baking sheet with parchment paper if you do not have an air fryer, be sure to flip the gluten-free sausages halfway. Serve with your favorite dipping sauce.

    Notes

    Storage: This dish can be stored in an airtight glass container for up to 5 days in the refrigerator.
    Nutrition: The nutrition for this recipe is an estimate and the calorie count is not guaranteed.
    Servings: This recipe should yield 10 servings. 
    Fun, easy and delicious gluten free treat.
    Serving: 1serving | Calories: 243kcal | Carbohydrates: 20g | Protein: 1g | Fat: 18g | Saturated Fat: 3g | Polyunsaturated Fat: 2g | Monounsaturated Fat: 12g | Cholesterol: 4mg | Sodium: 469mg | Potassium: 15mg | Fiber: 1g | Sugar: 1g | Vitamin C: 1mg | Calcium: 38mg | Iron: 1mg
    Tried this recipe?Tag me on instagram @alliannaskitchen!
    Pineapple pico de gallo on a plate with a silver spoon.

    May 19, 2024 Allergy Friendly

    Pineapple Pico De Gallo

    This Pineapple Pico De Gallo is perfect for summer! It is fresh and oh so delicious and has a nice tropical twist.This pineapple salsa takes minutes to prep and goes great with just about anything. We love eating it with fish, chips and vegetables.This healthy snack is sweet and fresh but still has the kick from the fresh raw red onion. 

    Pineapple pico de gallo on a plate with a silver spoon.

    This dish is a staple in my house during the summer months. I love to pair it with just about any seafood or just eat it with chips on its own. I will make a large bowl of this for any cookout I attend during the warm months and it is always a hit. I love to pair it with my Halibut Fish Tacos, Buffalo Shrimp Tacos, Salmon in the Air Fryer, Air Fryer Salmon Bites and Frozen Pork Chops in the Air Fryer. If I am making this recipe to dip with chips, I like to also serve it with my Pork Belly Guacamole and Mango Pico de Gallo. 

    [feast_advanced_jump_to]

    Why You Will Love My Pineapple Pico de Gallo Recipe

    • It is so simple! You simple cut up and prepare all of your ingredients and mix them together.
    • This recipe requires minimal fresh ingredients that you can find at just about any grocery store.
    • This perfect topping is naturally gluten free, dairy free, soy free, vegan, and paleo
    • Fresh fruit salsas make a great addition to just about any meal. 
    • I love to make my pan seared sea bass and pair it with this pico de gallo.
    • The tropical flavors in this dish will scream summer!
    • Unlike traditional pico de gallo, this pineapple version is located with vibrant colors and tropical fruits. 

    Ingredients

    Pineapple pico de gallo ingredients in glass bowls on a silver platter.
    • Whole Pineapple-We like to use a whole one and make plenty for leftovers to use with an appetizer. Chop this baby up into small 1 inch cubes. The sweetness of the pineapple is what makes this recipe!
    • Red pepper-Compliments the pineapple well, but any colored pepper will work.
    • Cilantro-I like fresh cilantro, it enhances the flavor big time.
    • Fresh zesty lime juice-To keep this pico nice and fresh with adding a citrus touch to the sweet pineapple. 
    • Red onions-For a nice crunch. I like red onions because they are more savory in this recipe. I use yellow onions for things where I want a sweet flavor. 
    • Salt – This will help offset the sweet fruit. I prefer to use pink Himalayan sea salt.

    See the recipe card below for a full list of ingredients and measurements.

    Substitutions and Variations

    • Other fruits- This recipe would also taste great with fresh mango in place of the pineapple to make mango pico de gallo.
    • White onion-White onion is more of a sweet onion. If you do not like the sweet and salty taste, you can use white onion. You can also use yellow onion or add green onions in for additional flavor and texture!
    • Peppers or ripe tomatoes- For additional spice and flavor you could add in finely spicy jalapeño peppers, serrano peppers, 
    • Fresh herbs-You can also add fresh parsley into the mix!
    • Added sugar-While I think this recipe is perfect without sugar and I am not a big fan of adding unnecessary sugars into the mix, you can add some sugar if you are usied to adding sugar into your own salsa.

    This recipe has not been tested with other substitutions or variations. If you replace or add any ingredients, please let us know how it turned out in the comments below!

    How To Make The Best Fruity Salsa

    Pineapple pico de gallo ingredients in a mixing bowl.

    Step #1: First, start by washing your fresh produce and chopping all of your ingredients. Then, add the fresh lime juice and remaining ingredients into a blender and blend until your desired consistency. 

    Equipment Needed

    • Mixing bowl

    Expert Tips

    • Tip # 1: You will want to make sure to use red, yellow, or orange bell peppers in this dish. They will be more sweet than a green bell pepper. I prefer to use a red bell pepper because the added color makes this dish even more beautiful.
    • Tip # 2: Depending on the dish you are pairing this pico de gallo with, you can choose the size you chop your ingredients based on the meal. Depending the pairing, you. may want smaller chunks than others.
    • Tip # 3: Limes are commonly seedless. When you juice your limes you can squeeze directly into the bowl.

    Recipe FAQ’s

    What can I eat this with?

    I love eating fresh pico de gallo with any kind of white fish, chips, or even vegetables! I love to make this pico to be served over salmon. It goes so well with my Frozen Salmon In The Air Fryer. I love this recipe because you do not even need to thaw your fish!

    What if I don’t like cilantro?

    Cilantro is definitely a love it or leave it herb. If you are one of the ones who don’t like it, I would recommend to lower the amount of cilantro in this dish and also chop it finer. The other flavors of this dish will help to mark the taste of the cilantro.

    Can I use frozen pineapple?

    I don’t recommend frozen pineapple for this dish because it will have additional liquid and also be softer when you thaw it.

    How can I cut a ripe pineapple?

    Using a sharp knife and cutting board, first cut off the top of the pineapple, then stand the pineapple upright and cut off the skin on the sides. Then slice into pieces.

    Pineapple pico de gallo in on a plate.

    Storage Instructions

    • This recipe can be stored in an airtight container in the refrigerator for up to 5 days.

    Other Fresh Sides You Will Love

    • Mango Pico de Gallo 1 scaled
      Mango Pico de Gallo
    • aip beet hummus 6
      AIP Beet Hummus With Cauliflower
    • Mexican pickled onions in a mason jar with a gold spoon.
      Mexican Pickled Onions
    • keto salsa in a bowl with a lime and cilantro on top with low carb chips on the side
      Easy Keto Salsa

    Want a free guide to my go to healthy alternatives?

     
    download your FREE guide
    Pineapple pico de gallo on a plate with a silver spoon.

    Pineapple Pico De Gallo

    Course Appetizer, Snack
    Cuisine American, Mexican
    Diet Gluten Free
    Prep Time 10 minutes minutes
    Total Time 10 minutes minutes
    Servings 6 servings
    Author Allianna Moximchalk
    1kcal
    Cost $3
    Print Recipe Pin Recipe

    Equipment

    • knife
    • cutting board

    Ingredients

    • 1 whole pineapple skinned and cubed into 1/2 inch pieces
    • 1 whole red pepper chopped into small pieces
    • 1 whole red onion chopped
    • 1/2 tsp sea salt
    • 4 whole limes juiced
    • 1/2 cup fresh cilantro

    Instructions

    • Place all ingredients in a bowl together and mix!

    Notes

    Storage: This recipe can be stored in an air tight container in the refrigerator for up to 5 days. 
    Nutrition: The nutrition for this recipe is an estimate and the calorie count is not guaranteed.  It is based on 6 servings. 
    Servings: This recipe should yield 6 servings. 
    Quick and easy pico recipe to go with just about anything!
    Serving: 1serving | Calories: 1kcal | Carbohydrates: 1g | Protein: 1g | Fat: 1g | Sodium: 1mg | Potassium: 8mg | Fiber: 1g | Sugar: 1g | Vitamin A: 96IU | Vitamin C: 1mg | Calcium: 1mg | Iron: 1mg
    Tried this recipe?Tag me on instagram @alliannaskitchen!
    Mexican pickled onions in a mason jar with a gold spoon.

    May 18, 2024 Allergy Friendly

    Mexican Pickled Onions

    These Mexican Pickled Onions go great with just about anything! Unlike most pickled vegetables, these pickled onions are sugar free. We like to add them on top of salads, tacos, and enchiladas. I love to make this simple recipe in bulk each month so that I always have them in my refrigerator when I make a dish that will pair well with them.

    Sugar free mexican pickled onions in a mason jar with a gold spoon on a platter.

    These pickled onions are tart from the vinegar but also still give you the taste of raw onion without being overpowering. The red onion is what causes the liquid of the jar to get the beautiful natural pink coloring to it. These are a great addition to some of my favorite meals on my blog like my Sheet Pan Chicken Fajitas, Shredded Lamb Power Bowls, Steak Taco Salad, Sheet Pan Shrimp Tacos, Dairy Free Enchiladas, Buffalo Shrimp Tacos, Halibut Fish Tacos or just about any Mexican Cuisine!I love adding them to salads too. These fun onions are the perfect condiment with just about any meal.

    [feast_advanced_jump_to]

    Why You Will Love This Recipe

    • These mexican onions are so simple! With only six ingredients and less than 10 minutes you will have a jar of pickled onions sitting in your refrigerator for whenever you need them.
    • This easy recipe is naturally gluten free, sugar free, soy free, paleo, whole30, and vegan.
    • Most recipes call for an extensive pickling process with boiling water and allowing the onions to soak in hot water or a pickling brine, but this recipe is much quicker and does not!
    • This recipe only requires simple ingredients that you likely already have on hand.You can make a quick batch into little to not time.
    • These easy mexican pickled onions are delicious addition to just about any meal/ I love to pair these onions with my paleo sheet pan fish tacos for added flavor.
    • This is a great way to add flavor and crunch to your dish without adding a lot of calories.
    • Eating pickled vegetables has health benefits too! It can be good for the gut. 

    Ingredients

    Mexican pickled onion ingredients in small glass bowls on a silver tray.
    • Large red onion-I like to chop up the raw onions long ways nice and thin. The red on the onion is what will give your pickled onion juice the pink coloring.
    • White wine vinegar or white vinegar-This assists in the fermentation process. You will want to make sure to use white vinegar as other vinegars such as apple cider vinegar or red wine vinegar will change the taste of the pickled onions.
    • Fresh Lime Juice-This adds to the flavor.
    • Sea salt-Helps with the fermentation process. I like pink sea salt. 
    • Water – This is what will gives the added liquid to the jar of pickled onions so they all can soak equally.
    • Black peppercorns – This will add a spice and peppery flavor to the onions.

    See the recipe card below for a full list of ingredients and measurements.

    Substitutions and Variations

    • If you do not like red onion or do not have red onion on hand, you can use a purple onion, white onions or yellow onions. This will change the flavor and color of the pickled onions though. You can even do a combination of onions if you like a variety of flavors
    • If you do not have fresh lime, you will. want to check to make sure pre-squeezed lime juice does not have any additives to it.
    • Sliced jalapeno-You can add jalapeño peppers to the onion mixture if you want to spice it up.
    • Habanero peppers- Definitely not a must but an option to add more flavor. 

    This recipe has not been tested with other substitutions or variations. If you add or replace any ingredients, please let us know how it turned out in the comments below!

    Step by Step Instructions

    Raw onions and pickling ingredients in a silver bowl.

    Photo #1: First, using a sharp knife, slice the onions into long onion slices. Next, add the sliced onions and the remaining ingredients into a bowl. Now, add to a glass jar and make sure the raw red onions are fully submerged in the vinegar mixture. Shake the jar and place in the refrigerator overnight.

    Equipment Needed

    • Mixing bowl.
    • Large jar, I like using a large mason jar.

    Expert Tips

    • Tip # 1: When slicing your onion, you will want to start by cutting the onion in half. Then, proceed to cut off the end that does not have the root and peel the outer layer off of the onion. Make sure to keep the root attached to the other side of the onion to help make it easier to cut. Then slice the onion into thing half moon slices holding the onion near the root end.
    • Tip # 2: Make sure to use whole black peppercorns so that they are easier to pick out of the pickled onions prior to eating them.
    • Tip # 3: If you cry when cutting onions, it can be helpful to place the onion halves into the freezer for a few moments prior to slicing to help prevent the onion juice from causing your eyes to water.

    Recipe FAQ’s

    What should I eat these with?

    We love serving these pickled onions with salads, tacos, chicken, and honestly just about anything.

    How long does it take the onions to pickle?

    They need to be stored in the brine for at least 12 hours. The longer, the better. The longer you let them sit, the more fermented they will become.

    Can I reuse the liquid from the pickled onions when I run out?

    If your onions have been in the refrigerator for a month then I would recommend making a new batch fresh. If it has been less than a month you can reuse the liquid and just add fresh onions to it. You will just want to make sure that the onions are fully submerged in liquid.

    Mexican pickled onions in a mason jar on a try with a slice of lime.

    Storage Instructions

    • This recipe can be stored in the refrigerator in a mason jar for up to one month.

    Other Vegetable Recipes You Will Love

    • lemon cucumber pickles 2 scaled
      Lemon Cucumber Pickles
    • Gluten free coleslaw in a bowl with a gold spoon.
      Gluten Free Coleslaw
    • IMG 3764
      Air Fryer Frozen Brussel Sprouts
    • paleo potato salad on a plate with green onion on top
      Gluten Free Potato Salad Recipe

    Want a free guide of my go to healthy alternatives?

     
    download FREE guide here
    Mexican pickled onions in a mason jar with a gold spoon.

    Mexican Pickled Onions

    Course Snack
    Cuisine Mexican
    Prep Time 10 minutes minutes
    Fermenting tine 12 hours hours
    Total Time 12 hours hours 10 minutes minutes
    Servings 10 servings
    Author Allianna Moximchalk
    9kcal
    Cost $1
    Print Recipe Pin Recipe

    Equipment

    • Large mason jar

    Ingredients

    • 1 whole purple onion sliced longways and very thin
    • 1.5 cups white vinegar
    • 1 cup water
    • 1 tbsp black peppercorns omit for AIP
    • 1 tsp sea salt
    • 2 whole limes juiced

    Instructions

    • Place all ingredients in a bowl and mix. Pour in a mason jar and make sure the onions are covered with the liquid. Shake and place in the fridge over night.

    Notes

    Storage: This recipe can be stored in an air tight container in the refrigerator for up to one month. 
    Nutrition: The nutrition for this recipe is an estimate and the calorie count is not guaranteed.  It is based on 10 servings. 
    Servings: This recipe should yield 10 servings. 
    These easy pickled onions without sugar go great with just about anything!
    Serving: 1serving | Calories: 9kcal | Carbohydrates: 1g | Protein: 1g | Fat: 1g | Saturated Fat: 1g | Sodium: 235mg | Potassium: 14mg | Fiber: 1g | Sugar: 1g | Vitamin A: 6IU | Vitamin C: 1mg | Calcium: 8mg | Iron: 1mg
    Tried this recipe?Tag me on instagram @alliannaskitchen!
    Gluten free coleslaw in a bowl with a gold spoon.

    May 17, 2024 Appetizers

    Gluten Free Coleslaw

    This creamy Gluten Free Coleslaw is super easy to make and is something everyone will enjoy!  This homemade coleslaw is made with simple ingredients and only takes 10 minutes of prep time to make! After finding out I have celiac disease, I really hammered down on finding the best gluten free recipes. I am a big fan of coleslaw, and this recipe hits the spot! The tangy flavor in this slaw is my absolute favorite! This recipe will become a go to for all of your Summer Cook Out needs. This healthy salad goes well with just about anything. 

    Whole30 gluten free coleslaw in a bowl with a spoon.

    Summer BBQs are my absolute favorite! As someone with dietary restrictions it can be difficult to navigate get togethers which is why I love hosting and making things that both our guests and I can enjoy! This recipe has become a perfect side dish for any summer bbq along with my Cantaloupe Melon Salad, Gluten Free Potato Salad, Gluten Free Burgers, Pork Belly on The Grill, Cucumber Watermelon Salad, and Gluten Free Pasta Salad.

    [feast_advanced_jump_to]

    Why I Love This Recipe

    • No one will even know it is gluten free!
    • This healthy coleslaw recipe is naturally soy free, gluten free, paleo, Whole30 friendly and can be made vegan. This recipe is naturally low carb too. 
    • This recipe goes great with just about anything and will fit in just great with all summer side dishes.
    • You can make this recipe ahead of time for all of your summer gathering needs

    Ingredients

    Gluten free coleslaw ingredients in small glass bowls on a silver tray.
    • Shredded cabbage coleslaw mix-I like to buy the shredded cabbage bag from Trader Joe’s. It is already partially shredded and saves a bunch of time! You can use whole cabbages, but you would have to cut them with a knife or shred them in the food processor. If you are making it yourself I like having a blend of red cabbage and green cabbage. If you are buying the pre-chopped cabbage, be sure to buy the freshest cabbage bags.
    • Avocado mayonnaise– Avocado mayonnaise is a great alternative for regular store bought mayonnaise. It is creamy and made from avocado oil instead of canola oil which is extremely inflammatory. 
    • Apple cider vinegar-This adds a nice tangy touch. The type of vinegar matters in this recipe, I only suggest using apple cider vinegar. 
    • Mustard-The mustard combined with the avocado mayo makes for an even more smooth and creamy taste as well as adding some flavor.
    • Dill-I love adding dried dill to add to the tangy apple cider vinegar flavor. I like using dried but you can also sprinkle in some fresh. Note that dried herb are a lot more potent so you need less of them. 

    See the full recipe card below with a full list of ingredients and measurements.

    Recipe Variations and Substitutions

    • Mayonnaise-If you are vegan, you can make vegan coleslaw by using vegan mayo. You can also use greek yogurt if mayo is not your thing. 
    • Red onion-If you like raw onions (some people do and some don’t) you can add this for a nice crunch. 
    • Apple cider vinegar-If you do not have vinegar on hand, you can you use lemon juice in its place. It is closest to apple cider vinegar. White vinegar is a little too tangy.
    • Fresh veggies-Sometimes I like adding other fresh veggies into my coleslaw mix like fresh shredded carrots. 
    • Kosher salt-If you are a big salt person.

    This recipe has not been tested with any other substitutions or variations. If you replace or add any ingredients, please let us know by leaving a comment below!

    Recipe Instructions

    Gluten free coleslaw ingredients in a large glass bowl unmixed.

    Step #1: First, If you are not using pre-shredded cabbage, be sure to chop and slice your own cabbage into small bite size pieces. You can also using a shredding blade in a food processor for this. If you are using a whole head of cabbage, be sure to cut the head into 4ths before adding it to the food processor. Now combine mayo and all other ingredients in a large bowl. Mix until well mixed throughout. This slaw tastes best when you let it sit and marinate overnight. The cole slaw gets creamier as it sits.

    Recipe FAQs

    What should I serve this recipe with?

    We love to serve this with tacos and even eat it plain as a side in the summer.

    How long does this last?

    The slaw should last in the fridge for up to 5 days in an airtight container. 

    Does the kind of cabbage matter?

    I personally like using a mix of red and green! Green is a little softer in my opinion. 

    Gluten free coleslaw in a clay bowl with a fresh lime slice.

    Other Gluten Free Delicious Recipes

    • burger with a bun on it with cheese, tomato and lettuce
      Gluten Free Burger
    • Cucumber and watermelon salad on a plate with limes, pepper and honey drizzled on top.
      Cucumber Watermelon Salad
    • grilled pork belly 1 2 scaled
      Pork Belly On The Grill
    • dairy free strawberry pretzel salad on a plate with whipped cream on top
      Gluten Free Strawberry Pretzel Salad

    Hey-you’ve made it this far! If you make this recipe, I would love for you to give it a star ★ rating and review below. Make sure you are following me on Instagram, Pinterest, and Facebook too!

    Are you interested in getting a list of my healthy go to alternative?

    Download your FREE guide below!

    Download the guide.
    Gluten free coleslaw in a bowl with a gold spoon.

    Gluten Free Coleslaw

    Course Side Dish
    Cuisine American
    Diet Gluten Free
    Prep Time 15 minutes minutes
    Total Time 15 minutes minutes
    Servings 6 servings
    Author Allianna Moximchalk
    129kcal
    Cost $3
    Print Recipe Pin Recipe

    Equipment

    • Cutting board and knife or food processor
    • spatula

    Ingredients

    • 1 bag shredded cabbage I like the Trader Joe's brand
    • 1/2 cup avocado mayo
    • 1/4 cup dijon mustard
    • 1/4 cup apple cider vinegar
    • 1 tsp dill

    Instructions

    • Either chop up the slaw into small pieces on a cutting board with a knife or place in the food processor for 10 seconds. Place the cabbage in a bowl and add the avocado mayo, apple cider vinegar, mustard, and dill. Store in your fridge for up to 5 days.

    Notes

    Storage: This dish can be stored in an air tight glass container for up to 5 days in the refrigerator.
    Nutrition: The nutrition for this recipe is an estimate and the calorie count is not guaranteed.  
    Servings: This recipe should yield 6 servings. 
    Tip: This dish tastes best when it sits in the fridge overnight to marinate.
    Quick and easy Gluten Free coleslaw alternative.
    Serving: 1serving | Calories: 129kcal | Carbohydrates: 2g | Protein: 1g | Fat: 12g | Saturated Fat: 1g | Trans Fat: 1g | Sodium: 225mg | Potassium: 22mg | Fiber: 1g | Sugar: 1g | Vitamin A: 9IU | Vitamin C: 1mg | Calcium: 7mg | Iron: 1mg
    Tried this recipe?Tag me on instagram @alliannaskitchen!
    grilled pork belly 1 2 scaled

    May 14, 2024 Allergy Friendly

    Pork Belly On The Grill

    I love making Pork Belly on The Grill during the sweet summertime. Cubed pork belly can elevate any dish! I love using this recipe to top off homemade guacamole or even just eat by itself. This delicious treat only requires 5 minutes of hands on time. The pork belly itself has so much flavor, the added seasonings makes this recipe even better!

    cubed grilled pork belly in a bowl

    This seasoned pork belly was inspired by my husband’s favorite taco joint here in Pittsburgh, Tako! Years ago they made Homemade Guacamole with fresh pork belly on top, ever since I have been obsessed with pork belly. If you like this easy pork recipe, be sure to check out my Easy Blackened Pork Chop recipe too! You may also like my other summer BBQ recipes on my blog like my Gluten Free Crab Cakes, Gluten Free Coleslaw, Cucumber Watermelon Salad, Gluten Free Potato Salad, Gluten Free Pigs in A Blanket, and Gluten Free Strawberry Pretzel Salad. 

    Why I Love This Recipe

    • This recipe is naturally dairy free, grain free, paleo, gluten free and soy free. 
    • Despite this recipe having minimal ingredients, this recipe is loaded with flavor!
    • This recipe is versatile. It goes great on top of salads, guacamole and it can also be eaten by itself! I also love making homemade pork belly to put into a lettuce wrap. It makes for a fun lower carb snack! You can also use the pork belly as a main dish over salad. 
    • Here in the United States summer is the best time for grilling season, I love having a variety of fun recipes to make on my gas grill all summer long.
    • If you love pork like I do, you will love the other pork recipes on my blog like my Blackened Pork Chops, Apple Ginger Pulled Pork, Frozen Pork Chops in the Air Fryer, Instant Pot Pork Butt, and my Whole30 Pork Tenderloin.
    • ​If you do not have a grill, you can also cook make Air Fryer Pork Belly. 

    Recipe Ingredients

    pork belly ingredients
    • Pork belly–I like to get my pork belly from Butcher Box. They have the best quality meats and it all gets sent right to your door. If you use my Butcher Box link, you can save on your first order. You can also get pork belly from almost any grocery store. The pork belly should be in bite-sized pieces. 
    • Paprika-Adds a nice kick!
    • Avocado oil-This helps form a marinate for the pork belly. 
    • Sea salt, black pepper, garlic powder, onion powder-For flavor. I like adding a generous amount of salt to the pork. It really boosts the flavor!
    • Fresh cilantro-This is what makes the guacamole.

    See the recipe card below for a full list of ingredients and measurements.

    Optional Ingredients

    • Coconut sugar-If you like your pork belly to be a little sweet coconut sugar is a nice touch. You can also use brown sugar if that is more your thing! It is totally personal preference.
    • Your favorite BBQ sauce-This is totally optional and something that can be added after the pork belly is cooked.  
    • Red pepper flakes-If you like an added kick, this is a fun garnish to add on top.

    This recipe has not been tested with any other substitutions or variations. If you try something else out please let me know how it turns out in the comments below!

    How To Make Pork Belly on The Grill

    Pork belly marinating in a glass bowl.
    Step #1: First pat try the pork with a paper towel. You want to make sure you get rid of any excess moisture. Now, remove the fat cap. I suggest using a sharp knife and doing this on a glass cutting board. Do not use a wood one! The fat drips so this will help eliminate a mess in your grill. Next, using kitchen scissors, cut the pork into 1 inch cubes. You can also make pork belly slices if you plan to use this recipe for tacos instead. Now, add all the spices and oil into a bowl and let the pork belly marinate.
    Marinated pork belly on a piece of foil.
    Step #2: Lastly, set the grill to medium heat. Allow the grill to get hot, then add a piece of foil to the wire rack and directly add the pork belly on top. Grill for 20 minutes without opening the lid, then flip the pork and cook for an additional 20 minutes or until the pork reaches 160 degrees F.

    Chef’s Tips

    • Tip #1: Make sure the pork belly is patted dry prior to cutting and marinating it! This will better help the marinate soak in.

    Recipe FAQs

    What should I serve this with?

    You can eat this pork belly with just about anything! My favorite way to serve it is on top of my Whole30 Guacamole.

    How do I know if pork belly is done?

    You can always use a meat thermometer to see if it reached 160 degrees F, however they may be a little difficult because the pieces are so small. You could also cut a small piece and examine the middle of it. It should be a light brown color.

    How can I make crispy pork belly?

    You can use a two-zone fire method. First start by indirect cooking, place the pork belly on the second rack in the grill where there is indirect heat. Then, once the pork belly is 75% of the way cooked, add it to direct heat and directly over the flame for the remaining time. This will give your tender pork belly a nice little crisp on the edges. 

    grilled pork belly 6

    Other Gluten Free Cookout Recipes

    • Cucumber and watermelon salad on a plate with limes, pepper and honey drizzled on top.
      Cucumber Watermelon Salad
    • burger with a bun on it with cheese, tomato and lettuce
      Gluten Free Burger
    • dairy free strawberry pretzel salad on a plate with whipped cream on top
      Gluten Free Strawberry Pretzel Salad
    • paleo potato salad on a plate with green onion on top
      Gluten Free Potato Salad Recipe

    Are you interested in a list of my go to healthy alternatives?

    Download your FREE guide below

    Download your free guide.
    grilled pork belly 1 2 scaled

    Pork Belly On The Grill

    Course Appetizer, Snack
    Cuisine American
    Diet Gluten Free
    Prep Time 5 minutes minutes
    Cook Time 40 minutes minutes
    Total Time 45 minutes minutes
    Servings 3 servings
    Author Allianna Moximchalk
    906kcal
    Cost $6
    Print Recipe Pin Recipe

    Equipment

    • Grill

    Ingredients

    • 1 pound pork belly
    • 2 tbsp avocado oil
    • 2 tbsp Paprika
    • 1 tbsp garlic powder
    • 1 tsp onion powder
    • 1/4 tsp sea salt

    Instructions

    • Preheat the grill to 350. Add the cubed pork belly, oil and spices to a boil to marinate the pork. Next, lay down a large piece of foil on the grill and arrange the pork in a single layer. Do not open the grill for 20 minutes. Open the grill once the 20 minutes is up, and flip the pork and cook for an additional 20 minutes or until the pork reaches an internal temp of 160 degrees F. Remove from the grill and serve.
    • If you enjoyed this recipe it would mean the world to me if you rated it and left a comment below. It helps others find it on google.

    Notes

    Storage: This recipe can be stored in an air tight glass container for up to 5 days in the refrigerator.
    Nutrition: The nutrition for this recipe is an estimate and the calorie count is not guaranteed.  
    Servings: This recipe should yield 3 servings. 
    This easy pork belly recipe goes great with just about anything! We love to make it to go on top of tacos and salads.
    Serving: 1serving | Calories: 906kcal | Carbohydrates: 10g | Protein: 15g | Fat: 90g | Saturated Fat: 30g | Polyunsaturated Fat: 10g | Monounsaturated Fat: 44g | Cholesterol: 109mg | Sodium: 261mg | Potassium: 331mg | Fiber: 1g | Sugar: 6g | Vitamin A: 209IU | Vitamin C: 9mg | Calcium: 13mg | Iron: 1mg
    Tried this recipe?Tag me on instagram @alliannaskitchen!
    whole30 salmon cakes 3 scaled

    May 13, 2024 Appetizers

    Gluten Free Salmon Cakes

    These Gluten Free Salmon Cakes are a staple in our home. We use this recipe for nearly every hosting occasion. Our guests always love them! The buffalo sauce and the old bay seasoning pairs add a nice kick while the celery and red onions add a nice crunch. We like to top this recipe off with the creamy dill aioli You can use this easy recipe as a fun appetizer or even a meal. This fun dish can be ready in less than 30 minutes! 

    Salmon cakes on a bed of greens with aioli sauce on top.

    While this recipe is a staple in my home, it is also a staple for my meal prep company. We deliver all over and within Western PA. You can get more details from my meal prep company on my website. If you do do not like salmon, you can also make this recipe with crab to make Gluten Free Crab Cakes.

    [feast_advanced_jump_to]

    Why I Love This Recipe

    • This is such a fun and easy appetizer to make at home! No one even knows it is gluten free. When I am hosting an event I love making this recipe along with a ton of my other favorite appetizers like my Dairy Free Crab Dip, Dairy Free Buffalo Chicken Dip, Beetroot Dip, Air Fryer Potato Skins, Gluten Free Crab Cakes, Gluten Free Pigs in A Blanket, and Keto Chicken Tenders. 
    • This is one tasty recipe yet so simple to make! 
    • You can make this salmon recipe with either canned salmon or fresh salmon. 
    • This recipe can be made into a fun appetizer or an easy weeknight dinner. 
    • You can make this recipe ahead of time and freeze or even freeze any leftover salmon cakes. 
    • You can swap the salmon in this recipe to make homemade tuna patties. 
    • I love to serve this recipe with lemon wedges and dill aioli. 
    • This recipe only requires simple wholesome ingredients.

    Simple Ingredients Required

    Gluten free salmon cake ingredients in small glass bowls.
    • Cooked salmon–You can for sure use canned or fresh that is cooked.If you are using canned be sure to use a brand where they keep the salmon in olive oil or water. I like the salmon that is in water. I like to use Butcher Box. Every month they send me a monthly supply of all of my meats and seafood that are all sustainably sourced. They ship them frozen and I thaw out whatever I need the night before making what I need to make. If you use my link, you can get freeze bacon for life! If you are using canned salmon, I love the Wild Planet brand. If you need help knowing how to cook your salmon, check out my Air Fryer Salmon recipe. 
    • Almond flour-This helps hold all of the ingredients together. Please keep in mind almond flour and almond meal are different. This recipe calls for almond flour. I use the almond flour in-this recipe as an alternative to gluten-free breadcrumbs. 
    • Chopped celery-This gives these salmon cakes a nice crunch.
    • Purple onions-Add to the flavor and add a nice crunch, if you are not an onion person skip the onions and double the celery for the crunch. 
    • Buffalo sauce- Adds a nice kick! This is a must for the best flavor. 
    • Old bay seasoning-A key ingredient in this recipe.
    • Garlic powder-Garlic always enhances the flavor!
    • Avocado mayo–This adds a layer of creaminess! 
    • Eggs-To bind everything together. 

    See recipe card below for a full list of ingredients and measurements.

    Recipe Substitutions and Variations

    • Salmon-While wild caught atlantic salmon and sockeye salmon is my favorite farm-raised salmon will also do the trick. You can also use this recipe to make crab cakes.  
    • Almond flour-This is my go to flour for this recipe. By using almond flour this recipe is low carb. You can use cassava flour if you would like this recipe to be nut free. I do not suggest using other gluten free flours like coconut flour as it has a different consistency. 

    This recipe has not been tested with any other substitutions or variations. If you replace or add any ingredients, please let us know how it turned out in the comments below!

    Step by Step Instructions

    Salmon cake ingredients all in a large glass bowl.

    Photo #1: Preheat the oven to 350 degrees F. Now add all ingredients to a large glass bowl.

    Salmon mixture mixed together in a large bowl.

    Photo #2: Mix the salmon mixture all throughout. Now using a large cookie scoop, scoop up the salmon into the cakes. Bake in the oven on a cookie sheet for 20 minutes.

    Recipe Tips

    • Tip #1: Make sure your salmon is shredded into small pieces.
    • Tip #2: If you decide to cook the salmon cakes on the stove top, be sure you do not burn them. I like cooking on medium heat.

    Recipe FAQs

    What serves well with salmon cakes?

    I love serving this recipe with my Dill Aioli, tartar sauce, sour cream or even dijon mustard. I like squeezing fresh lemon juice on top! You can eat these salmon cakes over a bed if greens, by themselves or even with a gluten free bun to eat as a salmon burger. 

    How long does the recipe last?

    I suggest keeping this recipe in an airtight container in the fridge for up to 4 days. 

    Can I cook these gluten-free salmon patties on the stovetop?

    Yes you can. Cooking them on the stovetop is more time consuming but it will work. I would use a large skillet and add a little but of coconut oil to the skillet. I would pan sear on both sides then cook until warm throughout. Keep in mind the salmon is already cooked so it does not need to cook for long. 

    Can you freeze salmon cakes?

    Yes! You can freeze them in the freezer for up to 1 month.

    Salmon cakes laid out on a sheet pan.

    Other Gluten Free Salmon Recipes You Will Love

    • Air fried salmon filets on a white platter with freshly cracked pepper on top and a fork on the side.
      Easy Frozen Salmon In Air Fryer
    • salmon bites on a plate
      Air Fryer Salmon Bites
    • salmon with pesto on top
      Pesto Salmon
    • close up picture of maple crusted salmon with thyme on top
      Maple Crusted Salmon

    Are you interested in a list of my go to healthy alternatives?

    Download your FREE guide below.

    Download the guide.
    whole30 salmon cakes 3 scaled

    Gluten Free Salmon Cakes

    Course Appetizer, Meals
    Cuisine American
    Prep Time 10 minutes minutes
    Cook Time 20 minutes minutes
    Total Time 30 minutes minutes
    Servings 12 salmon cakes
    Author Allianna Moximchalk
    345kcal
    Cost $7
    Print Recipe Pin Recipe

    Equipment

    • baking sheet

    Ingredients

    For the salmon cakes:

    • 2 whole eggs
    • 1/2 cup avocado mayo
    • 1/4 cup new bae seasoning or old bay seasoning
    • 1/2 red onion chopped small
    • 6 cloves garlic minced
    • 1/2 cup celery chopped small
    • 2 cups almond flour
    • 1 pound cooked salmon You can use canned or fresh. If it is canned be sure to drain all of the water and buy the oil free kind.
    • 1/4 cup buffalo sauce
    • avocado oil spray if you do not have the spray, you can use the oil

    For the dill aioli:

    • 1 cup avocado mayo
    • 1 tbsp dried dill
    • 1 tsp dijon mustard
    • 1 whole lemon juiced

    Instructions

    For the salmon cakes:

    • Preheat the oven to 350. Mix all ingredients (except the spray) together in a bowl. Spray the bottom of a non-stick baking sheet with the avocado oil. Using a large cookie scooper, scoop the salmon cakes and release on to the baking sheet. Do this until you are out of the mix. Bake the salmon cakes for 20 minutes. Let the salmon cakes sit for 10 minutes prior to serving.

    For the aioli:

    • Mix all ingredients together in a bowl until mixed throughout.
    • If you enjoyed this recipe it would mean the world to me if you rated it and left a comment below. It helps others find it on google.

    Notes

    Storage: This recipe can be stored in an airtight container for up to 4 days. 
    Nutrition: The nutrition for this recipe is an estimate and the calorie count is not guaranteed. 
    Servings: This recipe should yield 12 salmon cakes.  
    Quick and easy recipe that everyone will love. This recipe is great for appetizers too!
    Serving: 1salmon cake with sauce | Calories: 345kcal | Carbohydrates: 7g | Protein: 12g | Fat: 30g | Saturated Fat: 3g | Polyunsaturated Fat: 1g | Monounsaturated Fat: 1g | Cholesterol: 21mg | Sodium: 186mg | Potassium: 218mg | Fiber: 2g | Sugar: 1g | Vitamin A: 50IU | Vitamin C: 1mg | Calcium: 54mg | Iron: 1mg
    Tried this recipe?Tag me on instagram @alliannaskitchen!
    • « Go to Previous Page
    • Page 1
    • Page 2
    • Page 3
    • Page 4
    • Page 5
    • Page 6
    • Interim pages omitted …
    • Page 38
    • Go to Next Page »

    Primary Sidebar

    Allianna Headshots

    Hi, I'm Allianna! Allianna's Kitchen started by accident after battling an undiagnosed autoimmune disease for nearly my whole life.

    More about me →

    GLUTEN FREE DINNER RECIPES

    • steak date night dinner 1
      Steak Date Night Dinner with Garlic Aioli
    • gluten free fried shrimp 3 scaled
      Gluten Free Fried Shrimp
    • cooked frozen pork chops with chives on top on a white plate with a gold fork
      Easy Frozen Pork Chops In The Air Fryer
    • halibut fish tacos on a pale blue plate
      Halibut Fish Tacos

    EASY WHOLE30 RECIPES

    • Beetroot dip on a plate with crackers and fresh parsley on top.
      Simple Beetroot Dip Recipe
    • close up photo of ginger apple pork in a bowl
      Apple Ginger Pulled Pork
    • dairy free lobster bisque in a bowl with a gold spoon and garnished with lemon, fresh green herbs, and red pepper flakes.
      Dairy Free Lobster Bisque
    • juicy filet mignon on a plate
      Air Fryer Filet Mignon

    GLUTEN FREE APPETIZERS

    • peanut butter and jelly chicken wings on a plate with limes
      Peanut Butter And Jelly Wings
    • Stuffed mushrooms on a brown and white plate with fresh parsley on top.
      Gluten-Free Stuffed Mushrooms
    • Gluten free pigs in a blanket in a pile on a plate.
      Gluten Free Pigs In A Blanket
    • Pretty french onion dip in a silver bowl with potato chips and chives on top.
      Vegan French Onion Dip Recipe

    EASY MOCKTAIL RECIPES

    • honey simple syrup 2
      Honey Simple Syrup
    • orange lime cranberry mocktail 4
      Cranberry Mocktail Recipe
    • Clear glass with a brown drink and a cinnamon stick in it.
      Pear Cocktail Recipe
    • Grapefruit mocktail in a glass with jalapeño slice and grapefruit slice.
      Easy Grapefruit Mocktail Recipe

    Footer

    • Recipes
    • My Courses
    • Meal Prep Services
    • Accessibility Policy
    • Contact
    • About Me
    • Blog
    • Privacy Policy
    • Pinterest
    • Instagram
    • Facebook
    • Twitter

    Allianna’s Kitchen 2025 - All Rights Reserved

    Rate This Recipe

    Your vote:


    A rating is required
    A name is required
    An email is required