• Skip to primary navigation
  • Skip to main content
  • Skip to primary sidebar
  • Spring Recipes
  • Recipes
  • Order Meal Prep
  • Healthy Gut Baby Food Course
  • About

Allianna's Kitchen

menu icon
go to homepage
  • Spring Recipes
  • Recipes
  • Order Meal Prep
  • Healthy Gut Baby Food Course
  • About
    • Facebook
    • Instagram
    • Pinterest
    • Twitter
  • search icon
    Homepage link
    • Spring Recipes
    • Recipes
    • Order Meal Prep
    • Healthy Gut Baby Food Course
    • About
    • Facebook
    • Instagram
    • Pinterest
    • Twitter
  • ×
    Allianna's Kitchen » Recipes

    Blog

    close up shot of a gluten free cupcake with vanilla frosting on top

    September 22, 2019 Dairy free

    Gluten Free Cannoli Cupcakes

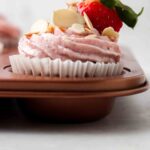
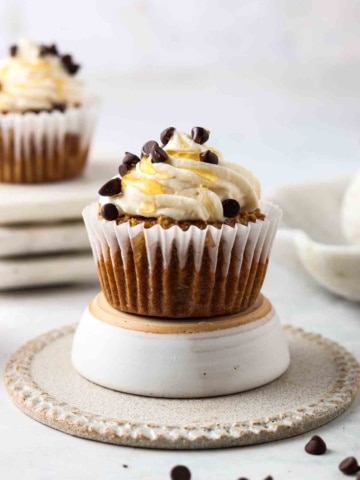
    These Gluten Free Cannoli Cupcakes are super easy and fun to make! The almond flour based cupcakes paired with the smooth and silky dairy free vanilla frosting is delightful. You can have these cupcakes on the table within 45 minutes. 

    close up shot of a gluten free cupcake with vanilla frosting on top

    Cannoli’s are super popular around the holidays, especially Christmas in an Italian home. Growing up in an Italian household these were always a staple. Once I went gluten free I was dying to find a fun alternative that I could safely eat, so I came up with this recipe!

    What Makes This Recipe So Good?

    • First off, the moist almond flour cupcake combined with the silky vanilla frosting is so delightful. The chocolate chips on top is definitely the icing on the cake!
    • This recipe is naturally dairy free, gluten free, grain free and paleo friendly. 
    • These cupcakes only take 45 minutes to make and require 15 minutes of hands on time which means they are super easy to make!
    • You can prepare these cupcakes in advance and they taste just as good. 
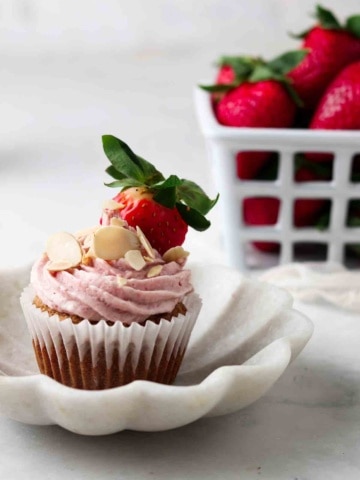
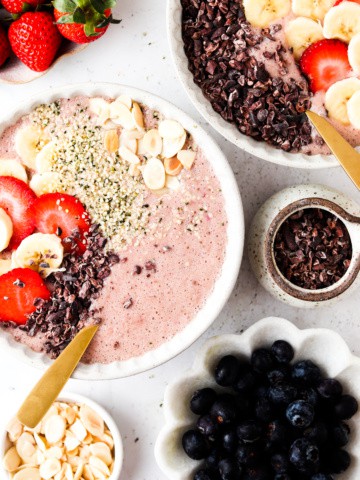
    • If you are a cupcake lover like me, you will also love my Paleo Strawberry Frosted Cupcakes.
    • I love making these cupcakes during the holiday season. They are such a fun twist on traditional cannoli yet they are gluten and grain free. 
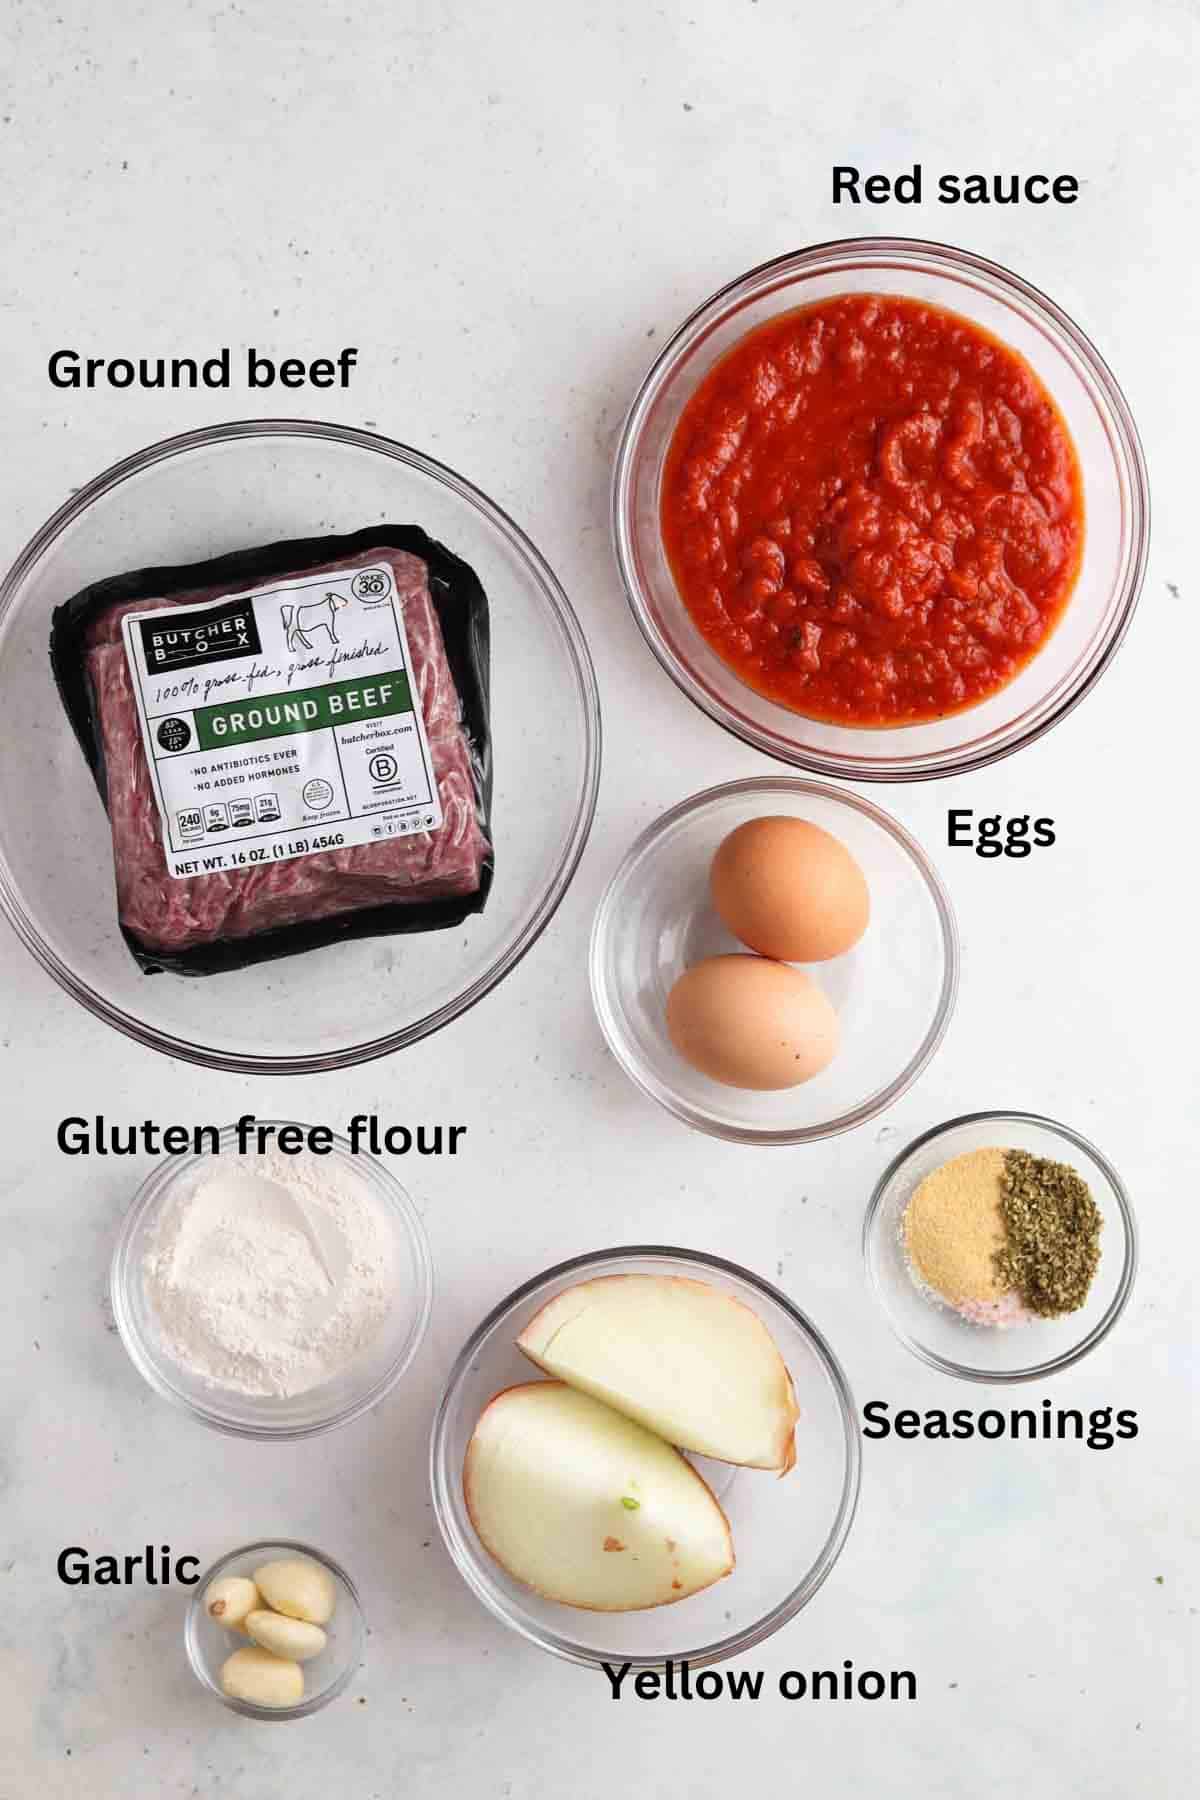
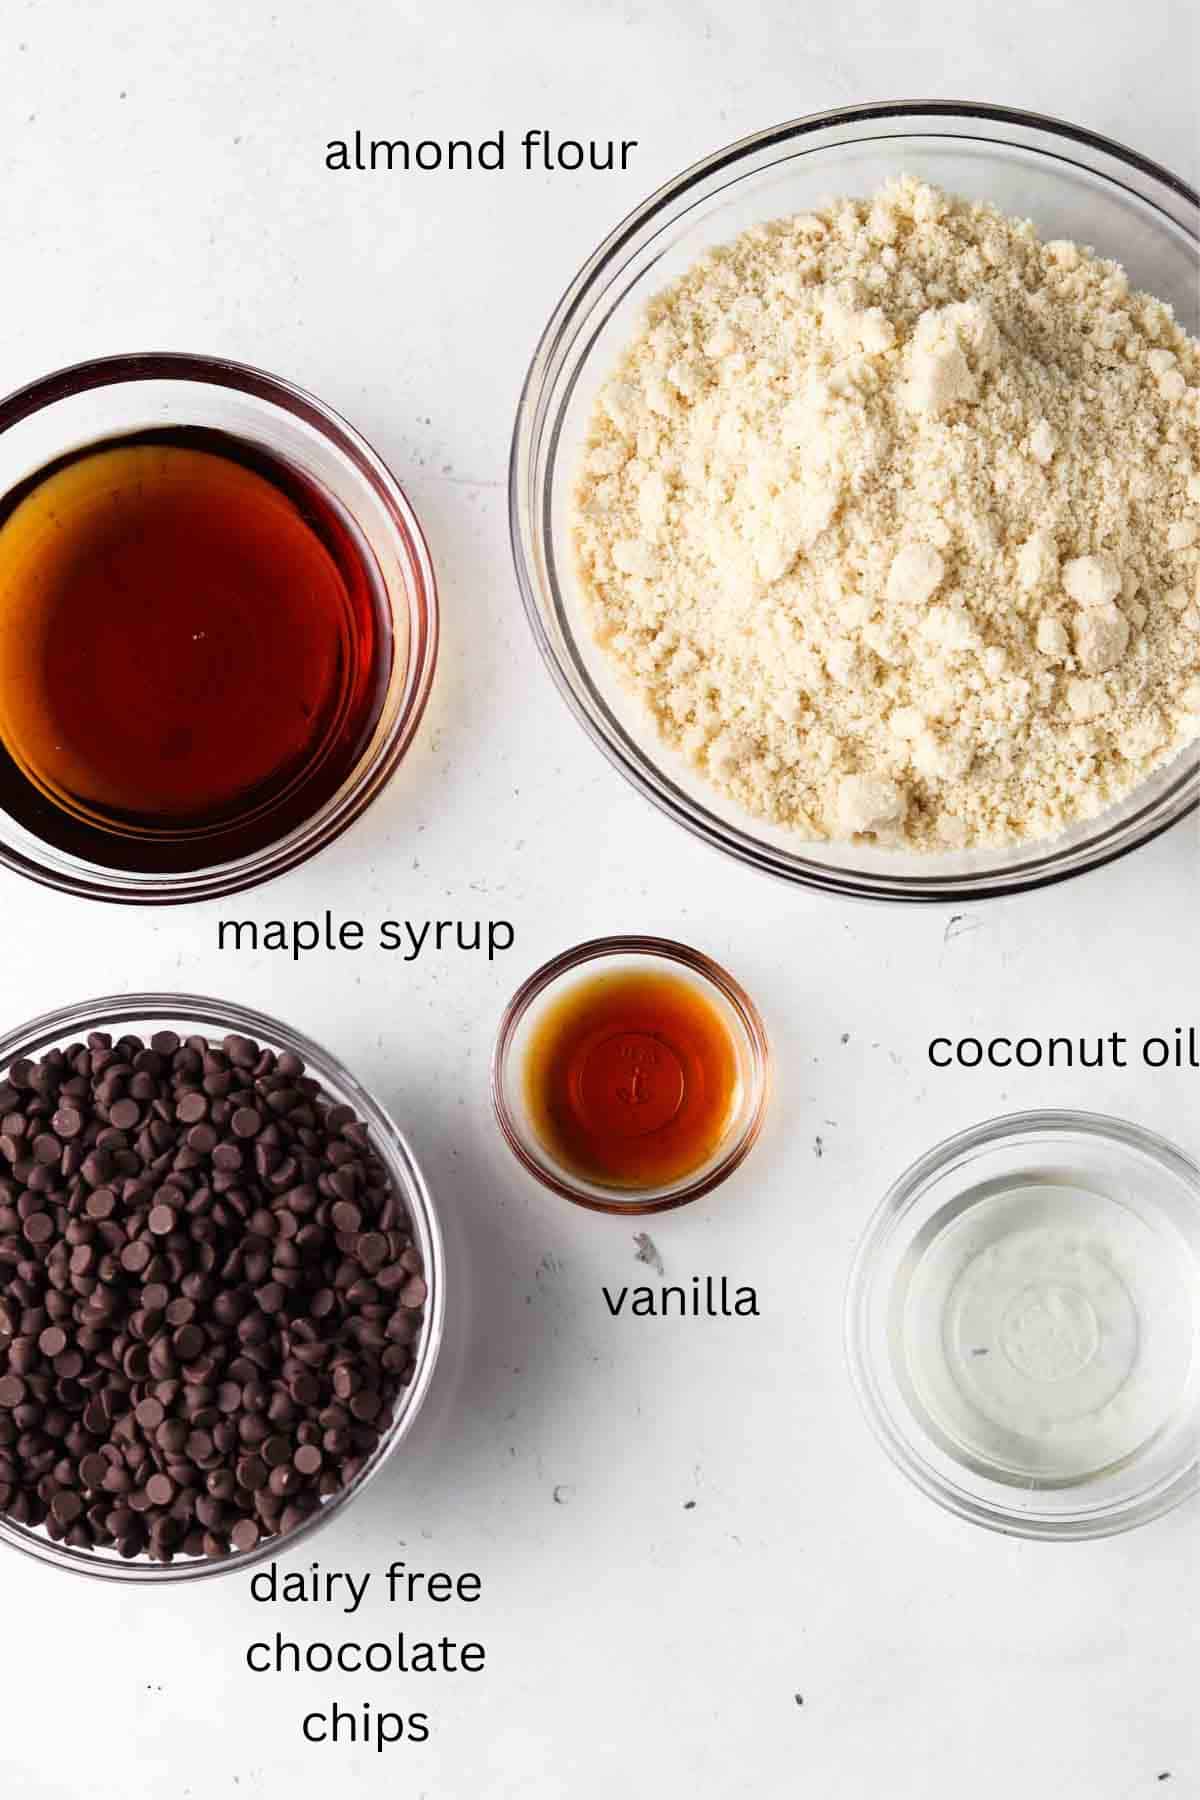
    cupcake ingredients laid out in bowls

    Ingredients: 

    For the gluten free cupcake-

    • Almond flour-This is the base of these cupcakes. Please note that not all gluten free flours are equal so it is important that you stick to almond flour in this recipe. I love getting my fine almond flour from Costco. I have found that you can get the best bang for your buck there. 
    • Tapioca flour-This helps bind everything together. 
    • Coconut flour-I like using a blend of flours when I bake because I find it makes the most stable cake. It also adds a tad of sweetness to baked goods. 
    • Coconut sugar-To sweeten these cupcakes. 
    • Baking soda-To help the cupcakes rise. 
    • Sea salt-To taste.

    dairy free frosting ingredients laid out in bowls

    For the dairy free frosting-

    • Palm oil shortening-This is the base of the frosting. Palm shortening is palm oil with some of the fat removed. When you remove the fat it thickens the mixture, and smooth which makes it perfect for frosting. 
    • Coconut flour-To help thicken the frosting. Without the coconut flour the frosting would be far too thin. 
    • Honey-To sweeten the frosting. You can also use maple syrup but note that it may change the color. I suggest using a lighter colored honey. 
    • Vanilla-To add some flavor.

    To serve:

    • Chocolate chips-I love the dairy free chocolate chips from Enjoy Life!

    Step By Step How To Make:

    • First preheat the oven to 350. 
    • Line a cupcake pan with muffin liners. 
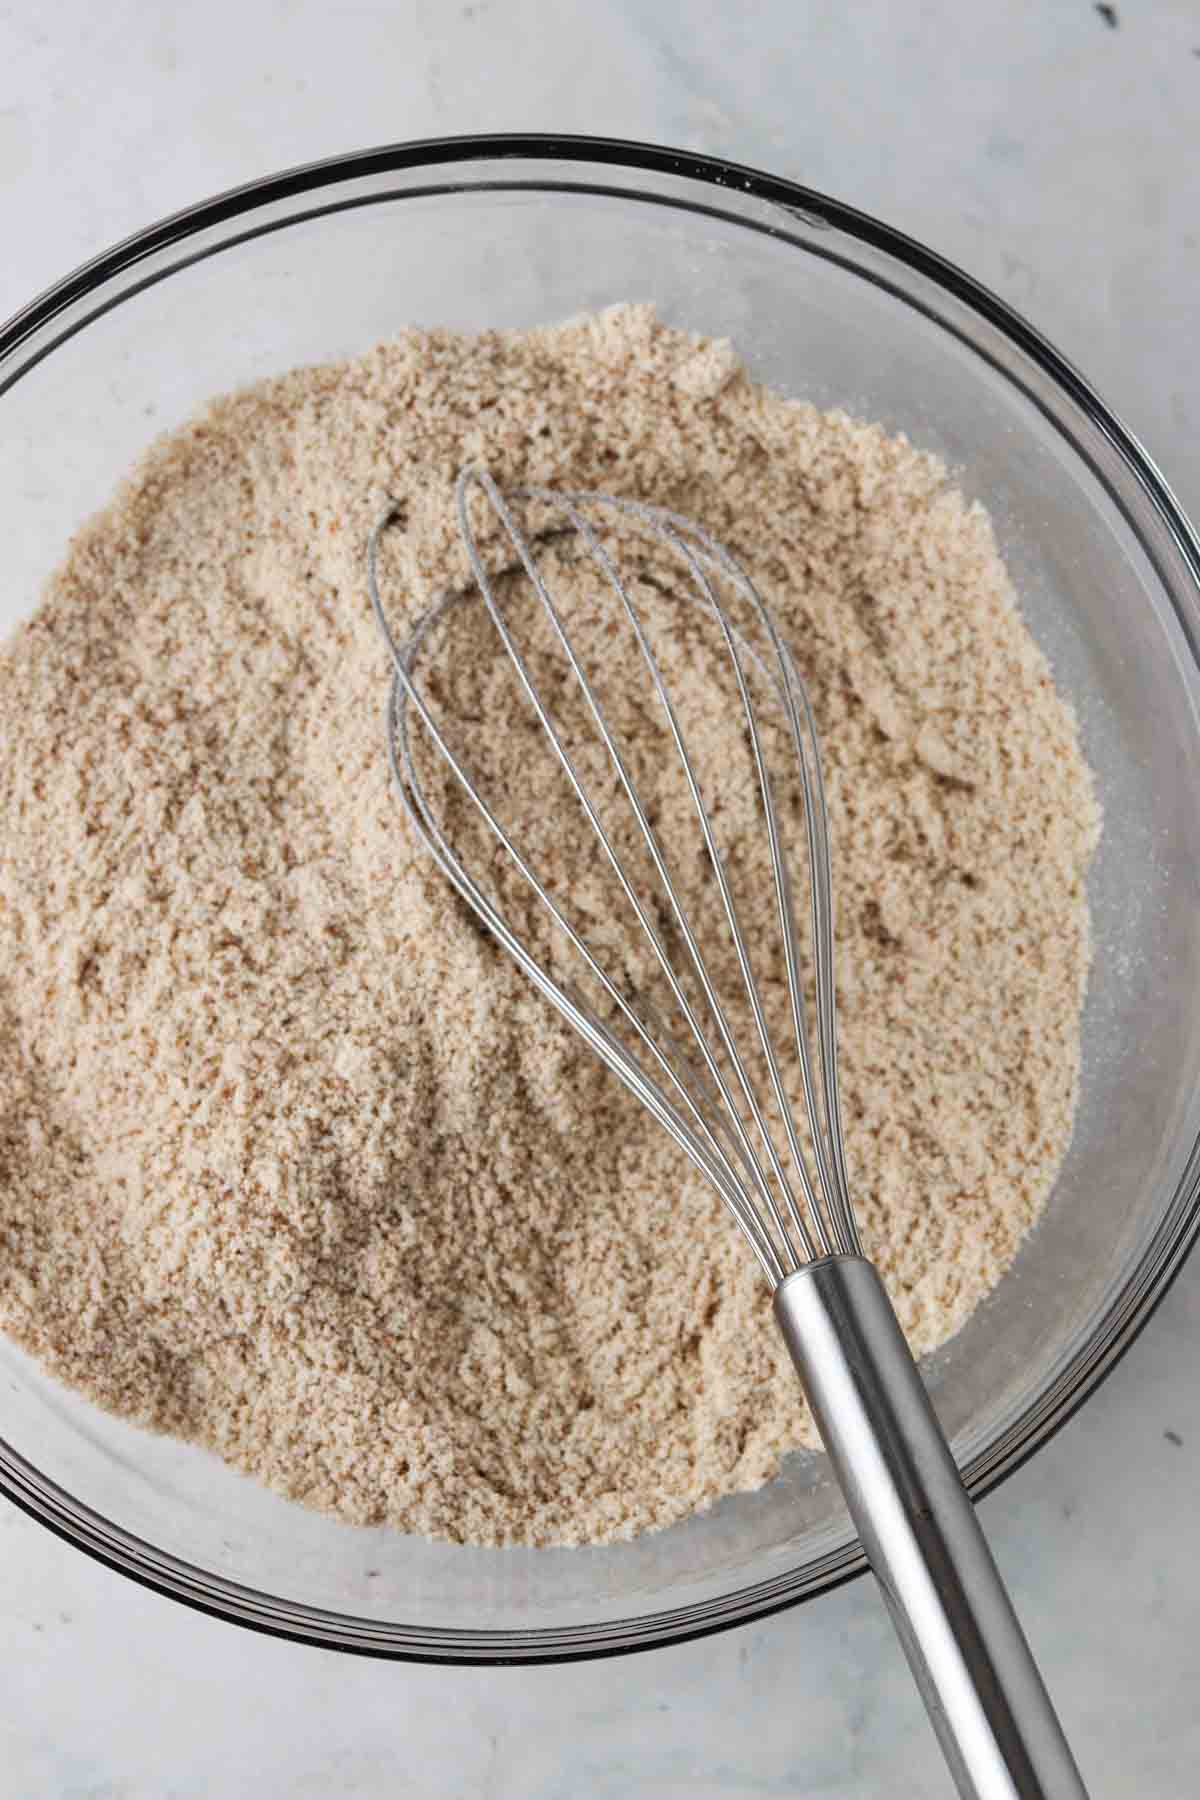
    • Now, mix all the dry ingredients in a bowl. 

    dry ingredients in a bowl

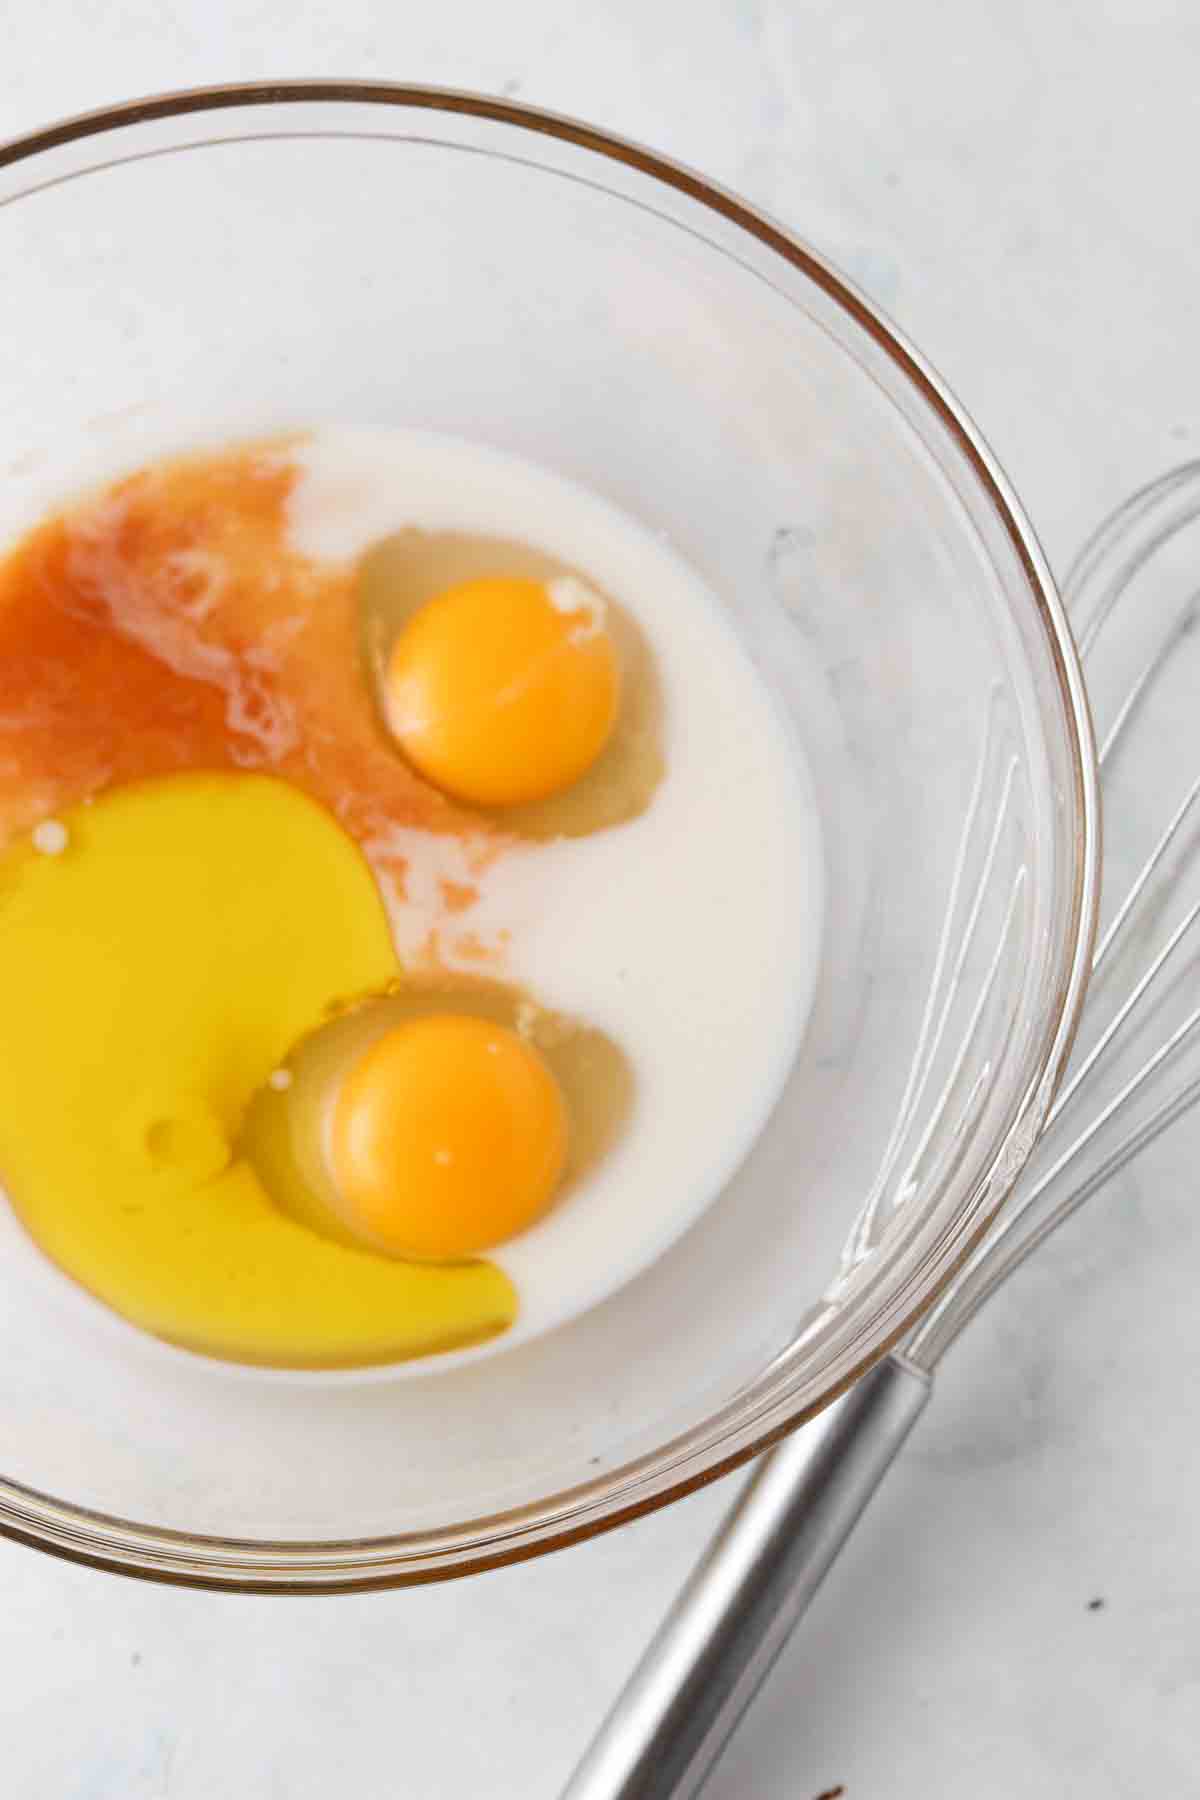
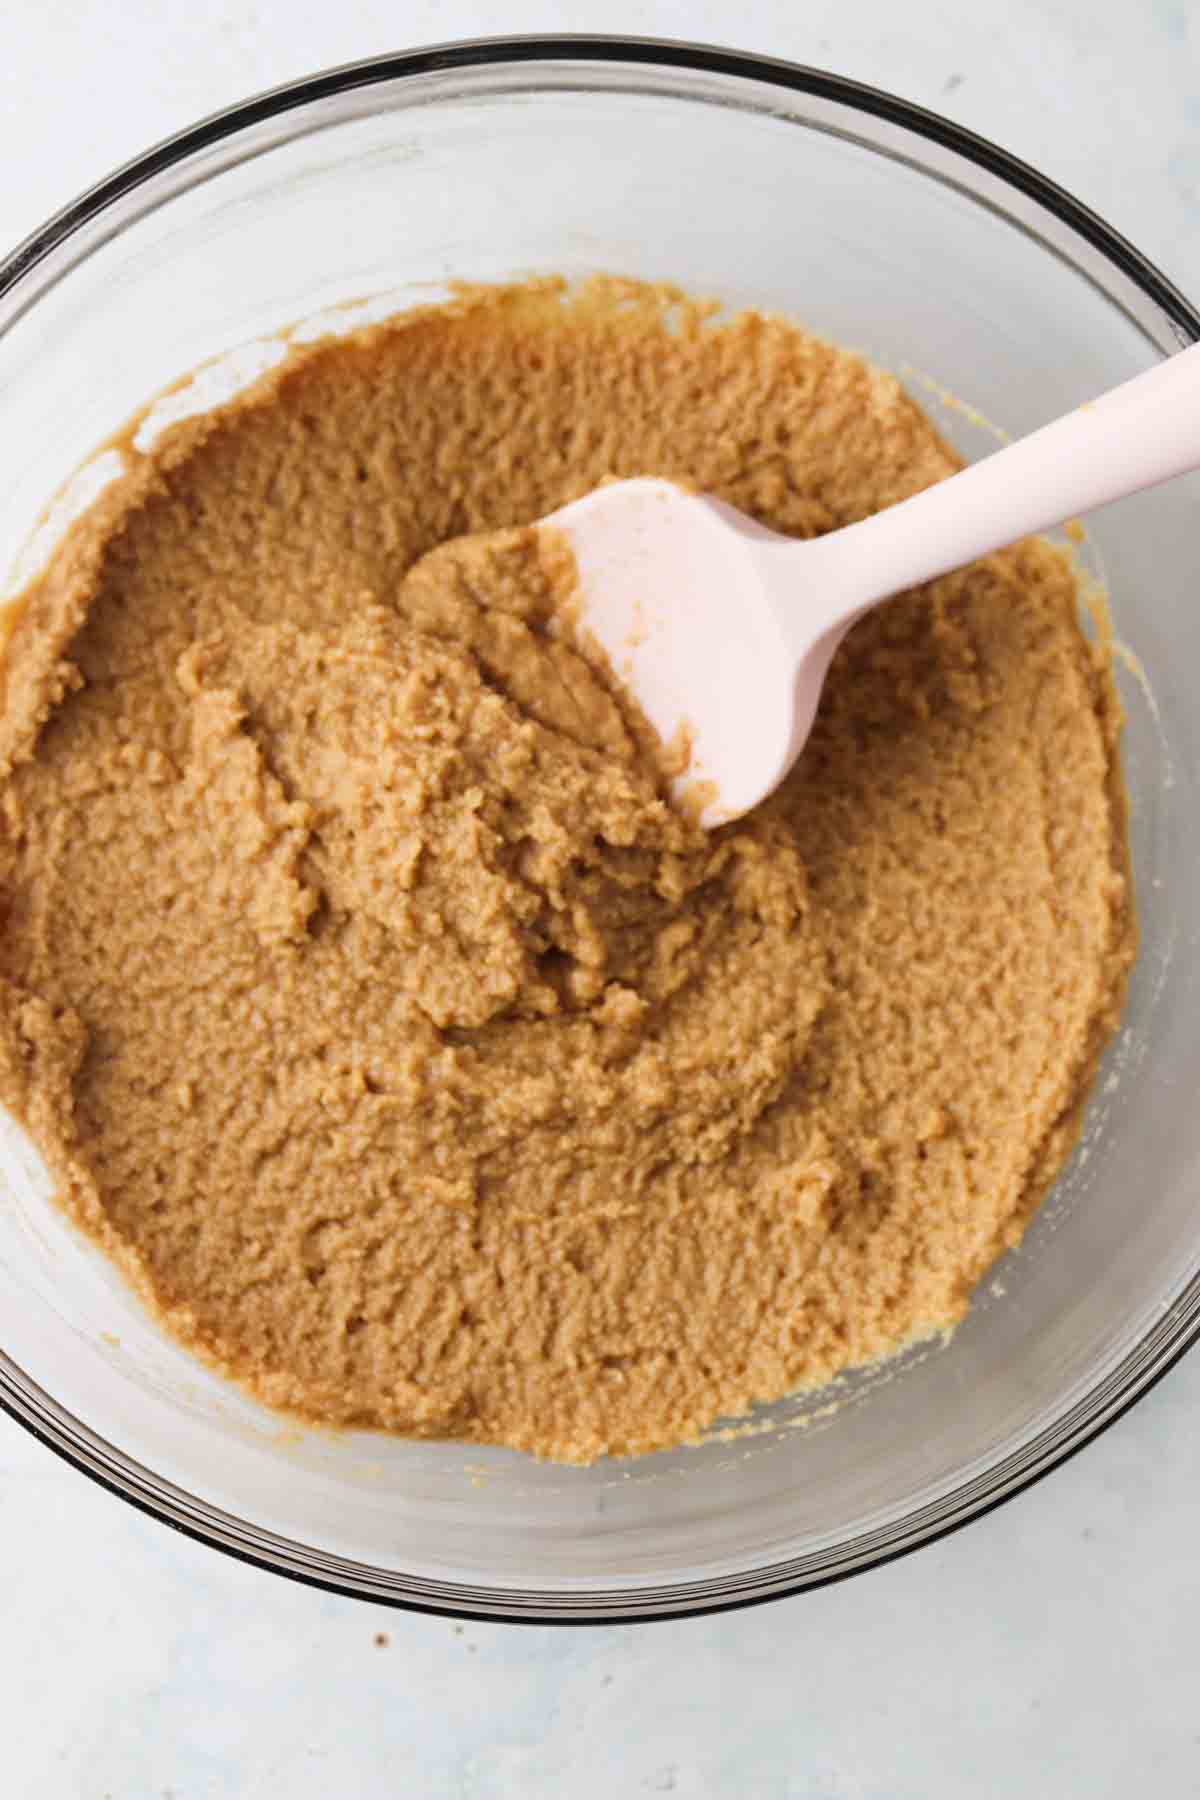
    • Then mix all of the wet ingredients in a separate bowl, now mix the two until smooth. 

    wet ingredients in abowl

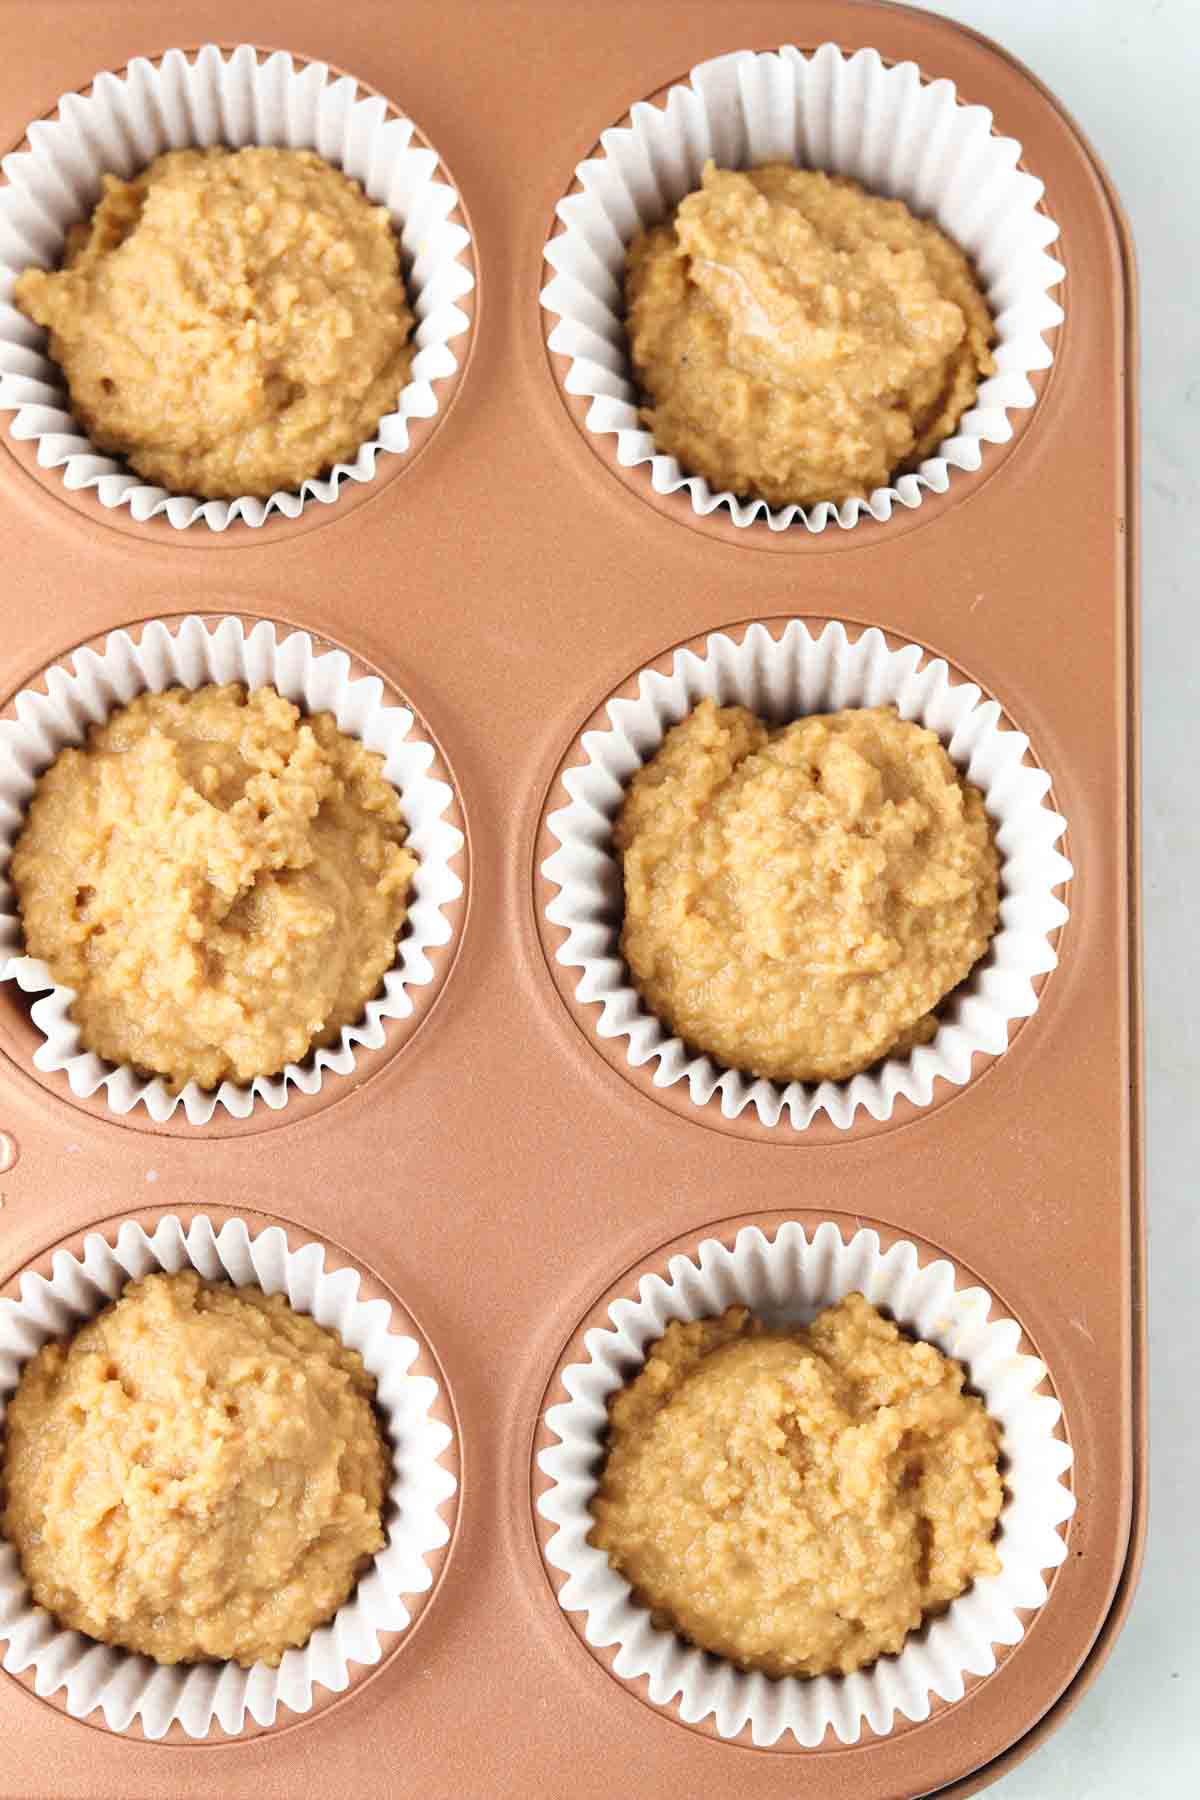
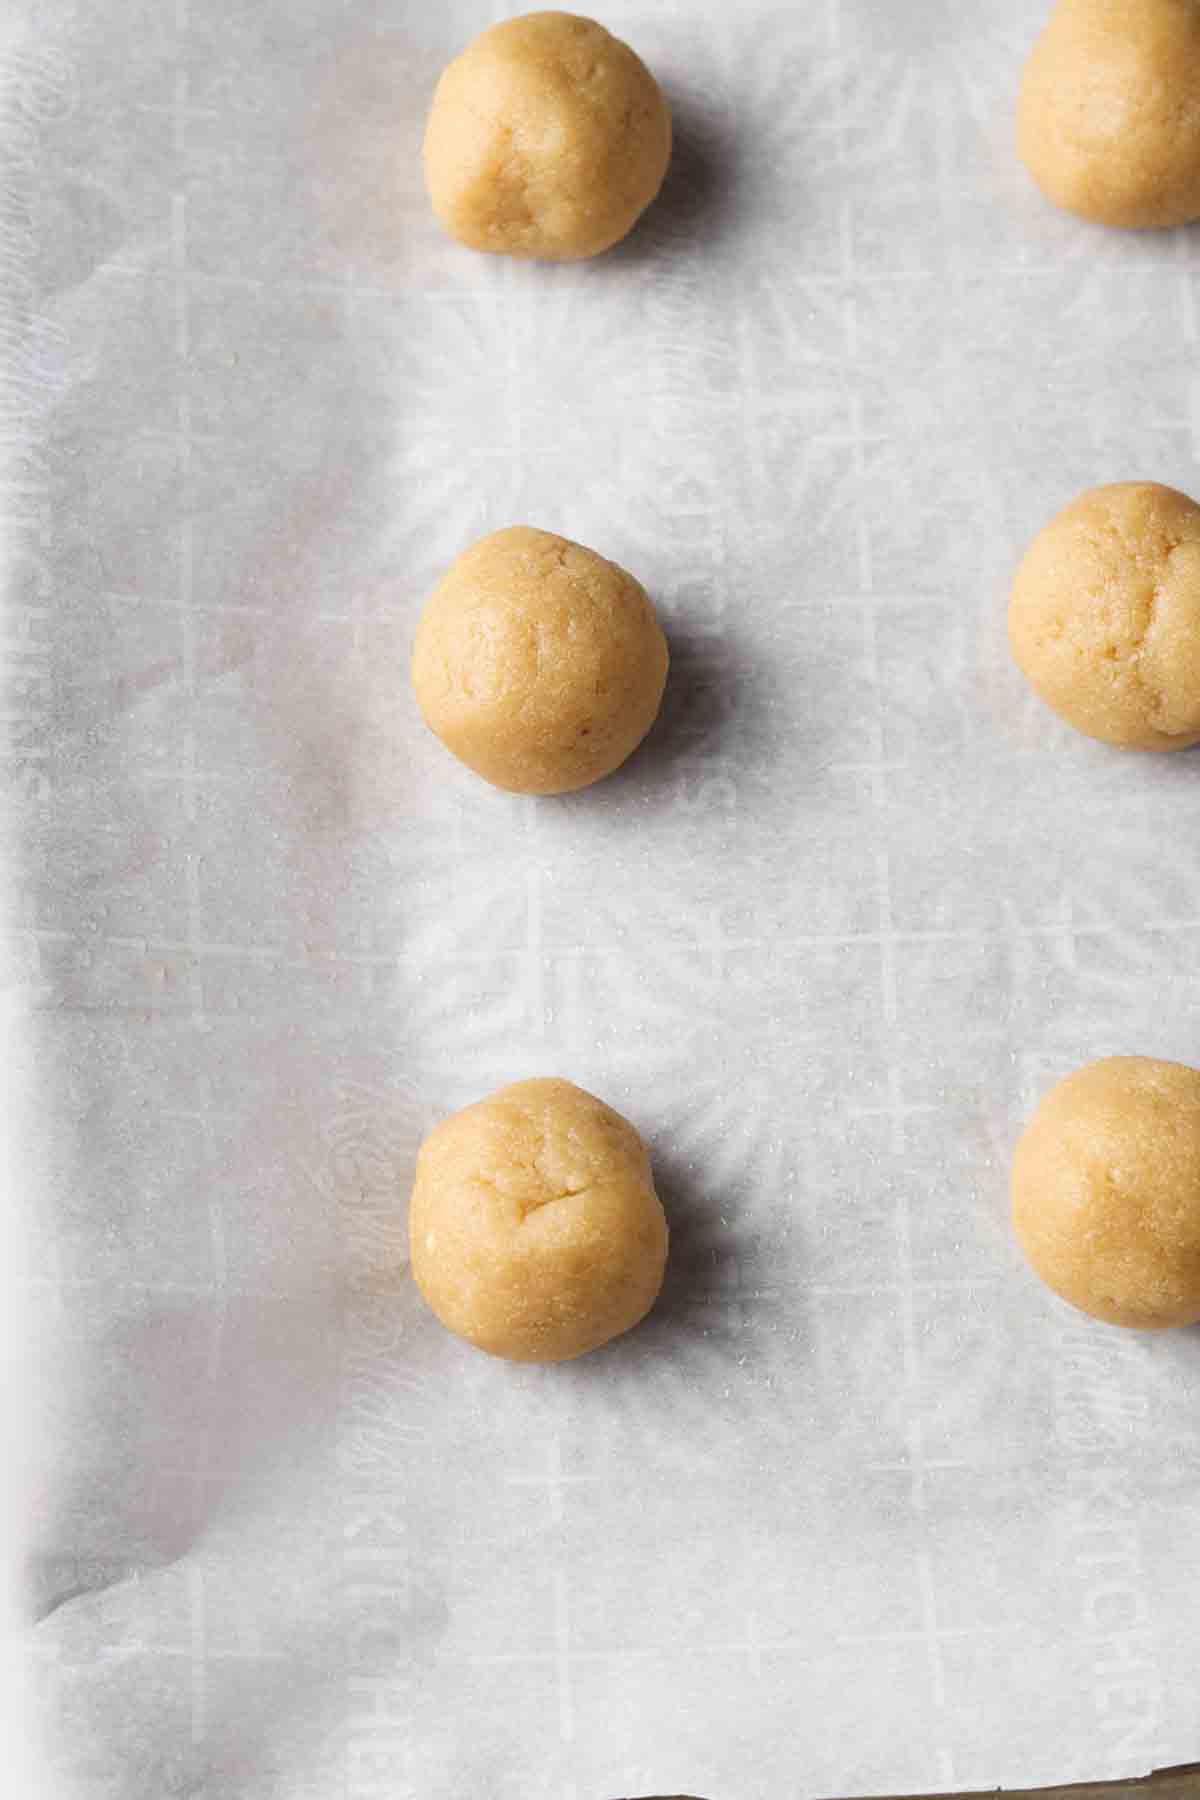
    • Divide up the muffin batter into the 12 cupcake liners and bake for 15 minutes. 

    raw cupcake batter in muffin pans

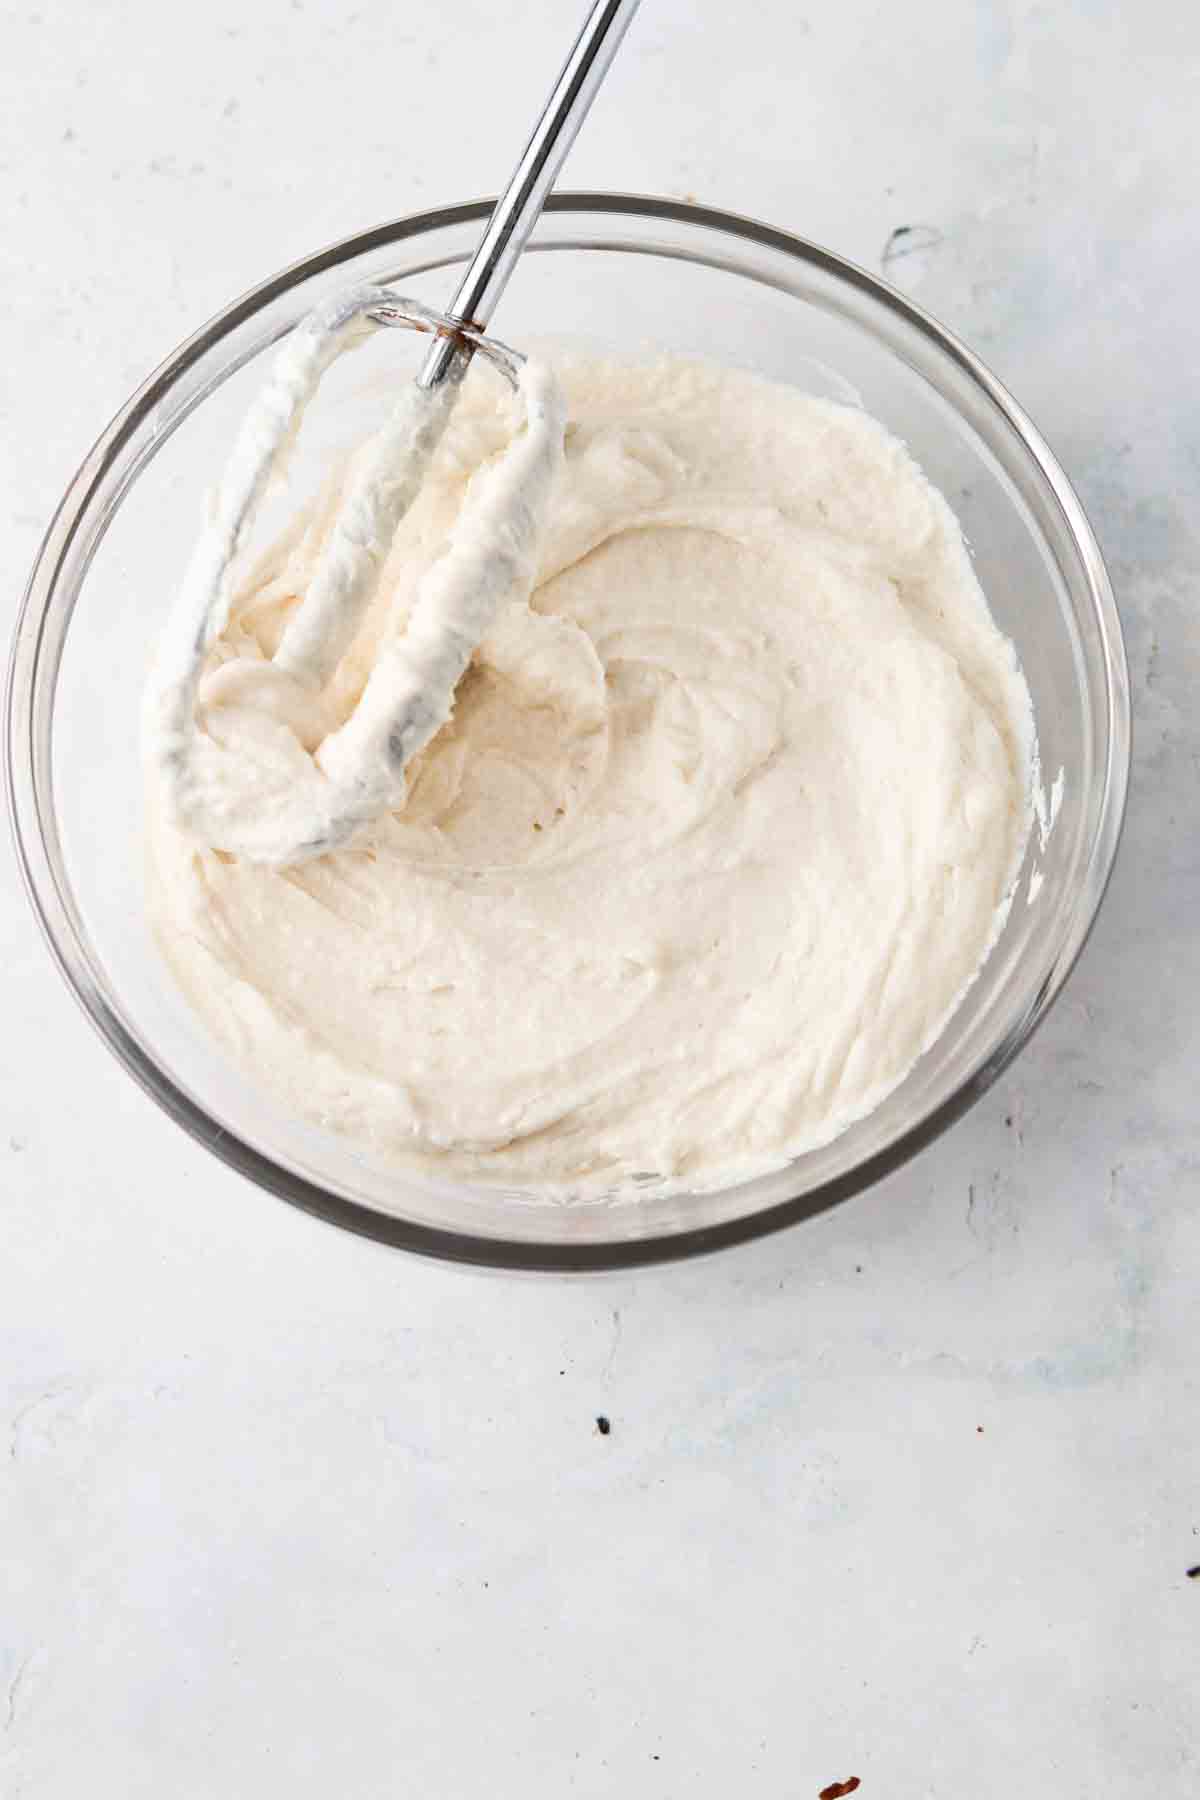
    • While the cupcakes are baking, add all of the frosting ingredients to a bowl and mix with a food processor until smooth. Roughly 30 seconds. 

    whipped dairy free vanilla frosting

    • Once the cupcakes come out of the oven, allow them to cook for 15 minutes. 
    • Once the cupcakes are cooled, frost the cupcakes and sprinkle chocolate chips on top.

    How Long Do These Cupcakes Last?

    • These cupcakes last for up to a week in the fridge. 

    Chef’s Tips:

    • Do not frost your cupcakes until they are cooled, if you frost them while they are warm the frosting will melt off. 
    • Make sure you keep them stored wrapped in the fridge to prevent them from spoiling. I like using a large glass container to store my cupcakes in. 

    3 paleo cupcakes laid out with chocolate chips on top

    If you like this recipe, you will LOVE my other gluten free desserts:

    • Paleo Mint Cookie Bars
    • Chocolate Covered Oranges 
    • Mini Gluten Free Chocolate Cakes
    • Vegan Reece’s

    If you enjoyed this recipe it would mean the world to me if you rated it and left a comment below. It helps others find it on google.xoxo-Allianna

    close up shot of a gluten free cupcake with vanilla frosting on top

    Gluten Free Cannoli Cupcakes

    Course Dessert
    Cuisine American
    Prep Time 20 minutes minutes
    Cook Time 16 minutes minutes
    Total Time 36 minutes minutes
    Servings 12 cupcakes
    Author Allianna Moximchalk
    308kcal
    Cost $5
    Print Recipe Pin Recipe

    Equipment

    • cupcake liners
    • cupcake pan
    • Hand mixer

    Ingredients

    For the frosting:

    • 1 cup palm oil shortening make sure it is room temp
    • 1 cup coconut oil make sure it is not hard
    • 1/3 cup tapioca flour or arrowroot. cornstarch is ok if you are not paleo
    • 1/3 cup honey make sure it is lighter honey or it could change the coloring
    • 1 tsp vanilla extract

    to serve:

    • chocolate chips I like the enjoy life kind because they are dairy free
    • honey to drizzle

    For the cupcakes:

    • 2 eggs
    • 1/2 cup coconut milk
    • 1/4 cup coconut oil
    • 1 tsp vanilla extract
    • 1/4 cup maple syrup
    • 1/4 cup coconut sugar
    • 2 cups almond flour
    • 1 tsp baking soda
    • 1/3 cup tapioca flour

    Instructions

    • Preheat the oven to 350. Mix all of the cake dry ingredients in a bowl, then mix all of the wet ones. Combine the wet and dry ingredients and mix until smooth. Divide up the batter between 12 cupcakes. Now bake for 14-16 minutes.
    • While the muffins are baking, put the frosting ingredients in a bowl and blend until smooth with a hand mixer. Put the frosting side.
    • When the cupcakes are done, allow them to cool for 15 minutes prior to frosting. Sprinkle with chocolate chips and a honey drizzle on top when ready to serve. If you enjoyed this recipe it would mean the world to me if you rated it and left a comment below. It helps others find it on google.xoxo-Allianna

    Notes

    If you enjoyed this recipe it would mean the world to me if you rated it and left a comment below. It helps others find it on google.xoxo-Allianna
    Be sure to wait to frost the cupcakes until they are cool. 
    Store in the fridge for up to 5 days. 
     
     
    Easy and fun gluten free cannoli cupcakes
    Serving: 1cupcake | Calories: 308kcal | Carbohydrates: 26g | Protein: 4g | Fat: 15g | Saturated Fat: 9g | Polyunsaturated Fat: 2g | Monounsaturated Fat: 8g | Sodium: 205mg | Potassium: 7mg | Fiber: 3g | Sugar: 13g | Vitamin C: 1mg | Calcium: 40mg | Iron: 1mg
    Tried this recipe?Tag me on instagram @alliannaskitchen!

    Gluten free meatballs on a white plate covered in red sauce and parsley.

    September 10, 2019 Beef

    The Best Gluten Free Meatballs

    These Gluten Free Meatballs are so delicious and packed with the best blend of Italian seasoning. They only require 15 minutes of hands-on time too which means they make for a great weeknight dinner that both you and your kids will love! This recipe can be made in bulk too which means it is a great recipe to batch cook so you can enjoy this recipe even on the days where you do not have time to cook.

    Gluten free meatballs on a white plate covered in red sauce and parsley.

    These meatballs are so versatile and are good any time of year. I love to bulk make these and keep them in the freezer so they are available any day. I love to eat these with my AIP Nomato Sauce. If you enjoy this dish, you will also enjoy my Cranberry BBQ Meatballs as well.

    [feast_advanced_jump_to]

    Why I Love This Recipe

    • This recipe allows you to have dinner on the table in under 45 minutes. 
    • Kids will love this recipe!
    • Meatballs are great because they can be enjoyed by themselves, with noodles, or zucchini noodles for a low carb option. 
    • This recipe is naturally gluten free, grain free, dairy free, keto, low carb, autoimmune protocol, AIP, vegan, paleo, soy free, and refined sugar free. 
    • You have many different options for the protein in this recipe. While I love beef because they have a little more fat, you can choose a lower fat leaner protein like ground turkey or ground chicken.
    • If you are in Pittsburgh and want my recipes delivered     ready to eat and fresh right to your door, check out my paleo meal prep business. 

    Ingredients

    Gluten free meatball ingredients laid out in glass bowls.
    • Ground beef- This can be swapped for a different ground meat, but I love ground turkey meatballs. I get all of my meat and seafood items from Butcher Box. Their stuff is the best quality, and you can tell. Use my Butcher Box discount code link to get free meat!
    • White onion– This kind tastes so good in meatballs. They have a strong flavor that goes well with the Italian seasonings. I recommend putting the onion in the food processor to chop it up super finely.
    • Eggs– Bind all the ingredients together and keep the meatball’s shape. 
    • Gluten free flour- I like either cassava or almond flour. Almond flour is a great lower carb option and cassava flour is great if you are nut free.
    • Garlic– You can toss the garlic cloves in the food processor with the onion, or use a garlic press to get it chopped nice and fine. 
    • Dried parsley, oregano, and basil- The best blend of Italian seasoning. This takes your average meatball to a new level. These spices add so much flavor. 
    • Black pepper & sea salt- For extra flavor and seasoning.
    • Rao’s red sauce– My favorite kind of red sauce and the only brand I use. Most red sauces are made with sugar and this brand does not have any added sugars.

    See the recipe card below for a full list of ingredients and measurements.

    Substitutions And Variations

    • You can use any kind of ground protein here: ground chicken, turkey, pork or beef. Note that different proteins have different amounts of fat in them. The different fat content can make some meatballs with a leaner protein more dryer than others. This is just something to note if you use ground turkey or chicken.
    • If you cannot tolerate nightshades you can substitute the red sauce with my Nomato Sauce recipe. It is essentially red sauce without tomatoes!
    • If you are doing the autoimmune protocol you can omit the eggs and use my Homemade Gelatin Egg.

    This recipe has not been tested with any other substitutions or variations. If you try swapping something out please leave a comment below and let me know how it turned out.

    Step By Step Instructions

    Yellow onions cut into fourths in the food processor.
    Photo 1: Cut half of your yellow onion into 4ths and place in your food processor.
    Yellow onions diced into pieces in the food processor.
    Photo 2: Put the food processor on the chop setting and process until the onions are in fine pieces.
    All ingredients laid in a clear bowl.
    Photo 3: Place all ingredients in a bowl.
    Meatball ingredients mixed in a clear bowl.
    Photo 4: Mix all ingredients until smooth and mixed throughout.
    Raw ground beef meatballs on a baking tray with a cookie scooper.
    Photo 5: Scoop the meatballs with a 1.5 inch cookie scooper on to a baking sheet. Bake at 350 degrees F for 25 minutes.

    Equipment Needed

    • Baking sheet
    • 1.5 inch cookie dough ball scoop
    • Large mixing bowl

    Expert Tips

    • Tip # 1: The best way to tell if ground beef is done is by using a meat thermometer. Ground beef should always temp at 160 degrees F.
    • Tip # 2: If you are serving the meatballs with pasta I like to put the meatballs in the red sauce once they are done cooking and warm up the sauce with the meatballs in it on the stove. It adds so much flavor to the sauce.
    • Tip # 3: If you are using pre-made frozen meatballs, you can either allow them to thaw or increase your cooking time.

    Recipe FAQs

    What is the best kind of beef to buy?

    I only like grass fed beef. I can taste a difference. I get all of our beef from Butcher Box. If you use my Butcher Box link you can get free beef every month if your order.

    Do you buy lean beef?

    I personally do not. The fat gives this recipe flavor. I am not worried about the fat content. If you like a lower fat option you could also use ground turkey or ground chicken.

    What is the best way to tell if meat is cooked thoughout?

    I always temp my meat prior to taking it out of the oven. This is the best way to test if it done. Sometimes the looks of it can be deceiving. Ground beef should temp at 160 degrees F.

    Spaghetti and gluten free meatballs on a white plate with forks.

    Storage Instructions

    • Be sure to allow your meatballs to completely cool prior to storing.
    • I like storing my leftovers in glass containers.
    • These meatballs last in the fridge for up to 5 days and in the freezer for up to 1 month.

    Other Gluten Free Meatball Recipes

    • asian meatballs in a bowl with sesame seeds and green onions on top
      Turkey Asian Meatballs
    • buffalo chicken meatballs stacked on top of each other with whole30 ranch and parsley
      Buffalo Chicken Meatballs
    • close up photo of meatballs with pesto sauce over beet noodles
      Gluten Free Pesto Meatballs (Whole30, AIP Option)
    • whole30 swedish meatballs in a bowl with broccoli
      Easy Gluten Free Swedish Meatballs With Gravy
    Gluten free meatballs on a white plate covered in red sauce and parsley.

    Gluten Free Meatballs

    Course Dinner, Lunch, Main Course, Meals
    Cuisine Italian
    Diet Gluten Free
    Prep Time 15 minutes minutes
    Cook Time 20 minutes minutes
    Total Time 35 minutes minutes
    Servings 18 meatballs
    Author Allianna Moximchalk
    50kcal
    Cost $8
    Print Recipe Pin Recipe

    Equipment

    • baking sheet
    • mixing bowl

    Ingredients

    • 1 pound ground beef Ground turkey would work too but the meatballs would not be as juicy. Use my link for Butcher Box ground beef and save on your first box!
    • 1/2 cup white onion diced
    • 2 eggs Use a gelatin egg for AIP.
    • 1/3 cup gluten free flour Almond flour or cassava flour would work.
    • 4 cloves garlic minced
    • 3/4 tsp black pepper skip for AIP.
    • 1/4 tsp sea salt
    • 1 tbsp dried parsley
    • 1 1/4 tsp dried oregano
    • 1 1/4 tsp dried basil
    • 10 oz Rao's red sauce Use nomato sauce for AIP.

    Instructions

    • Preheat the oven to 350 degrees F.
    • Mince the garlic and add the add your peeled onion to the food processor. Blend until chopped-the onion may need mixed around.
    • In a large bowl, combine the chopped onion, garlic, ground beef, eggs, cassava flour, and all seasonings. Mix well.
    • Using a 1.5-inch scooper, scooper and roll the meatballs. Place on a parchment lined baking sheet.
    • Bake for 20-23 minutes, or until internal temperature of meatballs reaches 165 degrees F.
    • Serve with Rao's red sauce and optional fresh herbs.

    Notes

    Storage: The best way to store leftovers is in a glass container. Be sure the meatballs are completely cool prior to storing. If you store them in the red sauce it will keep them moist. 
    Nutrition: The provided nutritional info is an estimate not a guarantee and is based off of this recipe making 18 meatballs. 
    Servings: This recipe should make roughly 18 meatballs.  
    The best gluten free Italian meatballs.
    Serving: 1meabtall | Calories: 50kcal | Carbohydrates: 3g | Protein: 7g | Fat: 1g | Saturated Fat: 0.3g | Polyunsaturated Fat: 0.3g | Monounsaturated Fat: 0.3g | Trans Fat: 0.01g | Cholesterol: 32mg | Sodium: 56mg | Potassium: 114mg | Fiber: 0.4g | Sugar: 0.4g | Vitamin A: 47IU | Vitamin C: 2mg | Calcium: 20mg | Iron: 1mg
    Tried this recipe?Tag me on instagram @alliannaskitchen!


    freeze pops with peaches laid out on ice cubes

    September 10, 2019 Allergy Friendly

    Homemade Peach Freeze Pops

    These Homemade Peach Freeze Pops are super easy to make and perfect for peach season! The ripe banana combined with the fresh strawberries, coconut water, and peaches is oh so delicious. This recipe only takes 15 minutes to make and can last in the freezer for months.

    freeze pops with peaches laid out on ice cubes

    This recipe was inspired by my order from Georgia Peach Truck. Every summer their peach truck travels all over the United States delivering fresh peaches. Last summer I found myself with 50 pounds of peaches which was way too many for my husband to eat in a week. I did not want my juicy peaches to go bad, so we made them into homemade freeze pops and peach cobbler. When I do not get my peaches from the peach truck, the closest fresh peaches near me are at Sorgels.

    What Makes This Recipe So Good?

    • These freeze pops are full of so much flavor and so darn delicious! 
    • This recipe only takes 15 minutes to make!
    • Unlike store bought freeze pops, these freeze pops are free of any refined sugars. 
    • This recipe is naturally refined sugar free, dairy free, gluten free, vegan, AIP (autoimmune protocol) friendly. 
    • This refreshing summer treat can last in the freezer all summer long!
    • Kids love them!
    • If you are obsessed with peaches like me, you will want to check out my favorite peach recipes. 
    peach freeze pop ingredients laid out in bowls

    Ingredients: 

    • Peaches-Make sure they are ripe. Any kind of peaches will work for this recipe. I leave the skin on my peaches because I love the little chunks in my freeze pops. The skin also contains extra nutritions, so I always eat it!
    • Bananas-The riper the better. The riper the banana is, the sweeter it will be. This is what helps make these freeze pops sweet and creamy!
    • Strawberries-Stems removed. The strawberry, peach, and banana combination is my favorite. 
    • Coconut water-This adds some extra electrolytes and flavor to these pops! If you do not have coconut water, you can use regular water. Sometimes I even like to cut the liquid with half water and half bone broth to make them even more nutrient dense.
    bananans, coconut water, strawberries, and peaches in a blender

    How To Make:

    • This recipe is so easy!
    • First, wash, slice, and remove the pit from your peaches.  
    • Next, wash the strawberries and remove the stems. 
    • Now, peel the bananas and add all ingredients into the food processor. 
    • Blend for 30 seconds. Personally I like the small chunks of fruit in mine so I do not like to blend them too smoothly. 
    • Once you blend them, use a funnel and add them to the freeze pop bags.
    • Place in the freezer for at least 3 hours or until they freeze.
    peaches, strawberries, and bananas blended in a blender

    What Kind Of Freeze Pop Bags Should I Use?

    • I use these freeze pop bags. I like using them because they come with a small funnel to help the liquid get it without making a mess.  

    How To Tell If A Peach Is Ripe:

    • The best way to tell if a peach is ripe is by the touch of it and smell. 
    • If the peach is ripe, it will be softer. It will not be hard. 
    • For the smell, the peach will smell fruity when it is ripe. When it is not ripe, it will still be really hard. 

    How Long Do These Last?

    • These frozen treats last for months in the freezer!

    Chef’s Tips:

    • Make sure the fruit you are using is ripe! This will make a big difference in this recipe. If they are not ripe, they will not come out sweet. 
    • Do not over process your mixture in the food processor or it will become too thin and icy. The fruit chunks in this recipe is what makes these freeze pops so good!
    close up photo of freeze pops on ice

    If you like this recipe, you will LOVE:

    • peach cobbler in two bowls
      Vegan Peach Cobbler
    • straweberry peach smoothie 15 scaled
      Strawberry Peach Smoothie Without Yogurt
    • IMG 2349
      Peach Mocktail Recipe
    • banana peach smoothie 1 scaled
      Banana Peach Smoothie Without Yogurt

    Are you interested in a guide of my go to healthy alternatives?

    Download your FREE guide below

    download here
    freeze pops with peaches laid out on ice cubes

    Homemade Peach Freeze Pops

    Course Dessert, Snack
    Cuisine American
    Prep Time 15 minutes minutes
    freeze time 3 hours hours
    Total Time 3 hours hours 15 minutes minutes
    Servings 12 pops
    Author Allianna Moximchalk
    8kcal
    Cost $5
    Print Recipe Pin Recipe

    Equipment

    • high speed blender
    • freeze pop sleeves

    Ingredients

    • 6 ripe peaches pits removed, I like to keep the skin on
    • 2 ripe bananas the riper, the better!
    • 2 cups strawberries
    • 1 cup water or coconut water to add more sweetness!

    Instructions

    • Place all ingredients in a high speed blender and blend until smooth. Once blended, gently pour the mixture into the freeze pop bags and zip shut. Place in the freezer for 3 hours or until frozen.
      If you enjoyed this recipe it would mean the world to me if you rated it and left a comment below. It helps others find it on google.xoxo-Allianna

    Notes

    If you enjoyed this recipe it would mean the world to me if you rated it and left a comment below. It helps others find it on google.xoxo-Allianna
    Quick, easy, and refreshing homemade freeze pops!
    Serving: 1freeze pop | Calories: 8kcal | Carbohydrates: 2g | Protein: 1g | Fat: 1g | Saturated Fat: 1g | Polyunsaturated Fat: 1g | Monounsaturated Fat: 1g | Sodium: 1mg | Potassium: 38mg | Fiber: 1g | Sugar: 1g | Vitamin A: 5IU | Vitamin C: 14mg | Calcium: 4mg | Iron: 1mg
    Tried this recipe?Tag me on instagram @alliannaskitchen!
    grainfreedogtreats

    August 29, 2019 Lifestyle

    Grain Free Dog Treats

    Yesterday we celebrated Douglas’s 1 year birthday. Over the past year, I have noticed that the quality of his food and treats makes the biggest difference. We originally fed him regular dog food containing grains and he was crazy! He tore apart our first apartment. The vet suggested that we try a grain-free dog food and his behavior significantly improved. For his birthday I wanted to bake him something special that was obviously grain-free. Dogs love pumpkin so I decided on a pumpkin theme and he LOVED them!

    Ingredients:

    2 cups coconut flour

    ½ tsp baking soda

    ½ teaspoon cinnamon

    15 oz of pumpkin

    ½ cup peanut butter

    ½ cup coconut oil

    4 eggs

    Instructions:

    Preheat the oven to 350.

    Whisk together all ingredients.

    Roll out the cookie dough and use your go-to cookie cutter, I like this dog bone cookie cutter set. 

    Line the cookie sheet with wax paper and place each cookie on the cookie sheet.

    Bake for 15 minutes.

    Let cool for 10 minutes.

    ENJOY!

    This post contains affiliate links. I only promote products I use and love. If you buy through my link I will earn a small percentage at no extra cost to you

    picture of an anti-inflammatory salad

    August 29, 2019 Dairy free

    The Best Kale Salad With Tahini Dressing

    This massaged kale salad is seriously the best kale salad ever! It is naturally paleo, vegan and whole30 friendly. The pomegranate and pistachios add the perfect mix between sweet and salty while giving this salad a crunch! If you typically don’t like kale, this salad is for you. The lemon tahini dressing adds the perfect kick to the salad as well as it helps break down the kale so it is not so tough. 

    individual salad ingredients covering kale, carrots, tahini, nuts and more in a glass bowl.

    What makes this kale salad so good?

    • I came up with this recipe when I really wanted to start adding kale into my diet but did not like how tough it was. I found out that the key to a wonderful kale salad is adding a dressing that helps break it down! The apple cider vinegar and lemon in the dressing helps break down the kale so it isn’t as tough. If you love this salad, you will want to check out one of my other favorite salad recipes on my blog, my Cucumber Watermelon Salad.
    kale salad ingredients laid out in bowls

    Paleo kale salad ingredients:

    • Tahini-My favorite brand of tahini is from Trader Joe’s! It is always so soft and creamy. I have found that some brands are more dry which makes it hard to make dressing with.
    • Lemon juice & apple cider vinegar-This helps break down the kale to make it easier to digest. It is also a nice kick. 
    • Cumin-For flavor. 
    • Coconut aminos-My go to gluten free soy free soy sauce alternative. 
    • Olive oil-To help thin out the dressing. 
    • Water-To help the dressing not be so thick. 
    • Garlic-To taste. 
    • Kale-I like to buy mine already chopped. I suggest removing stems if they are not already removed, 
    • Pomegranate-Adds a nice crunch!
    • Carrots-I like the shredded ones. 
    • Pistachios-Adds more texture and some good fat. 
    whole30 kale salad in a bowl

    What is so good about massaged kale?

    • First off, it helps break down the kale so it is easier to digest!

    Chefs tips:

    • Make sure you are using a fresh jar of tahini, you can tell by seeing how much oil is sitting on top. If you use an old jar it will make the dressing too thick.
    • Make sure you mix the dressing with the salad right away! The longer the dressing sits on the salad before serving the easier it will be for the kale to get digested. It won’t be as rough.
    • When mixing the salad, use your hands! The dressing is thick! It is near impossible to mix the dressing thoroughly with tongs.
    • Do not skip out on the apple cider vinegar and lemon in the dressing! This is what helps break down the kale to make it easier to digest.
    • Do yourself a favor and buy pomegranate that is already cut! Cutting a pomegranate and pulling out the seeds takes FOREVER.
    • Coconut aminos are used in the dressing to replace soy sauce! Coconut aminos are made from a coconut and contain far less sodium.
    • My favorite brand of tahini is Trader Joe’s brand. I have never had an issue with the tahini being too dried, you want to make sure your jar of tahini is fresh or the dressing will come out way too thick.
    • The cumin in the dressing adds the perfect kick!
    • If the kale is still too tough for you slowly add a teaspoon more of apple cider vinegar at a time to get a better consistency for you. This will help break down the kale.
     salad in a bowl with pomegranate and lemons

    If you like this salad, you will LOVE:

    • Crunchy Chickpea Kale Salad
    • Vegan Taco Bean Salad
    • Air-Fried Green Beans
    • Creamy Broccoli Slaw 
    • Vegan Greek salad
    • Beanless Hummus

    If you enjoyed this recipe it would mean the world to me if you rated it and left a comment below. It helps others find it on google.

    the best kale salad in a bowl with pomegranate and lemons

    The Best Kale Salad

    Course Salad
    Cuisine American
    Prep Time 15 minutes minutes
    Total Time 15 minutes minutes
    Servings 5 people
    Author Allianna Moximchalk
    550kcal
    Cost $7
    Print Recipe Pin Recipe

    Equipment

    • Lemon juicer
    • Food processor
    • Garlic mincer

    Ingredients

    For the salad

    • 10 cup chopped kale This is usually the equivalent to one large bag.
    • 1 cup shredded carrots You can buy the carrots already shredded next to the regular carrots.
    • 1/2 cup pistachios Save yourself time and buy the ones without the shells!
    • 1 cup pomegranate seeds Save yourself time and buy pomegranate where the seeds are already removed! Most grocery stores sell it this way.

    Dressing

    • 1 whole lemon, juiced If you roll the lemon before cutting into it, it will help release the juices!
    • 1/2 cup apple cider vinegar
    • 10 ounces tahini Make sure the tahini is not dried out! I like Trader Joe's brand.
    • 3 tbsp coconut aminos
    • 1 tbsp olive oil
    • 2 cloves garlic, minced
    • 1 tsp cumin
    • 1/2 cup water

    Instructions

    For the salad:

    • Put all salad ingredients in a bowl and set aside to make the dressing. Once the dressing is made, add the dressing to the bowl and massage the salad with your hands until it is mixed throughout. Massage for 1-2 minutes.

    For the dressing:

    • Place all dressing ingredients in a food processor and blend for 30 seconds. *Note this will come out thick
      If you enjoyed this recipe it would mean the world to me if you rated it and left a comment below. It helps others find it on google.

    Notes

    If you enjoyed this recipe it would mean the world to me if you rated it and left a comment below. It helps others find it on google.
    Crunchy kale salad with the perfect mix of salty, sweet and savory!
    Serving: 1bowl | Calories: 550kcal | Carbohydrates: 38g | Protein: 19g | Fat: 40g | Saturated Fat: 5g | Polyunsaturated Fat: 16g | Monounsaturated Fat: 16g | Sodium: 295mg | Potassium: 1233mg | Fiber: 6g | Sugar: 7g | Vitamin A: 17758IU | Vitamin C: 169mg | Calcium: 313mg | Iron: 5mg
    Tried this recipe?Tag me on instagram @alliannaskitchen!
    healthy heart gummies on a plate

    August 24, 2019 Allergy Friendly

    Healthy Gummies

    These Homemade Healthy Gummies are so fun and easy to make! They are seriously the best. While adults love these refined sugar free treats they are also super kid and toddler friendly too. This recipe only requires 10 minutes of hands-on time and will set in the fridge within 30 minutes which makes this recipe a fun easy snack and treat.

    healthy heart gummies on a plate

    What Makes This Recipe So Good?

    • First off, this recipe is so easy that kids will love helping you make it too!
    • Secondly, this recipe only requires 10 minutes of hands-on time which makes it great when you want to prepare something fun but do not have very much time. 
    • Third, these gummies store really well which means you can make a big batch and keep them in the fridge for weeks. 
    • This recipe is naturally refined sugar free, paleo, gluten free, and dairy free. This recipe can also be made keto or low carb friendly if you use vegetable juice and omit the sweeteners. 
    • The gelatin in this recipe is good for you! Gelatin has been proven to help with joints, hair and skin. 
    • This recipe reminds me so much of my Homemade Healthy Jello recipe on my blog which is one of my favorites! 
    • These homemade gummy bears are a great healthier alternative as they are not loaded with sugar like most store bought brands are. 

    gummie ingredients laid out on a tray

    Recipe Ingredients: 

    • Juice-Any kind of juice will work but I do prefer freshly squeezed juice over store bought juice. If you do buy store bought juice make sure you are buying juice without any added sugar. If you are making your own juice, I like to use this juicer. We use it all of the time to make my husband his very favorite Carrot Apple Ginger Juice. For a lower carb diet or the keto diet I suggest using a vegetable based juice-like celery or broccoli juice. You can always add some ginger to spice it up. 
    • Gelatin-Gelatin is what makes gummies, gummies! I love Vital Protein’s brand. I cannot attest to other brands as I have only tried Vital Proteins. 
    • Maple syrup-This is my go to sweetener for these homemade gummies. If you are doing the keto diet or following a lower carb diet, omit the sweetener. 

    juice and maple syrup in a sauce pan

    How To Make:

    • Step 1:
      • First, place your juice and maple syrup in a saucepan and bring to a boil.
    • Step 2:
      • Sprinkle in your gelatin slowly while whisking continuously. This will prevent any gelatin clumps from forming. 

    gelatin falling into a saucepan

    • Step 3:
      • Add the gelatin and juice mixture to the gummy molds, ensuring that you do not overflow them. You can use the little dropper the molds come with to help with this. 

    gummies in a gummy mold

    • Step 4:
      • Place the gummies in the fridge for at minimum 30 minutes.

    Frequently Asked Recipe Questions:

    • What Kind Of Molds Should I Use?

      • I love these silicone gummy bear molds for homemade gummies. They are super easy to use and clean which is the key!
    • How Long Do Homemade Gummies Last?

      • These gummies will last up to a month in the fridge as long as they are sealed in an airtight container. 
    • Can I Substitute The Maple Syrup For Honey?

      • Absolutely! Just note that honey tastes different so the honey substitution will be more subtle and the maple syrup flavor will be a little stronger. 

    Chef’s Tips:

    • Be sure to sprinkle in your gelatin to avoid it from clumping!
    • Secondly, allow your molds enough time to chill in the fridge or they will fall apart when they come out.

    cute little heart gummies

    If you like this recipe, you will LOVE:

    • Healthy Jello
    • Healthy Marshmallows
    • Vegan Twix Bars

    If you enjoyed this recipe it would mean the world to me if you rated it and left a comment below. It helps others find it on google.xoxo-Allianna

    • WP Recipe Maker #4372removehealthy heart gummies on a plate AIP Gummies Quick and easy healthy alternative for gummy bears. Course: Dessert, Snack Cuisine: American Keyword: easy, gelatin, paleo, quick, refined sugar free Prep Time: 15m Total Time: 75m Set time: 60m Servings: 3 servings Author: <a href=”https://www.alliannaskitchen.com/about-allianna-moximchalk/” target=”_self”>Allianna Moximchalk</a> – Gummie bear molds and dropper – 1 cup juice I like using my raspberry lemonade – 4 tbsp gelatin – 2 tbsp maple syrup OPTIONAL: – 2 droppers full CBD oil 1) Place the juice and maple syrup in a saucepan on the stove and bring to a simmer. Once it simmers, remove the pan from the heat and slowly mix in the gelatin. Place the gummie bear molds on a baking sheet. Now, using the dropper, fill the gummie bear molds. Place the molds in the fridge for 30 minutes. If you enjoyed this recipe it would mean the world to me if you rated it and left a comment below. It helps others find it on google.xoxo-Allianna If you enjoyed this recipe it would mean the world to me if you rated it and left a comment below. It helps others find it on google.xoxo-Allianna   serving_size 1 calories 87 carbohydrates 14 protein 8 fat 1 saturated_fat 1 sodium 22 potassium 100 fiber 1 sugar 12 vitamin_a 1 vitamin_c 1 calcium 19 iron 1  
    strawberry cupcake with a strawberry on top

    August 22, 2019 Dairy free

    Gluten Free Strawberry Cupcakes

    These Gluten Free Strawberry Cupcakes are super easy and fun to make! They only require 15 minutes of hands-on time and are perfect for strawberry season. The moist and fluffy grain free cupcakes combined with the silky dairy free frosting is delightful.

    Strawberry cupcakes in cupcake pan with almond slivers and fresh strawberry garnish.

    When I started working on my way of eating I didn’t want to lose my favorite sweets in the process. These cupcakes fit the bill in making sure I can fill my sweet cravings without having to worry about any of the additives from the cupcakes I grew up eating. It allows me to enjoy the sweets without feeling sick afterwards.

    [feast_advanced_jump_to]

    Why You Will Love This Recipe

    • These cupcakes are super easy to make and require minimal hands on time. 
    • This recipe is naturally grain free, gluten free, and dairy free. 
    • It contains my favorite spring fruit, strawberries! 
    • If you are a big strawberry dessert fan like me, you will also LOVE my Gluten Free Strawberry Pretzel Cake. 
    • The fluffy, soft and moist vanilla cupcake combined with the creamy, silky, fruity frosting is so darn good!
    • You can prepare these homemade cupcakes in advance which makes them a great option for parties and family gatherings.
    • The cupcake itself freezes super well which means you can make the cupcakes a week in advance and just prepare the frosting when you are ready to serve them!

    Ingredients

    Wet ingredients for strawberry cupcakes in glass bowls.
    Strawberry cupcake dry ingredients in glass bowls.

    For the cupcake-

    • Eggs– This is the binder for this recipe and a must. Do not substitute with a flax egg as it will not work. 
    • Coconut milk-To keep the cupcakes nice and moist. You can also use almond milk!
    • Vanilla extract-For flavor. 
    • Maple syrup-To sweeten the cupcakes. You can also use honey but note it will not be as sweet. 
    • Coconut sugar-My favorite healthier option to sweeten my treats. You can also use ground maple sugar here too. 
    • Almond flour-The main flour base. I like to get almond flour from Costco. They have the best bang for your buck there!
    • Tapioca flour-This helps bind everything together with the eggs. You can use tapioca flour and arrowroot flour interchangeably in this recipe. 
    Strawberry cupcake frosting ingredients in glass bowls.

    For the strawberry frosting-

    • Palm oil shortening-This is the base of the frosting. Palm oil shortening is palm oil without all of the fat. When you remove some of the fat, it makes this silky and smooth texture which is the key for frosting.
    • Coconut oil-To keep the frosting nice and silky. 
    • Tapioca flour-This is to keep the frosting held together. 
    • Honey or maple syrup-To sweeten the frosting. I like maple syrup!
    • Strawberries-To make these cupcakes strawberry flavored!

    See the recipe card below for a full list of ingredients and measurements.

    Substitutions and Variations

    • For extra strawberry flavor, you can mix fresh or freeze dried strawberries into the cupcake batter.
    • You can use any types of toppings for the cupcakes. I love to use fresh strawberries and almond slices for additional flavor and a cruch.

    This recipe has not been tested with other substitutions or variations. If you replace or add any ingredients, please let us know how it turned out in the comments below!

    Step by Step Instructions

    Dry cupcake ingredients in a glass mixing bowl.
    First, preheat the oven to 350 degrees F. Next, mix all of the dry ingredients in a bowl.
    Wet cupcake ingredients in a glass mixing bowl.
    Now, mix all of the wet ingredients in a bowl.
    Wet and dry cupcake ingredients mixed in a glass mixing bowl.
    Next, combine the wet and dry ingredients and mix until well combined.
    Cupcake batter in a cupcake pan.
    Add the cupcake liners into the cupcake pan and divide the batter between the cupcakes. Next, bake the cupcakes for 15-20 minutes at 350 degrees F.
    Strawberries in a food processor.
    While the cupcakes are baking, place the strawberries into the food processor and blend until smooth.
    Strawberry sauce in a sauce pan with a whisk.
    Then, add the strawberry mixture to the saucepan and bring to a boil so the syrup forms.
    Strawberry cupcake frosting in a bowl.
    Place the syrup and all other ingredients in a bowl and whip with a hand held food mixer. Place the frosting in the fridge to set until the cupcakes are cold and ready to frost.
    Strawberry cupcakes in a muffin pan.
    Once the cupcakes come out, allow them to cool for 10 minutes, then frost them. Sprinkle optional nuts on top and top with an optional fresh strawberry.

    Equipment Needed

    • Cupcake pan
    • Mixing bowls
    • Cupcake liners
    • Hand mixer
    • Saucepan
    • Food processor

    Expert Tips

    • Tip # 1: A great way to know if the cupcakes are cooked through is to use a toothpick and place in the center of the cupcakes. When the toothpick comes out clean the cupcakes are cooked through.
    • Tip # 2: If you are taking the cupcakes to a gathering, I like to place the frosting in a pipping bag with a star tip. This gives the icing a beautiful design on top of the cupcakes.
    • Tip # 3: I love to use silicone cupcake liners! It makes it easier clean up and also allows for the option of taking the cupcakes out of the liners easier before placing on a serving platter.

    Recipe FAQ’s

    Why do I need to allow the frosting to set?

    The strawberry puree adds some liquid to it and by placing it in the refrigerator it allows the frosting to set up making it easier to spread on the cupcakes.

    Can I use freeze dried strawberries?

    Yes! You sure use fresh, frozen, or freeze dried strawberries for this dish.

    Can I freeze the cupcakes?

    Yes! However, wait to frost them. If you are freezing your cupcakes, be sure to remove the liner as the liner will get funky in the freezer. The cupcakes will last for a month in the freezer. You can also use silicone muffin liners so they cupcakes pop right out. I love them! They clean up so much easier. 

    What if my frosting still appears runny when I get it out of the refridgerator?

    If your frosting appears to be too runny to frost the cupcakes, place the frosting back in the fridge to allow it to harden up. 

    How full should I fill my cupcake liners?

    Do not fill the cupcake liners up past ¾ of the cup to help prevent the cupcakes from overflowing. 

    Strawberry cupcake with a strawberry on top on a small white plate.

    Storage Instructions

    • These cupcakes can be stored in an air tight container in the refrigerator for up to one week.

    Other Strawberry Recipes You Will Love

    • strawberry banana smoothie bowl in a bowl with berries on top
      Strawberry Banana Smoothie Bowl
    • strawberry poppyseed salad 1 scaled
      Panera Inspired Strawberry Poppyseed Salad
    • close up photo of a strawberry covered in dairy free chocolate and sea salt
      Vegan Chocolate Covered Strawberries
    • Close up photo of strawberry gluten free muffins in a bowl.
      Gluten Free Strawberry Muffins

    Want a free guide of my go to healthy alternatives?

     
    download your FREE guide
    Strawberry cupcakes in a muffin pan.

    Gluten Free Strawberry Cupcakes

    Course Dessert
    Cuisine American
    Prep Time 15 minutes minutes
    Cook Time 15 minutes minutes
    Total Time 30 minutes minutes
    Servings 12 cupcakes
    Author Allianna Moximchalk
    584kcal
    Cost $6
    Print Recipe Pin Recipe

    Equipment

    • cupcake pan
    • cupcake liners
    • Hand mixer

    Ingredients

    Cupcakes:

    • 2 eggs
    • 1/2 cup coconut milk
    • 1/4 cup coconut oil
    • 1 tsp vanilla extract
    • 1/4 cup maple syrup
    • 1/4 cup coconut sugar
    • 2 cups almond flour
    • 1/3 cup tapioca flour

    For the strawberry frosting:

    • 1 cup palm oil shortening
    • 1 cup coconut oil
    • 1/3 cup tapioca flour
    • 1/3 cup honey or maple syrup
    • 1 cup strawberries chopped

    Instructions

    For the cupcakes:

    • Preheat the oven to 350 degrees F. Mix the dry ingredients and then add in the wet ingredients. Whisk with a hand mixer until smooth. Add in muffin liners to the cupcake molds and bake for 15-20 minutes. Allow the cupcakes to cool before frosting.

    For the frosting:

    • Place the strawberries in a food processor and blend until smooth. Then, add the strawberry pure to a saucepan and bring to a boil. Now, add all ingredients in a bowl and mix with a hand mixer until smooth. Set the frosting in the fridge until the cupcakes are cooled and ready to be frosted.

    Notes

    Storage: This recipe can be stored in an air tight container in the refrigerator for up to one week.
    Nutrition: The nutrition for this recipe is an estimate and the calorie count is not guaranteed.  It is based on 12 servings. 
    Servings: This recipe should yield 12 servings. 
    Quick, easy and delicious paleo cupcakes!
    Serving: 1cupcake | Calories: 584kcal | Carbohydrates: 26g | Protein: 6g | Fat: 53g | Saturated Fat: 31g | Polyunsaturated Fat: 2g | Monounsaturated Fat: 9g | Trans Fat: 1g | Cholesterol: 55mg | Sodium: 30mg | Potassium: 81mg | Fiber: 2g | Sugar: 15g | Vitamin A: 81IU | Vitamin C: 7mg | Calcium: 59mg | Iron: 1mg
    Tried this recipe?Tag me on instagram @alliannaskitchen!
    Cake pops on a stick in a blue cup with white sprinkles on top.

    August 22, 2019 Dairy free

    No Bake Gluten Free Cake Pops

    These No Bake Gluten Free Cake Pops are super easy to make and so good! In this recipe, you can modify the recipe to include a bunch of different fun toppings on top for different seasons. This homemade treat is one of a kind and your kids will love it. Plus, this recipe only requires 20 minutes of hands on time which means you can have this recipe ready in no time!

    Cake pops on a stick in a blue cup with white sprinkles on top.

    Who else grew up loving Starbucks cake pops? I did! However, they always made me so sick. This recipe was inspired by one of my childhood favorites and I am so excited to share it with you! If you love this simple dessert recipe, you will also love my Chocolate Covered Oranges, Edible Gluten Free Cookie Dough and Vegan Milkshake Recipe on my blog.

    [feast_advanced_jump_to]

    Why This Recipe Works

    • This recipe is so simple to make and it can be made in less than 20 minutes!
    • This recipe is naturally dairy free, gluten free, grain free, soy free, egg free, vegan and paleo friendly.
    • You can make this recipe ahead of time and freeze it so you have treats ready to go at all times.
    • This recipe is no bake which means it does not require you to even turn your oven on!
    • You can adjust this recipe so it is more seasonal. I love adding fun little sprinkles and different decorations to make it more specific to the season we are in!
    • This recipe was inspired by another no bake recipe on my website. If you love these cake pops, you will love my No Bake Cookie Dough Bites.

    Ingredients

    Cake pop ingredients laid out in small glass bowls on the counter top.
    • Almond flour-This is the base for the cake pops. I do not suggest switching out the flours because not all gluten free flours are created equally. I like the Costco brand of almond flour.
    • Maple syrup-This sweetens these cakes pops and also holds everything together!
    • Chocolate chips-I am dairy free so I prefer dairy free chocolate but any kind of chocolate will work. I love the Hu brand for dairy free chocolate chips.
    • Vanilla-For flavor.
    • Coconut oil-The coconut oil should be melted. This is what helps bind the ingredients together.
    • Sea salt-For taste.

    A complete list of ingredients and measurements can be found in the recipe card below.

    Recipe Substitutions And Variations

    • Chocolate-This recipe can also be made with white chocolate.

    This recipe has not been been tested with any other substitutions or variations. If you try something else, please let me know how it turned out in the comment section below!

    Step By Step Instructions

    Rolled cake pops on a baking sheet with wax paper.
    Step #1: Place all of the ingredients in a bowl and mix until smooth. Using a 1.5 inch cookie scooper, scoop the dough into small balls and roll the balls until smooth.
    Cake pop sticks stuck in the raw cake pops on a baking sheet.
    Step #2: Stick the cake pop sticks in the side of the cake pops. Then, place the baking sheet in the freezer for at least 1 hour or until the balls harden.
    Melted chocolate in a small glass bowl.
    Step 3: Add the chocolate chips to a small glass bowl that is microwave safe. Add the bowl to the microwave for 30 seconds, then mix. Add the bowl back into the microwave for 30 seconds and mix again. Then, add it to the microwave one last time and mix until smooth.
    Cookie cake pops dipped in chocolate inside of a muffin liner.
    Step #4: Dip the cake pops in the chocolate and place in a cupcake liner to harden. Place the cake pops in the fridge or freezer to set for at least 1 hour.
    Gluten free cake pops in muffin liners lined on a baking sheet.

    Equipment Needed

    • Microwave friendly glass bowl.
    • Silicone spatula.
    • Cookie cake pop sticks.
    • Baking sheet.
    • 1.5 inch cookie scoop.

    Expert Tips

    • Tip #1: You must continuously stir the chocolate when you put it in the microwave or it will burn! I suggest only microwaving it in 30 minute increments.
    • Tip #2: If you chose to wrap your cake pops, make sure the chocolate has hardened in the fridge or the freezer prior to wrapping them.

    Recipe FAQs

    How can I prevent burning melted chocolate?

    The key to prevent the chocolate from burning is by heating it slowly and whisking it throughout the process.

    Can I make these cake pops with vanilla chocolate?

    Yes! Absolutely.

    How can I prevent the chocolate from smearing?

    You can allow the chocolate covering on the cake pops to harden fully in the fridge prior to wrapping the pops.

    Storage Instructions

    • This recipe can be stored in the fridge for up to 1 week. Be sure to store them upright in some sort of cup so the chocolate does not get messy.
    • You can also store this recipe in the freezer for up to 1 month. You can store them laying down in the freezer because the chocolate will harden when frozen.

    Other Fun Gluten Free Dessert Recipes

    • Vegan and gluten free twix bars stacked up on a plate with
      Vegan Twix Bars
    • Dairy free brownies laid out on the counter top.
      Quick and Easy Dairy Free Brownies
    • mini gluten free bundt cakes on a plate with chocolate ganache
      Mini Dairy Free Chocolate Cakes
    • 6 slices of cookie cake stacked next to each other with sea salt sprinkled on top.
      Gluten Free Cookie Cake With Fudge Topping


    download my FREE anti-inflammatory guide below with all of my favorite healthy food swaps

    download your swap guide NOW
    Cake pops on a stick in a blue cup with white sprinkles on top.

    Gluten Free Cake Pops

    Course Dessert
    Cuisine American
    Prep Time 20 minutes minutes
    Freezer time 1 hour hour
    Total Time 1 hour hour 20 minutes minutes
    Servings 10 cake pops
    Author Allianna Moximchalk
    270kcal
    Cost $5
    Print Recipe Pin Recipe

    Equipment

    • cake pop sticks
    • mixing bowl
    • spatula
    • cake pop sticks

    Ingredients

    • 2 cups almond flour
    • 1/3 cup maple syrup
    • 1 cup chocolate chips I am dairy free so I prefer dairy free chocolate. I love the Hu brand.
    • 1 tsp vanilla
    • 2 tbsp coconut oil melted
    • pinch of sea salt

    Instructions

    • Place all ingredients in a bowl except the chocolate chips and mix until well mixed throughout. Using a 1.5 inch cookie scoop, scoop the dough onto a sheet pan with wax paper.
    • Then roll, the balls with your hands and set back on the sheet tray. Place the sheet tray in the freezer for 1 hour.
    • Once the hour is up, add the cake pop sticks to the bottom of the ball.
    • Then, add the chocolate chips into a bowl and place in the microwave for 30 seconds. Mix and then place them back in the microwave again for another 30 seconds. Then mix again and microwave for another 30 seconds. By this point the chocolate should be silky smooth.
    • Now, grab a few cups to allow the cake pops to sit in. Dip the cake pops into the chocolate, once they are dipped place them in the cup and store in the freezer to allow the chocolate to harden. Serve cold from the fridge.

    Notes

    Storage: These cake pops can store in the fridge for up to a week. They also can be stored in the freezer for up to 1 month. 
    Servings: This recipe yields approximately 10 cake pops.
    Nutrition: The nutrition on this recipe is an estimate and cannot be guaranteed. It is based off of 10 cake pops.
    Links to equipment: I use these cake pop sticks and they work great!
    These no bake, easy, gluten free, dairy free cake pops are super easy to make and so delicious!
    Serving: 1cake pop | Calories: 270kcal | Carbohydrates: 24g | Protein: 5g | Fat: 19g | Saturated Fat: 6g | Polyunsaturated Fat: 0.05g | Monounsaturated Fat: 0.2g | Sodium: 1mg | Potassium: 76mg | Fiber: 2g | Sugar: 18g | Calcium: 72mg | Iron: 1mg
    Tried this recipe?Tag me on instagram @alliannaskitchen!
    chicken caesar wraps on a platter

    August 22, 2019 Chicken

    Paleo Chicken Caesar Wraps

    These Paleo Chicken Caesar Wraps are so delicious! The chicken is super crispy and the fresh romaine greens add a nice crunch. These wraps are topped off with cheesy nutritional yeast to add a nice cheesy flavor. You can have dinner on the table within 30 minutes with this recipe.

    chicken caesar wraps on a platter


    Why You Should Make This Recipe:

    • First off, the chicken in this recipe is super crispy. 
    • Secondly, this recipe reminds me so much of my other favorite Crispy Paleo BLT Chicken Wraps. 
    • This recipe is naturally grain free, gluten free, dairy free, paleo and Whole30 friendly. 
    • This recipe is super kid friendly, I have yet to meet a kid that does not like crispy chicken!
    • You can have dinner on the table in less than 30 minutes with this recipe. 
    • I am obsessed with the sprinkled nutritional yeast on top, it gives these dairy free wraps a nice cheesy flavor. Matched with the delicious Whole30 Caesar Dressing it will be a favorite dinner recipe.
    • This recipe makes for a great recipe to make during meal prep. I like to prepare the chicken on its own and keep the ingredients separated so all I have to do is assemble when I am ready to eat!
    wrap ingredients laid out in bowls

    Ingredients: 

    For the chicken-

    • Chicken tenderloins-I get my chicken tenderloins from Butcher Box. Every month they send me a box of all of my favorite sustainably raised proteins. I love keeping a stash of their stuff in my freezer so all I have to do is thaw it out. I never have to worry about my meat going back. If you use my link to Butcher Box, you can get free ground beef for life!
    • Cassava flour–I only use Ottos’ cassava flour. Note that not all brands are created equally and I have noticed a big difference in different brands and textures. 
    • Garlic powder & sea salt-For flavor.
    • Cooking oil spray-I like the cooking oil avocado spray from Costco but any kind will work. You can also use a brush with oil on it in place of the spray. 

    To serve-

    • Caesar Dressing-I like the Primal Kitchen brand if you are looking for one that is already made. I also love making my own too with my homemade Paleo Caesar Dressing. Note if you are doing the autoimmune protocol (AIP) you can substitute the mayo with pureed artichokes. 
    • Tomatoes-For some extra flavor. Skip for AIP.
    • Romaine lettuce-This is a must! I love adding this for the extra crunch. 
    • Nutritional yeast-To give these wraps a cheesy flavor.
    • Wraps-You can make your own homemade cassava flour wraps using my recipe or buy your own. I like the siete brand. If you are doing AIP you will need to make my homemade wraps. 
    cassava flour, garlic powder and salt in a bowl

    How To Make:

    • First mix the cassava flour with the garlic powder and salt in a bowl. 
    cassava flour mixed with sea salt and garlic powder in a bowl with a fork
    • Next, spray the metal rack in your air fryer with cooking spray oil. If you do not have a spray, use a brush to coat the oil onto the rack.
    • Now dip the chicken tenderloins into the cassava mixture. Make sure the tenders are well coated. 
    chicken tenders in the air fryer
    • Add the chicken to the air fryer and then drizzle some oil on top to ensure that it gets nice and crispy. 
    oil drizzled on top of the chicken
    • Now place the chicken in the air fryer at 400 for 7 minutes. Once the 7 minutes is up, flip the chicken and cook for an additional 5 more minutes. 
    • Once the chicken is done assemble the wraps and top off with nutritional yeast.
    crispy chicken wrap with caesar dressing

    Recipe FAQ’s:

    Can I Bake The Chicken In The Oven?

    • If you do not have an air fryer and are using an oven, be sure to use a non-coated cooking rack over a baking sheet. This will help the chicken get crispy on both sides. Be sure it is non-coated, if it is coated in plastic it will melt in the oven.

    Can I Make These For Meal Prep?

    • Yes! I highly suggest waiting to assemble your wraps right until you are ready to eat but you can for sure prepare the parts ahead of time. 

    What Is Cassava Flour?

    • Cassava flour is made from cassava root (yuca.) Cassava flour is widely used in paleo and AIP cooking because it is grain free, nut free, and gluten free. I only use the Otto’s brand because not all brands are created equally. I love using it to get things nice and crispy. It works well with breading just about any protein too-like my Gluten Free Fried Shrimp!

    What Kind Of Air Fryer Do You Use?

    • I have this Air Fryer and have been using it for years! It is so easy to use and has multiple functions. 

    Chef’s Tips:

    • Be sure to heavily coat your air fryer insert with oil to prevent the chicken from sticking!
    • If you do not have chicken tenderloins, you can use chicken breasts, just slice them up.
    caesar wraps on a tray

    If you like this recipe, you will LOVE:

    • Crispy Crack Gluten Free Chicken
    • Buffalo Shrimp Tacos
    • Paleo Chicken Parmesan
    chicken caesar wraps on a platter

    Paleo Chicken Caesar Wraps

    Course Dinner, Meals
    Cuisine American
    Prep Time 10 minutes minutes
    Cook Time 20 minutes minutes
    Total Time 30 minutes minutes
    Servings 3 people
    Author Allianna Moximchalk
    778kcal
    Cost $8
    Print Recipe Pin Recipe

    Equipment

    • Air fryer or baking sheet with metal cooling rack

    Ingredients

    For the chicken:

    • 1 pound chicken tenderloins
    • 1 cup cassava flour I only use Otto's
    • 3 tbsp garlic powder
    • 1/2 tsp sea salt
    • a pinch black pepper omit for AIP
    • cooking oil spray I like avocado oil spray

    To assemble:

    • 6 gluten free tortillas I like the siete brand or see my notes about making your own. Make my homemade ones for AIP.
    • 3 cups romaine chopped

    For the dressing:

    • 1 cup caesar dressing I like Primal Kitchen, or you can make your own, see my notes to make your own. Make your own with my notes for AIP.

    Optional to serve:

    • fresh tomatoes omit for AIP
    • sprinkle nutritional yeast

    Instructions

    For the air fryer:

    • Mix the garlic powder with the sea salt and cassava flour. Insert the metal grate into the air fryer and spray with the cooking spray oil. Now, toss the chicken in the cassava mixture and place on the grate in the air fryer. Now spray the top of the chicken generously with the cooking spray oil and bake at 400 for 8 minutes, then flip and spray with oil and bake for an additional 8 minutes.

    For the oven:

    • Mix the garlic powder with the sea salt and cassava flour. Place a metal cooling rack on a baking sheet and spray with the cooking oil to prevent the chicken from sticking. Now, toss the chicken in the cassava mixture and place on the grate in the air fryer. Now spray the top of the chicken generously with the cooking spray oil and bake at 400 for 8 minutes, then flip and spray with oil and bake for an additional 8 minutes.

    To assemble:

    • Place 1/2 cup chopped romaine lettuce on each tortilla. Add a slice of chicken, mini tomatoes and drizzle with dressing. Sprinkle with nutritional yeast to serve.
      If you enjoyed this recipe it would mean the world to me if you rated it and left a comment below. It helps others find it on google.xoxo-Allianna

    Notes

    If you enjoyed this recipe it would mean the world to me if you rated it and left a comment below. It helps others find it on google.xoxo-Allianna
     
    To make your own homemade tortillas, check out my Cassava Tortilla Recipe.
    To make your own caesar dressing, check out my homemade caesar salad dressing. For AIP substitute the mayo with purred artichokes and omit the black pepper.
    Delicious crispy gluten free dairy free chicken caesar wraps.
    Serving: 1serving | Calories: 778kcal | Carbohydrates: 44g | Protein: 37g | Fat: 50g | Saturated Fat: 8g | Polyunsaturated Fat: 27g | Monounsaturated Fat: 12g | Trans Fat: 1g | Cholesterol: 127mg | Sodium: 1536mg | Potassium: 804mg | Fiber: 3g | Sugar: 4g | Vitamin A: 4166IU | Vitamin C: 6mg | Calcium: 130mg | Iron: 5mg
    Tried this recipe?Tag me on instagram @alliannaskitchen!
    Paella in a small bowl with fresh herbs sprinkled on top.

    August 22, 2019 Chicken

    Keto Paella

    This Easy Keto Paella with shrimp and chicken is delicious, packed with flavor, quick, easy, and is loaded with vegetables! This recipe has the perfect amount of spice and will leave you and your family satisfied. With this recipe, you can have dinner on the table in under 30 minutes. 

    Paella with shrimp and sausage on top in a pretty bowl with a ruffled plate underneath.

    My Seafood Paella with chicken sausage was inspired by one of our favorite restaurants. While the meal was always delicious, it did not always make me feel the best because it was so high in carbs. My lower card option is made with cauliflower rice which makes it very low carb, yet so delicious! 

    [feast_advanced_jump_to]

    Why This Recipe Works

    • With this recipe, you can have dinner on the table in under 30 minutes.
    • This recipe is naturally dairy free, gluten fee, soy free, nut free, paleo, keto, low carb and Whole30 friendly!
    • While I suggest using chicken sausage in this recipe, any kind of sausage will work!
    • This is a great dinner for those night where you are having company, but do not feel like cooking! This recipe involves minimal clean up.
    • This recipe stores well in the fridge which means you can eat the leftovers all week long!

    What Pairs Well With This Recipe

    • Vegan Taco Salad-This salad pairs so nicely and is so easy to make!
    • Easy Keto Salsa-This would pair great with chips on the side!
    • Vegan Taco Dip- I love this this dip with vegetables or some sort of chips! It pairs so nicely!

    Ingredients

    Recipe ingredients in small glass bowls laid out on the counter.
    • Shrimp-I like using the shrimp from Butcher Box. It is all wild caught and the highest of quality. If you use my link to subscribe to Butcher Box, you can save on your order every month.
    • Cauliflower rice-This is my go to lower carb brown rice substitute.
    • Bone broth-This helps give this paella flavor. While any kind of bone broth will work, Kettle & Fire is my favorite. I get it from Thrive Market, if you use my Thrive Market link, you will save on your first order. I like Thrive Market because they carry all healthy major brand names at the fraction of the cost.
    • Lemon juice-For flavor.
    • Peas, yellow onion & bell peppers-To add more flavor and low carb vegetables!
    • Chicken sausage-Any kind will work, but I like Applegate brand because it does not contain any added sugar.
    • Fresh parsley-To garnish.
    • Garlic, paprika, red pepper flakes, fennel & cilantro-For flavor.
    • Ghee-To saute.
    • Saffron-A staple for paella!

    See the recipe card below for a full list of ingredients and measurements.

    Substitutions And Variations

    • Sausage– If you would like this to be a pescatarian seafood paella, you can omit the sausage and add double shrimp. You can also use chorizo if that is your thing!
    • Cauliflower rice-You an also use any other low carb vegetable as the rice. A lot of grocery stores sell broccoli rice.

    This recipe has not been been tested with any other substitutions or variations. If you try something else, please let me know how it turned out in the comment section below!

    Step By Step Instructions

    Sausage in a large pot of boiling water.
    Step 1: Preheat the oven to broil. Add a big pot of water to the stove and bring to a boil. Once the water is boiling add in the sausage. Cook the sausage for 10 minutes or until it floats.
    Chopped up sausage on the cutting board.
    Step #2: Chop up the sausage into bite sized pieces on the cutting board.
    Ghee in a saute pan with chopped up sausage.
    Step #3: Add ghee to a sautee pan on medium heat. Once the pan is hot, add in the sausage and saute until the outside is crispy.
    All paella ingredients mixed into the frying pan.
    Step #4: Add the peppers, onions, spices, bone broth and lemon juice into the pan and saute for 5-7 minutes.
    Paella inside a dutch oven on the counter top.
    Step #5: Add in the cauliflower rice, peas and shrimp. Sautee for an additional 5 minutes then place in the oven in the dutch oven for 5-7 minutes.

    Equipment Needed

    • Dutch oven. I like this one from Caraway. It is non-toxic, beautiful and so easy to clean!
    • Cutting board.
    • Spatula.
    • Knife.

    Expert Tip

    • Tip 1: If you cannot find cauliflower rice in the store, you can make your own with a food processor or cheese grater.

    Recipe FAQs

    What is a dutch oven?

    A dutch oven is a thick pot. Most are made of cast iron, cast aluminum, or ceramic. My favorite Caraway Dutch Oven is made of ceramic and free of any toxic materials. The great thing about dutch ovens is that they are oven and stove top safe. So with with this recipe, you can use the same oven with sautéing on the burner and in the oven.

    What is paella?

    Although a lot of people think of paella as a Spanish dish, Spaniards consider it to be a dish from the Valencian region.

    What is the difference between paella and jambalaya?

    Both dishes are very similar in the sense that they both contain a lot of spices, meat, seafood and vegetables. However, the main difference is that jambalaya is a bit spicier and it contains cayenne pepper. Paella always contains saffron.

    Overhead shot of paella in two small bowls with a fork in them.

    Storage And Reheat Instructions

    • This recipe can be stored in the fridge for up to 4 days.
    • I love reheating paella on the stove top, in the oven, and in the air fryer. For the stove top, you will want to saute on medium heat. For the oven and air fryer you will want to bake for 5-10 minutes at 400 degrees F.

    Other Seafood Recipes You Will Love

    • dairy free lobster bisque in a bowl with a gold spoon and garnished with lemon, fresh green herbs, and red pepper flakes.
      Dairy Free Lobster Bisque
    • salmon bites on a plate
      Air Fryer Salmon Bites
    • lemon and shrimp with broccoli on a plate with a gold fork
      Lemon Garlic “Butter” Shrimp (Sheet Pan Meal)
    • paleo bang bang shrimp with dairy free bang bang sauce in a bowl with broccoli
      Whole30 Bang Bang Shrimp


    Do you want access to my FREE anti-inflammatory guide? You can download it below!

    download your free guide
    Paella in a small bowl with fresh herbs sprinkled on top.

    Keto Paella

    Course Meals
    Cuisine cauliflower rice, Mexican
    Prep Time 30 minutes minutes
    Cook Time 30 minutes minutes
    Total Time 1 hour hour
    Servings 8 people
    Author Allianna Moximchalk
    329kcal
    Cost $20
    Print Recipe Pin Recipe

    Equipment

    • dutch oven

    Ingredients

    • 6 cups cauliflower rice I like to get it from Trader Joe's or Coscto.
    • 3 cups bone broth
    • 1 lemon juiced
    • 10 links chicken sausage I like the Applegate chicken because it is sugar free.
    • 2 pounds shrimp Make sure it is thawed. I like getting mine through Butcher Box. If you use my link you can save on your first order.
    • 1 pound frozen peas
    • 1 yellow onion diced
    • 3 bell peppers diced
    • 1 tbsp ghee You can use olive oil too if needed.
    • 4 cloves garlic minced
    • 1 cup fresh parsley
    • 3 tbsp fennel
    • 2 tbsp paprika
    • 3 tsp cilantro
    • 2 tbsp chili pepper flakes
    • 1 tsp ground saffron

    Instructions

    • Preheat the oven to broil. Bring a large pot of water to a boil. Once boiling, add the sausage in and cook for 10 minutes until the sausage floats. Once it is done, drain the water and chop the sausage into bite-sized pieces.
    • Now, add the ghee to the dutch oven and saute the sausage until it is crispy.
    • Next, add in the peppers, onions, spices, bone broth, and lemon juice. Sautee for 5-7 minutes.
    • Now add in the cauliflower rice, peas, and shrimp. Saute for an additional 5 minutes.
    • Place the dutch oven inside the oven for 5-7 minutes.

    Notes

    Storage: You can store this recipe in the fridge for up to 4 days. 
    Servings: This recipe yields approximately 8 people.
    Nutrition: The nutrition on this recipe is an estimate and cannot be guaranteed. It is based off of 8 servings. 
    Easy, seafood low carb paella that everyone in your house will love@
    Serving: 1serving | Calories: 329kcal | Carbohydrates: 26g | Protein: 26g | Fat: 16g | Saturated Fat: 3g | Polyunsaturated Fat: 0.3g | Monounsaturated Fat: 0.1g | Cholesterol: 75mg | Sodium: 1169mg | Potassium: 706mg | Fiber: 8g | Sugar: 10g | Vitamin A: 2924IU | Vitamin C: 161mg | Calcium: 66mg | Iron: 3mg
    Tried this recipe?Tag me on instagram @alliannaskitchen!
    intermittentfasting

    August 22, 2019 Blog

    How I Lost 30 Pounds With Intermittent Fasting

    How I Lost 30 Pounds With Intermittent Fasting

    How I Lost 30 Pounds With Intermittent Fasting:

    • I was introduced to intermittent fasting (IF) when I started to work with a doctor who prescribed it to most of his patients. My initial thought was that it would never work for me since basically every morning I felt like I needed breakfast. While working with his patients, I saw remarkable results including weight loss and more energy.
    • I’m a science-oriented person and I love quantitative data that backs up qualitative data. Due to this, I did my research. I found that studies show IF slows down the aging process by counteracting disease processes. In addition, IF is proven to induce autophagy. Autophagy is the process by which the body self-eats any defective or diseased cells. IF particularly induces autophagy in the brain meaning people regularly see an improvement in cognition and mental clarity.
    • Once I read the research and realized how much it was helping people, I decided I needed to give IF a shot. Around this time, I was struggling with my weight. I had gained nearly 40 pounds after discontinuing a medication I had been taking for years.  Despite my plant-based diet combined with healthy organic meats, I still gained weight. My pants increased by four sizes in less than one year!
    • I began practicing IF 4 days a week while following a 14 hour fasting window. I did not eat between the hours of 8 PM and 10 AM. I have since worked my way up to a 24 hour fasting window once a week. For 4-5 days a week, I follow a 16-18 fasting hour window. I have energy like I have never had before! I no longer experience the mid-afternoon crash, I sleep better, and I am able to focus (which is something I have struggled with my whole life).
    • I now look at food differently. I realized that certain foods exhausted me and that certain foods energized me. I now view food as fuel. Here are my 5 steps to successfully introduce IF into your life!

    5 steps to successfully introduce IF into your life:

    • Start with a small fasting window and work your way up from there. If you normally eat within a 12 hour window, move it up to 14 hours at first. Ultimately work yourself up to a window that works best for you. I feel my best with a 16-20 hour fasting window 4-5 days a week and a 24 hour window one day a week.
    • Drink a ton of water. I try to drink a gallon a day (hints the gallon water bottle, HA!)  A gallon may be a bit excessive for you, but pick a water goal and stick to it!
    • At first your stomach WILL growl. This is normal. Set yourself up for success by keeping busy during your fasting period.
    • Plan your meals. Successful lifestyle changes require planning!
    • Pay attention to how you feel after eating certain foods. I feel amazing when I eat a vegetable-based diet combined with organic red meats and pasture-raised chicken. Grains make me feel tired and groggy. Listen to your body to figure out which foods best fuel you!

    Intermittent fasting sources:

    • https://www.ncbi.nlm.nih.gov/pmc/articles/PMC3106288/
    • https://www.ncbi.nlm.nih.gov/pmc/articles/PMC5411330/

    If you like this post, check out my other lifestyle blog posts here:

    • How To Do A Round Of Whole30
    • How To Eat Paleo While Traveling
    • Managing Hashimotos While Traveling
    • « Go to Previous Page
    • Page 1
    • Interim pages omitted …
    • Page 36
    • Page 37
    • Page 38

    Primary Sidebar

    Allianna Headshots

    Hi, I'm Allianna! Allianna's Kitchen started by accident after battling an undiagnosed autoimmune disease for nearly my whole life.

    More about me →

    GLUTEN FREE DINNER RECIPES

    • steak date night dinner 1
      Steak Date Night Dinner with Garlic Aioli
    • gluten free fried shrimp 3 scaled
      Gluten Free Fried Shrimp
    • cooked frozen pork chops with chives on top on a white plate with a gold fork
      Easy Frozen Pork Chops In The Air Fryer
    • halibut fish tacos on a pale blue plate
      Halibut Fish Tacos

    EASY WHOLE30 RECIPES

    • Beetroot dip on a plate with crackers and fresh parsley on top.
      Simple Beetroot Dip Recipe
    • close up photo of ginger apple pork in a bowl
      Apple Ginger Pulled Pork
    • dairy free lobster bisque in a bowl with a gold spoon and garnished with lemon, fresh green herbs, and red pepper flakes.
      Dairy Free Lobster Bisque
    • juicy filet mignon on a plate
      Air Fryer Filet Mignon

    GLUTEN FREE APPETIZERS

    • peanut butter and jelly chicken wings on a plate with limes
      Peanut Butter And Jelly Wings
    • Stuffed mushrooms on a brown and white plate with fresh parsley on top.
      Gluten-Free Stuffed Mushrooms
    • Gluten free pigs in a blanket in a pile on a plate.
      Gluten Free Pigs In A Blanket
    • Pretty french onion dip in a silver bowl with potato chips and chives on top.
      Vegan French Onion Dip Recipe

    EASY MOCKTAIL RECIPES

    • honey simple syrup 2
      Honey Simple Syrup
    • orange lime cranberry mocktail 4
      Cranberry Mocktail Recipe
    • Clear glass with a brown drink and a cinnamon stick in it.
      Pear Cocktail Recipe
    • Grapefruit mocktail in a glass with jalapeño slice and grapefruit slice.
      Easy Grapefruit Mocktail Recipe

    Footer

    • Recipes
    • My Courses
    • Meal Prep Services
    • Accessibility Policy
    • Contact
    • About Me
    • Blog
    • Privacy Policy
    • Pinterest
    • Instagram
    • Facebook
    • Twitter

    Allianna’s Kitchen 2025 - All Rights Reserved

    Rate This Recipe

    Your vote:


    A rating is required
    A name is required
    An email is required