• Skip to primary navigation
  • Skip to main content
  • Skip to primary sidebar
  • Spring Recipes
  • Recipes
  • Order Meal Prep
  • Healthy Gut Baby Food Course
  • About

Allianna's Kitchen

menu icon
go to homepage
  • Spring Recipes
  • Recipes
  • Order Meal Prep
  • Healthy Gut Baby Food Course
  • About
    • Facebook
    • Instagram
    • Pinterest
    • Twitter
  • search icon
    Homepage link
    • Spring Recipes
    • Recipes
    • Order Meal Prep
    • Healthy Gut Baby Food Course
    • About
    • Facebook
    • Instagram
    • Pinterest
    • Twitter
  • ×
    Allianna's Kitchen » Recipes

    Blog

    overhead shot of pasta with fresh pesto on top with mackerel

    March 12, 2022 Autoimmune Protocol

    Easy Mackerel Pasta With Creamy Pesto

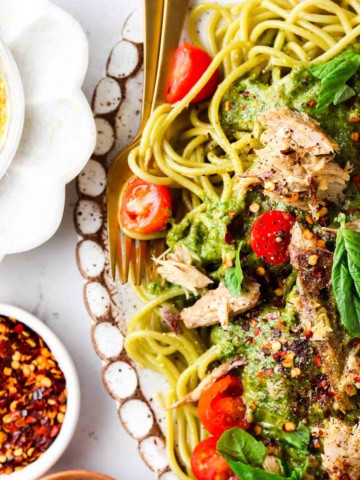
    This Mackerel Pasta With Fresh Pesto is by far my new favorite way to eat pasta! The fresh, salty, lemon pesto sauce combined with the moist mackerel and fresh cherry tomatoes are seriously to die for. This dish takes less than 15 minutes to make and makes for a perfect weeknight quick and easy meal. 

    overhead shot of pasta with fresh pesto on top with mackerel

    This recipe is packed with flavor and so simple as well! If you are looking for a lower calorie option, you could swap the pasta for Spaghetti Squash instead! If you have left over pesto, you can also make my Pesto Orzo Salad. If you enjoy this pasta dish, you would also enjoy my Gluten Free Ravioli as well!

    [feast_advanced_jump_to]

    What Is Mackerel?

    • I was first exposed to mackerel in the grocery store. I had never heard of it before! Mackerel is a salt water fish that is a little salty yet sweet. I like to buy it in the canned version with oil. 

    This recipe was made in partnership with Heinen’s, my favorite grocery store in Ohio!

    What Makes This Recipe So Good?

    • First off my fresh pesto recipe goes great on just about anything! It is full of flavor and so delicious. 
    • This recipe is super easy to make. The only thing that requires cooking is the noodles!
    • You can have dinner on the table with this recipe in only 15 minutes which makes it a great weeknight option. 
    • This recipe is super fresh and reminds me so much of Summer. It is a great elegant dinner to make when you do not want to be cooking in the kitchen all day. 
    • This recipe can be made AIP (autoimmune protocol), Whole30, paleo, pescatarian, gluten free, dairy free, grain free and keto friendly. 
    • To make this recipe keto friendly all you have to do is use vegetable noodles! 
    • If you are into fish lately like I am, you will want to check out my other favorite fish recipe on my blog-Gluten Free Fish and Chips.
    all ingredinets laid out in bowls

    Ingredients- 

    • Canned mackerel-I like the King Oscar brand, I have found it is the cleanest option! I am ok with it being in olive oil. If you like the lower fat option, you can get it in salt water. I personally think buying it stored in olive oil keeps it nice and moist. 
    • Pasta-You can use any kind of pasta here! Edamame, vegetable zoodles, or my favorite cassava noodles. If you are gluten free make sure you buy a gluten free kind!
    • Olive oil-To keep the pasta from clumping once it is done. 
    • Salt-To prevent the pasta from clumping as it cooks. 

    For the fresh pesto-

    • Basil-Fresh basil is a must! I include the stems in mine to minimize any waste. Make sure to wash off the basil prior to using it. 
    • Lemon juice-This helps with the flavor and adds a little kick. I highly suggest NOT skipping this key ingredient. 
    • Olive oil-I have found olive oil is the best base for pesto because it has the most perfect flavor profile. While olive oil is my preference, any kind of oil could technically work but note that it may change the flavor profile. 
    • Sea salt-This prevents the pesto sauce from tasting flat and is a must!
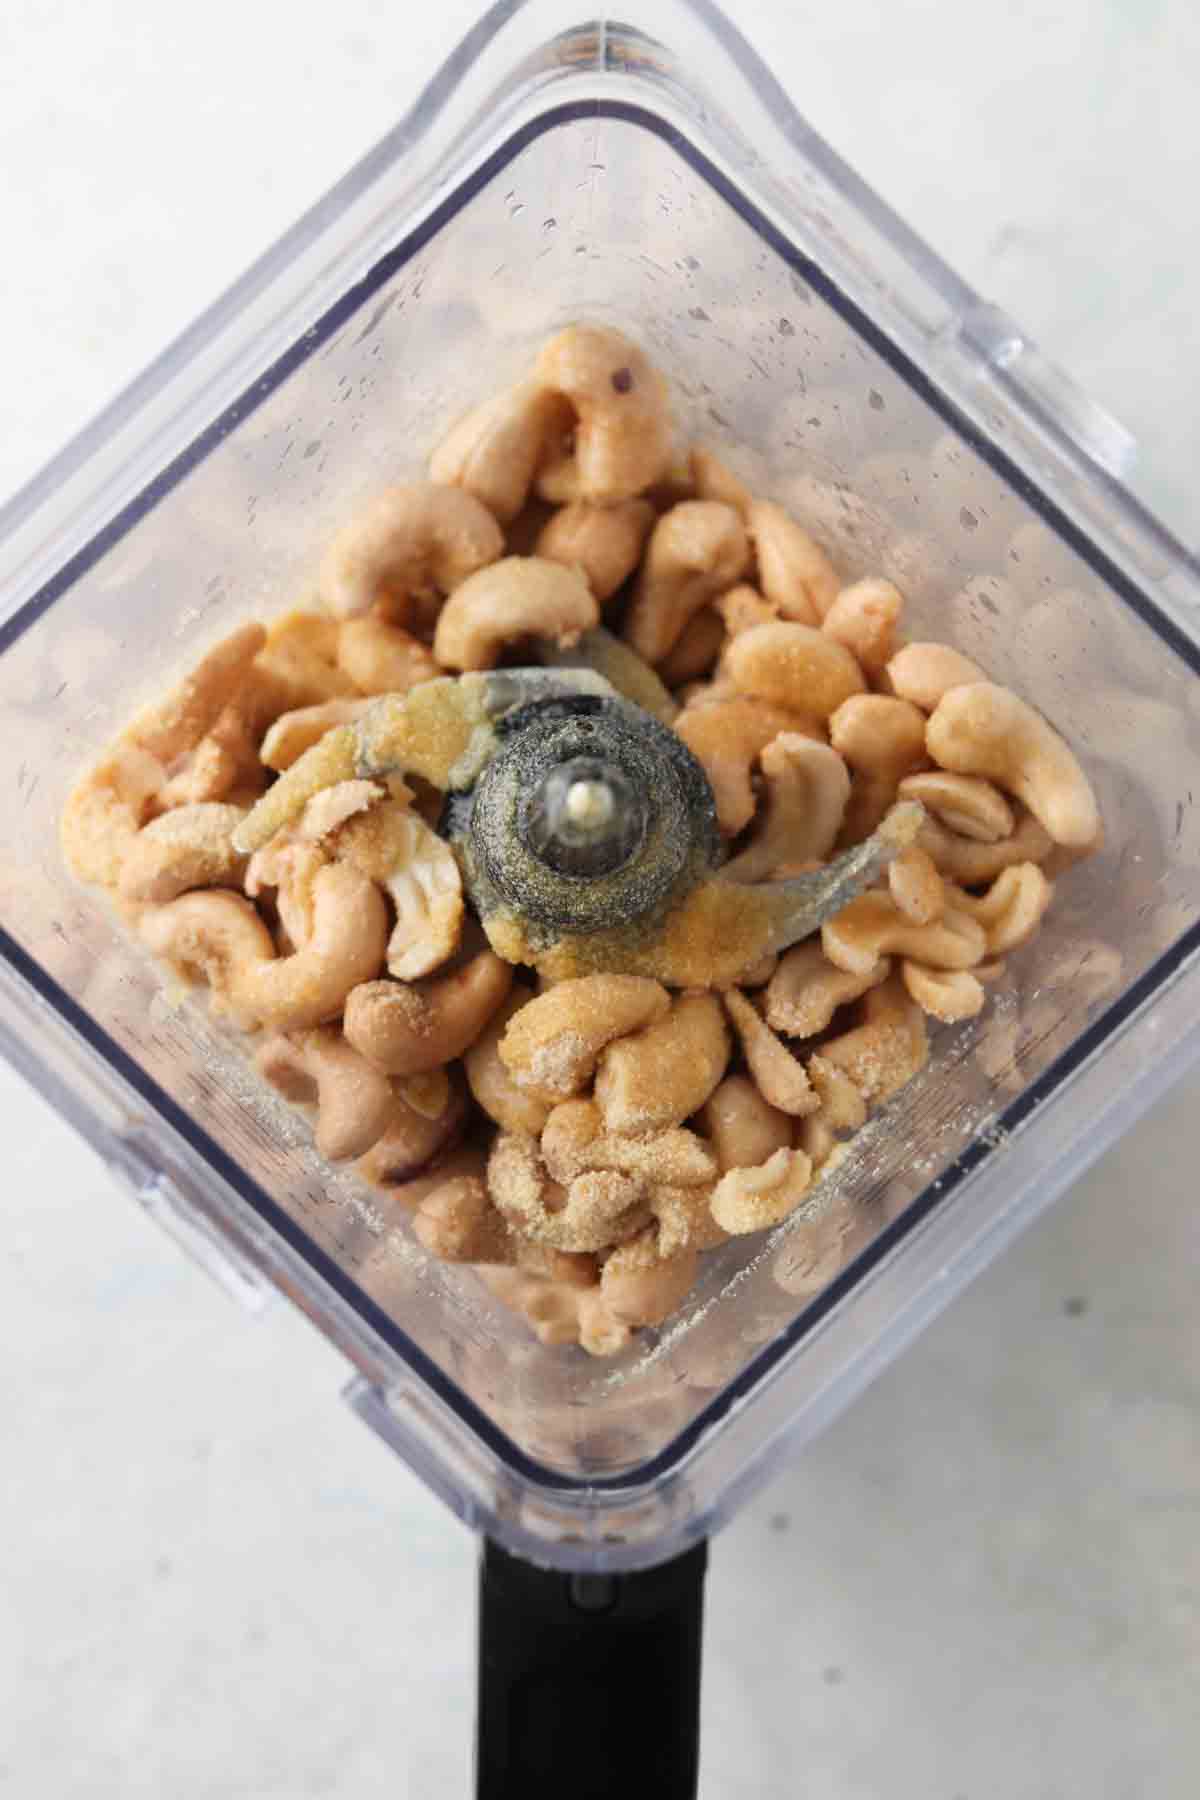
    • Pine nuts-My go to nut for pesto. Note you can use walnuts here if you do not have pine nuts but it will change the flavor profile. 
    • Garlic-For flavor.
    • Nutritional yeast-I use this instead of parmesan cheese but if you eat dairy you can use regular parm! I have been dairy free for years so nutritional yeast is always my go to swap out for regular parmesan cheese. 

    To serve-

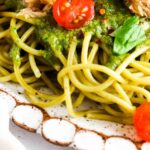
    • Fresh tomatoes, totally optional but delicious! 
    fresh pesto in the food processor

    How To Make:

    • First make the pasta according to the instructions on the box. Note that to get your pasta not to clump together, the salt mixed in with the pasta is important. I like to put a little sprinkle in to help prevent clumping. Also be sure to mix your pasta as you cook it. 
    • While the pasta is cooking, mix the pesto ingredients. I make my pesto in this food processor that I have had for years! 
    • Once the pasta is done, drain it and drizzle with olive oil to keep the noodles nice and soft. 
    • Pour the pesto overtop and mix well. 
    • Drain the mackerel cans and shred the fish with two forks. 
    • Add the shredded mackerel on top of the pasta and serve with optional tomatoes. 

    What Goes Well With This Recipe?

    • I love eating this pasta with my homemade garlic bread!

    What is the difference between mackerel vs salmon?

    • Mackerel is higher in fat, calories and contains more trace nutrients. 

    How Can I Eat Canned Mackerel?

    • I love eating it over greens when I do not have time to make this full recipe!

    Chef’s Tips:

    • Be sure to mix the pesto with the pasta as soon as it is ready! The pesto will prevent the noodles from sticking together. 
    • This recipe can last in the fridge for up to 4 days. 
    side picture of pasta and pesto with fish on top

    If you like this recipe, you will LOVE my other fish pasta recipes:

    • Shrimp Pesto Pasta
    • Gluten Free Shrimp Scampi

    If you enjoyed this recipe it would mean the world to me if you rated it and left a comment below. It helps others find it on google.xoxo-Allianna

    side picture of pasta and pesto with fish on top

    Easy Mackerel Pasta With Creamy Pesto

    Course Meals
    Cuisine American
    Prep Time 10 minutes minutes
    Cook Time 5 minutes minutes
    Total Time 15 minutes minutes
    Servings 3 servings
    Author Allianna Moximchalk
    866kcal
    Cost $10
    Print Recipe Pin Recipe

    Equipment

    • Food processor

    Ingredients

    For the pasta:

    • 1 box spaghetti I like Jovial cassava gluten free noodles
    • sea salt to prevent the pasta from sticking
    • 1 pound canned mackerel
    • olive oil to drizzle over the pasta once it is done

    For the pesto:

    • 4 cup fresh basil
    • 1/2 cup pine nuts omit for AIP
    • 8 cloves garlic
    • 1 1/2 cups olive oil
    • 1/2 cup nutritional yeast OR Parmesan cheese if you eat dairy
    • 2 lemons juiced
    • 1/2 tsp sea salt

    To serve:

    • fresh tomatoes optional, omit for AIP

    Instructions

    • Cook the pasta according to the instruction on the box. Sprinkle some sea salt in the pasta and mix while cooking to prevent sticking. Once the pasta is done, drain the noodles and drizzle with olive oil.
    • While the pasta is cooking make the pesto sauce by placing all ingredients in a food processor and blending until smooth. Pour the pesto over the pasta and drain the mackerel. Top off with fresh cherry tomatoes.
      If you enjoyed this recipe it would mean the world to me if you rated it and left a comment below. It helps others find it on google.xoxo-Allianna

    Notes

    If you enjoyed this recipe it would mean the world to me if you rated it and left a comment below. It helps others find it on google.xoxo-Allianna
     
    This recipe can hold up in the fridge for up to 3 days. 
    Quick, easy, pasta and fish recipe!
    Serving: 1serving | Calories: 866kcal | Carbohydrates: 43g | Protein: 64g | Fat: 40g | Saturated Fat: 19g | Polyunsaturated Fat: 23g | Monounsaturated Fat: 87g | Cholesterol: 119mg | Sodium: 500mg | Potassium: 1136mg | Fiber: 10g | Sugar: 7g | Vitamin A: 2366IU | Vitamin C: 48mg | Calcium: 491mg | Iron: 9mg
    Tried this recipe?Tag me on instagram @alliannaskitchen!
    keto taco dip on a plate with celery

    March 12, 2022 Appetizers

    Vegan Taco Dip

    This Vegan Taco Dip is so delicious and so darn good! This homemade dip only takes 10 minutes to make and is great for get togethers. No one even knows it is dairy free. The homemade taco seasoning combined with the creamy dairy free cream cheese and sour cream topped off with fresh vegetables is quite delightful. 

    keto taco dip on a plate with celery

    If you love a good dip like I do, you will love this recipe! Be sure to check out my other dairy free dips on my blog like my Beetroot Dip, Vegan Fruit Dip, and Vegan French Onion Dip Recipe.

    What Makes This Dairy Free Dip So Good?

    • The combination of the vegan sour cream and cream cheese is so creamy yet so light!
    • The homemade taco seasoning adds the perfect amount of seasoning. 
    • While I love the homemade seasoning, you can also use store bought to save on time. 
    • This dairy free dip pairs so well with plain veggies or chips. 
    • If you like this dip I have a feeling you will like my Dairy Free Buffalo Chicken Dip.
    • This recipe is naturally paleo, keto, low carb, Whole30, gluten free, dairy free and vegan friendly. 
    • We love making this dip in advance for events and parties, it is one less thing to do the day of and it holds up so well!

    Ingredients: 

    • Dairy free cream cheese-I love the Kite Hill brand. Any brand will work though!
    • Dairy free sour cream-I like the Kite Hill brand for this too, but any kind of dairy free sour cream will work. 
    • Taco seasoning– I like to make my own because there are not any additives or binders in it but you can also use a store bought packet if that is easier for you. 
    • Peppers-I prefer green peppers, but any kind of green peppers would work. 
    • Chopped tomatoes-Cherry tomatoes work great but any kind will work. I like to dice mine up finely. 
    • Black olives-Pitted and sliced, canned works great for this recipe. 
    cream cheese, sour cream, taco seasoning, olives, tomatoes, and peppers in bowls

    Step By Step Process:

    • First, place the sour cream, cream cheese and taco seasoning into a bowl.
    • Using a food processor, blend the mixture together until smooth. 
    • Once it is well mixed, pour the dip into a 8 by 8 casserole dish and sprinkle with the vegetables on top.
    • Store in the fridge until ready to serve. 
    cream cheese, sour cream, and taco seasoning in a bowl

    What Pairs Well With This?

    • I love eating my dairy free taco dip with chips (I love the Siete brand) or fresh vegetables like carrots or celery. 

    How Long Does It Last?

    • I suggest keeping this dip in the fridge for no more than 3 days. You can keep the dip itself in the fridge for up to a week, but without the vegetables. The veggies may get soft after 3 days so wait to add those until closer to the serving day.
    paleo taco dip in a bowl

    What Other Snacks Could I Serve With Vegan Taco Dip?

    • Dehydrated Kale Chips
    • Thai Pasta Salad
    overhead shot of taco dip with celery, carrots and chips on a plate

    Other Vegan Dips You Make Like:

    • Keto Salsa
    • Whole30 Hummus
    • Beet And Cauliflower Dip

    If you enjoyed this recipe it would mean the world to me if you rated it and left a comment below. It helps others find it on google.xoxo-Allianna

    overhead shot of taco dip with celery, carrots and chips on a plate

    Vegan Taco Dip

    Course Appetizer, Snack
    Cuisine American
    Prep Time 10 minutes minutes
    Servings 10 servings
    Author Allianna Moximchalk
    299kcal
    Cost $10
    Print Recipe Pin Recipe

    Equipment

    • mixing bowl

    Ingredients

    • 16 ounces dairy free cream cheese I like Kite Hill
    • 2 cups dairy free sour cream I like Kite Hill brand
    • 4 tbsp taco seasoning see below for homemade taco seasoning
    • 1 cup chopped tomatoes Cherry or roma
    • 1 cup olives pitted and sliced
    • 1 green pepper chopped

    Homemade taco seasoning (OPTIONAL-This recipe will make extras. Save rest for another time)

    • 1 tsp dried parsley
    • 1 tsp onion powder
    • 1 tsp garlic powder
    • 2 tsp paprika
    • 3 tsp oregano
    • 4 tsp black pepper
    • 1 tbsp sea salt
    • 2 tbsp ground cumin
    • 1/4 cup chili powder

    Instructions

    • Place the cream cheese, sour cream, and spices in a bowl and mix until smooth with a hand processor. Then, pour the dip into an 8 by 8 casserole dish. Now, sprinkle the veggies on top. Serve with fresh veggies or chips.
      If you enjoyed this recipe it would mean the world to me if you rated it and left a comment below. It helps others find it on google.xoxo-Allianna

    Notes

    If you enjoyed this recipe it would mean the world to me if you rated it and left a comment below. It helps others find it on google.xoxo-Allianna
    Quick, easy and delicious dairy free taco dip!
    Serving: 1serving | Calories: 299kcal | Carbohydrates: 11g | Protein: 5g | Fat: 28g | Saturated Fat: 15g | Polyunsaturated Fat: 2g | Monounsaturated Fat: 8g | Cholesterol: 74mg | Sodium: 1305mg | Potassium: 362mg | Fiber: 4g | Sugar: 4g | Vitamin A: 2929IU | Vitamin C: 14mg | Calcium: 156mg | Iron: 3mg
    Tried this recipe?Tag me on instagram @alliannaskitchen!
    brussel sprouts on a plate with a honey wand

    March 9, 2022 Allergy Friendly

    Honey Sriracha Brussel Sprouts

    These Honey Sriracha Brussel Sprouts are seriously to die for! They are the perfect combination of sweet and spice. The warm honey combined with the garlic powder and sriracha is simply delightful. This elegant side dish only takes 10 minutes to prep which means it is perfect for weeknights too! 

    Honey sriracha brussel sprouts on a plate with a wooden honey comb.

    The sweet, savory, and spice of this dish make it the perfect addition to any meal. You are not limited to poultry, beef, or seafood. These are also a perfect appetizer as well! If you like easy vegetable recipes like I do, be sure to check out the other veggie recipes on my blog like my Roasted Bok Choy Air Fryer Frozen Brussel Sprouts, and Blanched Broccoli Recipe.

    [feast_advanced_jump_to]

    What Makes This Recipe So Good?

    • It is super simple to make!
    • These brussel sprouts are crispy on the outside yet so soft on the inside.
    • This recipe requires less than 10 minutes of hands-on time, which makes it a great weeknight side dish. 
    • If you like your food a little spicier you can adjust the sriracha to appease your spicy taste buds. 
    • This recipe is naturally gluten free, paleo, dairy free, and plant based. 
    • If you like this recipe, you will also want to check out my Bacon Brussel Sprouts With Pomegranate or my Maple Brussel Sprouts. If I am making a big family meal I like to make this recipe with my Peas and Potatoes recipe too!
    • This recipe has so much flavor meaning it pairs so well with simple proteins, like seasoned chicken breast! 

    Ingredients: 

    Honey sriracha brussel sprout ingredients in small glass bowls.
    • Brussel sprouts-Some grocery stores nowadays sell brussel sprouts pre-cut. If you are looking to save on time in the kitchen this is an option! If you can spare 2-3 minutes you can save some money and cut them yourself. I cut the bottom off of mine then cut them into halves or thirds depending on how big they are. 
    • Honey-Any kind of honey will work. I love getting my honey from Costco. They have a big container of pure raw honey and it is so much more affordable then a bunch of small jars. 
    • Sriracha-In my option this is the best part because I am a big spice girl. If you like a lot of spice you can adjust the sriracha amount to your liking.
    • Garlic powder-For flavor. I like to use dried garlic powder. 
    • Sea salt-For taste. 
    • Cooking oil-I like to use avocado oil, but any oil will work! 

    See the recipe card below for a full list of ingredients and measurements.

    Substitutions and Variations

    • If you do not like honey, you can use a different sweetener such as agave.
    • You can choose the amount of sriracha based on your spice tolerance.

    This recipe has not been tested with other substitutions or variations. If you add or remove any ingredients, please let us know how it turns out in the comments below!

    Step by step instructions:

    Uncooked brussel sprouts sliced in half in a casserole dish.
    Photo 1: Preheat the oven to 400 degrees F. Trim off the ends of the brussel sprouts and slice in halves or fourths depending on the size of the brussels sprouts. Next, toss the brussel sprouts in cooking oil, sea salt, and garlic powder.
    Cooked honey sriracha brussel sprouts in a casserole dish.
    Photo 2: Place in the oven for 30-40 minutes. While the brussels are cooking, mix the sriracha and honey in a bowl. Then, pour over the brussel sprouts and serve warm.

    Expert Tips

    • Tip # 1: Never bake brussel sprouts with a sauce on them, they will come out soggy. Instead wait until they are done baking to add the sauce! A little bit of olive oil is the perfect touch to get them to roast nicely. 
    • Tip # 2: If preparing in advance, you can mix in the sauce, cover with foil, and placed in a warm but off oven to heat.
    • Tip # 3: If you are unsure of how much sriracha you can handle, you can start with less and add more once mixed in.

    Recipe FAQs

    Can I make this recipe in the air fryer?

    Absolutely! You would make the recipe the same way just in the air fryer instead of a roasting sheet in the oven. 

    Can I add bacon?

    Yes! Bacon is a nice touch. If you want to add bacon, chop up the bacon and roast the bacon with the brussel sprouts. The fat from the bacon will add so much flavor too. If you use my link to Butcher Box to order your bacon, you can get a free gift on your monthly box. 

    Can I reheat this dish?

    Yes! Reheat in the oven or air fryer for 5-10 minutes at 350 degrees F. The honey in the sauce can cause darkening of the brussel sprouts.

    Honey sriracha brussel sprouts on a clay plate with a wooden honey comb beside it.

    Storage Instructions

    • This recipe can be stored in an air tight container for up to 5 days in the refrigerator.

    Other Vegetable Side Dishes You Will Love

    • bacon wrapped asparagus 1 scaled
      Bacon Wrapped Asparagus In The Air Fryer
    • Easy air fryer spaghetti squash on a plate with fresh green herbs.
      Easy Air Fryer Spaghetti Squash
    • Lemon garlic asparagus on a serving dish.
      Lemon Garlic Asparagus
    • close up corner of salad
      Shaved Brussels Sprouts Salad

    Are you interested in a list of my go to healthy alternatives?

    Download your FREE guide below

    download here
    brussel sprouts on a plate with a honey wand

    Honey Sriracha Brussel Sprouts

    Course Side Dish
    Cuisine American
    Diet Gluten Free
    Prep Time 10 minutes minutes
    Cook Time 30 minutes minutes
    Total Time 40 minutes minutes
    Servings 4 servings
    Author Allianna Moximchalk
    132kcal
    Cost $3
    Print Recipe Pin Recipe

    Equipment

    • Air fryer

    Ingredients

    • 1 pound brussel sprouts
    • 1 tbsp cooking oil I love avocado oil
    • 3 tbsp honey
    • 1 tbsp sriracha
    • 1 tsp garlic powder
    • 1/2 tsp sea salt

    Instructions

    • Preheat the oven to 400 degrees F. Trim off the end of the brussel sprouts. Then, cut the brussel sprouts into halves or fourths depending on the size of the brussel sprouts. Then toss the brussel sprouts in the cooking oil, salt, and garlic powder. Place in the oven for 30-40 minutes (depending on how cripsy you like your veggies.) While the brussels are cooking mix the srircha and honey in a bowl. Then pour over the brussel sprouts. Serve warm.

    Notes

    Storage: This recipe can be stored in an air tight container in the refrigerator for up to 5 days. 
    Nutrition: The nutrition for this recipe is an estimate and the calorie count is not guaranteed.  It is based on 4 servings.
    Servings: This recipe should yield 4 servings. 
    Sweet yet spicy delicious brussel sprouts!
    Serving: 1seerving | Calories: 132kcal | Carbohydrates: 4g | Sugar: 4g
    Tried this recipe?Tag me on instagram @alliannaskitchen!
    toast on a plate with butter

    March 8, 2022 Air Fryer

    Air Fryer Toast

    Looking for the perfect way to make toast? Making Air Fryer Toast is one of the easiest ways to make it. This hassle free method only takes 3 minutes. The toast comes out crispy on the outside and oh so soft on the inside. This is my houses go to way to make toast.

    Air fryer toast on a plate with a pad of ghee on top.

    This recipe is perfect not only to eat plain or with homemade jam but is also the best for making sandwiches. I also love to use this recipe when I am making my Dairy Free Hollandaise Sauce. It is the perfect base to stand up to the avocado, eggs, and sauce.

    If you enjoy this recipe, you will also enjoy my AIP Pancakes as well.

    [feast_advanced_jump_to]

    Why You Will Love This Recipe

    • This recipe only takes 3 minutes to make. 
    • Depending on what kind of bread you use, this recipe can be made paleo, keto, gluten free, AIP (autoimmune protocol) or low carb friendly. 
    • This recipe won’t require you to pull out your big toaster oven. 
    • Depending on the type of air fryer you use, you can cook multiple pieces in the air fryer at once. 
    • The air fryer allows you to add in toppings like cinnamon while you are making it without having to worry about it coming off. 
    • Your toast will come out perfect every single time: crispy on the outside and nice and soft on the inside. 
    • If you like this recipe and have some dietary restrictions, you may want to check out my homemade AIP Bread Roll Recipe. 

    Ingredients

    Air fryer toast ingredients in glass bowls.
    • Bread– I tend to follow a lower carb diet so I love the Carbonaut brand. It is naturally gluten free and keto friendly. 
    • Cooking oil spray-I love using avocado oil for this but any kind of cooking oil will work. 

    See the recipe card below for a full list of ingredients and measurements.

    Substitutions and Variations

    • You can use you preferred type of bread for this recipe.
    • I prefer to use avocado cooking oil spray but you can use your cooking oil spray of choice.

    This recipe has not been tested with other substitutions or variations. If you replace or add any ingredients, please let us know how it turned out in the comments below!

    Step by Step Ingredients

    Brad in the air fryer.
    Photo 1: Add the bread to the baking rack in the air fryer.
    Spraying cooking oil spray on bread.
    Photo 2: Spray lightly with the cooking oil spray. Place on air fryer at 400 degrees F for 3 minutes.

    Equipment Needed

    • Air Fryer

    Expert Tips

    • Tip # 1: Be sure not to overcook your toast! Sometimes gluten free brands make their bread super small, if you are dealing with really small bread. Adjust the cooking time accordingly. I suggest starting off at 2 minutes if that is the case.
    • Tip # 2: If you do not have the air fryer rack, you could flip the toast after 1 minute to ensure both sides get evenly toasted.
    • Tip # 3: If you do not have an air fryer, you can also use the same instructions and make this recipe in your oven.

    Recipe FAQ’s

    What kind of Air Fryer do you use?

    I have this air fryer and love it! I have had it for years and have never had any issues. This one is amazing because it has 11 different functions yet it only takes up one spot on the counter. 

    What pairs best with toast?

    I love making toast as a snack and for breakfast. Here are a few other of my favorite easy breakfast and snack recipes: protein overnight oats and banana chia pudding.

    Can I make cinnamon toast in the air fryer?

    Yes! Sprinkle a little cinnamon on top before baking.

    What is the best kind of bread to use in the air fryer?

    Honestly, any kind of sandwich bread will work! Note that if they bread is a little smaller, like the gluten free bread I had mentioned the cooking time may be a little less.

    Toast on a plate with a pad of butter.

    Other Air Fryer Recipes You Will Love

    • air fried potato wedges on a plate with sauces
      Ninja Air Fryer Potato Wedges
    • crispy potatoes on a plate
      Air Fryer Home Fries
    • close up photo of pork belly in a bowl
      Air Fryer Pork Belly
    • close up photo of tomatoes in the air fryer with seasoning on top
      Air Fryer Roasted Tomatoes

    Are you interested in a guide of my go to healthy alternatives?

    download your FREE guide below

    download here
    toast on a plate with butter

    Air Fryer Toast

    Course Breakfast
    Cuisine American
    Diet Gluten Free
    Prep Time 2 minutes minutes
    Cook Time 3 minutes minutes
    Total Time 5 minutes minutes
    Servings 2 pieces
    Author Allianna Moximchalk
    90kcal
    Cost $1
    Print Recipe Pin Recipe

    Equipment

    • Air fryer

    Ingredients

    • 2 pieces bread I like gluten free
    • cooking oil spray

    Instructions

    • Add the bread to the baking rack in the air fryer. Spray lightly with the cooking spray oil. Place on air fryer 400 degrees F for 3 minutes.

    Notes

    Storage: This recipe can be stored in the refrigerator for up to 5 days but is best if eaten after being prepared. 
    Nutrition: The nutrition for this recipe is an estimate and the calorie count is not guaranteed.  It is based on 2 servings.
    Servings: This recipe should yield 2 servings. 
    Making toast in the air fryer is on of the best ways to do it!
    Serving: 1piece | Calories: 90kcal | Carbohydrates: 1g | Protein: 1g | Fat: 1g | Saturated Fat: 1g | Polyunsaturated Fat: 1g | Monounsaturated Fat: 1g | Sodium: 5mg | Potassium: 2mg | Fiber: 1g | Sugar: 1g | Vitamin A: 1IU | Calcium: 1mg | Iron: 1mg
    Tried this recipe?Tag me on instagram @alliannaskitchen!
    lasagna laid out in a casserole dish

    March 6, 2022 Beef

    Gluten Free Lasagna

    This Gluten Free Lasagna is something the whole family will love and eat. The creamy cashew cheese combined with the hearty beef red sauce is to die for!  This recipe can be made easily dairy free or with regular cheese and can be prepped ahead of time which makes it a great weeknight  dinner. 

    Piece of lasagna with gluten free noodles and cheese on a plate with a fork and fresh herbs on top.

    Growing up Italian, lasagna was one of my favorites! Once I found out I had celiac disease I thought I would have to go with it. Boy was I wrong! It is so easy to make a gluten or even grain free option. Plus the dairy free option is a walk in the park too!

    If you enjoy this pasta dish, you would also enjoy my Gluten Free Ravioli as well. If you love comfort food as much as I do, check out my Beef Gluten Free Meatloaf Without Breadcrumbs on my blog too!

    [feast_advanced_jump_to]

    What Makes This Recipe Work

    • First off, this recipe is just delightful. The creamy cashew cream combined with the gluten free noodles and beef red sauce is so good!
    • This recipe can be made with any kind of gluten free noodles- no bake or boil ones. 
    • I love this recipe because the cashew cheese tastes just like ricotta cheese, no one even knows it is dairy free. That said, it can be made with real cheese too if that is your thing.
    • It is a great recipe to prepare in advance, which means it is a great weeknight meal. I like to make my lasagnas on the weekend and then bake them during the week. 
    • This recipe is naturally dairy free, gluten free, soy free and can be made vegan if you omit the meat. 
    • If you like this recipe you will LOVE my Paleo Pizza Casserole recipe which is made with the same cashew cream. 
    • This recipe only takes 30 minutes to prepare, which means even if you do not make it ahead of time it is still a doable week day meal.

    Ingredients:

    Gluten free lasagna noodle ingredients laid out in small glass bowls.

    For the lasagna

    • Gluten free lasagna noodles-There are luckily so many gluten free noodles nowadays. I like the Taste Republic brand. Their noodles do not require baking which is so nice! There are also a few good other brands out there. Jovial makes a gluten free lasagna noodle but they do require boiling. 
    • Ground beef-This is my meat of choice. You can split it in half between beef and pork, use turkey or chicken instead. Any kind of protein will work for this. If you are vegan, just skip the meat. I love getting my beef from Butcher Box. If you use my link you can save on your first order.
    • Red sauce-I love Rao’s marinara sauce. While it is a little pricier in comparison to other brands, it is so worth the cost! In my opinion it is simply the best. You can get Roa’s at Sam’s Club or Costco which is a little cheaper than the regular grocery store. 
    • Fresh parsley-For taste.
    • Garlic powder, salt, pepper-To taste.
    • Eggs-To help hold everything together. 

    For the optional cashew cheese

    Cashew cheese ingredients laid out in small glass bowls on a counter top.
    • Cashews-I like to soak my cashews overnight. This makes them much easier to blend. 
    • Lemon-To add some flavor. 
    • Olive oil & water-To get the cashew cheese smooth. 
    • Garlic and salt-For flavor.

    See recipe card below for a full list of ingredients and measurements. 

    Substitutions And Variations

    • Mushrooms-I love mushrooms in my lasagna, you do not need to cook your mushrooms beforehand if you decide to use them. 
    • Nutritional least-To sprinkle on top in place of cheese. If you eat regular cheese, you can sprinkle fresh parmesan.

    This recipe has not been tested with other substitutions or variations. If you replace or add any ingredients, please let us know how it turned out in the comments below!

    Step By Step Instructions

    Ground beef and herbs in a grey saute pan.
    Step 1: Preheat the oven to 350 degrees F. If you are using hard baked noodles, cook them according to the box. Then, add the beef and spices to a saute pan and saute until the meet is no longer pink. Be sure to break up the meat during the process to break up big chunks.
    Ground beef in a skillet with red sauce and spices.
    Step 2: Once the beef is cooked throughout, stir in the red sauce.
    Cashews, olive oil, garlic powder, salt and lemon juice in a food processor.
    Step 3: If you are using regular cheese you can skip this step. For the cashew cheese-place all ingredients in the food processor and blend on high for 3 minutes. Then scrape the sides down and blend again on high until smooth.
    Cashew cheese, eggs and parsley in a glass bowl.
    Step 4: Now add the cashew cheese, eggs, and parsley into a glass bowl. If you are using regular cheese, you can add that in place of the cashew cheese.
    Mixed eggs, cheese and spices in a large glass bowl.
    Step 5: Mix the eggs, cheese (or cashew cheese if you are dairy free) and spices together with a silicone spatula.
    Mushrooms on a cutting board with a knife.
    Step 6: If you are using mushrooms, wash the mushrooms and slice into small bite sized pieces.
    Red sauce on the bottom of a white casserole dish with lasagna noodles.
    Step 7: Add red sauce to the bottom of the casserole dish and layer the lasagna noodles in a single layer.
    Ground beef sauce layered on top of lasagna noodles.
    Step 8: Add a layer of the beef sauce on top of the lasagna noodles.
    A layer of cheese on top of lasagna meat sauce.
    Step 9: Add a layer of cheese (cashew cheese if you are dairy free.)
    Mushrooms layered on top of the lasagna.
    Step 10: If you are adding the mushrooms, layer the mushrooms on top of the cheese. Repeat steps 7-10 again then pour with sauce on top.
    Uncooked lasagna with cheese sprinkled on top.
    Step 11: Sprinkle cheese (or dairy free cheese if vegan on top) and bake for 45 minutes. Allow the lasagna to cool for 20 minutes prior to serving.

    Equipment Needed

    • I suggest a 9 by 13 casserole dish. You want to make sure your dish is big enough so that the lasagna cooks evenly.

    Expert Tips

    • Tip #1: Be sure to allow the lasagna to cool for at least 20 minutes prior to serving. This will prevent it from falling part!
    • Tip #2: If you are using the no boil noodles, it is super important to make sure you have enough sauce. If you do not have enough sauce with the noodles, the noodles will turn out hard and not cook properly.

    Recipe FAQs

    What should I serve this with?

    I love eating my lasagna with a fresh salad and homemade garlic bread. My Vegan Garlic Bread is my absolute favorite! 

    Can you freeze lasagna?

    Yes! You can freeze this dish cooked or uncooked for up 1 month. One thing to note is if you do decide to cook the lasagna beforehand, you will need to allow it to completely cool prior to putting it in the freezer.

    How can I reheat?

    Lasagna tastes best reheated in the oven or air fryer. It will heat up faster if it is cut into pieces beforehand. If you are reheating individual pieces, it only takes about 5-10 minutes to be heated all the way through. If you are reheating multiple pieces, the time will depend on how many pieces you are reheating.

    Can I make this vegan or vegetarian?

    Yes! For the vegan version be sure to make the cashew lasagna. For the vegetarian version, just skip the meat!

    Where can I find gluten free lasagna noodles?

    You can find them at almost any grocery store and you can also find them online. I like to get mine from Thrive Market, if you use my link you can save on your first order.

    Lasagna with gluten free noodles and cashew cheese in a casserole dish.

    Storage

    • You can store lasagna in the refrigerator for up to 5 days in an air tight glass container.
    • Lasagna can be stored in the freezer for up to 1 month cooked or raw in an air tight container.

    Other Gluten Free Recipes You Will Love

    • stuffed cabbage laying on a tray
      Keto Cabbage Rolls
    • Slice of keto meatloaf on a plate with dairy free ranch and bacon.
      Keto Turkey Meatloaf With Ranch
    • paleo pizza casserole in a bowl with turkey pepperoni
      Paleo Pizza Casserole (Whole30)
    • Paleo big mac casserole on a plate.
      Easy Keto Big Mac Casserole

    Did you enjoy this recipe? Be sure to leave a rating and review below!

    Want access to my free anti-inflammatory guide, download it below!

    download here

    piece of lasagna with gluten free noodles and cashew cheese on a plate

    Gluten Free Lasagna

    Course Meals
    Cuisine American
    Prep Time 30 minutes minutes
    Cook Time 45 minutes minutes
    Total Time 1 hour hour 15 minutes minutes
    Servings 12 pieces
    Author Allianna Moximchalk
    757kcal
    Cost $15
    Print Recipe Pin Recipe

    Equipment

    • 9 by 13 casserole dish
    • high speed food processor

    Ingredients

    For the lasagna:

    • 1 package gluten free lasagna noodles I love the no boil taste republic brand. They are in the refrigerated part of the grocery store. Any kind of gluten free lasagna noodles will work!
    • 2 pounds ground beef I like Butcher Box. Use my link and save on your first order. You can also sub with ground chicken or pork. If you are vegan, skip!
    • 48 ounces red sauce I like Roa's, so worth the price!
    • 1/3 cup fresh parsley
    • 1 tsp garlic powder skip if you are not using meat
    • 1/2 tsp sea salt skip if you are not using meat
    • 1/2 tsp black pepper skip if you are not using meat
    • 1/3 cup nutritional yeast to sprinkle on top
    • 5 cups ricotta cheese see below for my go to dairy free substitute
    • 1 cup mushrooms sliced, OPTIONAL
    • 2 eggs

    For the cashew cheese:

    • 3 cups raw cashews I like to soak mine in water overnight to allow them to get night and soft. This is not a must but highly recommended.
    • 4 lemons juiced
    • 6 tbsp olive oil
    • 3 tbsp garlic powder
    • 1 cup water
    • 1/2 tsp sea salt

    Instructions

    • Preheat the oven to 350. If you are using hard lasagna noodles, cook them according to the box, drain and then lay them out to cool. If you are using no bake noodles, skip this step.
    • Now, make your meat sauce. Add your ground protein to a pan with sea salt, pepper and garlic powder. Break the meat apart and cook so it is no longer pink. One the meat is cooked, add in all of the red sauce except 3 cups (to use for the bottom and top of the lasagna.)
    • If you are making your own cashew cheese, place all ingredients in a blender and blend until smooth for about 4 minutes. You may need to scrape down the sides in the middle of blending to get everything mixed. Once the cheese is mixed, place the eggs and parsley in a bowl with the cheese and mix until smooth.
    • Put 1.5 cups of red sauce in the bottom of a casserole dish. Spread out the sauce in a thin layer. Then, add a single layer of the noodles to the bottom of the pan. Now, add a layer of the meat sauce, (optional mushrooms) and using a spoon add 12 "blobs" of cashew cheese. I prefer the blobs rather than spreading it out. Now add another layer of noodles. Do this on repeat until you have about 1/2 inch room at the top of the dish. For your last layer add the plain red sauce on top (should be 1.5 cups left) and sprinkle with nutritional yeast. Bake for 45 minutes (adjust if you are using a smaller or larger pan) covered with foil. Allow the lasagna to sit for 20 minutes prior to serving.
      If you enjoyed this recipe it would mean the world to me if you rated it and left a comment below. It helps others find it on google.xoxo-Allianna

    Notes

    Storage: You can store this recipe in the fridge for up to 5 days. This recipe can last uncooked in the freezer for up to 1 month. 
    Nutrition: The nutrition for this recipe is an estimate and not guaranteed and is based off of 12 servings. 
    Servings: This recipe should yield approximately 12 servings. 
    Easy Gluten Free Lasagna for weeknight dinners and company.
    Serving: 1serving | Calories: 757kcal | Carbohydrates: 45g | Protein: 33g | Fat: 30g | Saturated Fat: 18g | Polyunsaturated Fat: 4g | Monounsaturated Fat: 23g | Trans Fat: 1g | Cholesterol: 45mg | Sodium: 381mg | Potassium: 56mg | Fiber: 2g | Sugar: 2g | Vitamin A: 597IU | Vitamin C: 2mg | Calcium: 243mg | Iron: 4mg
    Tried this recipe?Tag me on instagram @alliannaskitchen!
    banana muffins with walnuts in them

    March 6, 2022 Breakfast

    Gluten Free Banana Walnut Muffins (Flourless)

    These Gluten Free Banana Walnut Muffins are so stinkin good and easy to make! Flourless muffins are a go to in my house, they are loaded with healthy fats and ingredients that you will likely already have on hand. These muffins only take 10 minutes to prep which means they are a great addition to your weekly meal prepping!

    a dozen gluten free banana muffins on a plate

    This recipe was sponsored by Heinen’s, my favorite grocery store in Ohio! I can’t forget to mention, kids love them too. If you enjoy this recipe, you will also like my Gluten Free Apple Muffins, Gluten-Free Blackberry Muffins, and Gluten Free Pumpkin Muffins as well. If you love all things banana like I do, check out my Gluten Free Banana Cake too!

    What Makes These Gluten Free Banana Muffins So Good?

    • They are super simple to make!
    • Secondly, they made for a great snack, breakfast, or even dessert. 
    • Third, these gluten free muffins freeze super well which means that I love to batch make them. I like to make 3-4 batches and freeze them. 
    gluten free banana muffin batter in a bowl

    Gluten Free Banana Walnut Muffin Ingredients: 

    • Nut butter-Any kind will work! I love using almond butter for this recipe.
    • Eggs-To help bind everything together. 
    • Flax seeds-This adds some extra fiber and in addition to the eggs helps bind everything together, 
    • Applesauce-This is a binder too, and it helps sweeten these gluten free banana muffins!
    • Banana-For the banana flavor.
    • Maple syrup-To add some sweetness. 
    • Walnuts-For a nice nutty crunch!
    • Apple cider vinegar-To help these muffins rise. 
    • Cooking oil spray-To prevent the muffins from sticking.
    muffins in a muffin pan

    How To Make:

    • First, preheat the oven to 350. 
    • Next, place all ingredients in a bowl together and mix well. 
    • If you are using paper muffin liners, line the cupcake tray with the paper liners. If you are using a silicone muffin tray, spray the pan with cooking oil spray. 
    • Now, divide the batter between the 12 muffin cups. 
    • Bake for 25 minutes. 

    What Kind Of Muffin Tray Should I Use?

    • I love these silicone ones HERE because the muffins literally just pop out and they require minimal clean up. 

    Can I Freeze These Muffins?

    • Yes! I love to batch bake them and freeze them to use at a later time. I find that if you freeze the cupcake papers, they will collect a ton of water so allow the muffins to cool prior to freezing them and remove the liners. 
    banana muffins with walnuts in them

    If you like this recipe, you will LOVE my other muffin recipes here:

    • Gluten Free Apple Muffins
    • Flourless Pumpkin Muffins
    • Gluten Free Zucchini Muffins
    • Paleo Blueberry Muffins

    If you enjoyed this recipe it would mean the world to me if you rated it and left a comment below. It helps others find it on google.xoxo-Allianna

    banana muffins with walnuts in them

    Gluten Free Banana Walnut Muffins

    Course Breakfast, Snack
    Cuisine American
    Prep Time 10 minutes minutes
    Cook Time 25 minutes minutes
    Total Time 35 minutes minutes
    Servings 12 muffins
    Author Allianna Moximchalk
    204kcal
    Cost $5
    Print Recipe Pin Recipe

    Equipment

    • muffin pan or silicone muffin pan

    Ingredients

    • 1 cup nut butter either almond or peanut butter
    • 1 banana mashed
    • 1/4 cup flax seeds
    • 1/2 cup applesauce
    • 1/4 cup maple syrup
    • 2 eggs
    • 1 tsp apple cider vinegar
    • 1/4 cup walnuts chopped
    • cooking spray oil I like avocado oil

    Instructions

    • Preheat the oven to 350. Place all ingredients in a bowl and mix together. If you are using a silicone muffin pan, spray it with the avocado oil (skip if you are using paper liners.) Then, evenly distribute the batter between the cups and bake for 25 minutes.
      If you enjoyed this recipe it would mean the world to me if you rated it and left a comment below. It helps others find it on google.xoxo-Allianna

    Notes

    If you enjoyed this recipe it would mean the world to me if you rated it and left a comment below. It helps others find it on google.xoxo-Allianna
    Quick, easy, flourless banana muffins!
    Serving: 1muffin | Calories: 204kcal | Carbohydrates: 13g | Protein: 6g | Fat: 15g | Saturated Fat: 1g | Polyunsaturated Fat: 5g | Monounsaturated Fat: 8g | Trans Fat: 1g | Cholesterol: 27mg | Sodium: 14mg | Potassium: 263mg | Fiber: 4g | Sugar: 7g | Vitamin A: 50IU | Vitamin C: 1mg | Calcium: 96mg | Iron: 1mg
    Tried this recipe?Tag me on instagram @alliannaskitchen!
    mint cookie bars on a baking sheet

    March 3, 2022 Allergy Friendly

    Healthy Mint Chocolate Bars

    These Healthy Mint Chocolate Bars are so simple and easy to make! We love making this recipe around the holidays: Christmas, Saint Patrick’s Day and Easter! This recipe only takes 30 minutes of hands on time, which makes it a great quick dessert to whip up yet still so elegant. 

    Paleo mint bars stacked up with milk in the back on a wooden cutting board.

    This recipe will give you all the great flavor of the classic cookies you grew up eating once a year. They delicious and a crowd pleaser for all mint chocolate lovers to enjoy their favorite flavors! This recipe is great year round.

    I have a huge sweet tooth and love to create sweet healthy recipes. Some of my favorite are: Chocolate Covered Oranges, Vegan Truffles, Vegan Reese’s, Gluten Free S’mores Cookies, Vegan Milkshakes, Gluten Free Edible Cookie Dough, Vegan Buckeyes, Gluten Free Chocolate Tart and Mini Dairy Free Chocolate Cakes.

    [feast_advanced_jump_to]

    Why You Will Love This Recipe

    • First off, I love using natural foods like spirulina as food coloring! So fun.
    • This recipe is just so delicious. I love the chocolate and mint combination. 
    • This recipe is naturally dairy free, gluten free, vegan, paleo, and grain free!
    • With a few modifications this recipe can be made AIP (autoimmune protocol friendly, too.)
    • This recipe does best when it has time to set, which means it is a great make ahead recipe for when you are having company. 
    • If you love mint in your desserts, you will also love my homemade Dairy Free Mint Chocolates. 
    • This is a kid friendly recipe, kids love these bars too!

    Ingredients

    Paleo mint cookie bar ingredients in small glass bowls.

    For the gluten free crust

    • Almond flour-This is the base of the crust. I love to get my almond flour from Costco, they sell it in bulk and the pricing is just so good, you can’t beat it! If you are following AIP (The autoimmune protocol) you can substitute half coconut flour and half cassava flour. 
    • Cacao powder-To give that chocolatey natural flavors. Make sure you buy unsweetened food. For AIP, use carob powder. You can also substitute for cocoa powder.
    • Sea salt-To taste.
    • Coconut butter-To help hold everything together. 
    • Warm water-To bind the ingredients together. 
    • Maple syrup-To sweeten the crust.
    • Vanilla extract-For flavor. Use vanilla powder for AIP.

    For the vegan creamy filling

    • Coconut cream-This is what really makes these bars creamy! I love Trader Joe’s brand of coconut cream. 
    • Almond butter-This adds so much flavor and texture. If you are doing AIP you can use my homemade Tigernut Butter recipe. If you are allergic to tree nuts, you can use a substitute such as granola butter.
    • Maple syrup-For sweetness. 
    • Spirulina- This is what gives these bars their green like color! Spirulina is a super food and really good for the immune system. That said, if you are doing AIP you will want to omit this because it is not allowed in the first phase. Note that by omitting this, your bars will not be green, but they will still taste so yummy!
    • Vanilla-For taste. Use the powder for AIP.
    • Peppermint oil–I love the Doterra brand. Please note that not all brands are created equally and intended for human consumption, so be sure whichever one you use, it is a clean one! If you do not have peppermint oil, you can substitute peppermint extract for mint flavor but the amounts will not be one for one.
    • Cocoa nibs-As chips, you can also use dark chocolate chips, unsweetened chocolate, bittersweet chocolate, dark chocolate bars, milk chocolate, or carob chips for AIP!

    See the recipe card below for a full list of ingredients and measurements.

    Substitutions and Variations

    • If you are following AIP, substitute half cassava flour and half coconut flour for the almond flour.
    • If you can’t find spirulina, you can use a natural green food coloring instead.
    • If you want additional coconut flavor, you can a small amount of melted coconut oil to the mixture.
    • If you do not like almond butter, you can substitute for nut butter of your choice such as peanut butter, cashew butter, or sunflower butter.
    • If these are not sweet enough the first time you make it, you can add cane sugar or organic sugar to the recipe as well the second time to the original recipe.

    This recipe has not been tested with other substitutions or variations. If you replace or add any ingredients, please let us know how it turned out in the comments below!

    Step by Step Instructions

    Gluten free cookie crust in a glass mixing bowl with a whisk in it.

    Photo 1: First, line an 8 by 8 baking sheet with wax paper or piece of parchment paper. Next, combine all of the crust ingredients in a small bowl and mix well.

    Chocolate cookie crust in an 8 by 8 pan.

    Photo 2: Transfer the chocolate mixture to the lined square pan and press firmly making it into a level and even chocolate crust for the bottom layer.

    Spirulina green mint mixture in a glass mixing bowl with a wooden spoon.

    Photo 3: Now, mix all of the filling ingredients together in a bowl to create a mint cream layer.

    Mint vegan mixture in a baking pan.

    Photo 4: Then, pour the mint filling over the crust and place into the freezer overnight to create the top layer. When you are ready to serve, cut the bars into squares.

    Expert Tips

    • Tip # 1: Be sure your bars are completely frozen before cutting into them! Without freezing them prior to cutting into them they will fall apart.
    • Tip # 2: If you like your desserts to be nice and crunchy, feel free to add some crusted nuts on top too!
    • Tip # 3: If you are having a hard time cutting the frozen bars, run your knife under hot water to make it easier to cut into even small pieces. It is also helpful to allow the mint chocolate bars to sit at room temperature for a small amount of time as well.

    Recipe FAQs

    What Is Spirulina?

    Spirulina is a plant algae that is rich in nutrients. It can often times be consumed in supplement and food form. When it is mixed with food, it can add a beautiful green color like it did in these mint bars! I also like using it in smoothies too.

    What If I Can’t Find Spirulina?

    A natural green food coloring will work! Most stores now carry natural food colorings. 

    Can I Make This Recipe AIP friendly?

    Yes! The recipe card below gives alternatives to ingredients so that you are able to make this recipe AIP compliant.

    Green mint cookie bars on a baking sheet with chocolate chips.

    Storage Instructions

    • This recipe can be stored in an airtight container in the freezer for up to 1 month.

    Other Fun Gluten Free Dessert Recipes

    • Cake pops on a stick in a blue cup with white sprinkles on top.
      No Bake Gluten Free Cake Pops
    • 6 slices of cookie cake stacked next to each other with sea salt sprinkled on top.
      Gluten Free Cookie Cake With Fudge Topping
    • Chocolate chip cookie in a heart shape skillet with ice cream on top.
      Healthy Mini Skillet Cookie
    • close up shot of a gluten free cupcake with vanilla frosting on top
      Gluten Free Cannoli Cupcakes

    Are you interested in a guide of my go to healthy alternatives?

    Download your FREE guide below

    download here
    mint cookie bars on a baking sheet

    Paleo Mint Cookie Bars

    Course Dessert
    Cuisine American
    Diet Gluten Free
    Prep Time 30 minutes minutes
    Freeze time 12 hours hours
    Total Time 12 hours hours 30 minutes minutes
    Servings 9 bars
    Author Allianna Moximchalk
    395kcal
    Cost $8
    Print Recipe Pin Recipe

    Equipment

    • 8 by 8 casserole dish

    Ingredients

    For the crust:

    • 1 1/2 cups almond flour sub half cassava flour and half coconut flour for AIP or nut free
    • 1/2 cup cacoa powder sub carob powder for AIP
    • 1/2 tsp sea salt
    • 1/3 cup coconut butter
    • 1/3 cup warm water
    • 3 tbsp maple syrup
    • 1 tsp vanilla extract use vanilla powder for AIP

    For the filling:

    • 1 1/2 cup coconut cream melted
    • 1/2 cup almond butter use tigernut butter for AIP
    • 3 tbsp maple syrup
    • 1 tsp spirulina can sub with natural green food coloring. skip for AIP
    • 1 tsp peppermint oil I like doterra
    • 1/2 cup cocoa nibs or chocolate chips sub carob chips for AIP

    Instructions

    • Line an 8 by 8 baking sheet with wax paper. Combine the curst ingredients and press down into the baking sheet evenly. Now mix all of the filling ingredients and pour over the crust. Place the pan in the freezer overnight. Cut the squares prior to serving. Store in the freezer.

    Notes

    Storage: This recipe can be stored in an airtight container in the freezer for up to 1 month.
    Nutrition: The nutrition for this recipe is an estimate and the calorie count is not guaranteed.  It is based on nine servings.
    Servings: This recipe should yield 9 servings.
    These paleo mint cookie bars are super simple to make and something everyone will love!
    Serving: 1bar | Calories: 395kcal | Carbohydrates: 20g | Protein: 9g | Fat: 34g | Saturated Fat: 14g | Polyunsaturated Fat: 2g | Monounsaturated Fat: 5g | Sodium: 138mg | Potassium: 269mg | Fiber: 5g | Sugar: 10g | Vitamin A: 2IU | Vitamin C: 1mg | Calcium: 109mg | Iron: 2mg
    Tried this recipe?Tag me on instagram @alliannaskitchen!
    dairy free strawberry pretzel salad on a plate with whipped cream on top

    March 3, 2022 Allergy Friendly

    Gluten Free Strawberry Pretzel Salad

    This Gluten Free Strawberry Pretzel Salad is super fun and easy for Spring and Summer! We love to make it for cookouts, picnics, Memorial Day weekend and the 4th of July. This easy recipe only requires 25 minutes of hands-on time and is a great gluten free dessert that you can prepare in advance. 

    Dairy free strawberry pretzel salad on a plate with whipped cream on top.

    This recipe is always a crowd pleaser whenever I bring it to a gathering. It is sweet but also refreshing and not heavy in the summer heat. If you have leftover strawberries after making this recipe, check out my Strawberry Simple Syrup. I love taking this recipe to Summer Cookouts along with my other favorite Summer BBQ recipes like my Gluten Free Potato Salad and Rhubarb Gluten Free Cake recipe.

    [feast_advanced_jump_to]

    Why You Will Love This Recipe

    • First off, the combination of sweet, salty and crunchy is to die for. 
    • This recipe is naturally gluten free, dairy free, and it can be made paleo and grain free. 
    • I love using this recipe for events when I want to prep something in advance and can still count on it holding up well. This recipe does even better the longer it sits in the fridge. 
    • If you love strawberry desserts, you will want to also check out my Vegan Chocolate Covered Strawberry recipe or my Gluten Free Vanilla Cupcakes With Strawberry Frosting. 
    • This recipe only takes 25 minutes of hands on time which means it is super easy to make!
    • This recipe can easily be made to accommodate dietary restrictions, it can be made grain free AND gluten free. 
    • We love making this recipe all summer long. 

    Ingredients

    Gluten free strawberry pretzel salad ingredients in small glass bowls.
    • Strawberry jello-You can use the traditional jello brand for this or you can use a brand that is flavored and dyed with natural fruits. Personally I do not consume red dye so I like one of the healthier alternatives. Simply delish and Bakol are two of my favorites. You can also make your own healthy jello using my Healthy Jello recipe. 
    • Gluten free pretzels-All stores have these nowadays. My favorite brand is also grain free. Quinn is my favorite brand. 
    • Coconut whipped cream-You can find this in the freezer section of the grocery store. If you do eat dairy, you can also use regular whipped cream. 
    • Cream cheese-I love the Kite Hill almond cream cheese, but regular cream cheese will also work. 
    • Coconut sugar-This is my go to sweetener with paleo baking. This makes the pretzel crust nice and sweet. You can use regular sugar if that is more of your jam. 
    • Strawberries-Fresh ones are a must for the top. 
    • Ghee-To get the sugar and pretzels to stay together. If you tolerate dairy, you can use regular butter here. 
    • Cooking oil spray-To prevent the paleo strawberry pretzel salad from sticking. I like the avocado oil from Costco. 

    See the recipe card below for a full list of ingredients and measurements.

    Substitutions and Variations

    • You could switch up the fruit and flavor jello to change the flavor and have variety.
    • If you are not a fan of coconut whipped cream, you can use your preferred choice of dairy free whipped cream.

    This recipe has not been tested with other substitutions or variations. If you replace or add any ingredients, please let us know how it turned out in the comments below!

    Step by Step Instructions

    Jello mix in water in a white bowl with a pick spatula.
    First, preheat the oven to 350 degrees F. Next, spray the 9 by 13 inch casserole dish with avocado oil or cooking spray oil. Now, combine the boiling water with the jello mix and mix well.
    Gluten free pretzels in the food processor.
    Next, place the pretzels in the food processor for 10 seconds to break them up. Be sure not to make them too fine, a few chunks in there is good!
    Ghee and coconut sugar in a sauce pan.
    Then, add the coconut sugar with the ghee on the stovetop and bring to a simmer.
    Pretzels mixed with coconut sugar and ghee.
    Add the pretzels to the saucepan and mix.
    Pretzel, ghee, and coconut sugar mixture spread in the bottom of a white casserole dish.
    Next, spread out the pretzel layer on the bottom of the casserole dish in an even layer.
    Whipped cream and cream cheese in a bowl.
    Set that aside and add the whipped cream with the cream cheese to a bowl and mix with a handheld mixer.
    Cream cheese and whipped cream being spread over pretzel layer.
    Now, add a layer of the cream cheese and coconut whip above the pretzel layer.
    Sliced up strawberries on a cutting board.
    Slice up the strawberries and remove the stems.
    Strawberry jello layer poured on top.
    Next, add the strawberries and jello into a bowl together and mix.
    Strawberry jello layer poured on top.
    Finally, pour the layer of the jello and strawberries on top of the coconut whipped layer and cover with plastic wrap. Set in the fridge for at least 4 hours.

    Equipment Needed

    • Blender
    • Baking dish

    Expert Tips

    • Tip # 1: When you are blending the pretzels, I recommend to use the pulse button so that you have more control over the size of the pretzels.
    • Tip # 2: Create a seal with the coconut whipped cream and cream cheese mixture on top meaning make sure it goes all the way to the end to prevent the jello from falling through.
    • Tip # 3: Be sure to allow the jello to sit for at least 4 hours prior to cutting into it. If you do not allow it to sit long enough it will fall apart. 

    Recipe FAQ

    How do I prevent it from falling apart?

    I highly suggest using a straight and sharp edge spatula to cut the salad, I use this sharp spatula.

    What should I serve this dish with?

    I love to serve mine with extra coconut whipped cream, fresh strawberries and pretzels on top.

    Should I use salted or unsalted pretzels?

    That is your flavor preference! I prefer with unsalted or lightly salted pretzels.

    Far out shot of strawberry salad on a plate with a cold spoon.

    Storage Instructions

    • This salad can last up to a week in the fridge!

    Other Strawberry Recipes You Will Love

    • strawberry banana smoothie bowl in a bowl with berries on top
      Strawberry Banana Smoothie Bowl
    • strawberry mint mocktail6
      Easy Strawberry Mocktail
    • strawberry poppyseed salad 1 scaled
      Panera Inspired Strawberry Poppyseed Salad
    • strawberry cupcake with a strawberry on top
      Gluten Free Strawberry Cupcakes

    Are you interested in getting a list of my healthy go to alternative?

    Download your FREE guide below

    download your free guide
    dairy free strawberry pretzel salad on a plate with whipped cream on top

    Gluten Free Strawberry Pretzel Salad

    Course Dessert
    Cuisine American
    Prep Time 25 minutes minutes
    Rest time 4 hours hours
    Total Time 4 hours hours 25 minutes minutes
    Servings 8 servings
    Author Allianna Moximchalk
    649kcal
    Cost $10
    Print Recipe Pin Recipe

    Equipment

    • Hand mixer
    • Saucepan
    • 9 by 13 casserole dish

    Ingredients

    • 3 ounces strawberry jello I like the brands that are colored with real fruits, like Bakol
    • 2 cups boiling water
    • 2 1/2 cups gluten free pretzels
    • 1/4 cup coconut sugar
    • 1/2 cup ghee or butter
    • 8 ounces cream cheese I like the Kite Hill Dairy free brand
    • 8 ounces cool whip I like the vegan dairy free kind in the freezer section or homemade
    • 1 pound fresh strawberries sliced
    • cooking spray oil I like avocado oil

    Instructions

    • Preheat the oven to 350 degrees F. Combine the strawberry jello with the boiling water and stir until it is dissolved.
    • Place the pretzels in a food processor for 10 seconds to break them up, but not too fine.
    • In a separate pan from the jello mix the ghee (or butter) with the coconut sugar and bring to a simmer. Then add in the crushed pretzels.
    • Spray a 13 by 9 casserole dish with avocado oil spray. Add in the pretzel mix to the bottom and press down evenly and bake for 10 minutes. Allow the crust to completely cool before adding in the whipped cream. Then, in a bowl mix the cool whip with the cream cheese until smooth. Add the cream cheese overtop of the pretzel layer. Make sure you spread the coconut whip layer all the way to the edge of the pan so that it creates a seal and the jello does not fall though.
    • Remove the stems from the strawberries and slice berries. Add the strawberries to the jello mixture and then pour over the coconut whipped cream mixture. Cover with clear wrap and allow to set for at least 4 hours.

    Notes

    Storage: This dish can be stored in the refrigerator in an air tight container for 5 days. 
    Nutrition: The nutrition for this recipe is an estimate and the calorie count can not be guaranteed.  It is based on 8 servings. 
    Servings: This recipe should yield 8 servings.
    Delicious, easy and fun healthier gluten free pretzel strawberry salad.
    Serving: 1slice | Calories: 649kcal | Carbohydrates: 98g | Protein: 5g | Fat: 27g | Saturated Fat: 16g | Polyunsaturated Fat: 1g | Monounsaturated Fat: 6g | Cholesterol: 65mg | Sodium: 1379mg | Potassium: 158mg | Fiber: 1g | Sugar: 30g | Vitamin A: 437IU | Vitamin C: 33mg | Calcium: 68mg | Iron: 1mg
    Tried this recipe?Tag me on instagram @alliannaskitchen!
    salmon with pesto on top

    March 2, 2022 Allergy Friendly

    Pesto Salmon

    This Pesto Salmon Recipe is so easy to make and oh so delicious. There is nothing like pesto sauce, the creamy sauce combined with garlic and wild caught salmon is delightful. This recipe only takes 10 minutes to prep and 20 minutes to make which makes it an easy weeknight dinner!

    salmon on a plate

    If you enjoy this recipe, you would also enjoy my Easy Gluten Free Fish and Chips and my Easy Gluten Free Salmon Cakes recipe as well.

    What Makes This Pesto Salmon So Good?

    • The flavor in this recipe is unreal! It is so darn good.
    • It only takes just a few minutes to make. 
    • This is a great quick dinner for nights you are in a rush. 
    • This recipe is paleo, Whole30, low carb, keto, gluten free, dairy free, and even AIP friendly (if you omit the nuts.)
    • You can make this salmon dish with either store bought or fresh pesto. My favorite is making it with my own homemade pesto recipe. If you have leftover pesto, check out my Pesto Orzo Salad.
    • If you like this salmon recipe, you will love my other salmon recipes: Maple Crusted Salmon, Whole30 Salmon Cakes, and Honey Sriracha Salmon. 
    • This recipe is perfect for meal prep!
    salmon, pesto, garlic powder and sea salt laid out in bowl

    Ingredients: 

    • Salmon filets-I love using Butcher Box. If you use my link you can get a free gift with every order. I love using Butcher Box. Every month they send me a monthly supply of all of my favorite proteins. Everything is the highest quality. I love having their stuff on hand as a quick dinner option. 
    • Sea salt & garlic powder-For flavor.
    • Pesto-You can buy store bought if you want to save 5 minutes or you can whip up my homemade pesto recipe! I am obsessed with the homemade kind. It is so dang good! 

    For homemade pesto:

    • Basil-The fresher the better!
    • Pine nuts-This will give the pesto that nutty flavor. While you can use any kind of nut, pine nuts are my favorite. 
    • Lemon juice-To add some acid. 
    • Nutritional yeast-This gives the pesto the cheesy flavor. If you eat dairy, you can use parmesan cheese but since I am dairy free I love nutritional yeast. 
    • Garlic-For flavor.
    • Olive oil-My go to oil for fresh pesto. In my opinion it has the best flavor profile. 
    salmon in a baking dish with pesto sauce on top

    How To Bake:

    • Preheat the oven to 350. 
    • Now, if you are making the fresh pesto, place all ingredients into the food processor and blend until smooth. If you are using store-bought, skip this step.
    • Place the salmon filets into a casserole dish and sprinkle with salt and garlic powder. 
    • Now drizzle the salmon on top. 
    • Bake for 15-20 minutes depending on how well done you like your salmon. 

    How Should I Reheat This?

    • I love reheating salmon in the air fryer. I have had this air fryer for years and love it!

    How Long Does Salmon Last In The Fridge?

    • I suggest keeping salmon in the fridge for up to 3 days. 

    Can I Grill The Salmon?

    • Yes! I would grill at 350 degrees F for 15 minutes. 

    What Goes Well With This Dish?

    • I love eating pesto salmon with fresh vegetables!
      • Air Fried Green Beans
      • Sweet Potato Mash 
      • Lemon Garlic Asparagus 
      • Air Fryer Roasted Tomatoes
    close of photo of delicious salmon

    If you like this recipe, you will love:

    • Herb Crusted Salmon
    • Lemon Dill Dijon Salmon

    If you enjoyed this recipe it would mean the world to me if you rated it and left a comment below. It helps others find it on google.xoxo-Allianna

    close of photo of delicious salmon

    Pesto Salmon

    Course Main Course
    Cuisine American
    Prep Time 10 minutes minutes
    Cook Time 20 minutes minutes
    Total Time 30 minutes minutes
    Servings 3 people
    Author Allianna Moximchalk
    751kcal
    Cost $10
    Print Recipe Pin Recipe

    Equipment

    • Casserole dish
    • Food processor If you are making your own pesto

    Ingredients

    For the salmon:

    • 3 6 ounce salmon filets I love getting mine from butcher box!
    • 1/4 tsp sea salt
    • 1/2 tsp garlic powder
    • 1 cup pesto see below recipe for homemade pesto

    Homemade pesto: (optional)

    • 2 cups fresh basil
    • 1/4 cup pine nuts omit for AIP
    • 4 cloves garlic
    • 1/2 cup olive oil
    • 1/4 cup nutritional yeast parm cheese if you eat dairy!
    • 1 lemon juiced
    • 1/2 tsp sea salt

    Instructions

    • Preheat the oven to 350. If you are making your own pesto, place all ingredients in the food processor and blend until smooth. If you are using store bought-skip. Lay out the salmon on a baking dish and sprinkle with garlic powder and sea salt. Then, drizzle the pesto on top. Bake for 15-20 minutes depending on how well done you like your salmon. I like to save some extra sauce to dip in on the side.
      If you enjoyed this recipe it would mean the world to me if you rated it and left a comment below. It helps others find it on google.xoxo-Allianna

    Notes

    If you enjoyed this recipe it would mean the world to me if you rated it and left a comment below. It helps others find it on google.xoxo-Allianna
    Quick, easy and delicious salmon recipe.
    Serving: 1piece | Calories: 751kcal | Carbohydrates: 15g | Protein: 9g | Fat: 75g | Saturated Fat: 11g | Polyunsaturated Fat: 8g | Monounsaturated Fat: 28g | Cholesterol: 7mg | Sodium: 1358mg | Potassium: 265mg | Fiber: 4g | Sugar: 4g | Vitamin A: 2523IU | Vitamin C: 23mg | Calcium: 181mg | Iron: 2mg
    Tried this recipe?Tag me on instagram @alliannaskitchen!
    mini chocolates laid out on a counter

    February 23, 2022 Allergy Friendly

    Dairy Free Mint Chocolates

    These Dairy Free Mint Chocolates are super simple to make and so delicious! The quick and easy vegan dessert only requires 10 minutes of hands-on time. This recipe is super kid friendly and a treat the whole family can enjoy. We love making these mini chocolates for the holidays, especially Saint Patrick’s Day.

    mini chocolates laid out on a counter

    What Makes This Recipe So Good?

    • First off, this recipe only takes 10 minutes of hands on time yet these mini chocolates feel like such a fancy treat. 
    • The mint and chocolate combination is so darn delicious and honestly one of my favorites! 
    • This recipe is SO easy and super kid friendly. It is the perfect recipe for kids to help with. 
    • These mini chocolates are vegan, dairy free, paleo and gluten free!
    • This recipe freezes super well which makes it a great recipe to make in advance for gatherings. 
    • The silicone chocolate molds allow for easy clean up!
    • If you like this recipe, you would love my Chocolate Covered Oranges, Vegan Chocolate Truffles, Dairy Free Chocolate Ganache, and Vegan Milkshakes.
    mint chocolate ingredients laid out in bowls

    Ingredients: 

    • Dairy free chocolate-I like the Enjoy Life brand or the Hu brand. Both are allergy friendly and dairy free. 
    • Peppermint oil–I love using Doterra. It is important to note that not all oils are created equally. A lot of them are not made for human consumption. This is why I only like Doterra. You can also use peppermint extract. 
    melted chocolate in a bowl with a whisk

    Step By Step Recipe Instructions:

    • First, place your chocolate in a microwave-friendly bowl. 
    • Next, microwave the chocolate for 30 seconds. Then whisk it for 30 seconds and place back in the microwave for an additional 30 seconds. The chocolate should need to go into the microwave 3 times. Be sure to whisk it in between. If you do not whisk it in between it will clump up and burn. In other words, this is important!
    • Once the chocolate is nice and silky smooth, add in the peppermint and whisk again. 
    • Now, using a 1 tsp measuring spoon. Add the chocolate to the silicone molds. 
    • Place the molds in the freezer for one hour then pop out the chocolates. 
    mint drops into chocolate

    How Long Do These Last?

    • These chocolates will last in the freezer for months.
    • They will last for up to two weeks in the fridge. 
    chocolate on a tsp

    What Kind Of Mold Should I Use?

    • I have this silicone chocolate mold. I love them because they are so easy to clean up.
    chocolate in molds

    Chefs Tips:

    • Be sure to whisk the chocolate in between sessions in the microwave. Without mixing it up, it will definitely burn. 
    mini chocolates on a plate

    If you liked this recipe, you will LOVE:

    • Vegan Twix Bars
    • Chocolate Covered Pecans
    • Chocolate Covered Oranges 
    • Vegan Chocolate Truffles 
    • Vegan Reece’s

    If you enjoyed this recipe it would mean the world to me if you rated it and left a comment below. It helps others find it on google.xoxo-Allianna

    mini chocolates laid out on a counter

    Dairy Free Mint Chocolates

    Course Dessert
    Cuisine American
    Prep Time 10 minutes minutes
    Freeze time 1 hour hour
    Total Time 1 hour hour 10 minutes minutes
    Servings 15 chocolates
    Author Allianna Moximchalk
    121kcal
    Cost $6
    Print Recipe Pin Recipe

    Equipment

    • silicone chocolate molds
    • microwave friendly bowl

    Ingredients

    • 2 cups dairy free chocolate I like the Hu or enjoy life brand
    • 10 drops peppermint oil or peppermint extract

    Instructions

    • Place the chocolate in a microwave friendly bowl. Microwave for 30 seconds. Then whisk the chocolate the chocolate for 30 seconds. Now repeat this for a total of 3 times-90 seconds total with whisking every 30 seconds. Now, add the peppermint to the chocolate and mix. Using a 1 tsp measuring spoon, pour in the chocolate into the molds. Now place the chocolate in the freezer for 1 hour.
      If you enjoyed this recipe it would mean the world to me if you rated it and left a comment below. It helps others find it on google.xoxo-Allianna

    Notes

    If you enjoyed this recipe it would mean the world to me if you rated it and left a comment below. It helps others find it on google.xoxo-Allianna
    This quick and easy dairy free dessert is so yummy and something everyone will love!
    Serving: 1chocolate | Calories: 121kcal | Carbohydrates: 14g | Protein: 2g | Fat: 8g | Saturated Fat: 5g | Fiber: 2g | Sugar: 11g | Calcium: 31mg | Iron: 2mg
    Tried this recipe?Tag me on instagram @alliannaskitchen!
    keto salsa in a bowl with a lime and cilantro on top with low carb chips on the side

    February 22, 2022 Allergy Friendly

    Easy Keto Salsa

    This Homemade Keto Salsa is full of flavor and makes for a great weekend snack or appetizer! It is seriously the best. The fresh cilantro combined with the ripe tomatoes and jalapeños is oh so delicious. We love using this homemade salsa for chips and dips but also on tacos too.

    paleo salsa on a platter with keto chips and fresh cilantro

    If you love a good healthy dip recipe like this one, you also have to check out my Simple Beetroot Dip, it is so good! If you enjoy this recipe, you will also enjoy my Bacon Wrapped Chicken Bites as well. This recipe has been my go to to pair with my Dairy Free Enchiladas too!

    What Makes This The Best Keto Salsa?

    • First off, it is so easy to make! This recipe takes 5 minutes max. You do not even have to cut up the ingredients, all you have to do is throw everything in the food processor and hit blend.
    • Secondly, this homemade keto salsa is seriously the best. It is loaded with flavor and has a nice spicy kick. 
    ingredients needed for keto salsa

    Keto Salsa Ingredients: 

    • Red onion-For flavor.
    • Jalapeno-For a nice kick. 
    • Fresh cilantro-One of my favorite parts of this recipe. Skip if you are not a cilantro fan. 
    • Fresh garlic-Stick to fresh! It tastes so much better than dried up garlic. 
    • Lime juice-To add a little bit of acid. 
    • Chili powder-To add a nice kick with the jalapeno. 
    • Sea salt-To taste.
    tomatoes, jalapenos, onion, garlic in a food processor

    How To Make:

    • The one thing I do suggest chopping up if you do not have a big food processor is the red onion. 
    • First, add the ingredients to the food processor for 10 seconds for chunky salsa and 20 seconds for thinner salsa. 

    What Should I Serve With Low Carb Salsa?

    • I love keeping the whole snack keto friendly by using veggies! Siete also has AMAZING almond flour based chips that are to due for that would go great with this.
    blended homemade salsa

    How Long Does Homemade Salsa Last In The Fridge?

    • I would keep this in the fridge for no longer than 5 days in an airtight glass container! 

    What Kind Of Food Processor Do You Use?

    • I use this one HERE and love it. I have had it for years. It always cleans up so well. 

    What Other Snacks Go Well With this? 

    • Air Fryer Potato Skins
    • Keto Jalapeno Poppers
    • BBQ Bacon Meatballs
    • Pork Belly On The Grill
    keto salsa in a bowl with a lime and cilantro on top with low carb chips on the side

    If you like this low carb dip, you will LOVE:

    • Red Chimichurri
    • Dairy Free Avocado Crema

    If you enjoyed this recipe it would mean the world to me if you rated it and left a comment below. It helps others find it on google.xoxo-Allianna

    keto salsa in a bowl with a lime and cilantro on top with low carb chips on the side

    Keto Salsa

    Course Appetizer, Snack
    Cuisine American, Mexican
    Prep Time 5 minutes minutes
    Total Time 5 minutes minutes
    Servings 12 servings
    Author Allianna Moximchalk
    14kcal
    Cost $3
    Print Recipe Pin Recipe

    Equipment

    • high speed blender

    Ingredients

    • 1/2 red onion chopped
    • 1/2 jalapeno steam removed
    • 1/2 cup fresh cilantro
    • 3 limes juiced
    • 1/2 tsp chili powder
    • 1/2 tsp sea salt
    • 3 cups cherry tomatoes

    Instructions

    • Place all ingredients in the food processor for 10 seconds.
      If you enjoyed this recipe it would mean the world to me if you rated it and left a comment below. It helps others find it on google.xoxo-Allianna

    Notes

    If you enjoyed this recipe it would mean the world to me if you rated it and left a comment below. It helps others find it on google.xoxo-Allianna
    Quick, flavorful low carb salsa.
    Serving: 1serving | Calories: 14kcal | Carbohydrates: 4g | Protein: 1g | Fat: 1g | Saturated Fat: 1g | Polyunsaturated Fat: 1g | Monounsaturated Fat: 1g | Sodium: 103mg | Potassium: 112mg | Fiber: 1g | Sugar: 1g | Vitamin A: 267IU | Vitamin C: 15mg | Calcium: 12mg | Iron: 1mg
    Tried this recipe?Tag me on instagram @alliannaskitchen!
    chocolate covered pecans on a baking sheet with sea salt

    February 20, 2022 Dairy free

    Chocolate Covered Pecans (Dairy Free Option)

    These Gourmet Chocolate Covered Pecans are so delicious and so simple to make. This recipe only requires 2 simple ingredients and can be made with milk chocolate or even dark chocolate. We love having this gourmet snack around for dinner parties and fun snacks!

    chocolate covered pecans on a baking sheet with sea salt

    If you enjoy this recipe, you will also enjoy my Vegan Chocolate Truffles and Chocolate Covered Oranges as well.

    What Makes These Chocolate Covered Pecans So Good?

    • First off, they are so simple to make! They literally only require 10 minutes of hands-on time (if that!) 
    • Secondly, they are crunchy, sweet and salty. The sprinkle of sea salt on top adds a nice sweet and salty combo which I am a big fan of.
    • If you love this simple chocolate recipe, check out my Vegan Milkshake recipe. It is just as simple!
    chocolate covered pecan ingredients laid out in bowls

    What Do I Need To Make Homemade Chocolate Covered Pecans?

    • Pecans-I like the whole nut, the crusted pecans are very hard to dip in chocolate so I suggest getting the whole ones!
    • Chocolate-You have a few different options here. Milk chocolate is great, but so is dark chocolate too! If you like to eat dairy free like me, I love using the enjoy life dairy free chocolate chips. They taste just like regular chocolate, no one ever knows they are dairy free. 
    • Sea salt-This is totally optional but in my opinion the best part! I love adding a little sprinkle of sea salt on top once I dip the chocolates. I love the sweet and salty combo. 
    melted chocolate in abowl

    How To Make:

    • First, place your chocolate in a microwave friendly bowl and line a baking sheet with wax paper. Then place them in the microwave for 30 seconds. Then take the chocolate out of the microwave and whisk for 30 seconds. Do this process for a total of 3 times so the chocolate is in the microwave for 90 seconds but is whisked every 30 seconds. This process will prevent the chocolate from burning. 
    • Once the chocolate is melted, add the pecans to the bowl and mix with a spoon.
    • Spoon out one pecan at a time onto the wax paper. Sprinkle on top with optional sea salt.
    • Once all of the pecans are out, add the baking sheet to the freezer to allow the chocolate to set. You need about an hour tops for it to set and harden. 
    melted chocolate and pecans in a bowl

    How Can I Prevent My Chocolate From Burning?

    • The key is whisking and mixing it in between sessions in the microwave. If you microwave it all the way through without whisking it, it will burn. 
    mixed chocolate covered pecans

    How Long Do These Homemade Chocolate Nuts Last?

    • These homemade dipped chocolate covered pecans last for up to 2 weeks in the fridge in an airtight glass container. 
    chocolate covered pecans on a baking sheet

    If you like this gourmet chocolate recipe, you will LOVE:

    • Vegan Chocolate Covered Strawberries
    • Chocolate Covered Oranges
    • Healthy Chocolate Covered Truffles
    • Healthy Twix Bars

    If you enjoyed this recipe it would mean the world to me if you rated it and left a comment below. It helps others find it on google.xoxo-Allianna

    chocolate covered pecans on a baking sheet with sea salt

    Chocolate Covered Pecans (Dairy Free Option)

    Course Dessert, Snack
    Cuisine American
    Prep Time 10 minutes minutes
    set/ freeze time 2 hours hours
    Total Time 2 hours hours 10 minutes minutes
    Servings 30 nuts
    Author Allianna Moximchalk
    82kcal
    Cost $5
    Print Recipe Pin Recipe

    Equipment

    • microwave friendly bowl
    • Mini whisk or fork
    • baking sheet
    • spoon

    Ingredients

    • 1 cup pecans
    • 2 cups milk chocolate if you are dairy free I love the Enjoy Life brand of chocolate
    • sea salt optional

    Instructions

    • Add a piece of wax paper to a baking sheet. Place the chocolate chips in a small bowl in the microwave for 30 seconds. Then take the chocolate out of the microwave and whisk for 30 seconds. Do this process for a total of 3 times so the chocolate is in the microwave for 1 1/2 minutes but is whisked every 30 seconds. Now, place the nuts in the bowl of chocolate and mix with a spoon. Using a spoon, spoon out the nuts and place on a baking sheet. Sprinkle optional sea salt on top. Add the nuts to the freezer to set for at least 1 hour.
      If you enjoyed this recipe it would mean the world to me if you rated it and left a comment below. It helps others find it on google.xoxo-Allianna

    Notes

    If you enjoyed this recipe it would mean the world to me if you rated it and left a comment below. It helps others find it on google.xoxo-Allianna
    These Chocolate Covered Pecans are super simple to make and so delicious! The perfect treat to put out for company.
    Serving: 1nut | Calories: 82kcal | Carbohydrates: 8g | Protein: 1g | Fat: 6g | Saturated Fat: 3g | Polyunsaturated Fat: 1g | Monounsaturated Fat: 3g | Sodium: 2mg | Potassium: 47mg | Fiber: 1g | Sugar: 6g | Vitamin A: 2IU | Vitamin C: 1mg | Calcium: 5mg | Iron: 1mg
    Tried this recipe?Tag me on instagram @alliannaskitchen!
    • « Go to Previous Page
    • Page 1
    • Interim pages omitted …
    • Page 13
    • Page 14
    • Page 15
    • Page 16
    • Page 17
    • Interim pages omitted …
    • Page 38
    • Go to Next Page »

    Primary Sidebar

    Allianna Headshots

    Hi, I'm Allianna! Allianna's Kitchen started by accident after battling an undiagnosed autoimmune disease for nearly my whole life.

    More about me →

    GLUTEN FREE DINNER RECIPES

    • steak date night dinner 1
      Steak Date Night Dinner with Garlic Aioli
    • gluten free fried shrimp 3 scaled
      Gluten Free Fried Shrimp
    • cooked frozen pork chops with chives on top on a white plate with a gold fork
      Easy Frozen Pork Chops In The Air Fryer
    • halibut fish tacos on a pale blue plate
      Halibut Fish Tacos

    EASY WHOLE30 RECIPES

    • Beetroot dip on a plate with crackers and fresh parsley on top.
      Simple Beetroot Dip Recipe
    • close up photo of ginger apple pork in a bowl
      Apple Ginger Pulled Pork
    • dairy free lobster bisque in a bowl with a gold spoon and garnished with lemon, fresh green herbs, and red pepper flakes.
      Dairy Free Lobster Bisque
    • juicy filet mignon on a plate
      Air Fryer Filet Mignon

    GLUTEN FREE APPETIZERS

    • peanut butter and jelly chicken wings on a plate with limes
      Peanut Butter And Jelly Wings
    • Stuffed mushrooms on a brown and white plate with fresh parsley on top.
      Gluten-Free Stuffed Mushrooms
    • Gluten free pigs in a blanket in a pile on a plate.
      Gluten Free Pigs In A Blanket
    • Pretty french onion dip in a silver bowl with potato chips and chives on top.
      Vegan French Onion Dip Recipe

    EASY MOCKTAIL RECIPES

    • honey simple syrup 2
      Honey Simple Syrup
    • orange lime cranberry mocktail 4
      Cranberry Mocktail Recipe
    • Clear glass with a brown drink and a cinnamon stick in it.
      Pear Cocktail Recipe
    • Grapefruit mocktail in a glass with jalapeño slice and grapefruit slice.
      Easy Grapefruit Mocktail Recipe

    Footer

    • Recipes
    • My Courses
    • Meal Prep Services
    • Accessibility Policy
    • Contact
    • About Me
    • Blog
    • Privacy Policy
    • Pinterest
    • Instagram
    • Facebook
    • Twitter

    Allianna’s Kitchen 2025 - All Rights Reserved

    Rate This Recipe

    Your vote:


    A rating is required
    A name is required
    An email is required