• Skip to primary navigation
  • Skip to main content
  • Skip to primary sidebar
  • Spring Recipes
  • Recipes
  • Order Meal Prep
  • Healthy Gut Baby Food Course
  • About

Allianna's Kitchen

menu icon
go to homepage
  • Spring Recipes
  • Recipes
  • Order Meal Prep
  • Healthy Gut Baby Food Course
  • About
    • Facebook
    • Instagram
    • Pinterest
    • Twitter
  • search icon
    Homepage link
    • Spring Recipes
    • Recipes
    • Order Meal Prep
    • Healthy Gut Baby Food Course
    • About
    • Facebook
    • Instagram
    • Pinterest
    • Twitter
  • ×
    Allianna's Kitchen » Recipes

    Blog

    sweet potatoes in a bowl

    August 29, 2022 Air Fryer

    Air Fryer Sweet Potato Cubes

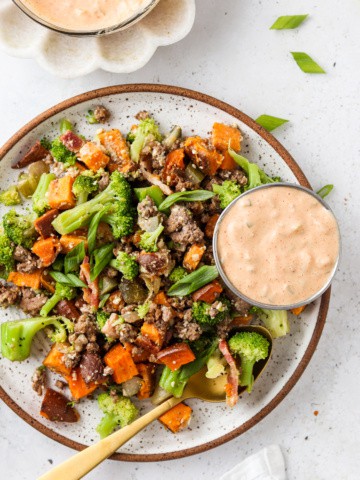
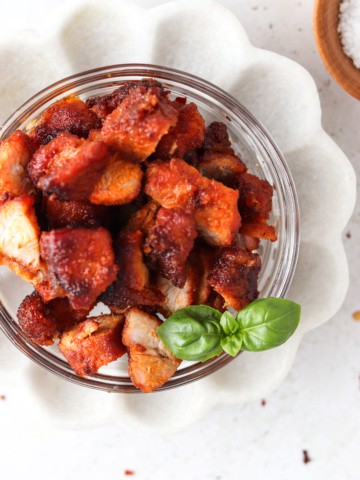
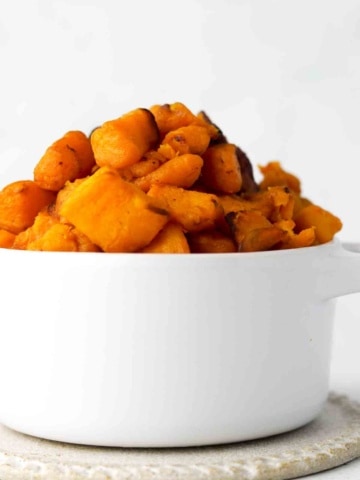
    These Air Fryer Sweet Potato Cubes are so delicious. They get crisped to perfection, using my favorite kitchen item – the air fryer! These can be added to salads, burrito bowls, or enjoyed alone. There are so many uses for these quick Air Fryer Sweet Potato Cubes. The best part about this recipe is that it literally takes under 5 minutes to prepare. 

    sweet potatoes in a bowl

    When I got an Air Fryer it was a complete game changer for me for meal time. I cook proteins in it and a variety of sides. Another favorite air fryer side of mine is my Air Fryer Spaghetti Squash! If you are just looking for another roasted vegetable recipe, be sure to check out my Roasted Leeks and Roasted Bok Choy recipe too! If you are on an air fryer kick like I am, check out my Air Fryer Turkey Burgers.

    [feast_advanced_jump_to]

    What Makes This Recipe So Good?

    • Sweet potatoes are naturally nutritious, they are packed with fiber and potassium.
    • Cooking sweet potatoes in the oven can be time consuming – the air fryer saves so much time. 
    • This recipe can be tweaked if you prefer your sweet potatoes sweeter by adding maple syrup or cinnamon. 
    • This recipe is naturally gluten free, dairy free, soy free, vegan, Whole30 friendly, refined sugar free, flourless, grain free, and paleo. 
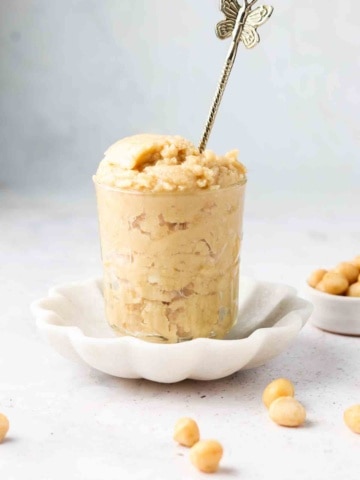
    • If you are like me, and LOVE sweet potatoes, my Vegan Sweet Potato Mash would be right up your alley. 
    • If you would prefer to have your sweet potatoes cooked for you, check out my paleo meal prep kitchen located in Pittsburgh. We deliver ready to eat meals right to your door and sweet potatoes are almost always on the menu.
    sweet potatoes, oil, salt and garlic powder laid out in bowls

    Recipe Ingredients

    • Sweet potatoes- Look for firm potatoes without many bruises/ discoloration. Avoid soft potatoes. Store them in a cool, dry, and dark area until you are ready to use. 
    • Avocado oil- My favorite cooking oil to use. This really allows the seasonings to soak into the sweet potatoes. Avocado oil is my favorite for high temperature cooking because it has a high smoke point. 
    • Garlic powder & sea salt- My go-to seasoning combination for just about anything. These seasonings make the sweet potatoes more savory. If you prefer a sweeter taste, you can swap for maple syrup or cinnamon. 
    sweet potato cubes in a bowl

    Recipe Modifications

    • You can use any other kind of oil that you may have on hand in place of avocado oil. 
    • If you do not like to cut up sweet potatoes ( I get it, it can be time consuming) you can buy them pre chopped in the freezer section of the grocery store. 

    How To Make

    • Step 1

      • Wash, and cube the sweet potatoes. Keep the cubes about ½ inch pieces. 
    • Step 2

      • Transfer the sweet potatoes into a bowl. Add the avocado oil, salt, and garlic powder. Toss well so they are evenly coated. 
    • Step 3

      • Add the sweet potatoes to your air fryer basket. Spread into a single layer (you can cook in multiple batches, if needed). 
    • Step 4

      • Cook for 15 minutes at 400 degrees F. Shake the basket half-way through and check on them frequently.
    sweet potatoes in the air fryer

    Recipe FAQ’s

    • Can I Make Frozen Sweet Potato Fries In Air The Fryer? 

      • Absolutely! You can cook frozen sweet potatoes in the air fryer. The sweet potatoes will not take as long to cook so I would cook them for 5 minutes, then toss them and cook them again for another 5 minutes. 
    • Can I Make Alexa Sweet Potato Fries In The Air Fryer?

      • Absolutely!
        • Note since they are frozen the time may be adjusted slightly. Start out cooking them for 5 minutes, then toss them and cook for an additional 5 minutes or until they are cooked to your liking. You can skip the oil part if you would like, or if you want your fries to be extra crispy be sure to add the oil on top.
    • Can I Cut The Sweet Potatoes Into Chunks?

      • Yes! However, you will want to make sure the chunks are cut into equal pieces. If you have different sizes they will cook differently which will result in some cooked sweet potatoes and some uncooked potatoes. 
    • How Do I Pick Fresh Sweet Potatoes?

      • You want a firm potato with few bruises. Avoid the soft potatoes. 
    • What Can I Serve These With? 

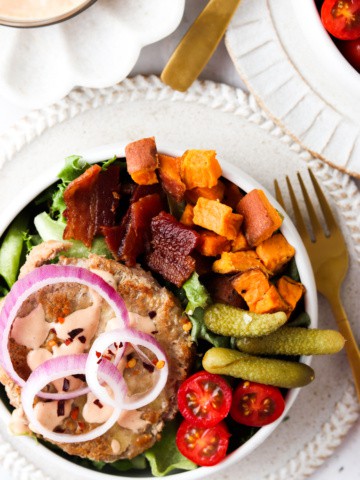
      • These make a great side dish for just about any meal. One possibility is pairing them with a Gluten Free Burger! 
    • Can I Use This Recipe for Yams too or Japanese Sweet Potatoes?

      • Absolutely! The same cooking time would apply. 
    • What Kind Of Air Fryer Do You Use?

      • I have the Ninja Foodie 11-1 and am obsessed! I love that it has 11 functions but it only takes up one spot on the counter.

    Chef’s Tips

    • Do not overcrowd the air fryer. Keeping the sweet potatoes in a single layer helps each cube cook evenly. Cook in batches if you need to. 
    • These will soften as they cool, so serve right away. 
    far away picture of sweet potatoes in a bowl

    If you like this recipe, you will LOVE

    • Vegan Sweet Potato Mash
    • Sweet Potato, Brussels, and Bacon Breakfast Sheen Pan
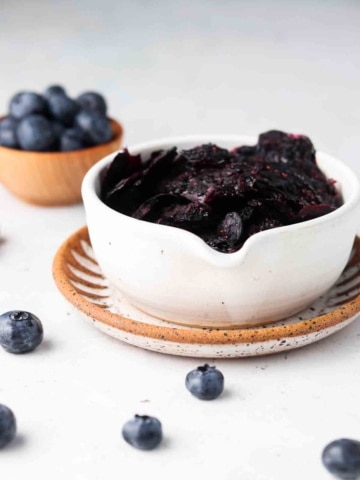
    • Sweet Potato, Fig, and Blackberry Salad
    • Air Fryer Home Fries
    • Air Fryer Roasted Tomatoes 
    sweet potatoes in a bowl

    Air Fryer Sweet Potato Cubes

    Course easy, Side Dish, Snack
    Cuisine American
    Prep Time 5 minutes minutes
    Cook Time 15 minutes minutes
    Total Time 20 minutes minutes
    Servings 3 people
    Author Allianna Moximchalk
    172kcal
    Cost $5
    Print Recipe Pin Recipe

    Equipment

    • Air fryer

    Ingredients

    • 1 lb sweet potatoes you can leave the skin on
    • 1 tbsp avocado oil
    • 1/4 tsp garlic powder
    • 1/3 tsp sea salt

    Instructions

    • Wash and cube the sweet potatoes. Keep the cubes about ½ inch pieces.
    • Transfer the sweet potatoes into a bowl. Add the avocado oil, salt, and garlic powder. Toss well so they are evenly coated.
    • Add the sweet potatoes to your air fryer basket. Spread into a single layer (you can cook in multiple batches, if needed).
    • Cook for 15 minutes at 400 F. Shake the basket multiple times throughout cooking process.
      If you enjoyed this recipe it would mean the world to me if you rated it and left a comment below. It helps others find it on google.xoxo-Allianna

    Notes

    If you enjoyed this recipe it would mean the world to me if you rated it and left a comment below. It helps others find it on google.xoxo-Allianna
     
    Crispy and delicious sweet potatoes make for the perfect side dish!
    Serving: 1serving | Calories: 172kcal | Carbohydrates: 31g | Protein: 2g | Fat: 5g | Saturated Fat: 1g | Polyunsaturated Fat: 1g | Monounsaturated Fat: 3g | Sodium: 342mg | Potassium: 513mg | Fiber: 5g | Sugar: 6g | Vitamin A: 21450IU | Vitamin C: 4mg | Calcium: 46mg | Iron: 1mg
    Tried this recipe?Tag me on instagram @alliannaskitchen!
    A girl holding magnesium in her hands.

    August 26, 2022 Anxiety

    Why I Love Magnesium

    Please note: This article contains my personal opinions and experiences.  It is not to be used as medical advice.  To seek medical advice, I suggest connecting with a Functional Medicine doctor.

    I struggled with anxiety my whole life.  Specifically from my teenage years through my early twenties, I also had a hard time achieving quality sleep at night and feeling refreshed when I woke up.  I eventually found out that this was linked to an undiagnosed and untreated autoimmune disease.  I also learned that some of my symptoms were due to underlying hormone imbalances and macronutrient deficiencies.

    A girl holding magnesium in her hands.

    Little did I know I was not alone in this struggle.  Magnesium is one of the most common nutrient deficiencies that people have, yet so many are walking around not even knowing that they are lacking it. In fact, nearly half of the American population is experiencing a deficiency in Magnesium.

    Interestingly enough, one of the biggest reasons for this deficiency is that our soil today is much different than it was in the past.  In addition, modern farming and processed foods have reduced the amount of magnesium available through our nutrition.  Another factor to consider is that stress in the body can also use up your magnesium supply at a faster rate. In response, low magnesium rates increase stress.  It’s an endless loop that can be hard to break! 

    While going through my own experience of finding answers, I was surprised to learn that my blood work revealed my magnesium levels to be considered normal.  However, my functional medicine doctor looked at both my labs and symptoms as a whole.  I am a huge advocate of this holistic approach, and through it, we determined that my “normal” magnesium levels were not normal for my body. It turns out that I need more magnesium than the average person.  This is why bio-individuality is so important: differing bodies have differing levels of need.

    What Are The Different Kinds Of Magnesium?

    • Magnesium Threonate 

      • This type of Magnesium is good for your brain and promotes better memory and cognitive function.  It’s said to improve short-and long-term memory and to support the normal stimulation of brain cells.  I choose to take this supplement at night.  
    • Magnesium Glycinate

      • This magnesium has been shown to have a variety of benefits that includes relieving anxiety, maintaining normal heart rhythms and managing blood sugar in people with diabetes.  I take it at night and it relaxes me for quality sleep. I started out by taking one a night and slowly started working my way up to my ideal dose based on how I felt.
    • Calm Drink

      • This drink uses a different kind of magnesium called Magnesium Citrate. Among other things, it’s also known for helping with constipation.  (Be aware: If you drink too much, it can cause diarrhea.)  I usually drink around 1 TBSP of this powder to prevent that from happening.  This is my first go-to remedy when I feel anxious in the moment.
      • I also love this drink when we are out.  It comes in convenient individual packets and I prefer the unflavored version. It calms me almost instantly.  My husband, Mitchell, now drinks it every night before bed, too. 
    • Epsom Salts 

      • Epsom salts are pure magnesium.  If you follow along on Instagram, you know how much I love taking a warm bath every single night with 3-4 cups of unscented epsom salts. I instantly feel relaxed in my mind and body.  I have also noticed that I get a better night of sleep when I use my epsom salts before bed. My husband always jokes with me when I come out of the bathroom after my bath and asks,“Did the mag hit?” 
      • Important note: I always make sure that I am done using electronics for the night when I take my bath. This helps me get the full effects of the epsom salts. I have noticed that if I pick up my phone after my bath, then I am no longer tired. I make sure that my nightly bath is the last thing I do before bed.

    If you enjoyed this blog post, you will LOVE:

    • How Should Food Make Me Feel?
    • Reinventing Yourself
    • 5 Tips For Sustainable Weight Loss
    dried blueberries in a bowl

    August 22, 2022 Allergy Friendly

    Dehydrated Blueberries

    Dehydrated Blueberries will be your new favorite thing to do with leftover blueberries. The dehydrating process can take up to 7 hours, but the preparation of the blueberries will take less than 5 minutes. Dehydrated blueberries can be used in a variety of ways, including muffins, oatmeal, salads and trail mix. Kids love them too!

    dehydrated blueberries in a bowl

    What Makes This Recipe So Good?

    • They are SO easy and quick to prepare. 
    • This recipe only requires 5 minutes of hands-on time.
    • Frozen blueberries or fresh blueberries will work for this recipe. 
    • You can use dehydrated blueberries in so many recipes-salads, desserts and trail mix.
    • You can make these in the oven, air fryer, or dehydrator. 
    • This recipe is naturally paleo, gluten free, dairy free, Whole30, refined sugar free and low carb friendly. 
    • Dehydrated blueberries can last up to 6-10 months! 
    • These would be so delicious in my blueberry banana baked oatmeal.

    blueberries in a bowl

    Recipe Ingredients

    • Blueberries– I used fresh for this. You can also use frozen. If you use frozen, you can skip the blanching step and go straight to the dehydrating process. They do not need to be thawed!

    blanched blueberries in a pot

    How To Make

    • Step 1 

      • Wash the blueberries. 
    • Step 2

      • Blanch blueberries. Put blueberries in boiling water for 30 seconds. The skins will start to crack–this is normal! 
    • Step 3

      • Remove blueberries from boiling water with a slotted spoon and put into ice water for 30 seconds. 

    blueberries in an ice bath

    • Step 4

      • Remove the berries from ice water and pat dry. 

    blueberries on a sheet pan

    • Step 5

      • Different dehydrator methods: 

        • Oven: Line a cookie sheet with parchment paper. Place the blueberries on the sheet in a single layer, so they are not crowded. Bake at 130 degrees F for 10 hours. 
        • Air Fryer: Place blueberries in the air fryer in a single layer. Set the temperature to 120 degrees F and cook for 15 hours. Check them frequently after 10 hours. 
        • Dehydrator: Place prepared blueberries in a single layer on the trays. Set the temperature to 115 degrees F. If your dehydrator does not have temperature control, just turn it on. Leave the blueberries for 18 to 24 hours. Check them frequently after 18 hours.

    dehydrated blueberries on a sheet pan

    Recipe FAQ’s

    • What Are Dehydrated Blueberries? 

      • Dehydrated blueberries are blueberries that are left to dry to conserve for a long period of time. When you dehydrate blueberries, you are removing the juices. The natural juices are what make blueberries perishable. By removing these juices, blueberries can be used later, without spoiling. 
    • How Can I Use Dehydrated Blueberries? 

      • However you please. They can be used in trail mix, pancakes, oatmeal, granola bars, yogurt, muffins, and more! They would make a great salad topping as well. 
    • How Long Do They Last?

      • These blueberries last for months in an airtight container. I like storing mine in the fridge. 
    • Can I Use Frozen Blueberries?

      • Yes! If you opt to use frozen blueberries you can skip the blanching process (boiling in hot water.) Frozen berries are blanched prior to freezing to help preserve them in their fresh form. 

    Chef’s Tips

    • If you are pinched for time, you can also bake these in the oven at 200 degrees F for 7 hours. 

    dehydrated blueberries on a sheet pan

    If you like this recipe, you will LOVE

    • Dehydrated Kale Chips
    • Blueberry Maple Jam
    • Blueberry Banana Overnight Oats
    • Paleo Blueberry Muffins
    • Blueberry Banana Baked Oatmeal

    If you enjoyed this recipe it would mean the world to me if you rated it and left a comment below. It helps others find it on google.xoxo-Allianna

    dried blueberries in a bowl

    Dehydrated Blueberries

    Course Breakfast, easy, quick, Salad
    Cuisine American
    Prep Time 5 minutes minutes
    Cook Time 12 hours hours
    Total Time 12 hours hours 5 minutes minutes
    Servings 4 people
    Author Allianna Moximchalk
    Cost $3
    Print Recipe Pin Recipe

    Equipment

    • dehydrator of choice oven, air fryer, or dehydrator

    Ingredients

    • 4.25 cups bluberries fresh or frozen

    Instructions

    • Wash the blueberries.
    • Blanch blueberries. Put blueberries in boiling water for 30 seconds. The skins will start to crack–this is normal!
    • Remove blueberries from boiling water with a slotted spoon and put into ice water for 30 seconds.
    • Remove the berries from ice water and pat dry.
    • Use the dehydrating method of choice!
      Oven: Line a cookie sheet with parchment paper. Place the blueberries on the sheet in a single layer, so they are not crowded. Bake at 130 degrees F for 10 hours.
      Air Fryer: Place blueberries in the air fryer in a single layer. Set the temperature to 120 degrees F and cook for 15 hours. Check them frequently after 10 hours.
      Dehydrator: Place prepared blueberries in a single layer on the trays. Set the temperature to 115 degrees F. If your dehydrator does not have temperature control, just turn it on. Leave the blueberries for 18-24 hours. Check them frequently after 18 hours.

    Notes

    If you enjoyed this recipe it would mean the world to me if you rated it and left a comment below. It helps others find it on google.xoxo-Allianna
    How to dehydrate blueberries in the oven, air fryer, or dehydrator.
    Tried this recipe?Tag me on instagram @alliannaskitchen!

    crispy potatoes on a plate

    August 17, 2022 Air Fryer

    Air Fryer Home Fries

    These Air Fryer Home Fries are the perfect crispy, diner-style potato. Requiring only a few common household ingredients and 15 minutes of prep time, you can make these for a quick, yummy breakfast side. Everyone loves a good crispy potato, so this will definitely be a new staple in your breakfast rotation.

    home fries and ketchup in a bowl

    Air frying vegetables, especially potatoes, always give them the perfect crispiness. My Air Fryer Spaghetti Squash and Roasted Bok Choy are other favorite filling side dishes I love to make. Using the same piece of equipment and the same delicious results. If you want to air fry a protein to go well with this recipe, check out my Air Fryer Turkey Burgers.

    [feast_advanced_jump_to]

    What Makes This Recipe So Good?

    • These Vegan Home Fries are SO easy and only require 15 minutes of hands-on time. 
    • Seasoned to perfection, this recipe is a dupe for classic diner-style home fries.
    • This recipe makes for the BEST breakfast side dish. Who doesn’t love crispy potatoes? 
    • This recipe is naturally paleo, gluten free, dairy free, Whole30, soy free, vegan, grain free and refined sugar free. 
    • If you are like me and like to make sure you have greens with every meal you can take this recipe up a notch by making my Homemade Peas and Potatoes.
    • This recipe is so delicious on its own but also pairs so well with my Homemade Garlic Aioli. 
    • This recipe pairs so well with just about any breakfast recipe, check out the other breakfast recipes on my blog!
    • If you are located in the Pittsburgh area, check out my weekly meal prep menu. We have a variety of meals that are delivered right to your door.
    close up photo of home fries

    Recipe Ingredients

    • Mini potatoes– I love using mini potatoes, but feel free to use your choice of potato. Mini potatoes come in various packs- there’s gold, red, white, and assorted colors. I find the mini ones easier to cut up rather than a large potato.
    • Olive oil- Gets the potatoes greased up when tossing with the seasoning. This will help hold all of the delicious flavor to each potato cube. You can also use avocado oil or ghee in this recipe if you would like. If you do use ghee, make sure it is melted!
    • Garlic powder & paprika– The best flavor combo for home fries. The paprika provides a great, subtle spice. Garlic powder is ALWAYS a must.
    • Salt & pepper- Extra seasoning.
    ingredients laid out in bowls

    How To Make

    • Step 1 

      • Cut the mini potatoes into halves or fourths, depending on each potatoes’ size. 
    sliced potatoes
    • Step 2

      • Place the cut potatoes into a large bowl of cold water. Cover and let sit for 10-15 minutes.
    potatoes in water
    • Step 3

      • Pour out the water and pat the potatoes dry. 
    seasoning on the potatoes
    • Step 4

      • Add olive oil, garlic powder, paprika, salt, and pepper to the bowl and toss. Make sure the potatoes are evenly coated. 
    potatoes in the air fryer
    • Step 5

      • Add potatoes to the air fryer and cook at 400 degrees F for 20-30 minutes. Check on them frequently and toss. You may want to cook them longer if you like crispy potatoes. 
    crispy potatoes

    Recipe FAQ’s

    • What Are Home Fries? 

      • A basic potato dish, often made in a skillet. Home fries use chunked, sliced, wedged, or diced potatoes that are sometimes unpeeled and may have been par-cooked by boiling, baking, steaming, or microwaving. The air fryer is the best and easiest method to make home fries. 
    • What Can I Serve These With? 

      • These make a great breakfast side. I recommend serving these with your preferred style of egg and breakfast protein. Try my Instant Pot Bacon or Sausages in the Air Fryer. 
    • Can These Be Reheated? 

      • Absolutely. Store in an airtight container in the refrigerator. When you are ready to reheat, throw them in the air fryer at 400 degrees F for 5-10 minutes. 
    • What Dip Would Go With Vegan Home Fries? 

      • Ketchup is my go-to for these. If you are nightshade free, check out this Nightshade Free Ketchup.
    • What Kind Of Air Fryer Do You Use?

      • I love this Ninja all in one air fryer. It is so simple to use and has multiple functions yet it only takes up one space on the counter.
    • What Is The Key For Making Crispy Potatoes?

      • The key is to toss them throughout the cooking process to ensure they get extra crispy. 
    crispy potatoes on a plate

    Chef’s Tips

    • Every 5 minutes or so, make sure you shake the air fryer basket! This ensures the potatoes cook evenly. 

    If you like this recipe, you will LOVE

    • Crispy Mini Potatoes with Paleo Garlic Aioli
    • Crispy Whole30 Potatoes with Peas and Dairy Free Ricotta
    • Whole30 Mashed Potatoes
    • Crispy Chickpeas With Garlic Aioli

    If you enjoyed this recipe it would mean the world to me if you rated it and left a comment below. It helps others find it on google.xoxo-Allianna

    home fries and ketchup in a bowl

    Air Fryer Home Fries

    Course Breakfast, Side Dish
    Cuisine American
    Prep Time 20 minutes minutes
    Cook Time 20 minutes minutes
    Total Time 40 minutes minutes
    Servings 4 people
    Author Allianna Moximchalk
    64kcal
    Cost $4
    Print Recipe Pin Recipe

    Equipment

    • Air fryer

    Ingredients

    • 2 bags mini potatoes 1 pound in each bag
    • 2 tbsp olive oil
    • 1/2 tsp garlic powder
    • 1/2 tsp paprika
    • 1/4 tsp sea salt
    • 1/4 tsp black pepper

    Instructions

    • Cut the mini potatoes into halves or fourths, depending on each potatoes' size.
    • Place the cut potatoes in a large bowl of cold water. Cover and let sit for 10 minutes.
    • Pour out the water and pat the potatoes dry.
    • Toss with olive oil, garlic powder, paprika, salt, and pepper.
    • Add potatoes to the air fryer and cook at 400 degrees F for 20-30 minutes depending on how crispy you like them. Every 5 minutes or so, shake the basket so that the potatoes cook evenly.
      If you enjoyed this recipe it would mean the world to me if you rated it and left a comment below. It helps others find it on google.xoxo-Allianna

    Notes

    If you enjoyed this recipe it would mean the world to me if you rated it and left a comment below. It helps others find it on google.xoxo-Allianna
     
    Perfectly crispy homemade home fries.
    Serving: 1serving | Calories: 64kcal | Carbohydrates: 0.5g | Protein: 0.1g | Fat: 7g | Saturated Fat: 1g | Polyunsaturated Fat: 1g | Monounsaturated Fat: 5g | Sodium: 146mg | Potassium: 10mg | Fiber: 0.1g | Sugar: 0.04g | Vitamin A: 20IU | Vitamin C: 1mg | Calcium: 1mg | Iron: 0.1mg
    Tried this recipe?Tag me on instagram @alliannaskitchen!
    nut butter in a jar

    August 15, 2022 Dairy free

    Macadamia Nut Butter

    This Macadamia Nut Butter is so simple to make and SO much better than store bought. It is smooth and creamy and only takes 5 minutes to make. I love the combination of sweet and salty! I love to pair this Macadamia Nut Butter with apple slices, bananas, and even almond crackers– it’s one of my favorite snacks. 

    macadamia but butter in a jar


    What Makes This Recipe So Good?

    • There are so many ways you can use this nut butter. It is a nice way to spice up the traditional almond butter or peanut butter. You can bake with it and also eat it as a snack. 
    • This homemade macadamia nut butter is a great alternative to store bought butter-it is free of any additives unlike most nut butters in the grocery store. 
    • It takes 5 minutes to make this recipe.
    • This homemade nut butter will last for up to 2 weeks in the refrigerator. This recipe is naturally gluten free, grain free, dairy free, flourless, paleo, soy free, and refined sugar free. It can also be made Whole30 friendly if you omit the maple syrup.
    • If you are doing the autoimmune protocol and are missing nuts, check out my homemade Tigernut Butter on my website. 
    • If you’re in the Pittsburgh area and interested in getting meals/ snacks delivered right to your door, check out my weekly meal prep menu!

    homemade nut butter ingredients laid out in a bowl

    Recipe Ingredients

    • Macadamia nuts- Make a great butter. Macadamia nuts contain healthy fats and fiber. They are nutrient dense and filling. They have a great creamy texture and buttery taste. Make sure you buy macadamia nuts without any oil on them. A lot of grocery stores sell them with refined oils on top.
    • Maple syrup– A little added sweetness. Make sure to use a pure maple syrup. Many maple syrups have a ton of additives. I recommend Costco’s Kirkland brand. If you prefer lower carb, you can omit the maple syrup.
    • Avocado oil- You can also use olive oil. Avocado oil is the best alternative to other oils, like canola oil or vegetable oil. 
    • Sea salt– If you are using unsalted nuts, I recommend adding a pinch of sea salt. You will love the sweet and salty combination.

    macadamia nuts, maple syrup and avocado oil in a blender

    How To Make

    • Step 1

      • Add all ingredients to a food processor or high speed blender. 
    • Step 2

      • Blend on high until smooth and creamy. Be sure to scrape down the sides of the blender every 45 seconds to ensure everything is blended evenly. 
    • Step 3

      • Continue blending until it is fully smooth and creamy. 
    • Step 4

      • Store in an airtight container and enjoy!

    creamy nut butter in a blender

    Recipe FAQ’s

    • How Long Will The Macadamia Nut Butter Last? 

      • It will last for up to 2 weeks in the fridge. 
    • What Do I Pair This With?

      • Anything you want, really. It is great with various fruits. It would also be delicious in a smoothie. 
    • How Are Nut Butters Made? 

      • They are made from ground up nuts. Once the nuts are blended, they release their natural oils. This is how it becomes creamy. 
    • What Is A Perk Of Making Nut Butter At Home Vs. Buying it?

      • First off, making your own saves money! Store bought nut butters can be quite costly. Secondly, you can control what is in it when you make your own. Often time store bought nut butters contain crazy additives or processed oils that we do not want to be eating. 
    • Are There Different Variations You Can Make?

      • Yes! You can add a little bit of cocoa powder if you want a chocolatey taste or even chocolate syrup. I sometimes like to add a little bit of cinnamon. 

    macadamia but butter in a jar

    Chef’s Tips

    • Scrape down the sides of the food processor/ blender every 30-45 seconds while blending. This will allow everything to be fully blended, with no extra chunks on the sides. 

    close up photo of nut butter

    If you like this recipe, you will LOVE

    • Tigernut Butter
    • Healthy Jello
    • Whole30 Hummus
    • Easy Keto Salsa

    If you enjoyed this recipe it would mean the world to me if you rated it and left a comment below. It helps others find it on google.xoxo-Allianna

    close up photo of nut butter

    Macadamia Nut Butter

    Course Condiment, easy, Snack
    Cuisine American
    Prep Time 4 minutes minutes
    Total Time 4 minutes minutes
    Servings 12 servings
    Author Allianna Moximchalk
    196kcal
    Cost $8
    Print Recipe Pin Recipe

    Equipment

    • blender or food processor

    Ingredients

    • 2 cups macadamia nuts
    • 1 tbsp maple syrup
    • 3 tbsp avocado oil
    • 1 pinch sea salt optional

    Instructions

    • Add all ingredients to the blender. If using unsalted macadamia nuts, add a pinch of sea salt, if desired.
    • Blend on high until smooth and creamy. Stop every 45 seconds to scrape down sides of blender.
    • Blend until nut butter is evenly smooth.

    Notes

    If you enjoyed this recipe it would mean the world to me if you rated it and left a comment below. It helps others find it on google.xoxo-Allianna
     
    Creamy and smooth nut butter
    Serving: 3g | Calories: 196kcal | Carbohydrates: 4g | Protein: 2g | Fat: 20g | Saturated Fat: 3g | Polyunsaturated Fat: 1g | Monounsaturated Fat: 16g | Sodium: 4mg | Potassium: 86mg | Fiber: 2g | Sugar: 2g | Vitamin C: 0.3mg | Calcium: 21mg | Iron: 1mg
    Tried this recipe?Tag me on instagram @alliannaskitchen!

    vegan pumpkin mousse 8

    August 8, 2022 Allergy Friendly

    Vegan Pumpkin Mousse

    This Vegan Pumpkin Mousse is incredible! It’s unbelievably easy to make. All you need is a few simple ingredients and a blender. This recipe only takes 5 minutes to make and makes for a great snack and dessert.  It’s so easy to whip up for any occasion. This recipe is so good, you’ll want to make it year-round. 

    pretty picture of dairy free pumpkin mousse

    If you enjoy this recipe, you will also enjoy my Gluten Free Pumpkin Cake, Gluten Free Pumpkin Bread, Pumpkin Baked Oatmeal, Dairy Free Pumpkin Spice Smoothie, and Gluten Free Pumpkin Muffins as well.

    What Makes This Recipe So Good?

    • If you love pumpkin, like me, this will be your new favorite dessert. It is just oh so smooth and creamy without any dairy, of course!
    • Is it ever too early for pumpkin? No one is judging you if you want this in the middle of summer. This recipe only requires 5 minutes of hands-on time. 
    • We love making this treat for snacks and dessert, kids love it too!
    • This recipe is naturally Whole30 friendly, vegan,  gluten free, grain free, dairy free, flourless, paleo, soy free, and refined sugar free. With a few tweaks this recipe can be made nut free and autoimmune protocol friendly too (AIP.)
    • This recipe was inspired by my vegan pumpkin cheesecakes (one of my favorites.) I wanted another dessert recipe on my blog with pumpkin but also having the nut free option. 
    • If you live in the Pittsburgh area, check out my weekly meal prep menu for some seasonal treats too.

    ingredients laid out

    Recipe Ingredients

    • Coconut yogurt– My favorite brand is Cocoyo. This makes the mousse light and fluffy but still so rich. You can for sure make your own homemade yogurt or you can use store bought. I like to point out that a lot of store bought brands have additives in them so be sure to read the label. I have found the cocoyo brand.
    • Pumpkin puree- I love to buy my pumpkin puree from Whole Foods. Trader Joe’s also has it too. Just an FYI they always sell out of it every single season! That said, I always like to buy a case of it at the beginning of the season to ensure it will last.
    • Maple syrup- A little added sweetness. Make sure you use a pure maple syrup, with no additives. I use Costco’s Kirkland brand. 
    • Pumpkin pie spice- The best blend of fall spices. If you are doing the autoimmune protocol you can skip this and just use cinnamon instead. 
    • Vanilla extract & Sea salt– Enhances all the flavors. Skip the vanilla if you are doing AIP.
    • Almond butter-I like the Costco brand, but any kind will work. It  adds a creaminess and a subtle nuttiness. If you are nut free or are doing the autoimmune protocol you can use my homemade Tigernut Butter instead. Despite the name, tigernut butter is actually nut free!

    vegan pumpkin mousse 3

    How To Make

    • Step 1

      • Add all ingredients to the blender.
    • Step 2

      • Blend on medium-high speed until smooth. Be sure to stop and stir as necessary. Do not over blend or it will become too thin. 
    • Step 3

      • Serve immediately or chill for 2-3 hours. This will create a thicker texture!

    creamy pumpkin mousse in the blender

    Vegan Pumpkin Mousse FAQ’s

    • How Do I Store This?

      • Refrigerated in an airtight container. 
    • How Long Does Homemade Mousse last?

      • This dairy free pumpkin mousse will last for up to a week in the fridge. 
    • What Kind Of Blender Do You Use?

      • I have had this Ninja Blender for years and absolutely love it! I have had it for over a decade now. I love that I can just rinse it and throw it in the dishwasher to clean. 
    • What Is Mousse?

      • Mousse is a soft food that incorporates air bubbles to give it a light, airy texture. Mousse can be light and fluffy OR creamy and thick. This varies based on preparation technique and ingredients.
    • What Can I Pair This With?

      • I love serving this with homemade whipped cream or even chocolate chips or cinnamon on top!

    Chef’s Tips

    • If you over blend and it becomes too thin, add almond butter. Chilling before serving will also allow the mousse to become thicker.

    close up photo of dessert

    If you like this recipe, you will LOVE my other paleo pumpkin recipes

    • Pumpkin Baked Oatmeal Bars
    • Gluten Free Pumpkin Cookies
    • Paleo Pumpkin Cheesecake Jars
    • Pumpkin Spice Smoothie 
    • Flourless Pumpkin Muffins
    If you enjoyed this recipe it would mean the world to me if you rated it and left a comment below. It helps others find it on google.xoxo-Allianna

    close up photo of pumpkin mousse

    Vegan Pumpkin Mousse

    Course Dessert
    Cuisine American
    Prep Time 5 minutes minutes
    Total Time 5 minutes minutes
    Servings 4 people
    Author Allianna Moximchalk
    206kcal
    Cost $10
    Print Recipe Pin Recipe

    Equipment

    • blender

    Ingredients

    • 1 cup coconut yogurt I like the cocoyo brand
    • 1/2 cup pumpkin puree
    • 1/4 cup almond butter sub tigernut butter of nut allergy or AIP
    • 1/4 cup maple syrup
    • 1 tbsp pumpkin pie spice skip for AIP
    • 1 tsp vanilla extract skip for AIP
    • 1/4 tsp sea salt

    Instructions

    • Add all ingredients to the blender.
    • Blend on medium-high speed until smooth. Do not over blend or it will become too thin.
    • Serve immediately or chill for 2-3 hours for a thicker texture. If you enjoyed this recipe it would mean the world to me if you rated it and left a comment below. It helps others find it on google.xoxo-Allianna

    Notes

    If you enjoyed this recipe it would mean the world to me if you rated it and left a comment below. It helps others find it on google.xoxo-Allianna
    The best fall dessert
    Serving: 1cup | Calories: 206kcal | Carbohydrates: 23g | Protein: 6g | Fat: 11g | Saturated Fat: 2g | Polyunsaturated Fat: 2g | Monounsaturated Fat: 6g | Cholesterol: 8mg | Sodium: 179mg | Potassium: 332mg | Fiber: 3g | Sugar: 17g | Vitamin A: 4831IU | Vitamin C: 2mg | Calcium: 169mg | Iron: 1mg
    Tried this recipe?Tag me on instagram @alliannaskitchen!

    hashbrown breakfast casserole in a plate

    August 5, 2022 Breakfast

    Hashbrown Breakfast Casserole

    This Hashbrown Breakfast Casserole is SO delicious and easy! The cream cheese makes this casserole so creamy, which is a great combination with the veggies, bacon, and sausage. Prep is super quick, only requiring some chopping and dicing. All you have to do is throw this yummy casserole in the oven and you’re set. We love making this gourmet breakfast casserole for meal prep and when we know we are going to have guests, too!

    hashbrown breakfast casserole in a plate

    If you are looking something fun to make with this recipe for breakfast, check out my Banana Chia Pudding, Gluten Free French Toast Casserole, and my AIP Pancakes as well.

    What Makes This Recipe So Good?

    • Prep time is quick and easy. It could be even made the night before, only needing to be baked in the morning. 
    • This recipe only requires 15 minutes of hands-on time. 
    • This recipe is adaptable! You can swap out veggies or add different breakfast meats. This recipe can easily be made vegetarian by omitting the bacon and sausage. 
    • The combination of creamy, savory, and crunchy is the BEST.
    • This recipe is naturally paleo, dairy free, gluten free, soy free, Whole30 friendly, grain free, and refined sugar free. 
    • This casserole can be easily reheated, which means it is great for meal prep!
    • If you are in the Pittsburgh area, you can check out my weekly meal prep menu. We make various egg muffins that are similar to this recipe and are great for on-the-go!

    breakfast casserole ingredients laid out in bowls

    Recipe Ingredients

    • Bell peppers-Your preference. Green peppers are the most bitter and have the most vegetal taste. Yellow and orange peppers are sweeter, while red peppers are the sweetest.
    • Red onion-You can use yellow onion if you prefer a sweeter onion, but red onions are my preference for this savory dish.
    • Cream cheese-Adds a delicious creaminess to the casserole.In my opinion, this is the key ingredient! Since I am dairy free,  I like the Kite Hill cream cheese. For this dish, I used their chive cream cheese, for extra flavor! Feel free to use your favorite kind.
    • Bacon-Gives the casserole a nice crunch and so much more flavor. I get all of my bacon from Butcher Box. They send me a monthly supply of all of my favorite meats and proteins, if you use my Butcher Box link you can get a free thing of meat every month with your order!
    • Sausage-Extra protein!
    • Hashbrowns-I used Alexia frozen hash browns.
    • Milk-I used almond milk but you can use your preferred choice of milk. 
    • Eggs-The key to a breakfast casserole. I prefer pasture raised. All this means is the cows are more humanely raised. 
    • Salt & pepper-To taste.
    cream cheese, eggs and milk in a bowl

    How To Make:

    • Step 1

      • Preheat the oven to 400 degrees F.
    • Step 2

      • Mix the egg, milk, cream cheese, salt and pepper in a bowl.
    liquid ingredients whisked together
    • Step 3

      • In a separate bowl, mix the remaining items. 
    sausage, bacon, onions, and hashbowns in a bowl
    • Step 4

      • Spray the casserole dish with oil. Mix both bowls of ingredients together in a casserole dish. 
    ingredients mixed together
    • Step 5

      • Bake at 400 degrees F for 50 minutes. 
    all ingredients in a casserole dish

    Recipe Frequently Asked Questions:

    • Can I Save Leftovers?

      • YES! Absolutely. I love using this recipe for meal prep.
    • How Should I Reheat?

      • For the air fryer-Place each portioned out serving into the air fryer at 350 degrees for 5-10 minutes. 
      • For the oven-Place on a baking sheet at 350 degrees for 5-15 minutes. Note it may take a little longer to heat up if you are reheating the whole thing together. 
      • In the microwave-30-60 seconds. I do not suggest this route, as this dish comes out so much better when it is reheated in the oven or air fryer. 
    • Can I Make This Casserole Ahead Of Time?

      • Absolutely! Preparing the night before would save you time in the morning! Follow all of the steps up until the baking. Then, store it in the fridge (unbaked) overnight. Take it out in the morning and follow the remaining baking instructions.
    pretty picture of hashbrown casserole

    Chef’s Tips:

    • The casserole will puff up a decent bit while baking, so make sure you use a large baking dish.
    hashbrown casserole in a casserole rish

    If you like this recipe, you will LOVE

    • Keto Egg Muffins
    • Gluten Free French Toast Casserole
    • Spinach Mushroom Frittata 
    • Prosciutto Egg Cups
    • Pizza Egg Muffins

    If you enjoyed this recipe it would mean the world to me if you rated it and left a comment below. It helps others find it on google.xoxo-Allianna

    hashbrown breakfast casserole in a plate

    Hashbrown Breakfast Casserole

    Course Breakfast, easy
    Cuisine American
    Prep Time 20 minutes minutes
    Cook Time 50 minutes minutes
    Total Time 1 hour hour 10 minutes minutes
    Servings 6 servings
    Author Allianna Moximchalk
    897kcal
    Cost $10
    Print Recipe Pin Recipe

    Equipment

    • baking dish
    • 2 mixing bowls
    • whisk

    Ingredients

    • 2 peppers diced
    • 1 red onion diced
    • 16 ounces cream cheese I am dairy free so I like the Kite Hill brand. I also use chive cream cheese for this recipe for some extra flavor!
    • 1 cup bacon cooked, chopped
    • 1 cup sausage cooked, chopped
    • 1 bag hashbrowns Frozen, I like the Alexa brand
    • 1/2 cup almond milk or regular milk is ok
    • 9 eggs
    • pinch salt & pepper

    Instructions

    • Preheat the oven to 400 degrees F. Mix the salt, pepper, milk, cream cheese, and egg in a bowl. Whisk together.
    • In a separate bowl, mix the remaining ingredients. Spray the casserole dish with cooking spray oil to prevent it from sticking.
    • Mix both bowls together and pour into the casserole dish. Bake for 50 minutes or until the egg is cooked all the way through.
      If you enjoyed this recipe it would mean the world to me if you rated it and left a comment below. It helps others find it on google.xoxo-Allianna

    Notes

    If you enjoyed this recipe it would mean the world to me if you rated it and left a comment below. It helps others find it on google.xoxo-Allianna
     
    Easy breakfast casserole with hashbrowns, eggs, breakfast meat, and veggies!
    Serving: 1serving | Calories: 897kcal | Carbohydrates: 18g | Protein: 21g | Fat: 83g | Saturated Fat: 36g | Polyunsaturated Fat: 8g | Monounsaturated Fat: 32g | Trans Fat: 0.1g | Cholesterol: 388mg | Sodium: 683mg | Potassium: 546mg | Fiber: 2g | Sugar: 5g | Vitamin A: 1548IU | Vitamin C: 38mg | Calcium: 153mg | Iron: 2mg
    Tried this recipe?Tag me on instagram @alliannaskitchen!
    burger with a bun on it with cheese, tomato and lettuce

    August 3, 2022 Air Fryer

    Gluten Free Burger

    These Gluten Free Burgers are tender and seasoned to perfection! This gluten free burger recipe can be whipped up in under 30 minutes. We love eating these burgers all year round and in the summertime-cooking them on the grill. You can top these juicy burgers off with a fluffy gluten free bun or eat it business, on a bed of lettuce too! This recipe is so versatile and delicious! 

    A gluten free burger on a plate with tater tots.

    This recipe is a huge hit in my house! It is a great option to make in bulk and freeze the burgers so you have them on hand whenever you are in a pinch for a quick dinner. I love making these burgers for summer cookouts with my Gluten Free Pasta Salad, Gluten Free Potato Salad, and Gluten Free Coleslaw. If you like to change up things from your typical burgers, I like using my Red Chimichurri Sauce on top of this burger. It adds a nice kick! I even love adding Roasted Tomatoes on top too!

    [feast_advanced_jump_to]

    Why You Will Love This Recipe

    • These homemade burger patties require less than 10 minutes of hands on time which means they make for a great dinner option when you need something in a rush.
    • This recipe can be grilled, air fried or baked in the oven.
    • We love making these gluten free homemade burger patties in bulk and freezing them in the freezer so we have a nice stash of burgers on hand at all times. 
    • This recipe is naturally Whole30 friendly, gluten free, grain free, dairy free, flourless, paleo, soy free, and refined sugar free. This recipe can also be made keto friendly by putting the burgers on a bed of lettuce instead of a bun.
    • These gluten free burgers pair so well with my favorite Crispy mini potatoes with paleo garlic aioli and Gluten Free Potato Salad.
    • If you are in the Pittsburgh area, check out my weekly meal prep menu. We have similar recipes on there, that are delivered right to your door!

    Ingredients

    Gluten free burger ingredients in glass bowls.
    • Grass Fed ground beef- I love getting my beef from Butcher Box. They have the best quality stuff – all grass fed- and it gets shipped directly to your door. If you use my Butcher Box link you can get free meat with every order!
    • Dairy free cream cheese- I used chive cream cheese, for extra flavor! Kite Hill is my favorite dairy free brand. Cream cheese will help keep your patties moist. If you are not dairy sensitive like me you can use regular cream cheese. 
    • Cassava flour & Egg yolk- Work together to bind all ingredients. I only use Otto’s cassava flour because I have found it works best! Not all cassava flour brands are created equally so if you do use cassava flour, make sure it is Otto’s Cassava Flour! Any kind of gluten free flour can work.
    • Coconut aminos- My go-to soy sauce alternative. It is soy free and gluten free. It tastes just like soy sauce. I get all of my coconut aminos from Thrive Market, is you use my Thrive Market link you can save on your first order!
    • Garlic powder & onion powder- The best seasonings for a ground beef burger patty. 
    • Sea salt & black pepper- As desired.

    See the recipe card below for a full list of ingredients and measurements.

    Substitutions and Variations

    • You can substitute the ground beef for your preferred meat of choice.
    • Add additional spices to change the flavor profile.

    This recipe has not been tested with any other substitutions or variations. If you try something else out please let me know how it turns out in the comments below!

    Step By Step Instructions

    Gluten free beef burger ingredients in a glass bowl.
    Combine all ingredients in a bowl and mix with your hands. Mix until thoroughly combined without overworking the meat.
    Combined beef burger ingredients in a glass bowl.
    Form the meat into 1/3 – pound patties, about 1-1.5 inches thick. Use your thumb to make an indent in the center of each patty. This will prevent them from puffing up while cooking.
    Raw beef burger patties on a baking sheet.
    Different cooking methods: -Air fryer: Place on the air frying rack in the air fryer at 365 degrees F for 7 minutes on each side or until the burger reaches 165 degrees F. – Grill: Heat your grill to medium heat. Cook the burgers for 3-4 minutes on each side, or until the internal temperature reaches 165 degrees F. – Oven: If you are cooking burgers in the oven, preheat the oven to 350 degrees F. Cook burgers 6-7 minutes on each side on a parchment lined sheet or until the internal temperature reaches 165 degrees F.
    Baked beef burger patties on a baking sheet.
    Finally, top with your favorite toppings and serve on a gluten free bun!

    Equipment

    • Mixing bowls
    • Measuring cups and spoons
    • Baking sheet
    • Meat thermometer

    Expert Tips

    • Tip # 1: Indenting your thumb in the center of the raw burger patties will help the burger hold its shape – rather than swelling up.
    • Tip # 2: If grilling outside, it is good to keep a glass of water near by in case you get flames from the beef fat dripping.
    • Tip # 3: If you choose to use a different type of meat it will impact your cook time.

    Recipe FAQ’s

    Can I Freeze Leftover Patties?

    Yes. Store them cooked in an airtight container, layered with parchment paper (for easy remove of the patties). Defrost in the fridge overnight and reheat on the grill, oven, or air fryer. You can also cook directly fro frozen, it will just take longer on each side and not be as juicy.

    How Can I Reheat?

    To reheat in the air fryer, reheat in the air fryer at 350 degrees F for 5-10 minutes. To reheat in the oven, reheat at 350 degrees F for 5-10 minutes. To reheat on the grill, reheat on medium heat for 3 minutes on each side.

    What Can I Serve These With?

    There are so many possibilities! I love making these homemade burger patties for a nice summer picnic with Whole30 Deviled Eggs, Air Fryer Potato Skins, Arugula Pear Salad, and my go-to Strawberry Poppyseed Salad.

    What are the best pre-made gluten free burger patties?

    If you do not feel like making your own homemade patties, I do love Butcher Box’s frozen burger patties. They are delicious and easy to make! I cook mine frozen in the air fryer with a little bit of salt and pepper at 350 degrees F for 10 minutes on each side. If you use my Butcher Box link you can save on your order every month.

    Gluten free beef burger with a bun on it with cheese, tomato and lettuce on a plate with tater tots.

    Storage Instructions

    • This recipe can be stored in the refrigerator for 5 days in an air tight container.

    Other Gluten Free Recipes You Will Love

    • deconstructed burger bowls with sweet potatoes, pickles, tomatoes, and bacon
      Deconstructed Burger Bowls (AIP, Whole30)
    • Paleo big mac casserole on a plate.
      Easy Keto Big Mac Casserole
    • air fried turkey burger on a plate with french fries
      Air Fryer Turkey Burgers
    • grilled pork belly 1 2 scaled
      Pork Belly On The Grill

    Are you interested in a list of my go to healthy alternatives?

    Download your FREE guide below

    download here


    burger with a bun on it with cheese, tomato and lettuce

    Gluten Free Burgers

    Course Dinner, Main Course
    Cuisine American
    Prep Time 5 minutes minutes
    Cook Time 12 minutes minutes
    Total Time 17 minutes minutes
    Servings 4 burgers
    Author Allianna Moximchalk
    200kcal
    Cost $5
    Print Recipe Pin Recipe

    Equipment

    • mixing bowl
    • grill or oven

    Ingredients

    • 1 lb grass fed beef
    • 1/4 cup cassava flour or any kind of gluten free flour will work
    • 1 egg yolk
    • 1/2 tbsp coconut aminos
    • 1/2 tsp sea salt
    • 1/2 tsp garlic powder
    • 1/2 tsp onion powder
    • 1/4 tsp black pepper
    • 1/4 cup cream cheese I like Kite Hill chrive cream cheese as a dairy free option

    Instructions

    • Combine all ingredients in a bowl and mix with your hands. Mix until thoroughly combined, without over-working the meat. Form the meat into 1/3-pound patties (about 1-1.5 inches thick). Use your thumb to make an indentation in the center of each patty. This will prevent them from puffing up while cooking.
    • Air fryer: Place on the air frying rack in the air fryer at 365 degrees F for 7 minutes on each side or until the burger reaches 165 degrees F.
      Grill: Heat your grill to medium heat. Cook the burgers for 3-4 minutes on each side, or until the internal temperature reaches 165 degrees F.
      Oven: Place the burgers on a parchment paper lined sheet pan. If you are cooking burgers in the oven, preheat the oven to 350 degrees F. Cook burgers for 6-7 minutes on each side or until the internal temperature reaches 165 degrees F.
    • Top with your favorite toppings and serve on a gluten free bun!

    Notes

    Storage: This dish can be stored in an air tight glass container for up to 5 days in the refrigerator.
    Nutrition: The nutrition for this recipe is an estimate and the calorie count is not guaranteed.  It is based off of 4 servings. 
    Servings: This recipe should yield 4 servings. 
    Tender and seasoned to perfection!
    Serving: 1burger | Calories: 200kcal | Carbohydrates: 7g | Protein: 25g | Fat: 7g | Saturated Fat: 3g | Polyunsaturated Fat: 0.5g | Monounsaturated Fat: 3g | Trans Fat: 0.4g | Cholesterol: 119mg | Sodium: 411mg | Potassium: 407mg | Fiber: 0.3g | Sugar: 0.3g | Vitamin A: 66IU | Vitamin C: 0.4mg | Calcium: 29mg | Iron: 3mg
    Tried this recipe?Tag me on instagram @alliannaskitchen!
    stuffed cabbage laying on a tray

    August 1, 2022 Allergy Friendly

    Keto Cabbage Rolls

    These Keto Cabbage Rolls are super easy to make and oh so delicious! This recipe takes under 30 minutes of hands-on time which means it is a great gourmet option for those nights where you do not have much time to prepare dinner, but still want a home cooked meal. The flavorful ground turkey combined with Rao’s red sauce is so darn delicious, something the whole family will love too!

    Stuffed cabbage rolls topped off with fresh parsley on a white plate with red pepper flakes.

    This recipe is a great alternative from traditional stuffed cabbage. It is much lighter and quite honestly, it is easier to make! This recipe has multiple variations from making it into a casserole to an unstuffed version! If you enjoy this dish, you would also enjoy my AIP Turkey Breast in a Maple Garlic Sauce, Keto Turkey Meatloaf and Beef Gluten-Free Meatloaf Without Breadcrumbs as well.

    [feast_advanced_jump_to]

    Why You Will Love This Recipe

    • This recipe can be made nut free by substituting the almond flour with cassava flour. 
    • The prep for this recipe is super simple. You can even prepare the dish in advance so all you have to do is bake it!
    • Only a few ingredients for a delicious, flavorful, healthy meal. 
    • This recipe is naturally paleo, dairy free, gluten free, soy free, Whole30 friendly, grain free, and refined sugar free. This recipe can also be made autoimmune protocol friendly by using my nomato sauce. It is a tomato sauce alternative that is tomato free!
    • This recipe is wonderful for meal prep, it reheats super easily. You can even prepare this recipe in advance and freeze it when you are ready to bake it.
    • If you are in the Pittsburgh area, you can check out similar dishes on my weekly meal prep menu – and have them delivered right to your door! 

    Ingredients

    Keto cabbage roll ingredients laid out in small glass bowls.
    • Cabbage leaves– I used green cabbage for this. Red cabbage is a bit smaller. The cabbage will be blanched.
    • Red sauce- My favorite is Rao’s brand. I love to order Rao’s sauce (among other popular items) from Thrive Market. You can use my Thrive Market link and get 25% off your first purchase! You can also use your favorite jarred red sauce. This is a huge time saver. But, if you prefer, of course you can use homemade red sauce. 
    • Ground turkey– The protein of the cabbage roll. You can substitute for your choice of ground meat if you prefer. I buy my ground turkey from Butcher Box, every month they send me a box of all of my favorite proteins. It is always the best quality stuff. If you use my Butcher Box link you can get free meat every month with your order. 
    • Cauliflower rice- For the filling of the cabbage roll. I love Trader Joe’s brand! The meat and rice together is SO good. 
    • Almond flour – Binds the filling together. 
    • Onion-Adds flavor to the filling of the cabbage rolls. You can use whatever kind of onion you prefer. I used yellow because yellow onions are a bit sweeter.
    • Parsley– Adds balance to a savory dish. 
    • Salt & pepper– to taste. 

    See the recipe card below for a full list of ingredients and measurements.

    Substitutions and Variations

    • Cabbage leaves-You can use pre-shedded cabbage that comes in a bag in place of the leaves if you want to make stuffed cabbage casserole or an unstuffed version.
    • Ground turkey-Any kind of ground meat will work: pork, chicken, or beef. Just note if you use a different kind of meat it may take longer or not as long to cook. Ground chicken should be cooked to 165 degrees F and ground beef and ground pork should be cooked to 160 degrees F.
    • Almond flour-You can use any other kind of flour but just note that almond flour is the best low carb option. Cassava flour is great for those of you avoiding nuts or doing the autoimmune protocol.
    • Red sauce-If you are nightshade free like me, you can use my Homemade Nomato Sauce Recipe.
    • Black pepper-If you are doing the autoimmune protocol you can omit it.

    This recipe has not been tested with any other subsiutions or variations. If you replace of add any ingredients, please let us know how it turned out in the comments below!

    Step By Step Instructions

    Beef, tomato sauce onions, flour, herbs in a bowl ready to be mixed.
    Step 1: Add all ingredients except the cabbage in a bowl.
    All stuffed cabbage ingredients mixed together.
    Step 2: Mix all ingredients together until mixed well throughout. While you mix the mixture, add water to a pot on the stove until it is boiling and blanch the cabbage for 2 minutes.
    Raw stuffed cabbage in a white casserole dish with red sauce on top.
    Step 3: Divide up the meat (about 1/3 cup of the mixture in each) in the blanched cabbage and roll. Top it off with some extra red sauce. Make sure the cabbage rolls are with the seam side down.
    Cooked stuffed cabbage in a casserole dish.
    Step 4: Bake the stuffed cabbage rolls at 350 degrees F for about 1 hour and 15 minutes or until the internal temp is 165 degrees F.

    Equitment Needed

    • Large casserole dish.
    • Large pot for blanching.

    Expert Tips

    • Tip #1: Wrapping the rolls and the placement in the baking dish are the keys to the BEST stuffed cabbage rolls. You want to make sure the seams of the stuffed cabbage are facing down to ensure the filling does not fall out.
    • Tip #2: Cover the dish with tin foil or a lid before placing it in the oven. This will prevent the cabbage rolls from drying out.
    • Tip #3: If the stems are really long, you can trim them on the end. This will make them easier to roll.

    Recipe FAQs

    How can I make the unstuffed version?

    You can use shredded cabbage in this recipe in place of large cabbage leaves. To do that you will want to mix up all ingredients and bake until the meat is cooked all the way through.

    What is the best way to reheat?

    Once it is fully cooked you can reheat it in the air fryer at 350 degrees F for 10 minutes or in the oven. You can also reheat it in the microwave.

    Can I cook this recipe in a slow cooker?

    You can cook this recipe on low for 8 hours.

    Side view of stuffed cabbage on a plate with fresh parsley on top.

    Storage Instructions

    • You can store this dish covered in an air tight container in the fridge for up to 5 days.
    • If you want to eat stuffed cabbage all month long, you can freeze this meal! This dish can be frozen raw or cooked. If you freeze it raw you will need to thaw it out and cook it for the full hour and 15 minutes prior to serving. If you freeze it cooked you will need to allow it to thaw and you can reheat it any way you would like.

    Other Keto Recipes You Will Love

    • Paleo big mac casserole on a plate.
      Easy Keto Big Mac Casserole
    • everything bagel seasoned chicken on a baking sheet with garlic aioli
      Keto Everything Bagel Chicken (Dairy Free)
    • Slice of keto meatloaf on a plate with dairy free ranch and bacon.
      Keto Turkey Meatloaf With Ranch
    • Sheet Pan Chicken Fajitas with lime wedges and jalapeño no slices
      Gluten Free Chicken Fajitas

    Want a copy of my FREE anti-inflammatory guide?

    download it here

    stuffed cabbage laying on a tray

    Keto Cabbage Rolls

    Course Dinner, Main Course, Meals
    Cuisine American
    Prep Time 25 minutes minutes
    Cook Time 1 hour hour 20 minutes minutes
    Total Time 1 hour hour 45 minutes minutes
    Servings 9 rolls
    Author Allianna Moximchalk
    80kcal
    Cost $10
    Print Recipe Pin Recipe

    Equipment

    • large pot
    • Large mixing bowl
    • Large baking dish

    Ingredients

    • 10 leaves cabbage green
    • 1 jar Rao's red sauce If you are doing the autoimmune protocol you can use my nomato sauce
    • 1 lb ground turkey or beef, I like to get mine from Butcher Box! Use my link and save on your first order.
    • 1/2 cup cauliflower rice
    • 1/4 cup almond flour use cassava flour for AIP or nut free
    • 1/2 large onion chopped
    • 2 tbsp freshly chopped parsley plus more for garnish
    • sea salt
    • ground black pepper omit for AIP

    Instructions

    • In a large pot of boiling water, blanch cabbage leaves until tender and flexible. About 1 minute 30 seconds. Then, remove from boiling water and soak in ice water for 30 seconds. Then remove.
    • Make filling: In a large bowl, combine ground meats, 1 cup jarred red sauce, cauliflower rice, cassava flour, onion, and parsley. Season with salt and pepper.
    • Spread a thin layer of sauce on the bottom of a large baking dish.
    • Place about 1/3 cup of meat filling into one end of each cabbage leaf, then roll up. Make sure to tuck in the sides as you roll. Place rolls "seam side" down on top of the sauce in the baking dish.
    • Spoon remaining sauce on top of cabbage rolls then cover dish with foil. This prevents the cabbage rolls from drying out. Bake 1 hour and 15 minutes, until rice and meat are cooked through (should temp at 165 degrees F).
    • Garnish with more parsley and optional more red sauce before serving.

    Notes

    Storage: This recipe can be stored in the fridge for up to 5 days.
    Nutrition: The nutrition in this recipe is based off of an estimate and not a guarantee. It is based off of 6 servings. 
    Servings: This recipe should yield approx 6 servings. 
     
    Dairy free and gluten free stuffed cabbage rolls
    Serving: 1roll | Calories: 80kcal | Carbohydrates: 2g | Protein: 13g | Fat: 3g | Saturated Fat: 0.4g | Polyunsaturated Fat: 0.3g | Monounsaturated Fat: 0.3g | Trans Fat: 0.01g | Cholesterol: 28mg | Sodium: 29mg | Potassium: 189mg | Fiber: 1g | Sugar: 1g | Vitamin A: 14IU | Vitamin C: 5mg | Calcium: 12mg | Iron: 1mg
    Tried this recipe?Tag me on instagram @alliannaskitchen!

    beautiful plate of zucchini oatmeal bars

    June 17, 2022 Breakfast

    Zucchini Oatmeal Bars

    These Chocolate Chip Zucchini Oatmeal Bars are sweet, filling, easy to make, and kid friendly! This is a simple and delicious way to get some vegetables in for breakfast. This recipe only requires 5 minutes of hands-on time, so you can have it ready for the whole family in no time! This is the perfect dish to make in advance so that you have them on hand for your busy week ahead.

    Zucchini oatmeal bars on a plate with fresh bananas.

    These are a great way to get additional vegetables into your daily diet. The zucchini doesn’t have a strong flavor so you don’t even realize that it is in the bars. The chocolate chips, maple syrup, and ripe bananas are what gives these bars the sweetness. If you have a bunch of zucchini leftover from this recipe, check out my Gluten Free Zucchini Bread recipe, Gluten Free Zucchini Fritters, and Gluten Free Zucchini Muffin Recipe! Another one of my seasonal favorites is watermelon. Be sure to check out my Cucumber Watermelon Salad Recipe too!

    [feast_advanced_jump_to]

    Why You Will Love This Recipe

    • It only requires 5 minutes of prep-time! 
    • Zucchini oatmeal is sweet and filling. It’s perfect for a quick breakfast or afternoon snack!
    • They are easy to heat up and can be served with any fruit, of your choice. 
    • This recipe is naturally gluten free, dairy free, nut free, and refined sugar free.
    • Kids will love this recipe! They won’t even realize they are eating vegetables.
    • This recipe is inspired by the other homemade oatmeal bars on my website like my Blackberry Oatmeal Bake.
    • We also have oatmeal bars listed on my weekly meal prep menu. Right now, we deliver all over Pittsburgh, but will soon be shipping nationwide! 

    Ingredients

    Zucchini oat bar ingredients in glass bowls.
    • Sprouted gluten free oats–sprouted oats undergo a germination process that activates fiber. This makes them easier to digest, for people like me. I got a large bag from Costco! 
    • Banana –make sure it is ripe! The riper it is, the sweeter the oatmeal bars will be. This is a great way to use up ripe bananas that were previously frozen.
    • Zucchini –Grated. I like using this cheese grater. You will want to make sure to squeeze some of the additional liquid out before mixing it into the batter.
    • Chocolate chips –I like the enjoy life brand. You can use regular chocolate chips if you are not dairy free. 
    • Maple syrup–As the sweetener. Make sure it is pure maple syrup! You can also swap for honey. 
    • Coconut milk–You can also use almond milk! You will just want to make sure that your diary free milk of choice is unsweetened and is not flavored.
    • Cinnamon–To give a nice kick! 
    • Egg–Binds everything together.

    See the recipe card below for a full list of ingredients and measurements.

    Substitutions and Variations

    • If you want to add additional vegetables to the oat bars, you could add grated cauliflower or thawed frozen cauliflower rice to the batter. Cauliflower does not have much flavor so it is great to add to recipes!
    • To add additional nutrients and an added crunch, you could add flax seed, chia seed, or fresh nuts such as almond slices.

    This recipe has not been tested with other substitutions or variations. If you replace or add any ingredients, please let us know how it turns out in the comments below!

    Step by Step Instructions

    Oatmeal, eggs, zucchini, chocolate chips, maple syrup and eggs all mixed in a bowl.
    First, preheat the oven to 350 degrees F. Place all of the ingredients in a bowl and mix together.
    Oatmeal bars placed in a casserole dish.
    Next, spray a 9×15 baking dish with avocado oil and spread out the oat mixture. Bake for 35 minutes. Let sit for 10 minutes prior to cutting and serving.

    Equipment Needed

    • Mixing bowls
    • Baking dish

    Expert Tips

    • Tip # 1: Make sure you pat the grated zucchini with a paper towl in order to get all of the liquid out. You could also place all of the zucchini into a cheese cloth and twist to squeeze the liquid out.
    • Tip # 2: If you double the recipe, watch the bars closely while cooking to be sure that they are cooking evenly.
    • Tip # 3: Allow the oatmeal bars to fully cool before moving and cutting into them. This will help to prevent the bars from falling apart.

    Recipe FAQ’s

    How should I serve this?

    I love eating these oatmeal bars nice and warm, with fresh berries or banana slices on top! To reheat, you can place it in the microwave for 20 seconds or in the oven at 350 degrees F for 5-10 minutes. 

    Are oats Paleo?

    Technically, no. Grains are avoided on the paleo protocol, however, some people find that once their gut heals, they can tolerate them! I can tolerate them and enjoy eating them as a treat. It took me years to get to this point, though. I was strictly grain-free for 4 years prior. 

    How can I know the center of the oat bars are cooked through?

    I like to check to see if they are golden in the center and if they have a “dry” appearance to them. You could also stick a toothpick in the center as well.

    Zucchini chocolate chip oatmeal bars on a plate with fresh banana and chocolate chips.

    Storage Instructions

    • This recipe can be stored in the refrigerator for up to 5 days in an air tight container.

    Other Oatmeal Bar Recipes You Will Love

    • strawberry oat bar with bananas on top
      Strawberry Oatmeal Bars
    • cranberry oat bars in a plate with a gold fork
      Cranberry Oatmeal Bars (Gluten Free)
    • applee oatmeal bake 16
      Apple Oatmeal Bake (Gluten Free)
    • blueberry banana baked oatmeal 136 scaled
      Blueberry Banana Baked Oatmeal (Gluten Free)

    Want a free guide of my go to healthy alternatives?

    download your FREE guide
    beautiful plate of zucchini oatmeal bars

    Zucchini Oatmeal

    Course Breakfast, Snack
    Cuisine American
    Prep Time 5 minutes minutes
    Cook Time 35 minutes minutes
    cooling time 10 minutes minutes
    Total Time 50 minutes minutes
    Servings 6
    Author Allianna Moximchalk
    260kcal
    Cost $5
    Print Recipe Pin Recipe

    Equipment

    • Large baking dish

    Ingredients

    • 2 1/4 cup oats Make sure they are gluten free! I like sprouted oats.
    • 1/2 tsp cinnamon
    • 1 whole banana Sliced. Make sure it is ripe.
    • 3/4 cup coconut milk Or almond milk
    • 1/4 cup maple syrup
    • 1 cup zucchini grated.
    • 1/2 cup chocolate chips dairy free
    • 1 egg

    Instructions

    • Preheat the oven to 350 degrees F. Place all ingredients in a bowl and mix together.
    • Spray a 9×15 with avocado oil and spread out the oat mixture.
    • Bake for 35 minutes. Let sit for 10 minutes prior to cutting and serving.

    Notes

    Storage: This recipe can be stored in the refrigerator in an air tight container for up to 5 days. 
    Nutrition: The nutrition for this recipe is an estimate and the calorie count is not guaranteed.  It is based on 6 servings. 
    Servings: This recipe should yield 6 servings. 
    This zucchini oatmeal is easy, delicious, and makes a great breakfast or snack!
    Serving: 1bar | Calories: 260kcal | Carbohydrates: 37g | Protein: 5g | Fat: 11g | Saturated Fat: 7g | Polyunsaturated Fat: 1g | Monounsaturated Fat: 1g | Cholesterol: 3mg | Sodium: 12mg | Potassium: 258mg | Fiber: 3g | Sugar: 14g | Vitamin A: 42IU | Vitamin C: 4mg | Calcium: 40mg | Iron: 2mg
    Tried this recipe?Tag me on instagram @alliannaskitchen!
    orange poppyseed salad dressing in a bowl with a whisk

    June 15, 2022 Dairy free

    Orange Poppyseed Dressing

    This Orange Poppyseed Dressing is SO easy to make and so delicious! This is a great summer dressing to keep your salads light and refreshing! Throw the ingredients in a bowl, whisk it up, and you have a tasty dressing that the whole family will love. 

    orange poppyseed salad dressing in a bowl with a whisk

    If you enjoy this recipe, you would also like my Whole30 Caesar Dressing as well.

    What Makes This Recipe So Good?

    • First off, it takes 5 minutes to make! So convenient. 
    • Secondly, it is light and refreshing. Perfect for a summer salad!
    • I love having homemade dressings on hand that are easy to throw together. 
    • This dressing is versatile, meaning you can pair it with almost anything! I love eating it with salmon. Or try it on this Strawberry Poppyseed Salad!
    • The whole family will love this dressing! 
    • It can last in the refrigerator for up to 1 week! 

    Recipe Ingredients:

    • Orange juice-you can use fresh squeezed or store bought. If you buy orange juice, make sure it is pulp free! 
    • Olive oil–Oil base of choice. I recommend EVOO, it has a slightly different taste profile than avocado oil. 
    • Honey–Gives the dressing a nice, subtle sweetness. 
    • Apple cider vinegar–Adds an extra sweetness that will balance everything out.
    • Poppyseeds– Adds a slightly nutty taste, crunchy texture, and unique decoration!
    • Salt–to taste.
    orange poppyseed salad dressing 1

    How To Make:

    • Step 1:
      • So simple! Put all the ingredients into a mixing bowl and whisk together. Add salt to taste. 
    orange poppyseed dressing in a bowl

    Recipe FAQ’s:

    • What Should I Serve This With?

      • Any salad of your choice! For some extra protein, chicken breast on your salad would taste great as well. 
    • How Long Does This Dressing Last? 

      • I would store it in the fridge for up to 1 week. 
    • What Kind of Container Should I Store This In? 

      • An airtight container that can be easily shaken or mixed. The dressing will separate, so you’ll want to be able to mix it up easily. 

    Chef’s Tips:

    • Store the dressing in a salad dressing container or bottle that will be easy to shake/ mix. It will separate, but a quick stir will mix everything back together.
    cute little container for dressing with a whisk in it

    If you like this recipe, you will LOVE:

    • Strawberry Poppyseed Salad 
    • Whole30 Ranch Dressing
    • Whole30 Caesar Dressing
    • Healthy Avocado Lime Ranch Dressing 

    If you enjoyed this recipe it would mean the world to me if you rated it and left a comment below. It helps others find it on google.xoxo-Allianna

    orange poppyseed salad dressing in a bowl with a whisk

    Orange Poppyseed Dressing

    Course Condiment, Dressing, quick, Salad
    Cuisine American
    Prep Time 5 minutes minutes
    Servings 4 people
    Author Allianna Moximchalk
    171kcal
    Cost $10
    Print Recipe Pin Recipe

    Equipment

    • mixing bowl
    • whisk

    Ingredients

    • 1/2 cup orange juice
    • 1/4 cup olive oil extra virgin
    • 2 tbsp honey or maple syrup for vegan
    • 2 tbsp apple cider vinegar
    • 1 tsp poppyseeds
    • 1 pinch salt

    Instructions

    • Combine all ingredients into a mixing bowl. Whisk together. Add pinch of salt, or to taste, at the end.

    Notes

    If you enjoyed this recipe it would mean the world to me if you rated it and left a comment below. It helps others find it on google.xoxo-Allianna
    Delicious, quick, and light salad dressing
    Serving: 1serving | Calories: 171kcal | Carbohydrates: 12g | Protein: 1g | Fat: 14g | Saturated Fat: 2g | Polyunsaturated Fat: 2g | Monounsaturated Fat: 10g | Sodium: 11mg | Potassium: 78mg | Fiber: 1g | Sugar: 11g | Vitamin A: 62IU | Vitamin C: 16mg | Calcium: 15mg | Iron: 1mg
    Tried this recipe?Tag me on instagram @alliannaskitchen!
    photo collage of gluten free meals for fourth of july

    June 10, 2022 Featured Home

    Gluten Free Fourth of July Ideas

    Fourth of July is quickly approaching. Summer barbecues don’t have to mean falling off track with your eating! Keep this years’ Fourth of July barbecue light and delicious with these 8 easy Gluten Free Fourth of July recipes! 

    photo collage of gluten free meals for fourth of july

    Gluten Free Fourth of July Ideas:

    cupcakes in a muffin pan

    Gluten Free Strawberry Cupcakes

    • These Gluten Free Strawberry Cupcakes are super easy and fun to make! They only require 15 minutes of hands-on time and are perfect for strawberry season. The moist and fluffy grain free cupcakes combined with the silky dairy free frosting is delightful.


    garlic butter wings 1 683x1024 3

    Garlic Butter Wings

    • These crispy Buffalo Wild Wings copycat garlic butter wings are my husband’s favorite. They are the perfect date night alternative to take out. With these crispy wings only requiring 5 minutes of hands on time, they are also perfect for all of your weeknight cooking needs! These garlic butter wings are naturally Whole30, paleo, keto and AIP friendly.


    paleo salsa on a platter with keto chips and fresh cilantro

    Keto Salsa

    • This Homemade Keto Salsa is full of flavor and makes for a great weekend snack or appetizer! It is seriously the best. The fresh cilantro combined with the ripe tomatoes and jalapeños is oh so delicious. We love using this homemade salsa for chips and dips but also on tacos too.


    paleo mac and cheese in a bowl

     Paleo Mac and Cheese

    • This paleo mac and cheese recipe is creamy and delicious! This recipe only takes minutes to make and is something the whole family can eat.


    whole30 deviled eggs 1 scaled

    Whole30 Deviled Eggs

    • These Whole30 deviled eggs are perfect for every occasion! The creamy avocado mayonnaise confined with the dijon mustard and pickle juice makes for the most perfect filling. We like to top these eggs off with black olives and mini pickles. This recipe includes two ways to make these deviled eggs.


    whole30 bbq meatballs

    BBQ Bacon Meatballs

    • These BBQ bacon meatballs are quick, delicious and make for a fun dinner option! This recipe is naturally Whole30 friendly and can be made AIP friendly. We like to make these for a fun date night and also use them as a paleo appetizer!


    paleo pasta salad 7 683x1024 1

    Paleo Pasta Salad

    • This paleo pasta salad is everything pasta salad should be: crunchy, easy, quick, filling, and oh so delicious. The crunchy red pepper and onions combined with the oregano and red pepper flakes makes this salad so tasty.  This pasta salad is naturally paleo, vegan, and Whole30 friendly. This Whole30 pasta salad is perfect for all of your warm day and hosting needs.


    dairy free strawberry pretzel salad on a plate with whipped cream on top

    Gluten Free Strawberry Pretzel Salad

    • This Gluten Free Strawberry Pretzel Salad is super fun and easy for Spring and Summer! We love to make it for cookouts, picnics, Memorial Day weekend and the 4th of July. This easy recipe only requires 25 minutes of hands-on time and is a great gluten free dessert that you can prepare in advance
    • « Go to Previous Page
    • Page 1
    • Interim pages omitted …
    • Page 10
    • Page 11
    • Page 12
    • Page 13
    • Page 14
    • Interim pages omitted …
    • Page 38
    • Go to Next Page »

    Primary Sidebar

    Allianna Headshots

    Hi, I'm Allianna! Allianna's Kitchen started by accident after battling an undiagnosed autoimmune disease for nearly my whole life.

    More about me →

    GLUTEN FREE DINNER RECIPES

    • steak date night dinner 1
      Steak Date Night Dinner with Garlic Aioli
    • gluten free fried shrimp 3 scaled
      Gluten Free Fried Shrimp
    • cooked frozen pork chops with chives on top on a white plate with a gold fork
      Easy Frozen Pork Chops In The Air Fryer
    • halibut fish tacos on a pale blue plate
      Halibut Fish Tacos

    EASY WHOLE30 RECIPES

    • Beetroot dip on a plate with crackers and fresh parsley on top.
      Simple Beetroot Dip Recipe
    • close up photo of ginger apple pork in a bowl
      Apple Ginger Pulled Pork
    • dairy free lobster bisque in a bowl with a gold spoon and garnished with lemon, fresh green herbs, and red pepper flakes.
      Dairy Free Lobster Bisque
    • juicy filet mignon on a plate
      Air Fryer Filet Mignon

    GLUTEN FREE APPETIZERS

    • peanut butter and jelly chicken wings on a plate with limes
      Peanut Butter And Jelly Wings
    • Stuffed mushrooms on a brown and white plate with fresh parsley on top.
      Gluten-Free Stuffed Mushrooms
    • Gluten free pigs in a blanket in a pile on a plate.
      Gluten Free Pigs In A Blanket
    • Pretty french onion dip in a silver bowl with potato chips and chives on top.
      Vegan French Onion Dip Recipe

    EASY MOCKTAIL RECIPES

    • honey simple syrup 2
      Honey Simple Syrup
    • orange lime cranberry mocktail 4
      Cranberry Mocktail Recipe
    • Clear glass with a brown drink and a cinnamon stick in it.
      Pear Cocktail Recipe
    • Grapefruit mocktail in a glass with jalapeño slice and grapefruit slice.
      Easy Grapefruit Mocktail Recipe

    Footer

    • Recipes
    • My Courses
    • Meal Prep Services
    • Accessibility Policy
    • Contact
    • About Me
    • Blog
    • Privacy Policy
    • Pinterest
    • Instagram
    • Facebook
    • Twitter

    Allianna’s Kitchen 2025 - All Rights Reserved

    Rate This Recipe

    Your vote:


    A rating is required
    A name is required
    An email is required