• Skip to primary navigation
  • Skip to main content
  • Skip to primary sidebar
  • Spring Recipes
  • Recipes
  • Order Meal Prep
  • Healthy Gut Baby Food Course
  • About

Allianna's Kitchen

menu icon
go to homepage
  • Spring Recipes
  • Recipes
  • Order Meal Prep
  • Healthy Gut Baby Food Course
  • About
    • Facebook
    • Instagram
    • Pinterest
    • Twitter
  • search icon
    Homepage link
    • Spring Recipes
    • Recipes
    • Order Meal Prep
    • Healthy Gut Baby Food Course
    • About
    • Facebook
    • Instagram
    • Pinterest
    • Twitter
  • ×
    Allianna's Kitchen » Recipes

    Blog

    buffalo chicken meatballs stacked on top of each other with whole30 ranch and parsley

    November 19, 2020 Appetizers

    Buffalo Chicken Meatballs

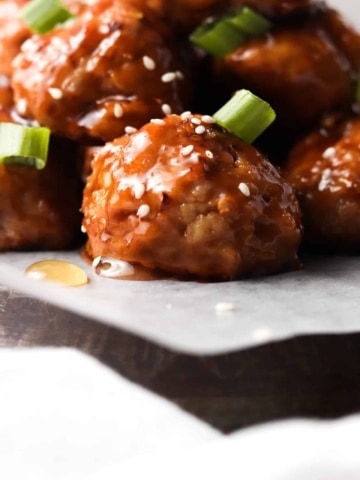
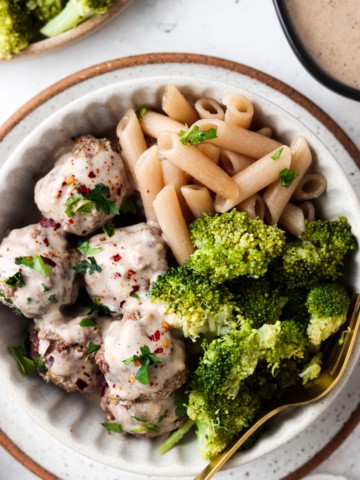
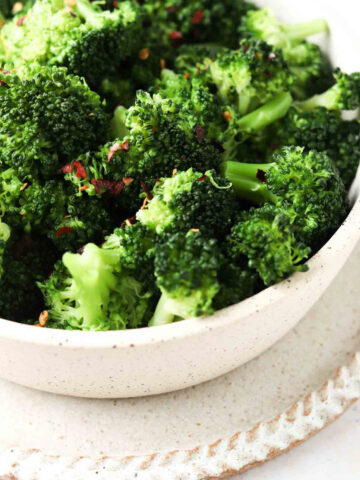
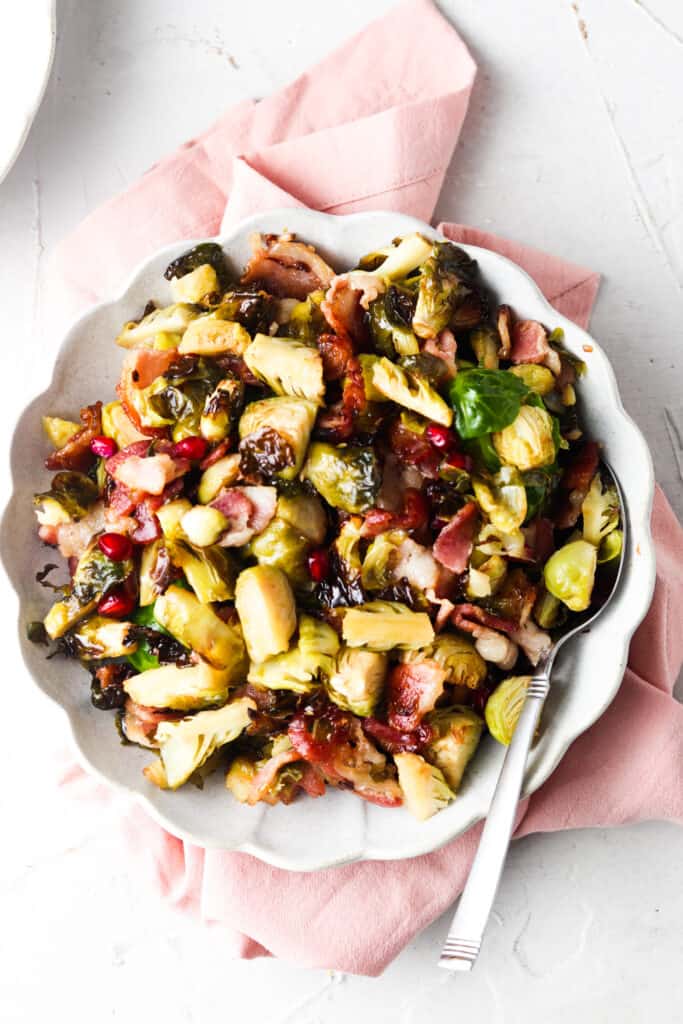
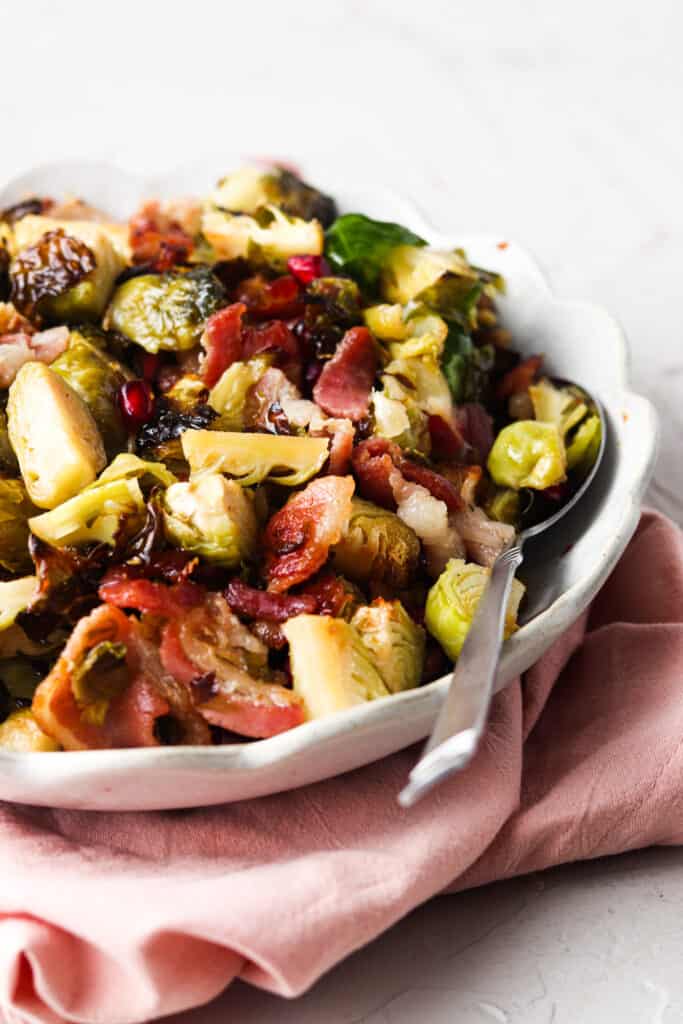
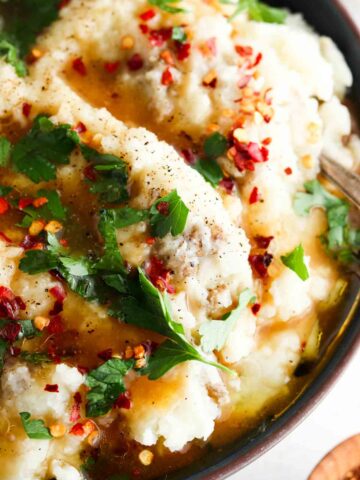
    These paleo and Buffalo Chicken Meatballs are loaded with flavor and quite a crowd pleaser. They are perfect for all of your football game day snack needs as well as an easy paleo dinner. For dinner we like to serve them with roasted broccoli. The homemade buffalo sauce combined with the homemade ranch dressing makes these meatballs oh so delicious.

    Buffalo chicken meatballs stacked on top of each other with whole30 ranch and parsley.

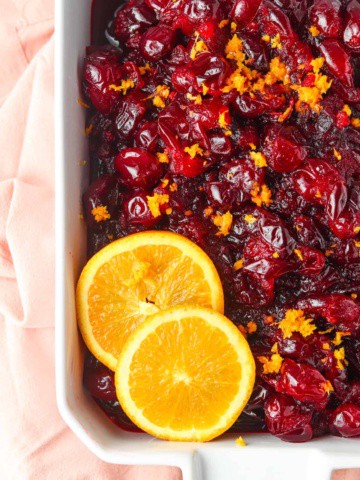
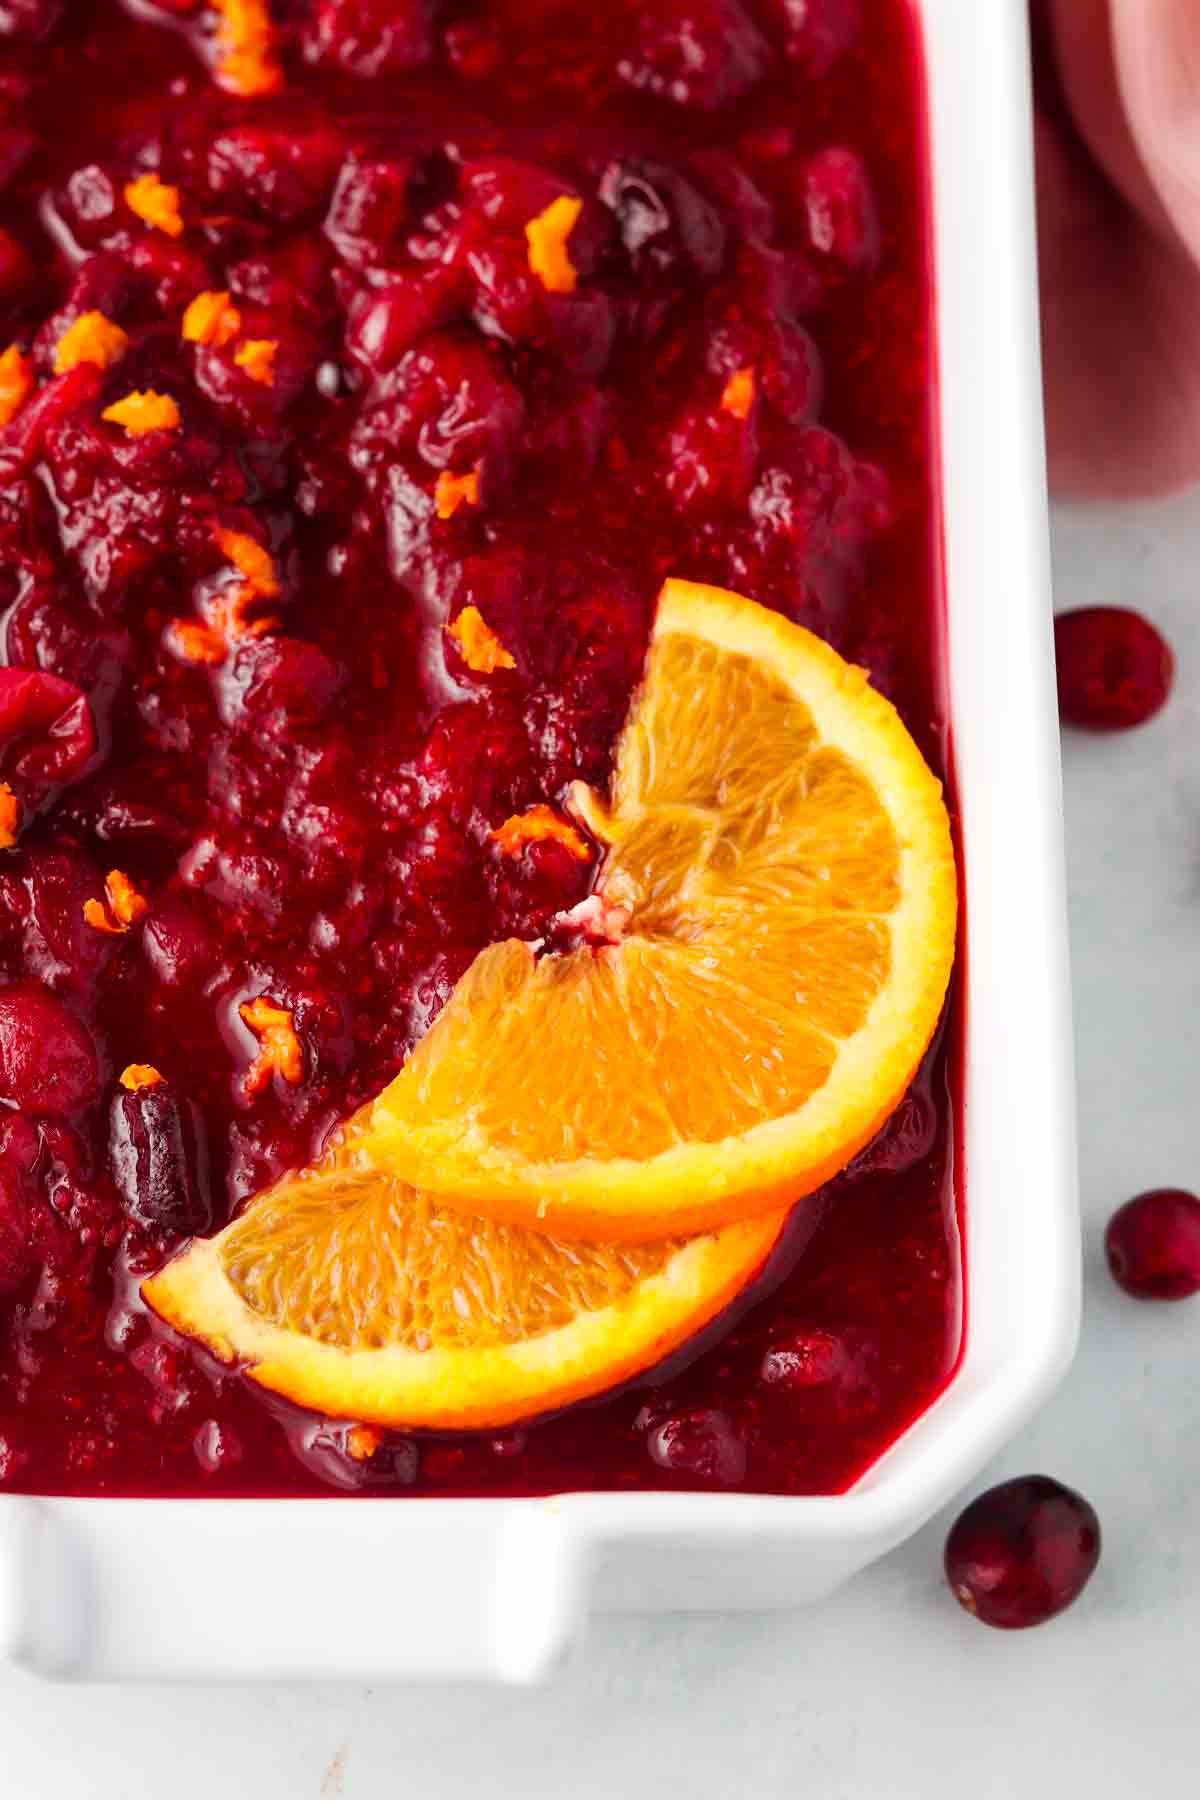
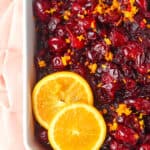
    These meatballs are a great meal option to prepare in advance for your lunches for the week ahead! Pair them with some cauliflower rice and broccoli and you are ready to go. If you enjoy this recipe, you will also enjoy my Cranberry BBQ Meatballs as well.

    [feast_advanced_jump_to]

    Why You Will Love This Recipe

    • One of the best things about this recipe is how simple it is, you only need a key few ingredients and you can buy pre-made paleo ranch and buffalo sauce if you would prefer.
    • This recipe is naturally gluten free, dairy free, paleo, soy free, and Whole30.
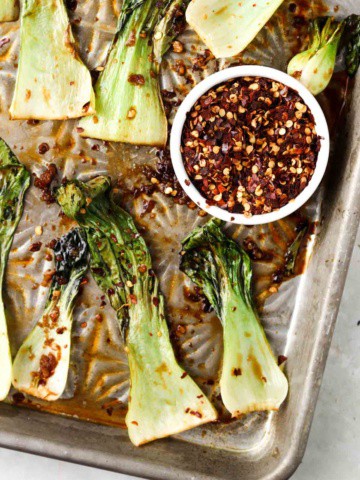
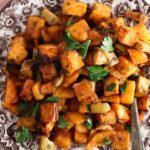
    • I like to pair this recipe with my go to Broccoli Recipe.
    • This recipe is great to meal prep for your week ahead!
    • You can serve this dish as a meal or as an appetizer. When I make these meatballs for football Sunday, I like to also make my Crockpot Gluten Free Mac and Cheese.
    • If your kids don’t like spice, you can always leave some meatballs without sauce so the whole family can enjoy!
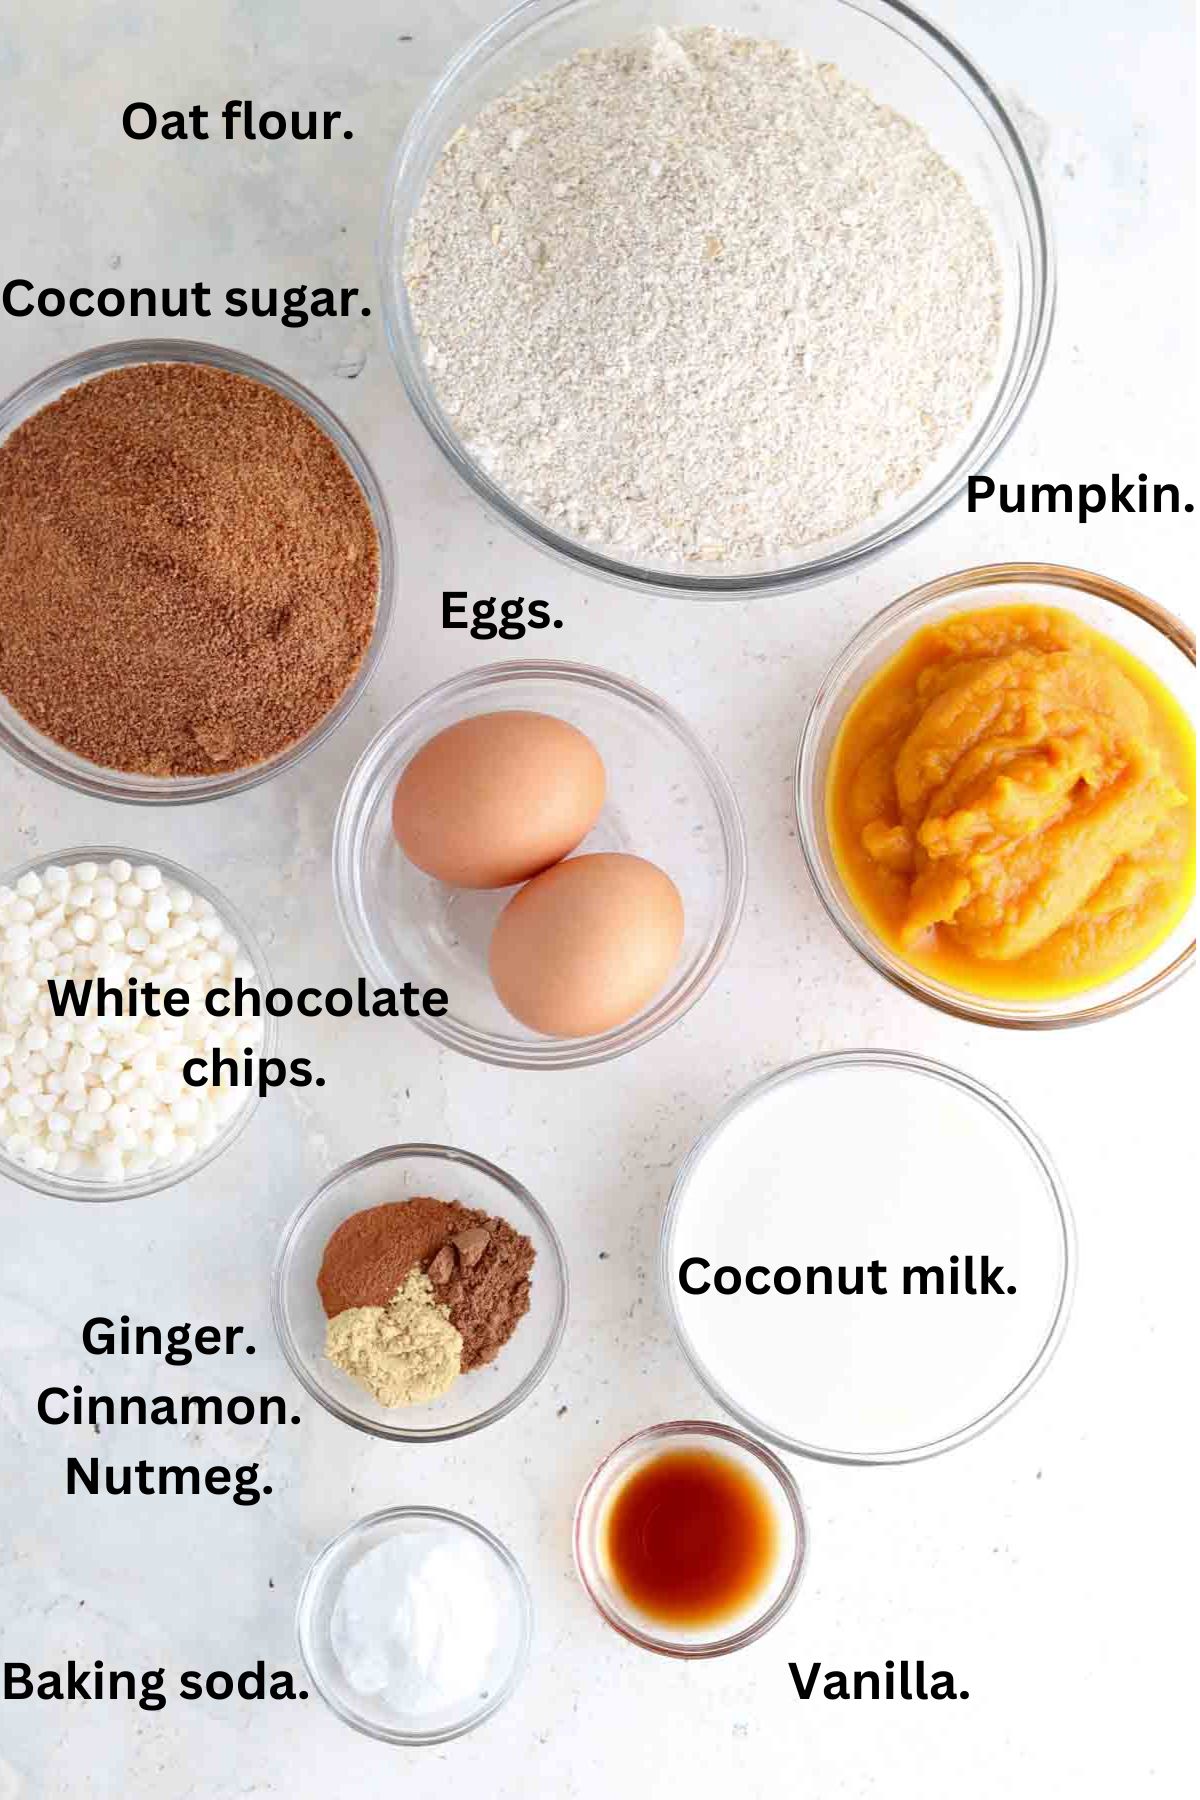
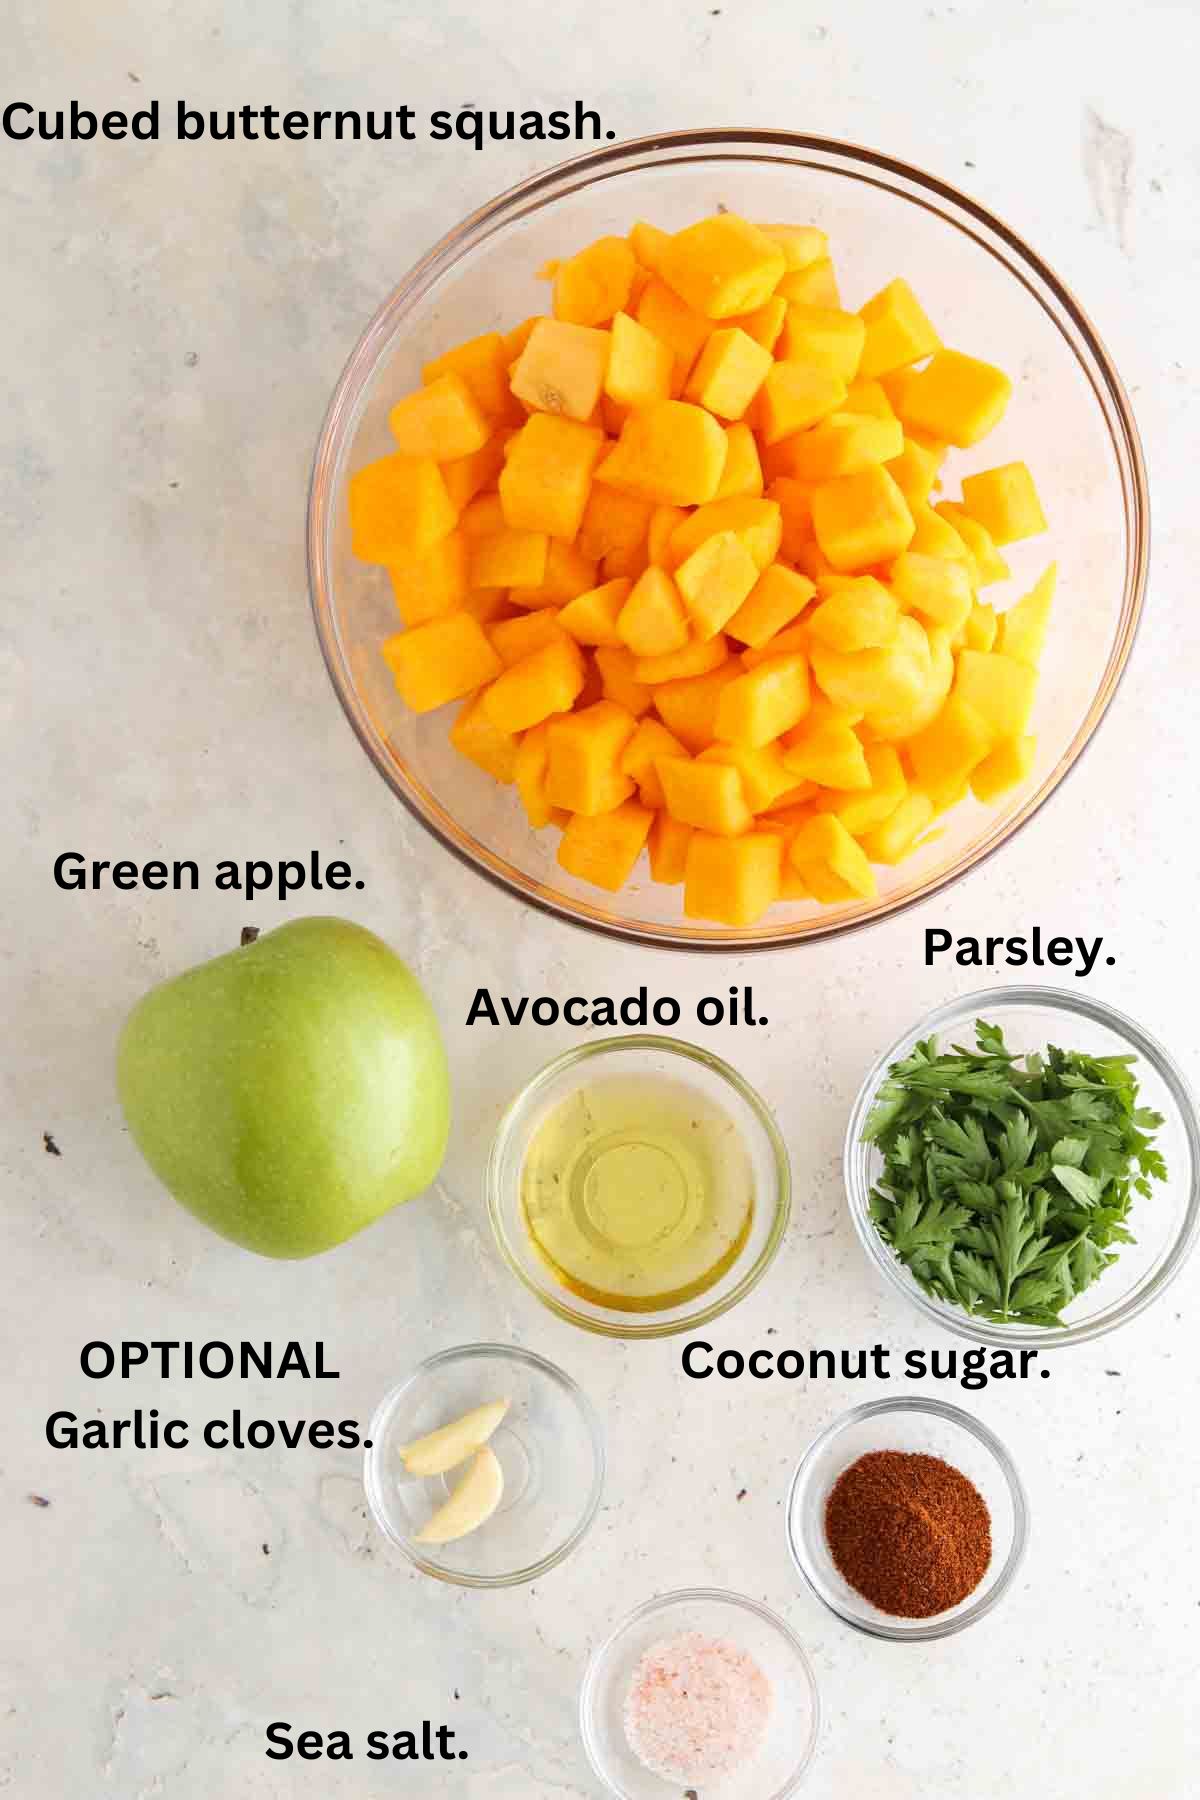
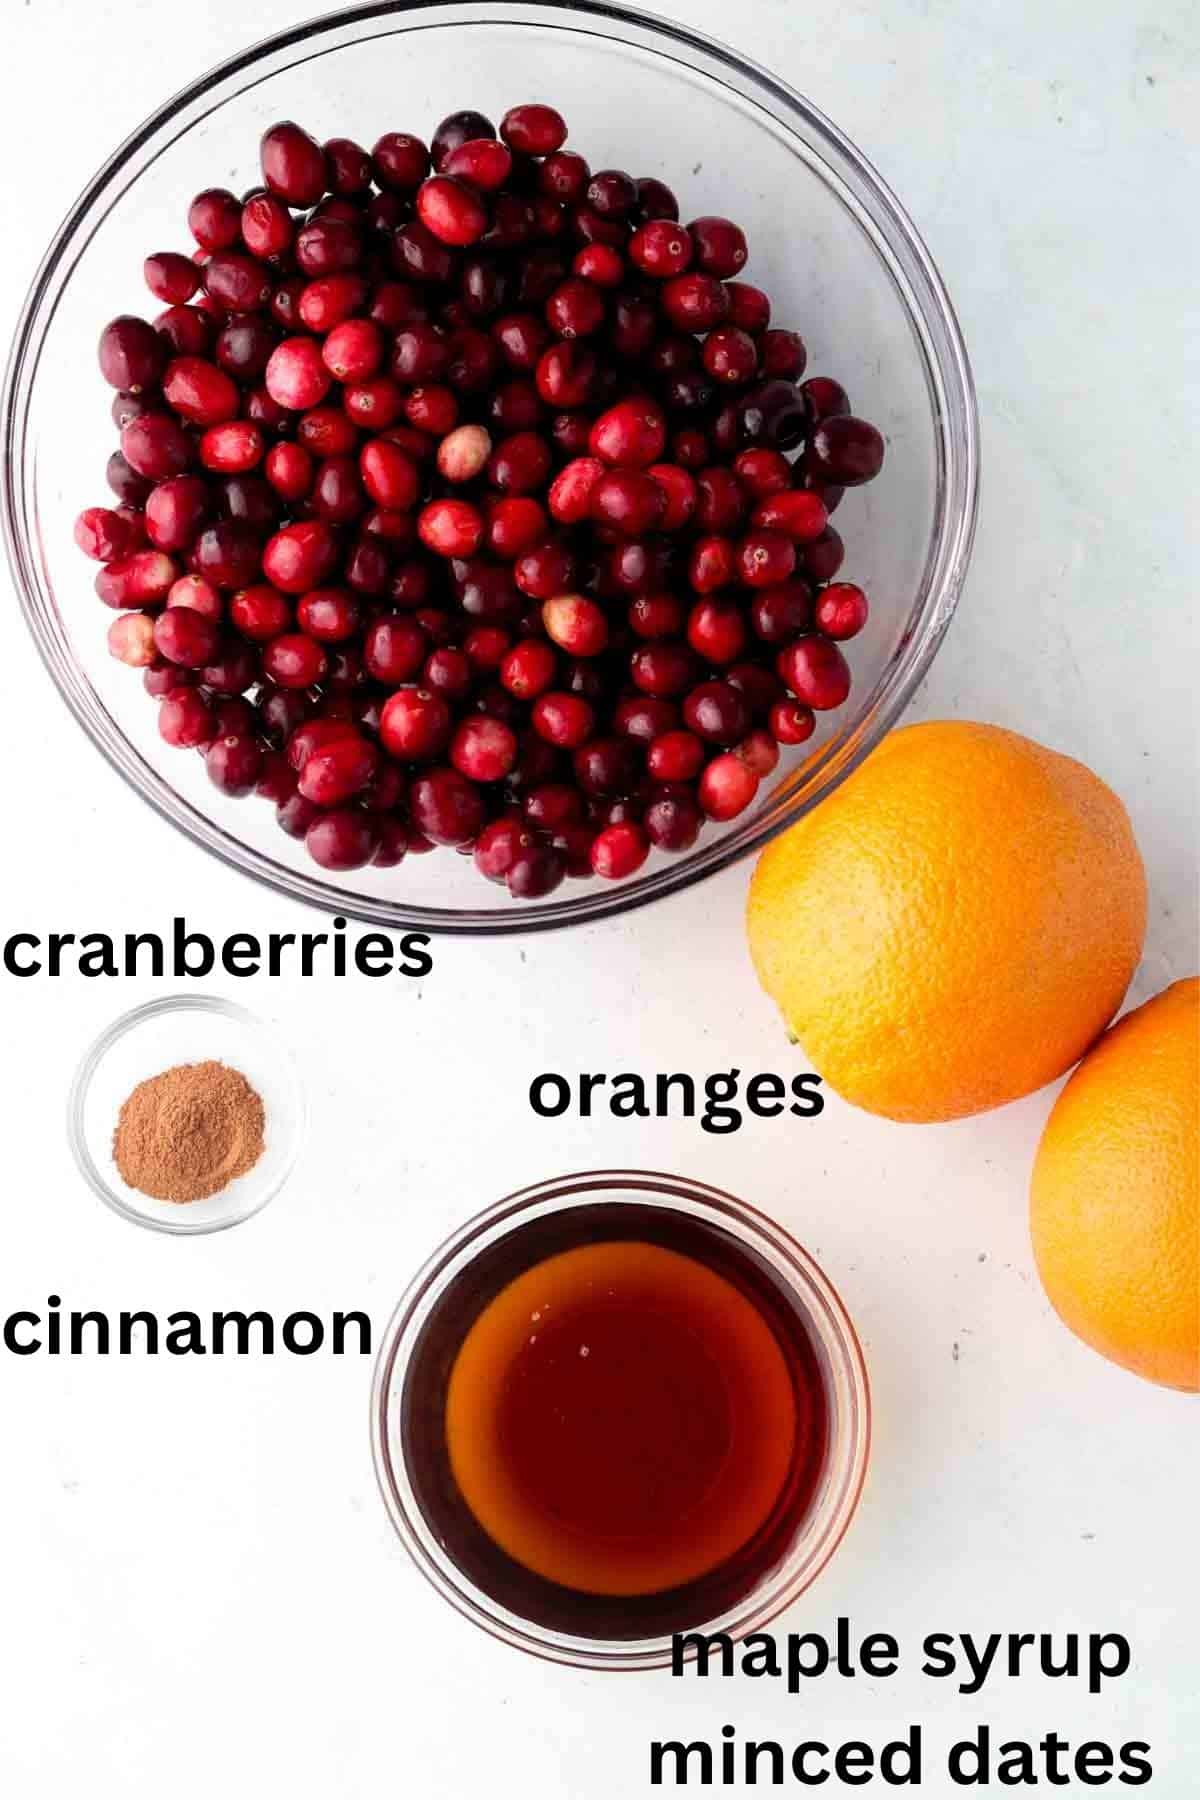
    Ingredients

    buffalo chicken meatball

    For the meatballs:

    • Ground chicken– I personally love the ground chicken thighs because I feel like they have more flavor, however you can use lean chicken if you would prefer. 
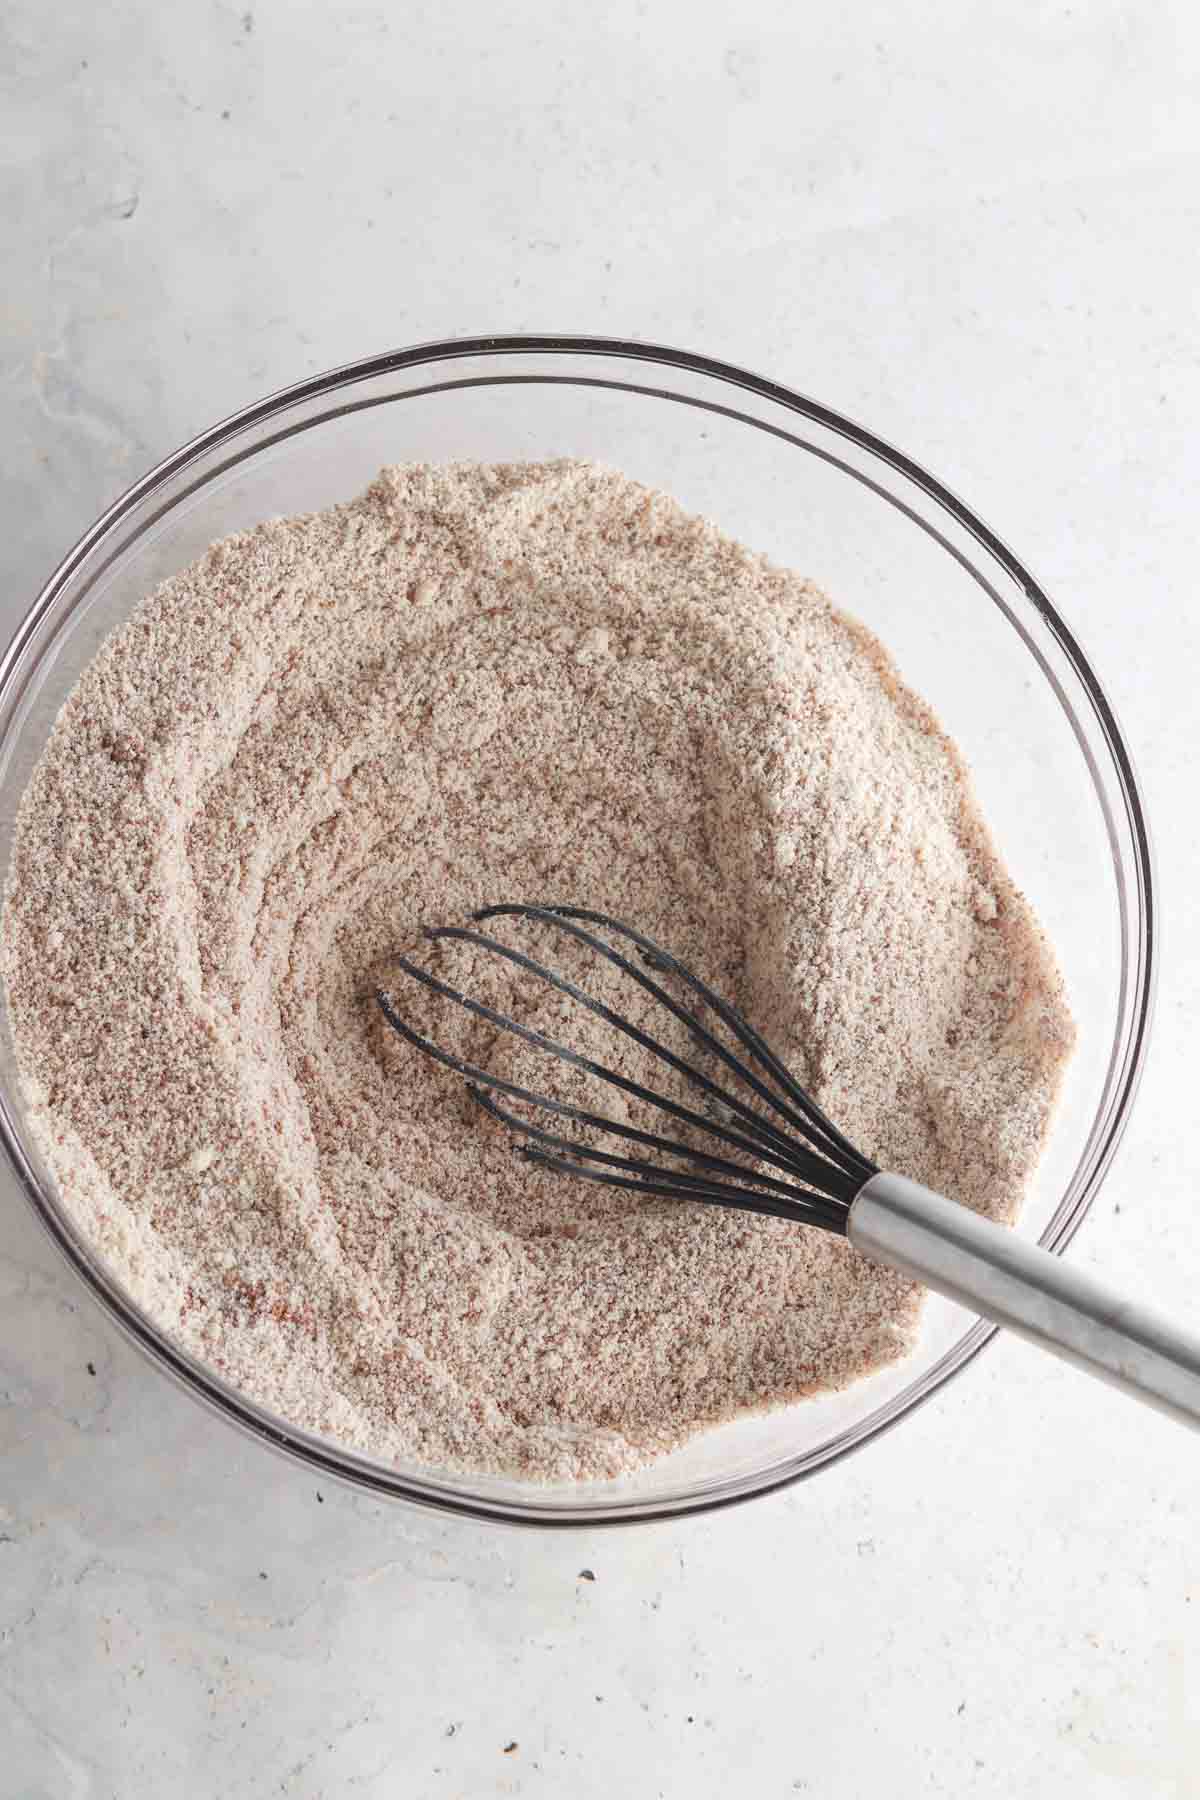
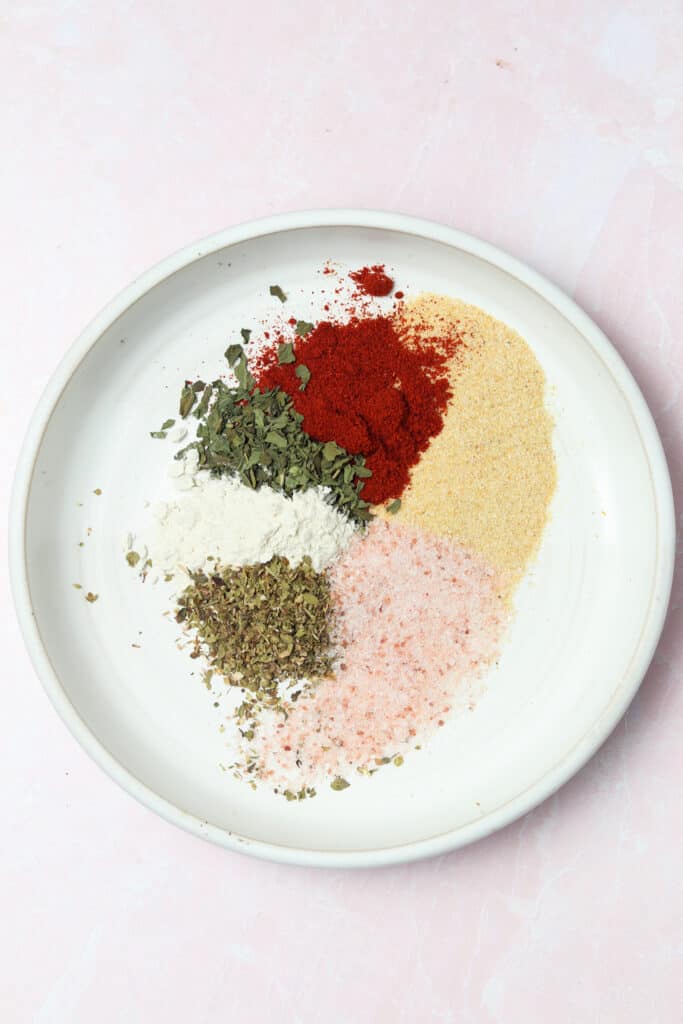
    • Spices– do not skimp on the spices. This is what makes these meatballs loaded with flavor!

    For the buffalo sauce:

    **You can opt to buy pre-made from a store if you would like to save time, but it literally takes 2 minutes to make!

    • Ghee– The ghee is what gives this whole30 buffalo sauce a creamy texture. If you cannot tolerate ghee, you can use vegan butter. 
    • Hot sauce– I like this one. It is a whole30 and paleo complaint. 
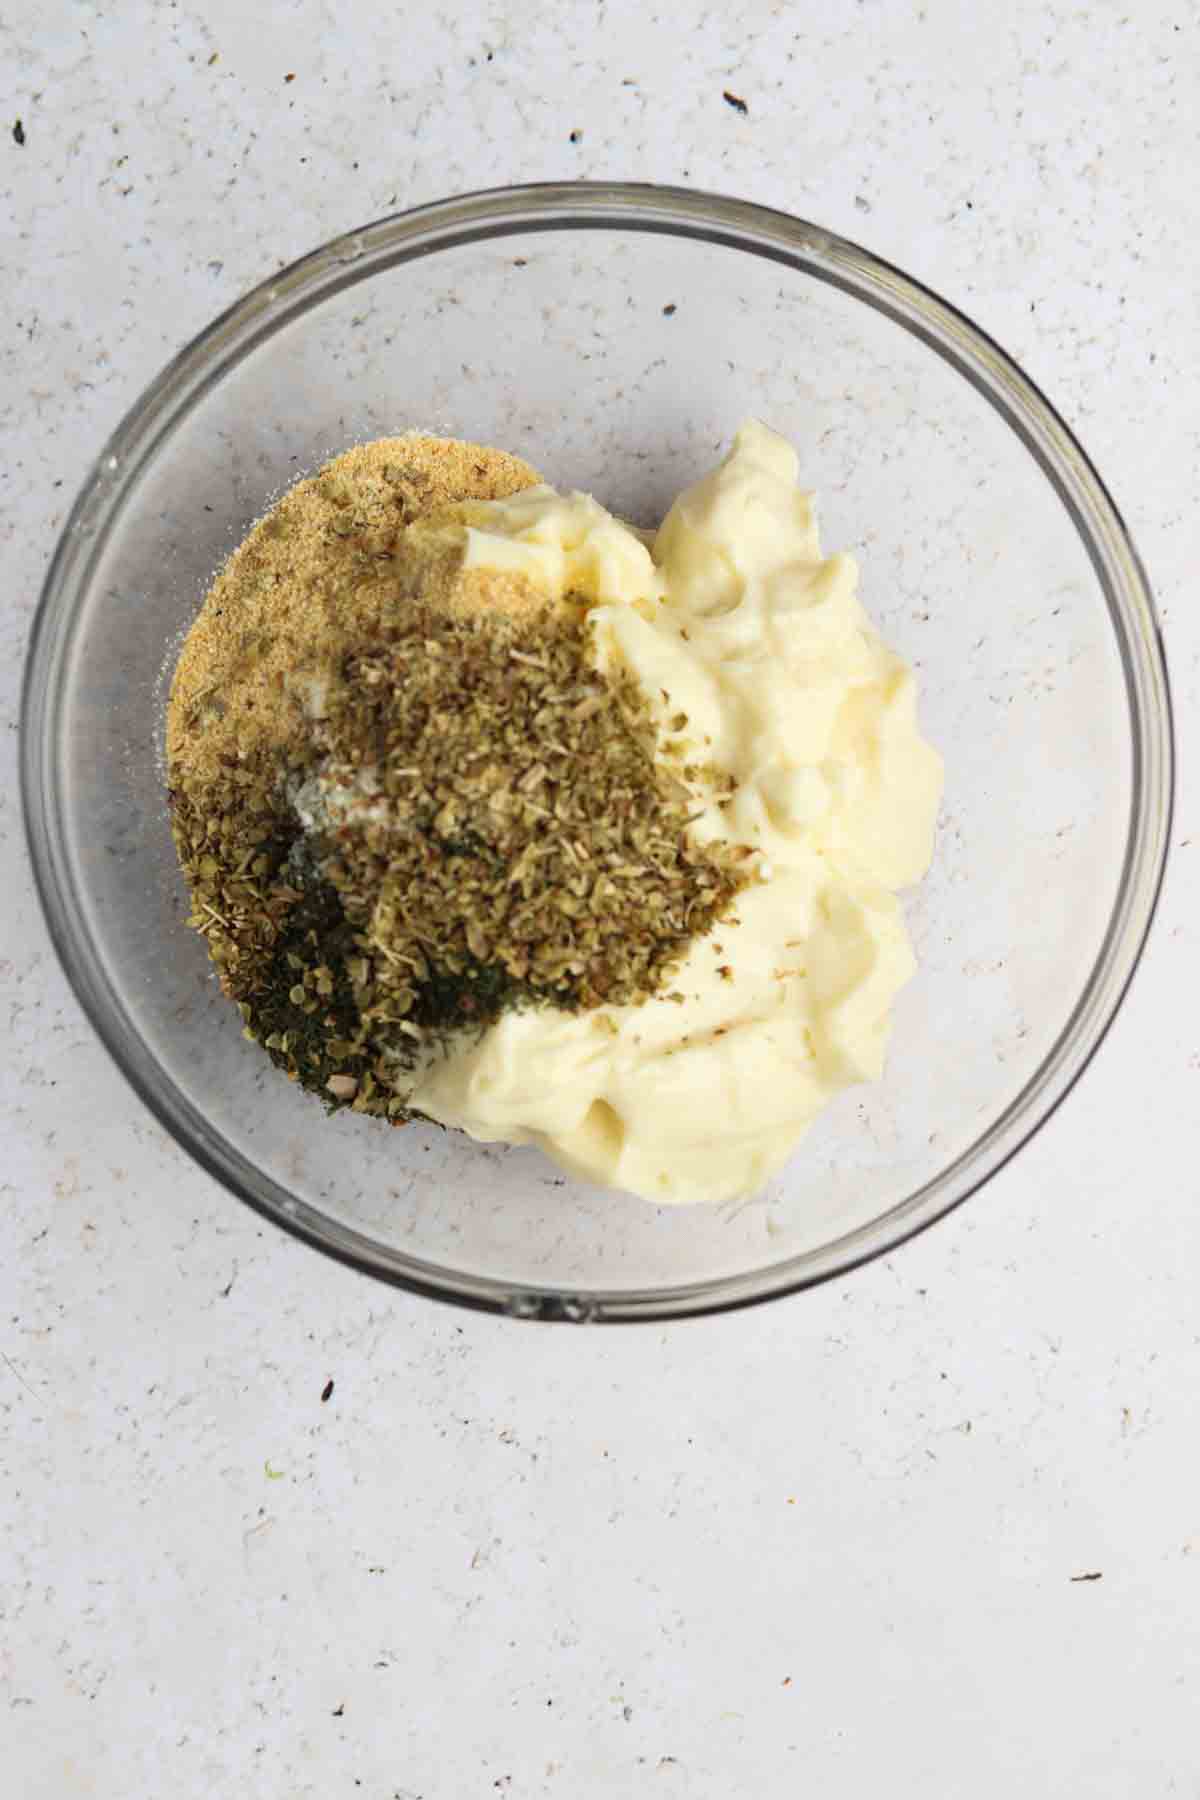
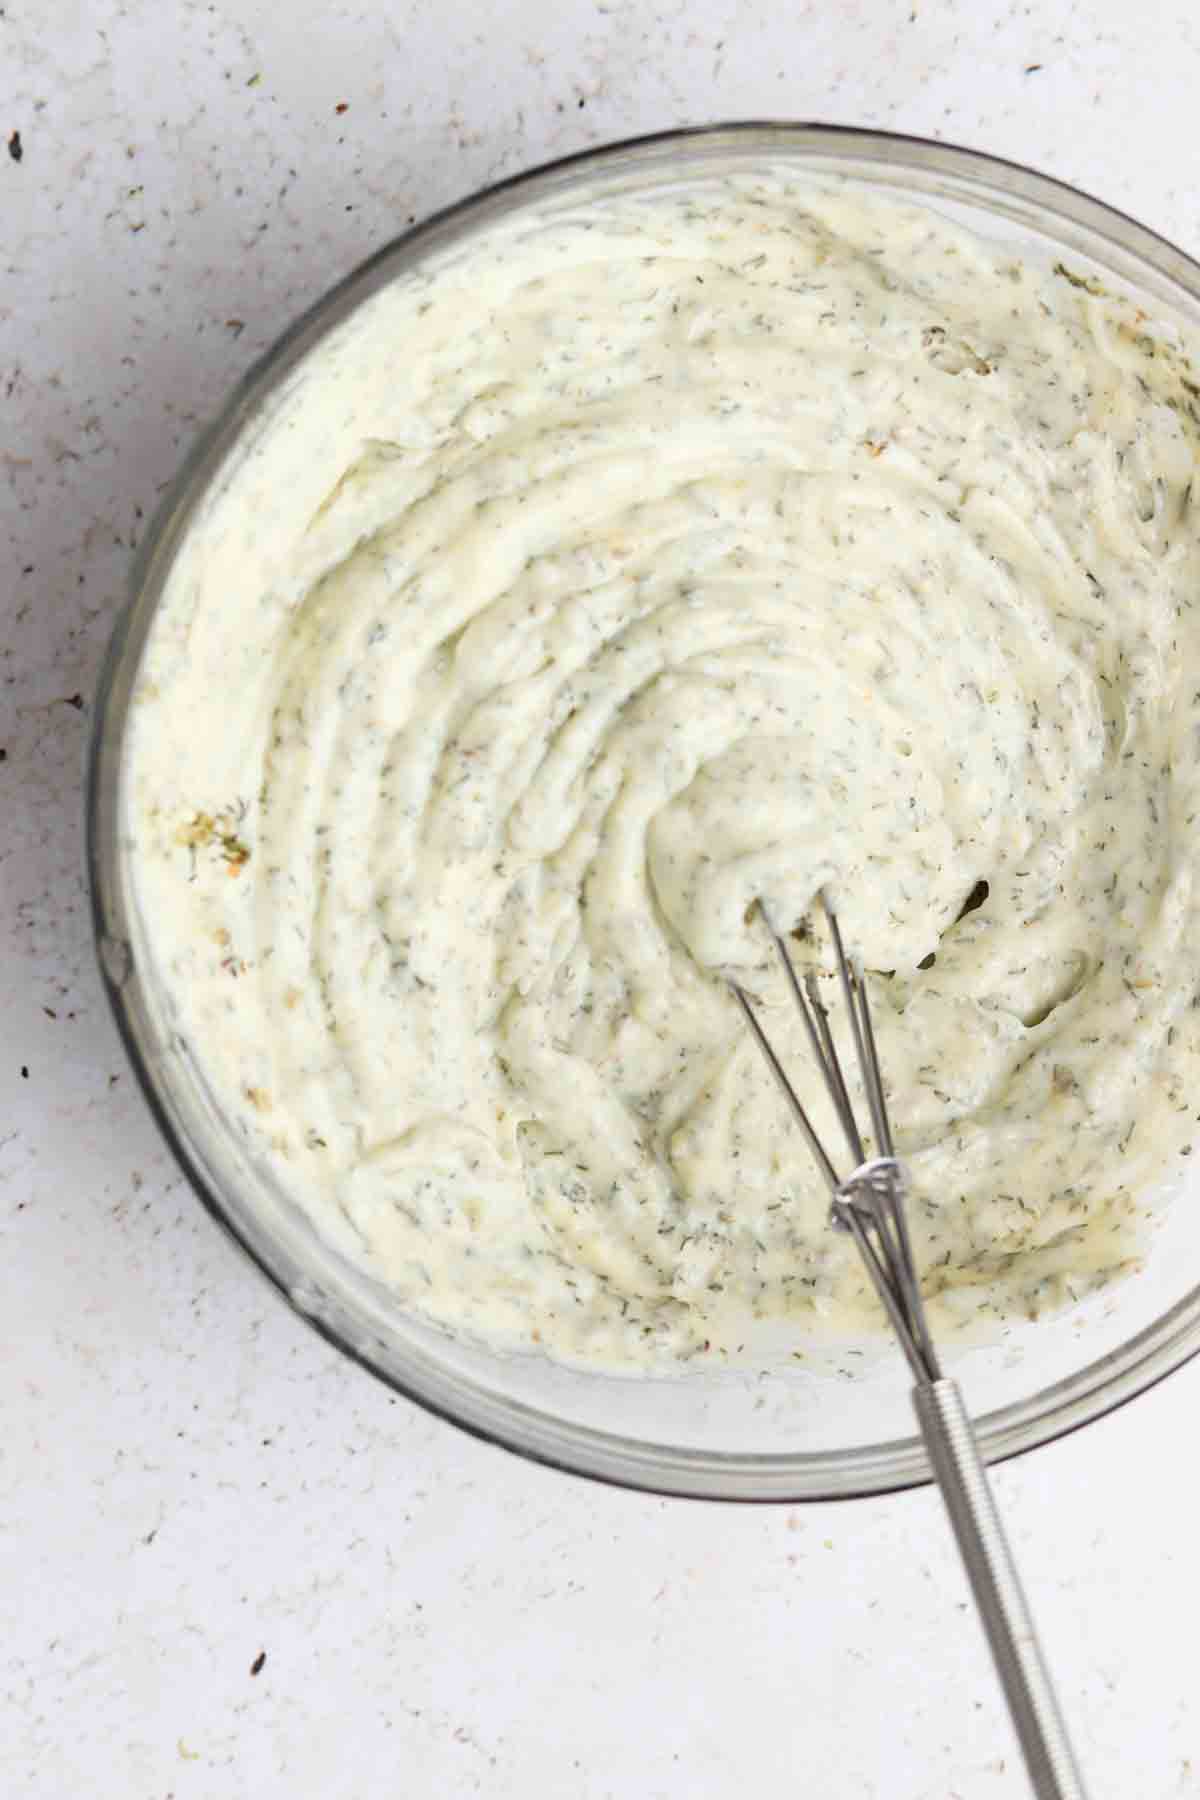
    For the ranch:

    • Avocado mayo– I love this brand of avocado mayo. I prefer avocado mayo vs. regular mayo because it is made with healthier (omega-3 fats)
    • Spices– don’t skip! It is what gives this whole30 dressing its flavor. 

    See the recipe card below for a full list of ingredients and measurements.

    Substitutions And Variations

    • You can make this recipe with either homemade buffalo sauce or ranch dressing or pre-made.
    • You can change the spice of this recipe by changing the type of hot sauce used to make the homemade buffalo sauce.

    This recipe has not been tested with any other substitutions or variations. If you try something else out please let me know how it turns out in the comments below!

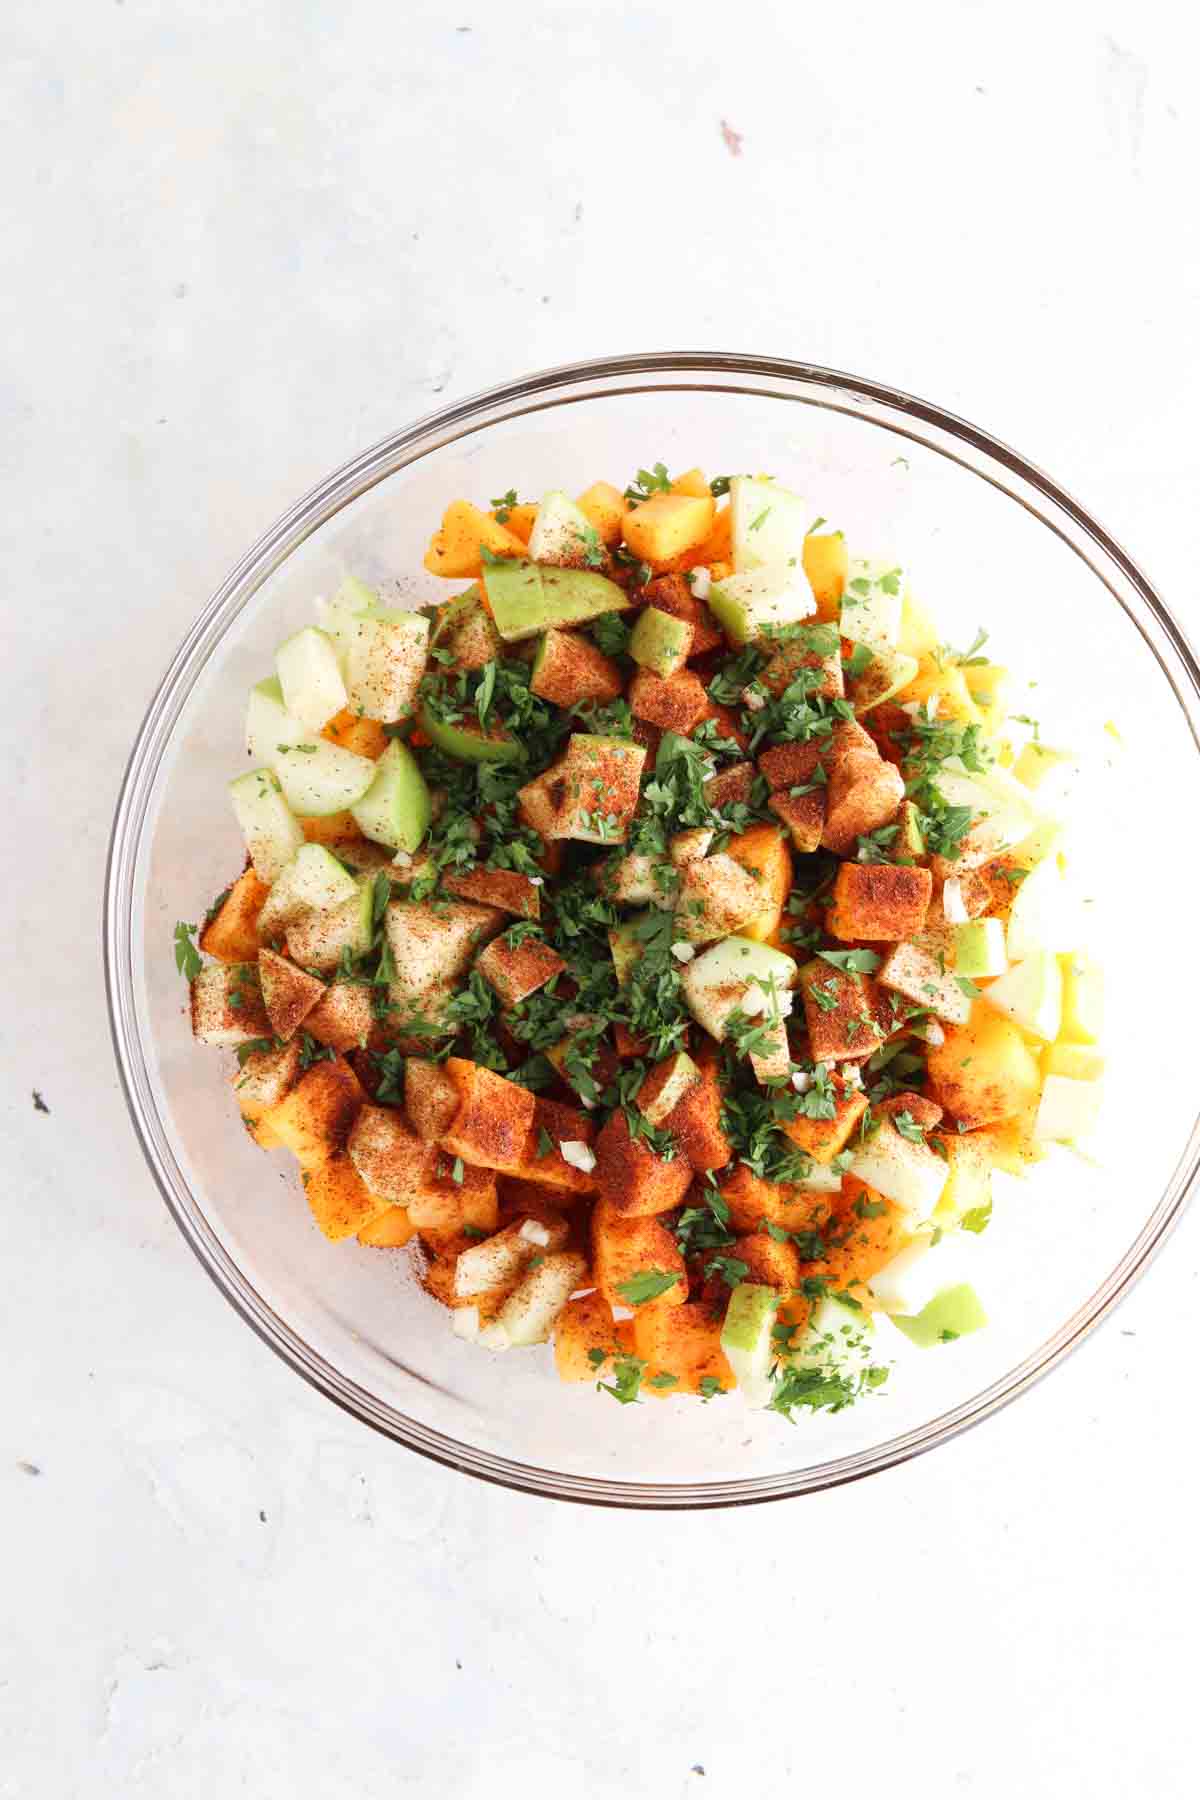
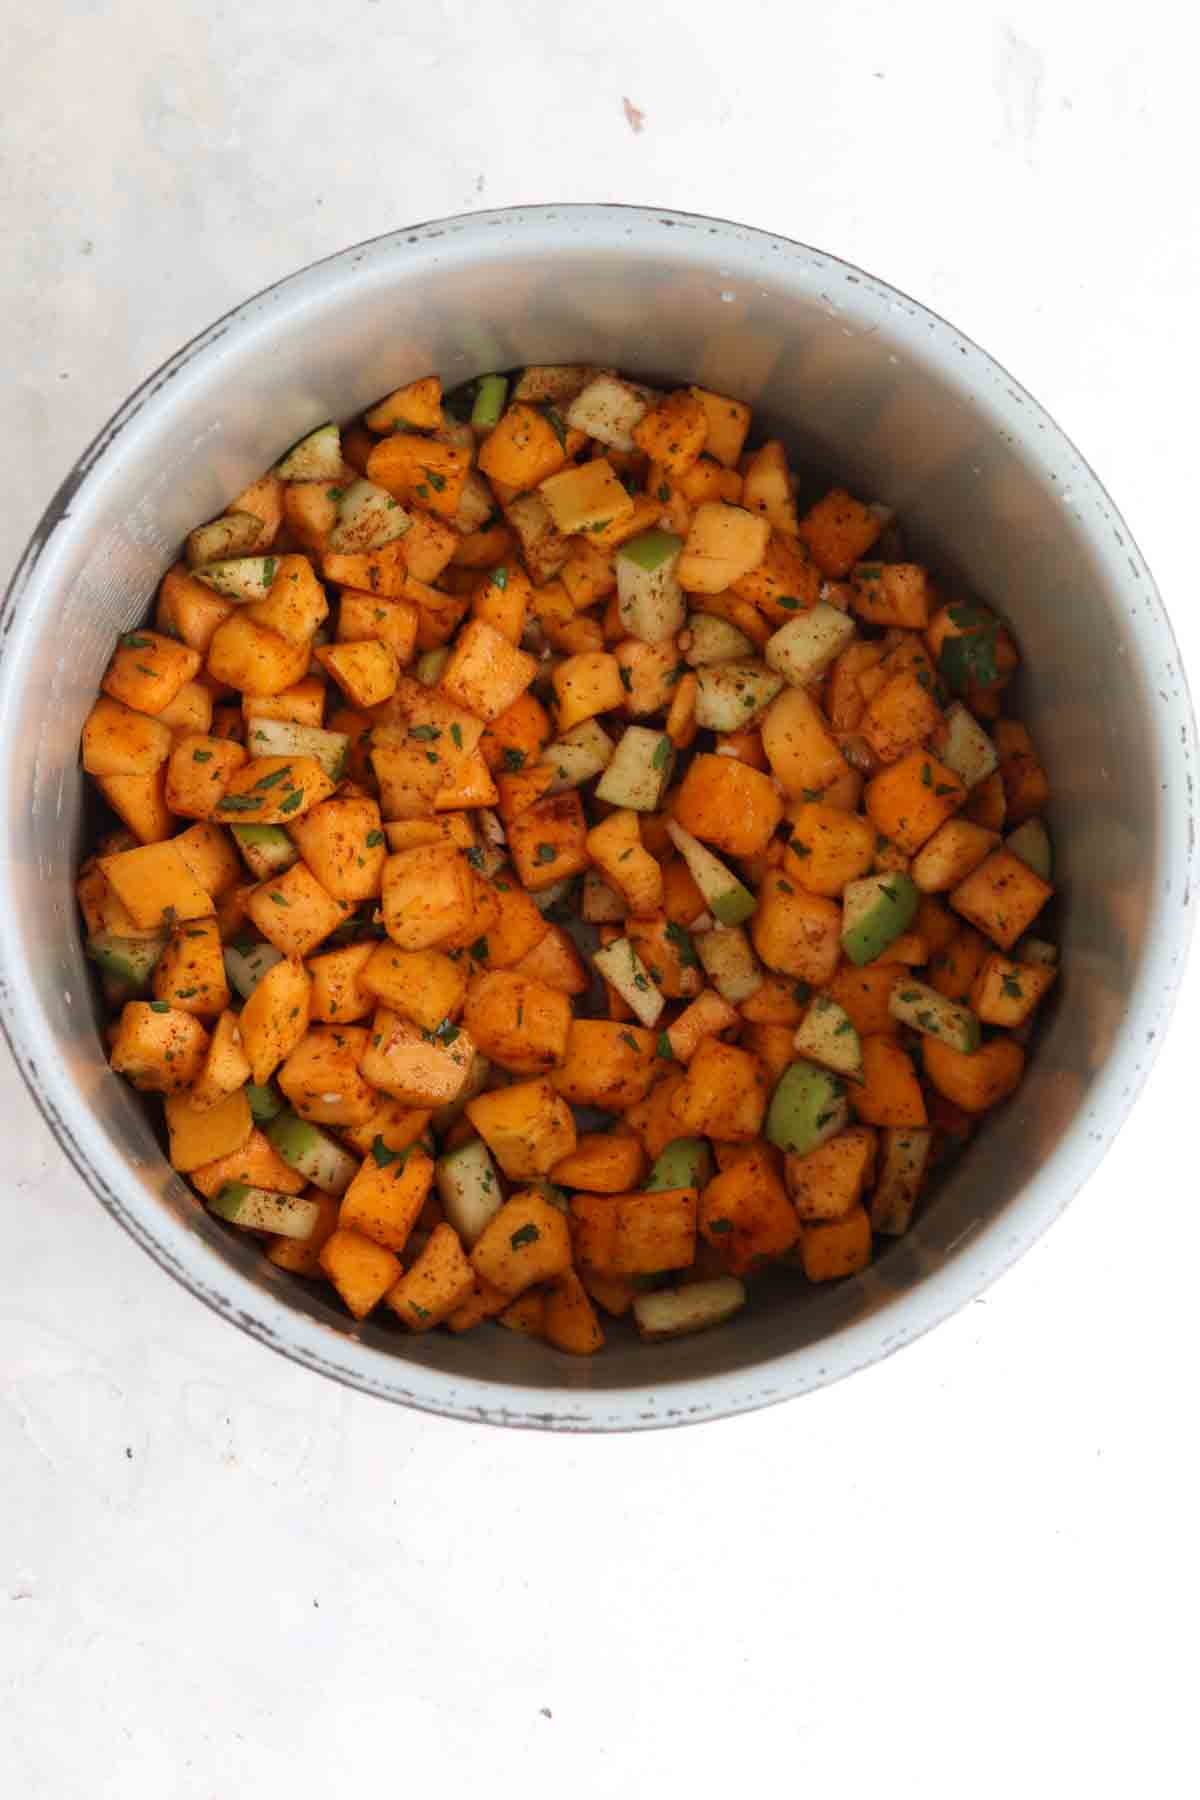
    Step By Step Instructions

    raw ground chicken in a bowl for buffalo meatballs
    First, preheat the oven to 400 degrees F. Place all of the meatball ingredients into a bowl and mix with your hands until the spices are well mixed in.
    raw meatballs on a baking tray
    Next, grab your non stick baking sheet. Using a cookie scooper or your hands, roll the meat into 1 inch meatballs. Add the meatballs to the tray and bake for 25 minutes.
    homemade paleo ranch ingredients in a bowl
    Add the ghee and hot sauce to a sauce pan and bring to a simmer for 5 minutes while the meatballs are cooking.
    whole30 ranch in a glass mixing bowl with a small whisk
    Finally, mix all of the ingredients for the ranch into one bowl, drizzle on top of the meatballs and serve.

    Equipment

    • Mixing bowls
    • Meatball scoop
    • Baking sheet
    • Saucepan

    Expert Tips

    • Tip # 1: You can serve the meatballs as is with toothpicks for an appetizer with the drizzles ranch on top or you can make them into a meal. 
    • Tip # 2: If you are choosing to make them into a meal I like to serve them with roasted broccoli or cauliflower rice.
    • Tip # 3: If you want to make ahead of time, freeze the meatballs before mixing in buffalo sauce.

    Recipe FAQ

    How Can I Reheat?

    I suggest reheating in the oven at 350 degrees F for 5-10 minutes. Drizzle with extra sauce when you remove from oven to prevent the meatballs from drying out.

    What Should I Serve This With?

    I like to pair these meatballs with cauliflower rice and roasted broccoli.

    Can I Freeze This Recipe?

    Yes! I would freeze the meatballs before tossing them in the buffalo sauce.

    Buffalo chicken meatballs on a wooden platter with a toothpick in one.

    Storage Instructions

    • This recipe can be stored in the refrigerator for 5 days in an air tight container.

    Other Paleo Meatball Recipes You Will Love

    • asian meatballs in a bowl with sesame seeds and green onions on top
      Turkey Asian Meatballs
    • close up photo of meatballs with pesto sauce over beet noodles
      Gluten Free Pesto Meatballs (Whole30, AIP Option)
    • close up of one meatball
      Chicken Teriyaki Meatballs (Paleo, Whole30)
    • whole30 swedish meatballs in a bowl with broccoli
      Easy Gluten Free Swedish Meatballs With Gravy

    Are you interested in a list of my go to healthy alternatives?

    Download your FREE guide below

    download here


    close up of meatballs

    Buffalo Chicken Meatballs (Whole30, Paleo)

    Course Appetizer, Main Course, Snack
    Cuisine American
    Prep Time 5 minutes minutes
    Cook Time 25 minutes minutes
    Prep time while the meatballs are cooking 10 minutes minutes
    Total Time 30 minutes minutes
    Servings 22 meatballs
    Author Allianna Moximchalk
    91kcal
    Cost $8
    Print Recipe Pin Recipe

    Equipment

    • 2 mixings bowl
    • measuring spoons
    • cookie sheet
    • Sauce pan
    • measuring cups

    Ingredients

    For the buffalo sauce: (or you can sub for pre- made paleo sauce)
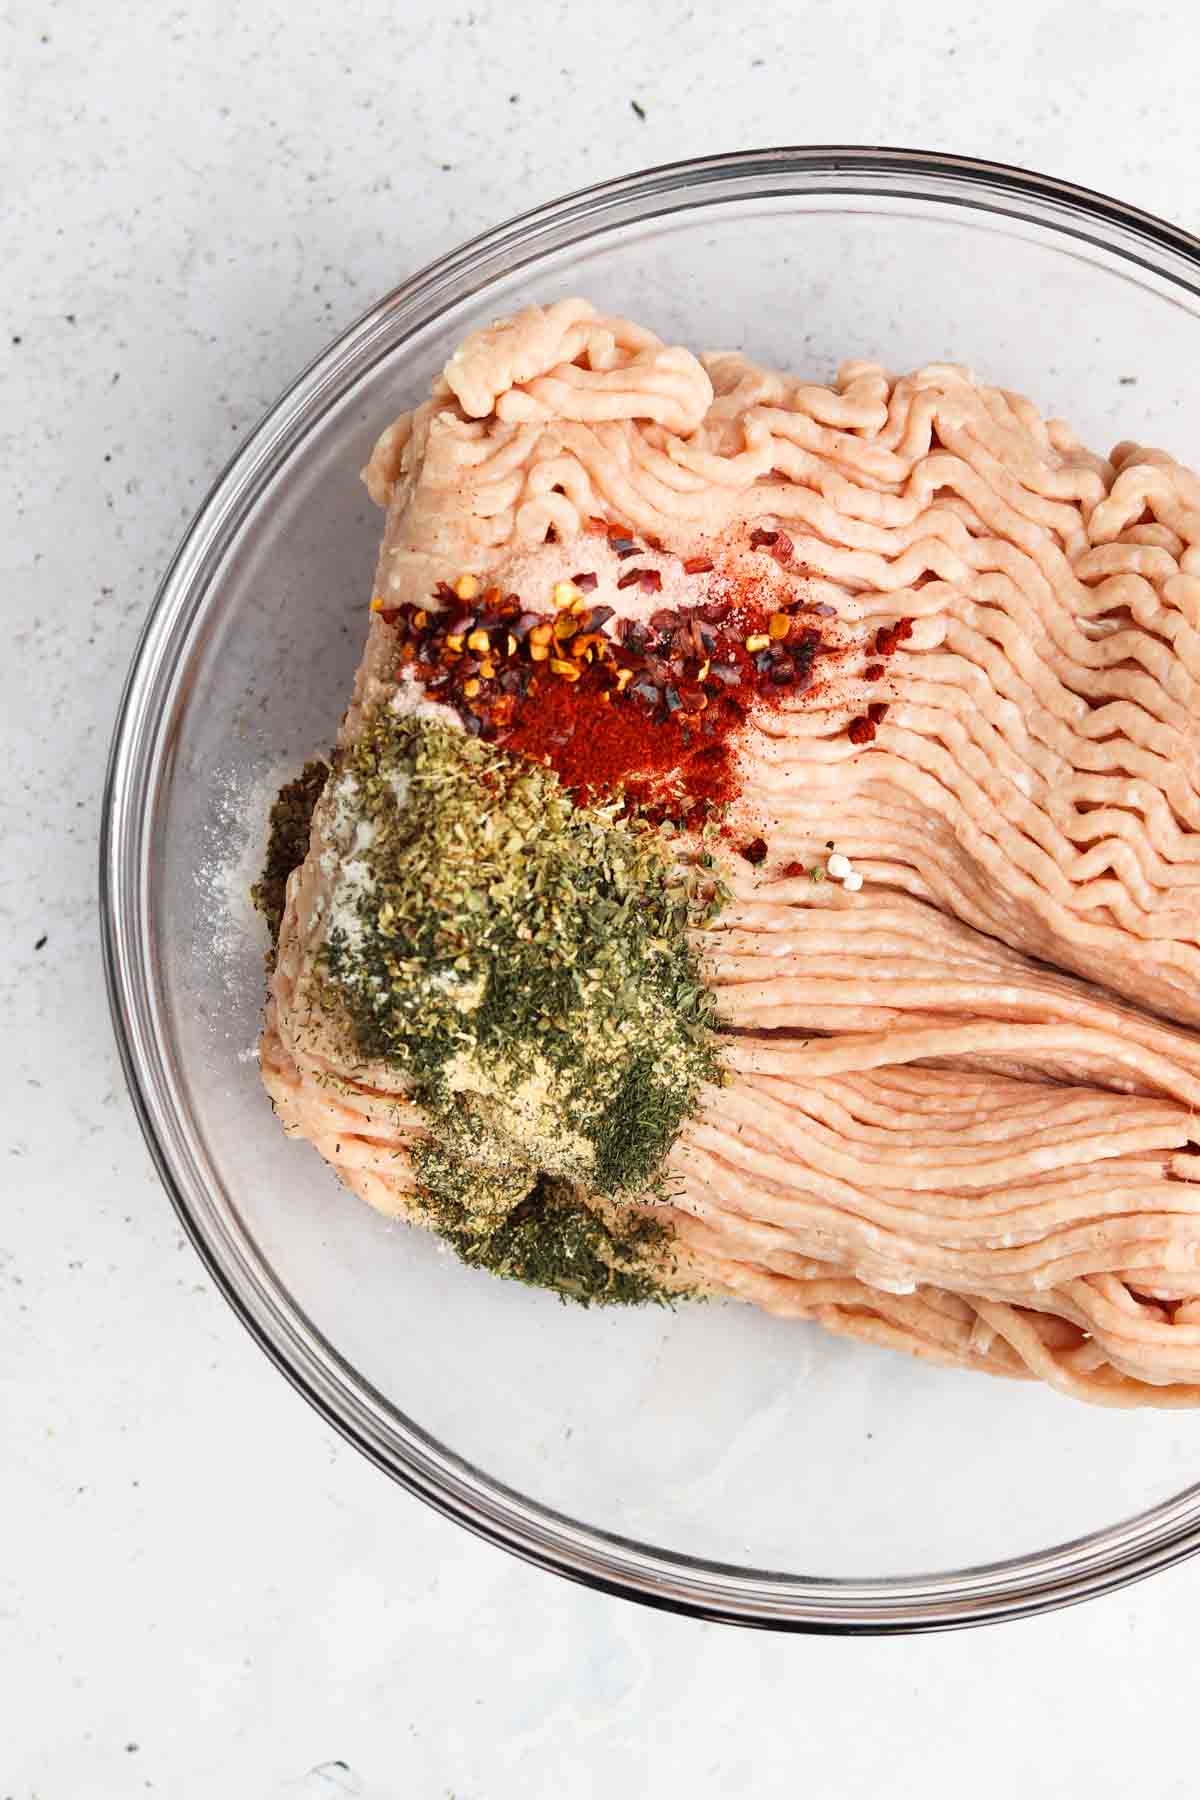
    • 2 tbsp Ghee
    • 3/4 cup hot sauce Franks original is my favorite.

    For the meatballs:

    • 2 pounds ground chicken
    • 1 tsp garlic powder
    • 1 tsp dried dill
    • 1 tsp onion powder
    • 1 tsp dried parsley
    • 1 tsp dried basil
    • 1 tsp dried oregano
    • 1/2 tsp Paprika
    • 1/4 tsp red pepper flakes
    • 1/4 tsp sea salt

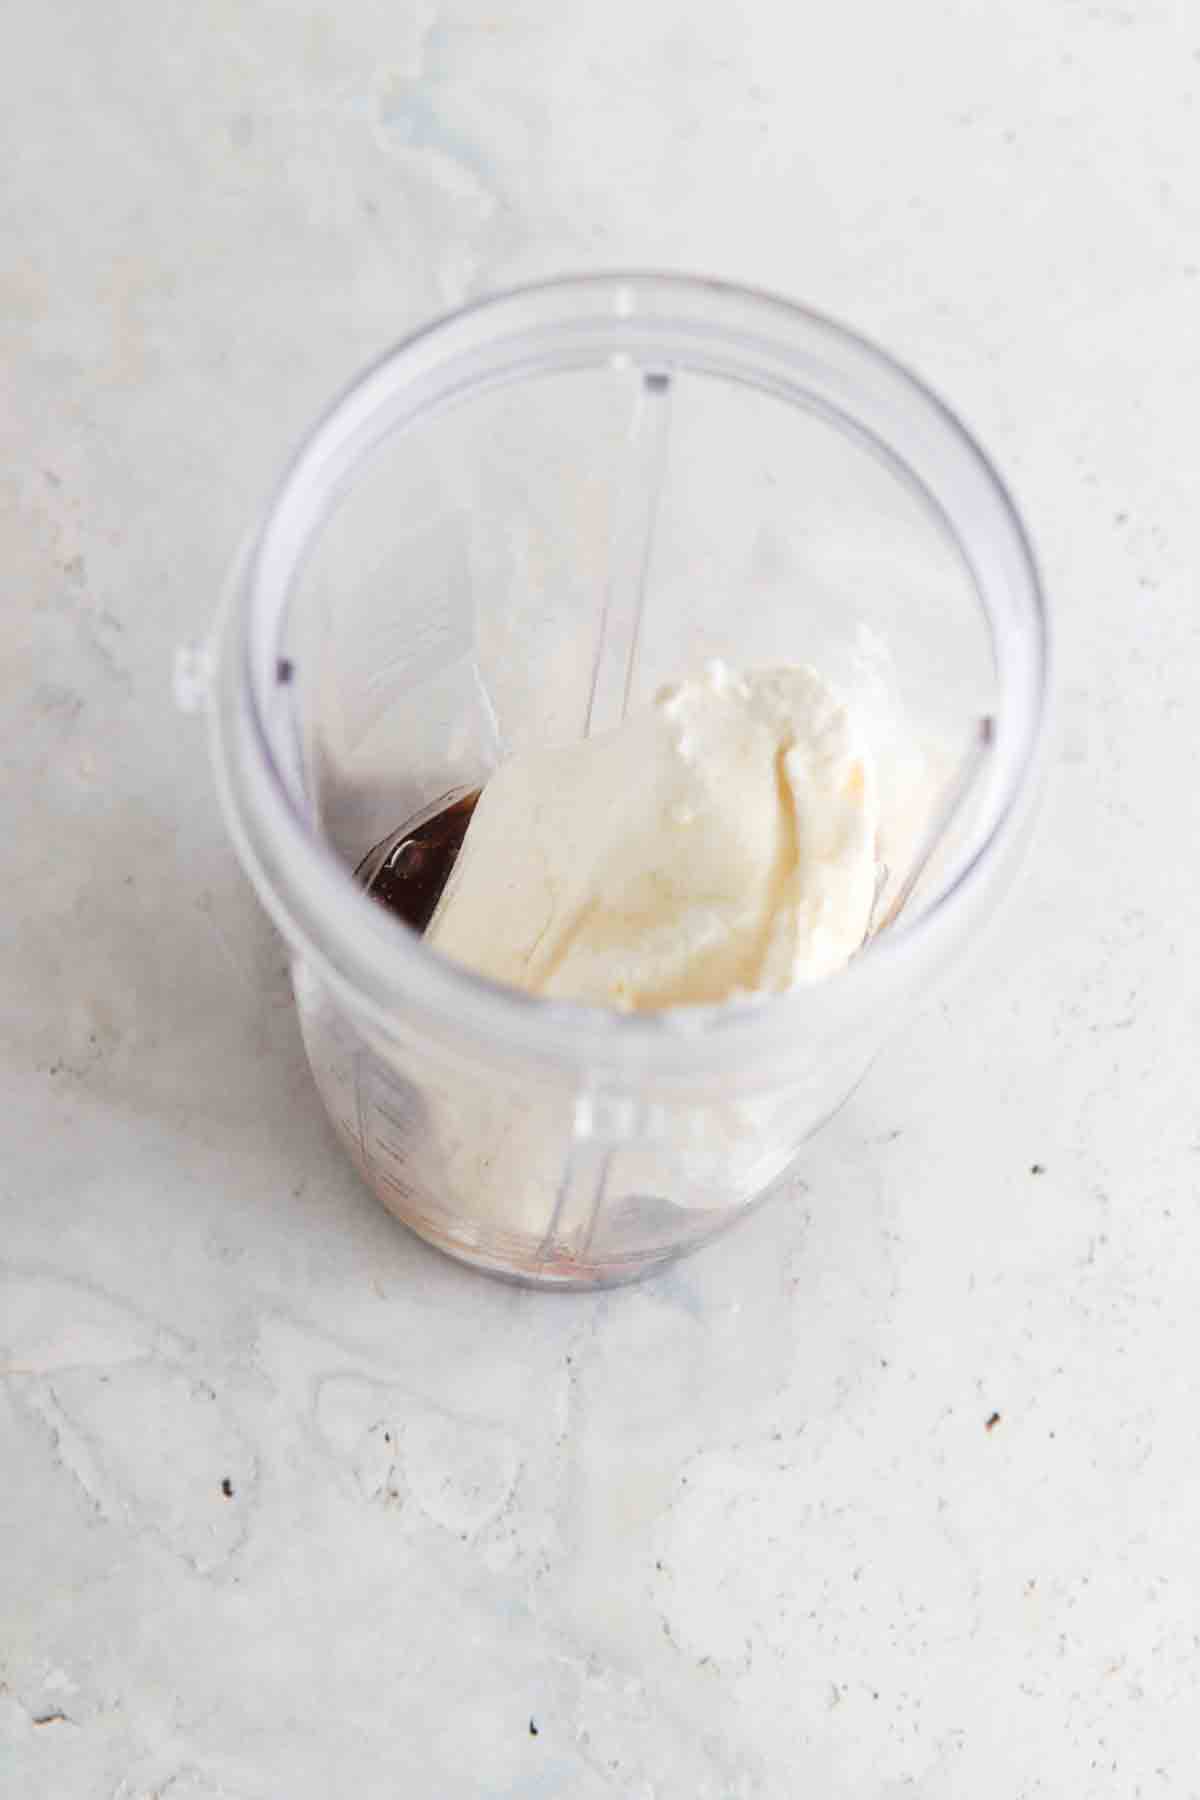
    For the homemade ranch: (optional)

    • 1/2 cup avocado mayo
    • 2 tsp dried dill
    • 1/2 tsp dried parsley
    • 1/2 tsp dried oregano
    • 1 tsp garlic powder
    • 1 tsp onion powder

    Instructions

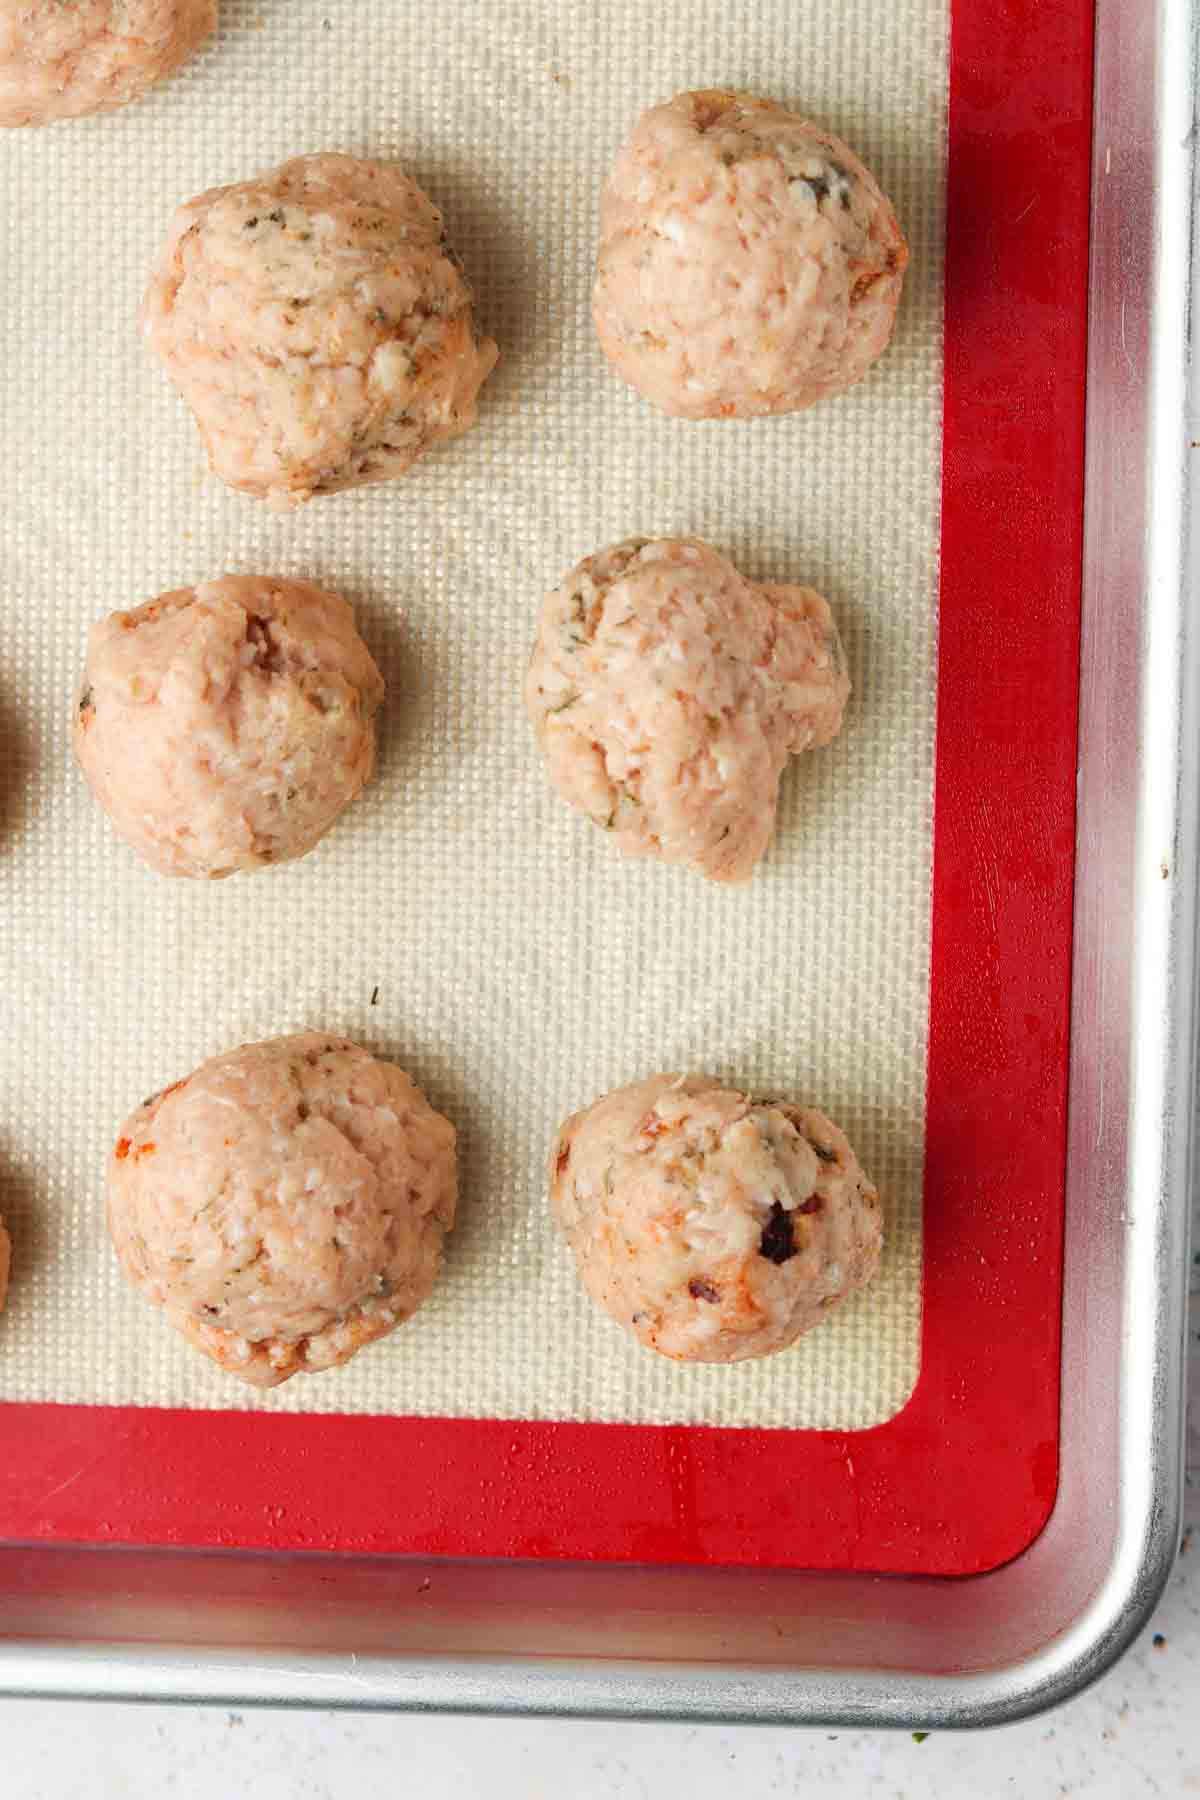
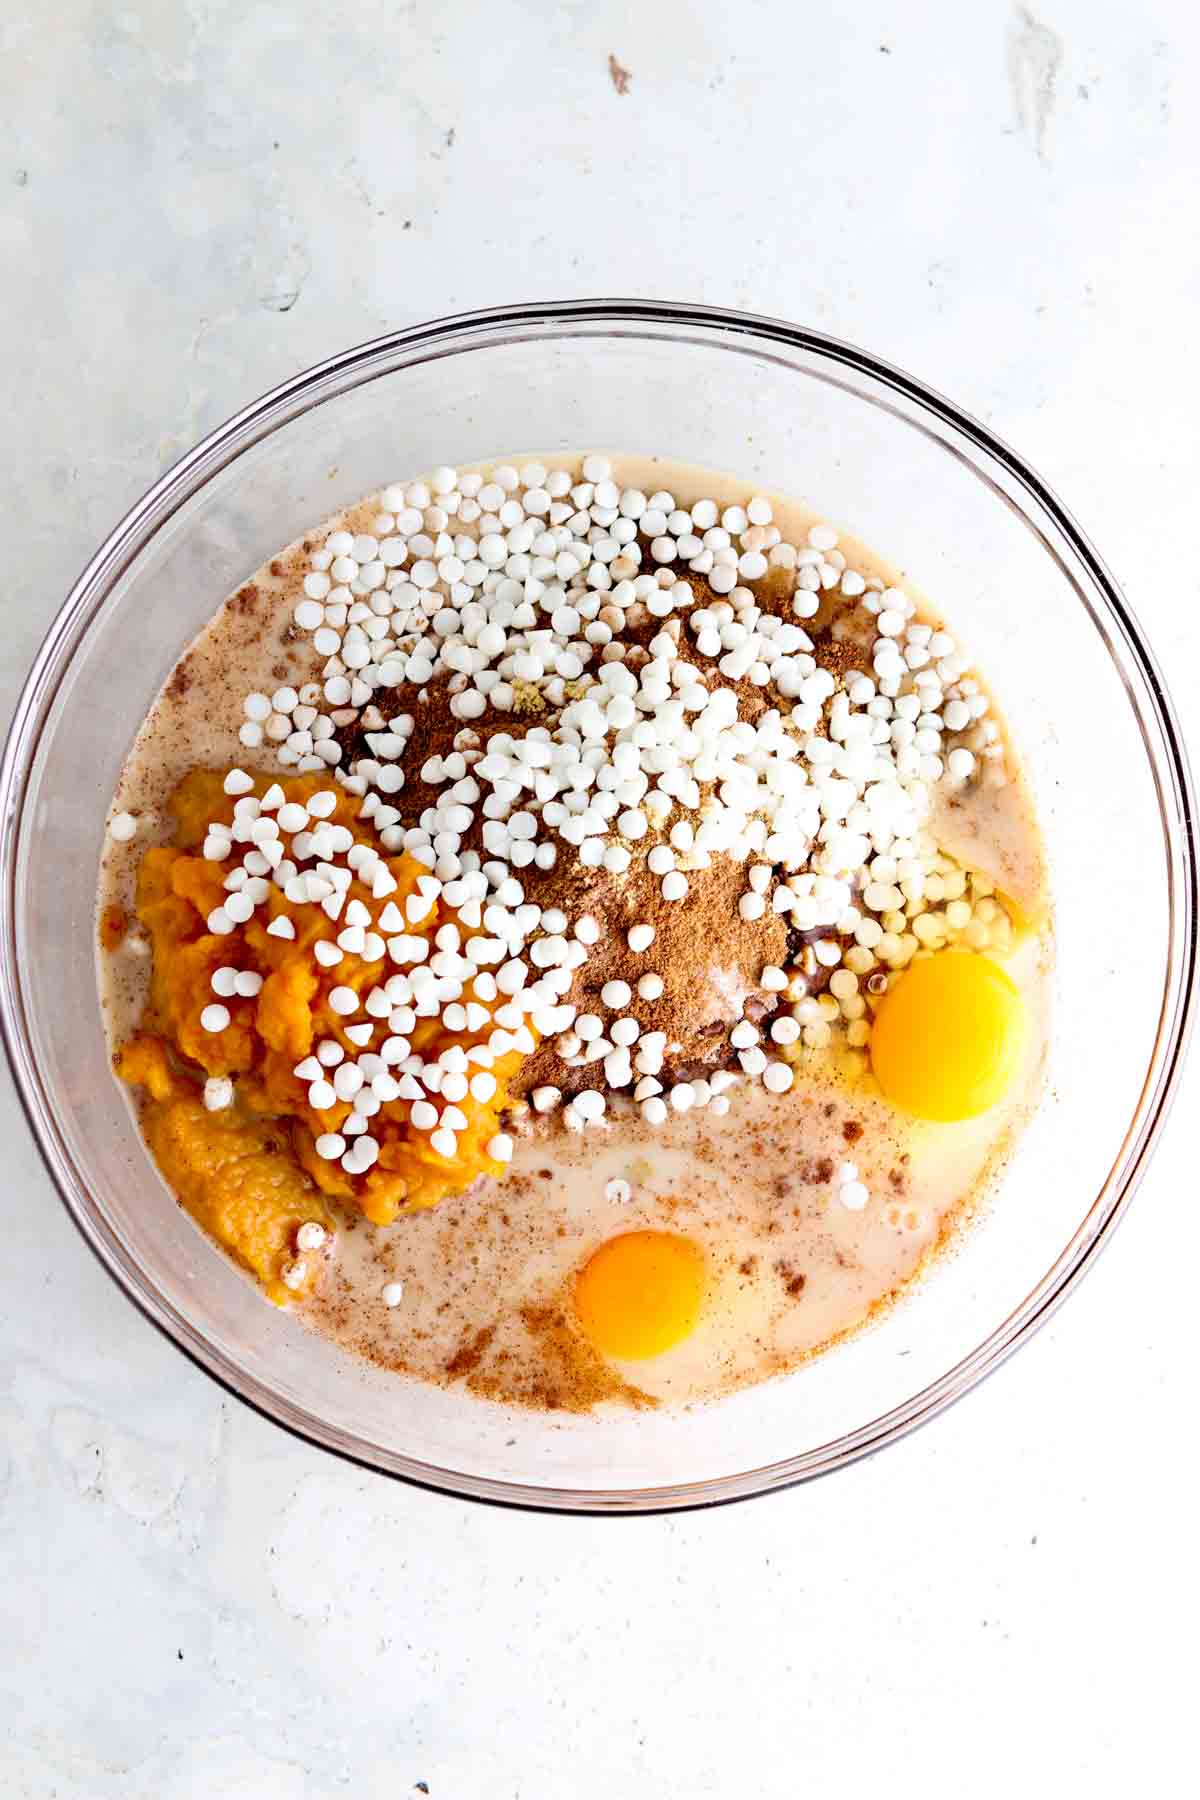
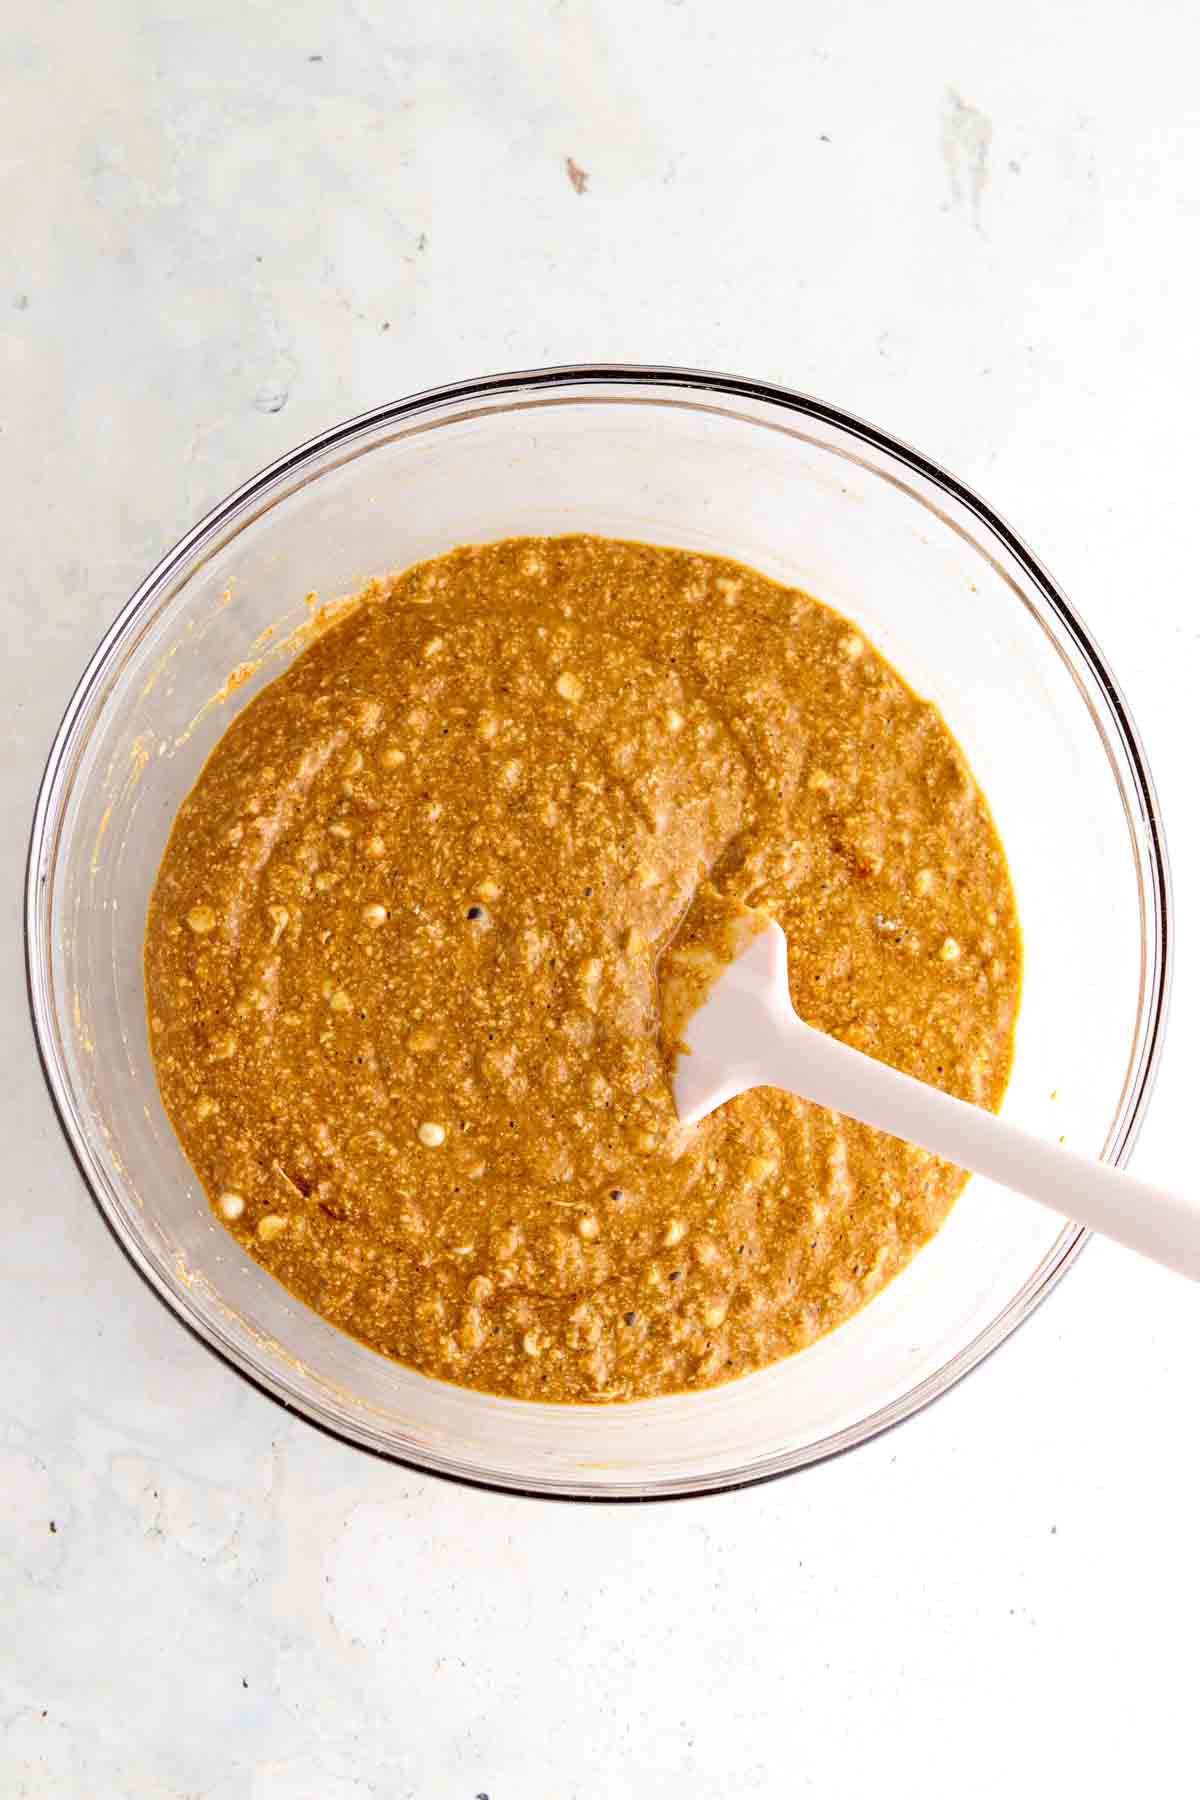
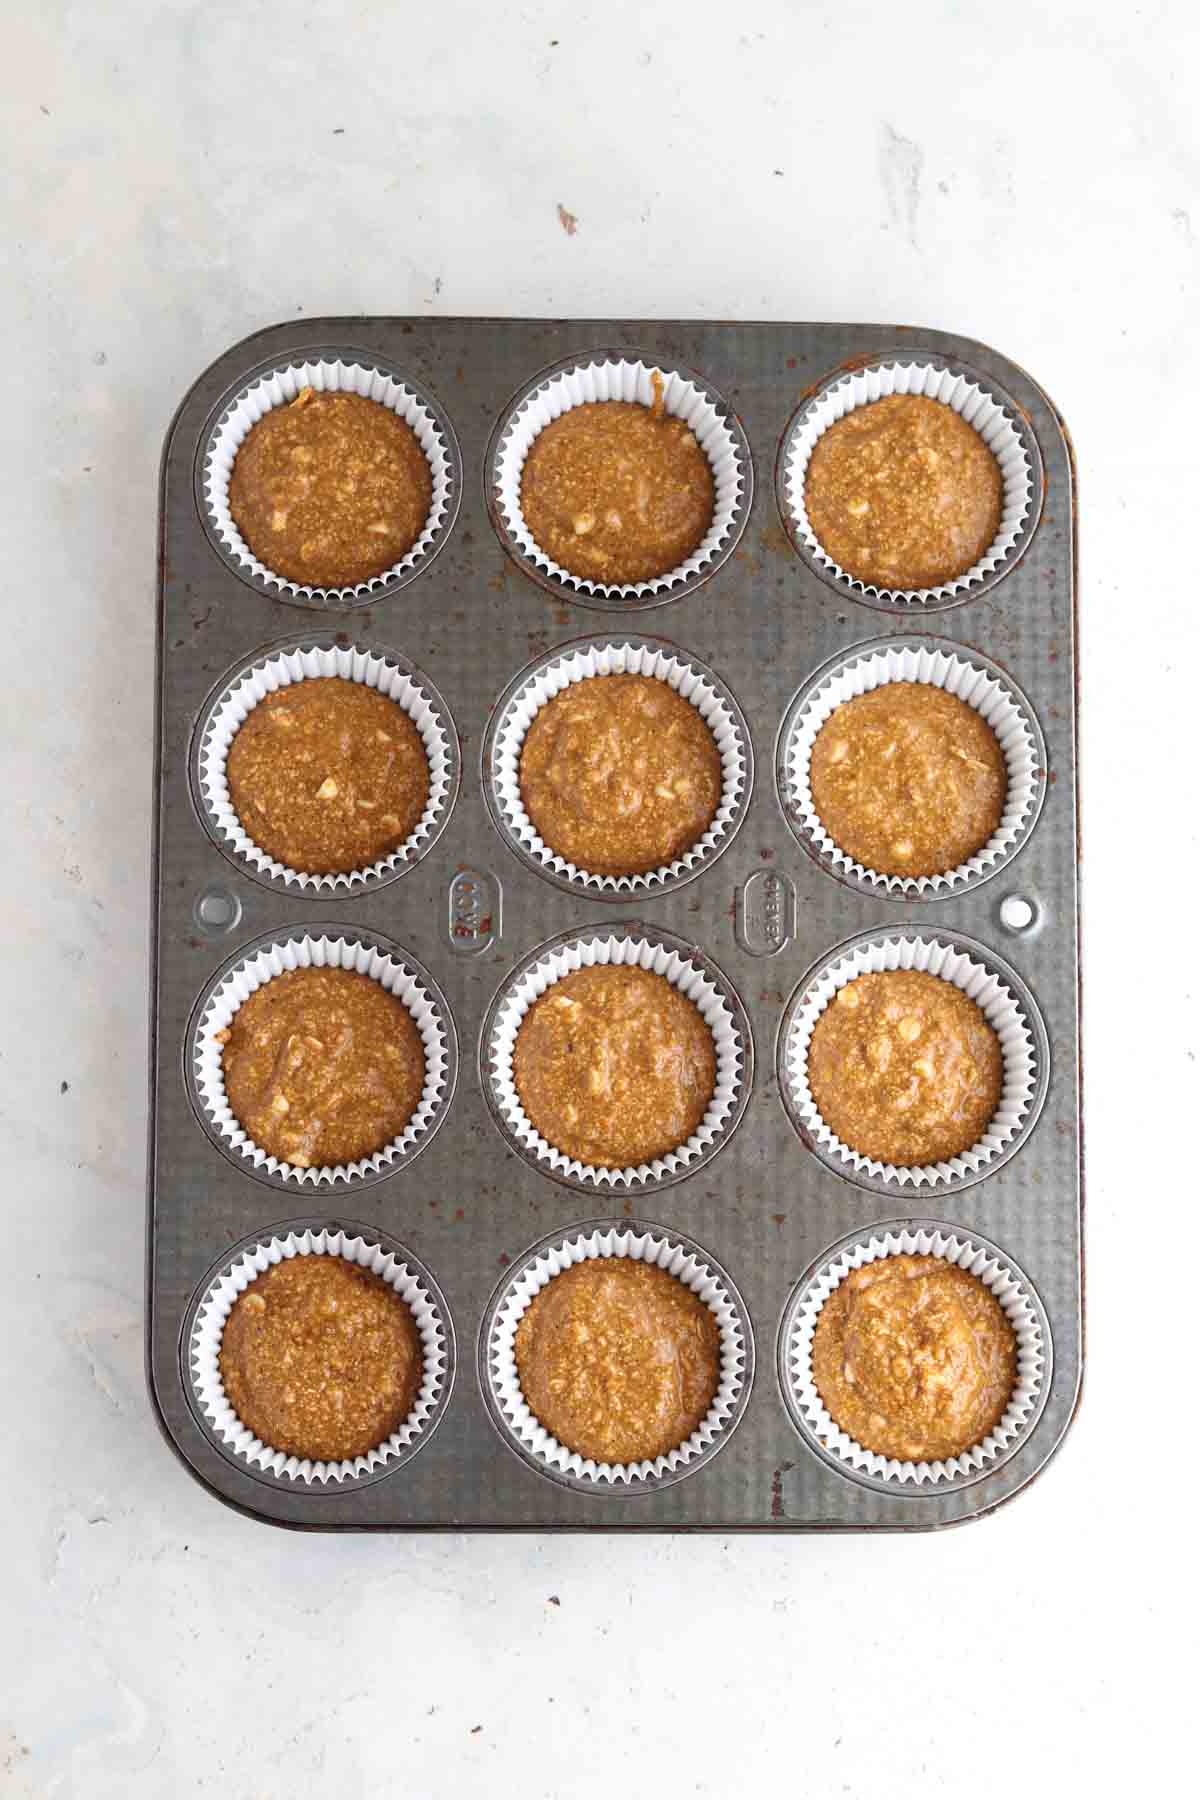
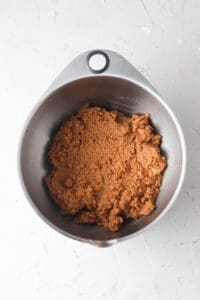
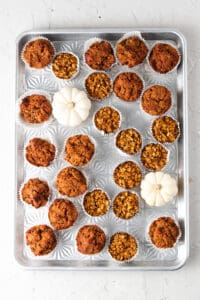
    • Preheat the oven to 400 degrees F. Place all meatball ingredients in a bowl and mix with your hands until the spices are well mixed in. Grab your non stick baking sheet. If things tend to stick, add some oil to the dish. Using a cookie scooper or your hands, roll the meat into 1 inch meatballs. Add the meatballs to the tray. Bake the meatballs for 25 minutes.

    For the sauce:

    • Add the ghee and hot sauce to a sauce pan and bring to a simmer for 5 minutes while the meatballs are cooking.

    For the homemade ranch:

    • Mix all ingredients in one bowl, drizzle on top, then serve.

    Notes

    Storage: This dish can be stored in an air tight glass container for up to 5 days in the refrigerator.
    Nutrition: The nutrition for this recipe is an estimate and the calorie count is not guaranteed.  It is based off of 5-6 servings.
    Servings: This recipe should yield 5-6 servings.
    Quick, easy and tasty whole30/ paleo appetizer and even dish.
    Serving: 7meatballs | Calories: 91kcal | Carbohydrates: 1g | Protein: 7g | Fat: 6g | Saturated Fat: 2g | Cholesterol: 39mg | Sodium: 283mg | Potassium: 233mg | Fiber: 1g | Sugar: 1g | Vitamin A: 31IU | Vitamin C: 6mg | Calcium: 7mg | Iron: 1mg
    Tried this recipe?Tag me on instagram @alliannaskitchen!
    close up corner of salad

    November 16, 2020 Autoimmune Protocol

    Shaved Brussels Sprouts Salad

    This cold brussels sprout salad paired with a aip and whole30 approved salad dressing is exactly what you need for these cold fall and winter months. The added pomegranate adds a nice crunch to this nutrient dense and colorful salad. The pumpkin vinaigrette compliments the fall harvest fruits and veggies oh so nicely. You can prep this salad and cook the squash in advance to help free up oven space during your holiday occasions.

    Cold Brussels Sprouts Salad | Alliannas Kitchen

    Lately I have been obsessed with salads, if you love salads like I do check out my other go to, my Fall Salad With Fig Balsamic Vinaigrette, Cucumber Apple Salad. I have been topping these salads off with my Homemade Chickpea Crouton recipe.

    What Do I Need For This AIP Salad

    • Brussel Sprouts- You can buy these pre shaved or shave them yourself. You can shave them using your food processor.
    • Pomegranate- I know I am biased, but this is my favorite part of the dish. It adds the most perfect sweet crunch. A lot of stores now sell pomegranate pre- seeded. I always opt for that. It saves you time and is nearly not as messy! Pomegranate juice stains, FYI!
    • Red apples- You can easily swap these out for green. I like the red because they are sweeter and give this dish an added layer of sweetness. Green apples tend to be more sour.
    • The butternut squash- This makes this salad even more filling. You can buy your squash pre-cut which saves you a ton of time or you can cut it yourself. If you are making this dish for the holidays, you can cook the squash in advance and serve it cold over the salad. That will help you save on oven space! I am always thinking ahead. 

    For the pumpkin vinaigrette: 

    • Pumpkin puree- I like the canned stuff, it will save you so much time! Just be sure there are no added ingredients like sugar. 
    • Apple cider vinegar- This will make this dressing a vinaigrette. Do not skip!
    • Pure maple syrup- This is optional. It will make this dressing a little more sweet. If you are doing Whole30, skip it!
    • Olive oil- EVOO is my go to oil when baking, cooking or making salad dressing. You can swap it out for avocado oil if you desire. 
    Pumpkin Vinaigrette | Alliannas Kitchen
    Cold Brussels Sprouts | Alliannas Kitchen
    Cold Brussels Sprouts Salad Dressing | Alliannas Kitchen

    How To Make This AIP Salad

    • As mentioned above, you can make the squash in advance if you would like. It will save on oven space and time if you are making this dish along with other dishes. If you are not making it ahead of time, you want to preheat the oven to 400 , chop up the butternut squash in ½ inch cubes, and bake for 40 minutes. 
    • While the squash is baking, you can prepare the other ingredients. Chop up the apples and seed the pomegranate. 
    • Once you are done prepping the salad, you can prep the dressing. Place all ingredients in a food processor and blend.
    • Once you are ready to serve the salad, mix all ingredients together. 
    Brussels Sprouts AIP Salad | Alliannas Kitchen

    What Can I Serve This AIP Salad With

    • I love to make this salad for my weekly meal prep lunches. It goes so well with this whole oven roasted chicken. If you are looking to go crazy on the vegetables, you can make my Arugula Pear Salad too which is so delicious and is AIP friendly as well.
    Cold Brussels Sprouts AIP Salad | Alliannas Kitchen

    If you like this recipe, you will also LOVE these fall salads:

    • Sweet Potato Blackberry Fig Salad
    • Acorn Squash Grape Apple Salad
    • Shaved Steak Fajita Salad
    • Crunchy Pomegranate Kale Salad
    close up corner of salad

    Cold Brussels Sprouts Salad w/ Pumpkin Vinaigrette (AIP, Paleo, Whole30)

    Course Salad, Side Dish
    Cuisine American
    Prep Time 20 minutes minutes
    Cook Time 50 minutes minutes
    Total Time 1 hour hour 10 minutes minutes
    Servings 8 people
    Author Allianna Moximchalk
    301kcal
    Cost $8
    Print Recipe Pin Recipe

    Equipment

    • Roasting pan/ baking sheet
    • Large bowl
    • cutting board
    • knife
    • Ninja or food processor.

    Ingredients

    • 1 small butternut squash Whole Foods and Trader Joe's have pre-cut and peeled squash, which makes things a lot easier. All you would have to do is cook it! You can also pre cook the squash days in advance and serve it cold to save oven space if you are cooking a full meal.
    • 1 red apple
    • 1 Pomegranate seeded, or you can buy a cup of the seeds itself.
    • 28 ounces brussels Sprouts
    • 1 tbsp EVOO I also like the olive oil spray from Trader Joe's!
    • 1 pinch sea salt

    FOR THE PUMPIN VINAIGRETTE

    • 1/4 cup pumpkin puree canned is great
    • 1/4 cup apple cider vinegar
    • 1/2 cup EVOO
    • 1/3 cup pure maple syrup OMIT for whole30.

    Instructions

    For the squash: (see * below for cooking it in advance options*

    • Preheat the oven to 400.
    • If your squash is not already pre cut, pre cut the squash into 1/2 inch cubes.
    • Line in a single layer on the baking sheet and season with the EVOO and salt.
    • Bake for 40 minutes or until the squash is soft. I suggest flipping it at the 20 minute mark.

    For the salad:

    • While the squash is cooking, cut the ends off of the brussels sprouts and cut the brussels in half.
    • Place the brussels into the food processor. *Note, you may have to do this in two batches.
    • Turn on the food processor to chop for 10 seconds.
    • Now, add the chopped up brussels sprout to your serving bowl.
    • Wash the apple, remove the core and chop into slices.
    • If you pomegranate is not already seeded, cut in half and pick out the seeds.
    • Once the squash is done, add it on top!

    For the dressing:

    • Place all ingredients in the food processor and blend.
    • ENJOY! If you make this recipe I would love it if you shared the link to this recipe with a friend, left a comment below or tagged me on instagram with a picture @alliannaskitchen

    Notes

    I suggest waiting to assemble the salad with the ingredients and dressing prior to eating. 
     
    *You can also pre cook the squash days in advance and serve it cold to save oven space if you are cooking a full meal.
    Easy and quick brussels sprout salad for the cool fall and winter months.
    Calories: 301kcal | Carbohydrates: 39g | Protein: 5g | Fat: 16g | Saturated Fat: 2g | Sodium: 37mg | Potassium: 875mg | Fiber: 8g | Sugar: 20g | Vitamin A: 11918IU | Vitamin C: 109mg | Calcium: 108mg | Iron: 2mg
    Tried this recipe?Tag me on instagram @alliannaskitchen!
    cooked chicken side view

    November 11, 2020 Autoimmune Protocol

    Oven Roasted Whole Chicken (AIP, Paleo, Keto, Whole30)

    This foolproof easy roasted AIP chicken recipe is not only delicious but it takes 10 minutes to prep. This Oven Roasted Whole Chicken is full of flavor, crispy, juicy, and free of additives and sugar which is normally found in whole chickens at the store. This recipe is naturally paleo, whole30, AIP, and keto compliant.

    If you enjoy this dish, you will also enjoy my AIP Turkey Breast in a Maple Garlic Sauce as well.

    What Do I Need To Make This Oven Roasted AIP Chicken Recipe:

    • 1- 5 pound whole chicken- You can buy fresh or frozen but you will need to fully thaw the bird before cooking. 
    • Paprika- If you are doing AIP, omit the paprika. The paprika will give this chicken a nice kick!
    • Oregano- Will add an herb-y flavor. 
    • Basil- The basil will add evenly more herby flavors. 
    • Onion powder- You can also use garlic cloves in place. If you chose the cloves I would use 6-7.
    • Garlic powder- My favorite part 🙂 
    • Pink sea salt- The salt is important here, do not skip this!
    • Bone broth- This will keep your chicken breast nice and moist.
    • Cooking oil of choice- I love using Trader Joe’s cooking oil spray, but you can use oil that is not in spray form as well.

    How Do I Make This Oven Roasted AIP Chicken Recipe?

    • *Note your chicken needs to be fully defrosted. I always suggest defrosting meat in the fridge on a plate. Sometimes big pieces of meat like this can take 2-3 days to defrost.
    • First thing is first, preheat the oven to 400 degrees F.
    • Next, take the giblets out of the chicken in the breast cavity. They should be in a bag. You can throw them away or use them for soups.
    • Now, place the chicken in a roasting pan, breast side facing down. I like using a roasting pan because it will evenly cook the chicken on both sides. 
    • Pat dry the chicken with paper towels. *Note I do NOT wash the chicken. I feel that any bacteria on it will be killed off in the oven. For me it is not worth getting the raw chicken everywhere. 
    • Now, mix the spices.
    • Spray the chicken on both sides with cooking oil of choice. If you do not have a cooking spray you can take a brush and brush on the oil. Make sure to oil both sides.
    • Next, you want to sprinkle the spices all over the chicken. 
    • Be sure once you are done adding the spices, the chicken ends up with the breast face down.
    • Now, dice up 1 onion and cut a lemon in half and stuff the chicken with the onion, lemon, thyme, and rosemary.
    • OPTIONAL: but highly recommended, tie the legs up and together. This will help the chicken cook evenly. You can use twine or sewing string.
    • Lastly, add the broth to the bottle of the pan and place it in the oven for 85 minutes. I suggest adding a meat thermometer. The best way to tell if the chicken is done is once it reaches 165 degrees. 
    • If you do not have a thermometer you can cut into it and see once the 85 minutes is up; however, I highly suggest getting a meat thermometer.

    What Do I Eat This Oven Roasted Chicken With?

    The best thing about this paleo aip chicken recipe is that it is so versatile, you can literally eat it with anything! I love eating roasted chicken with garlic-y mashed potatoes, and this bacon brussel sprout pomegranite dish. My favorite is eating it with BOTH! So good. I love using this recipe in my weekly meal prep too.

    How To Store This Roasted Chicken

    I highly suggest cutting the chicken/ pulling off the meat prior to serving. I like to store the chicken breast in airtight glass containers.

    If you like this chicken recipe, you will love:

    Crispy AIP Chicken Tenders

    Almond Butter Chicken Pumpkin Soup

    Whole30 Chicken Nuggets

    Whole30 Chicken Teriyaki

    cooked chicken side view

    Oven Roasted Whole Chicken

    Course Dinner
    Cuisine American
    Prep Time 10 minutes minutes
    Cook Time 1 hour hour 25 minutes minutes
    Total Time 1 hour hour 35 minutes minutes
    Servings 5 servings
    Author Allianna Moximchalk
    519kcal
    Cost $7
    Print Recipe Pin Recipe

    Equipment

    • oven roasting pan
    • turkey baster
    • small bowl
    • measuring spoons

    Ingredients

    • 5 pound whole chicken It should be defrosted, see notes above.
    • 1 tbsp Paprika
    • 1 tbsp sea salt
    • 1 tsp garlic powder
    • 1 tsp onion powder
    • 1 tsp dried oregano
    • 1 tsp basil
    • 1 tbsp cooking spray I like Trader Joe's EVOO spray but you can also use oil that is not in a spray form. You can use a brush to brush on the oil.
    • 5 cups bone broth

    What To Use To Stuff The Chicken

    • 1 whole onion
    • 5 sticks fresh rosemary
    • 10 sticks fresh thyme
    • 1 whole lemon

    Instructions

    • First thing is first, preheat the oven to 400 degrees F.
    • Next, take the giblets out of the chicken in the breast cavity. They should be in a bag. You can throw them away or use them for soups.
    • Now, place the chicken in a roasting pan, breast side facing down. I like using a roasting pan because it will evenly cook the chicken on both sides.
    • Pat dry the chicken with paper towels. *Note I do NOT wash the chicken. I feel that any bacteria on it will be killed off in the oven. For me it is not worth getting the raw chicken everywhere.
    • Now, mix the dried spices in a bowl.
    • Spray the chicken on both sides with cooking oil of choice. If you do not have a cooking spray you can take a brush and brush on the oil. Make sure to oil both sides.
    • Next, you want to sprinkle the spices all over the chicken.
    • Be sure once you are done adding the spices, the chicken ends up with the breast face down.
    • Now, cut an onion and lemon in half and stuff the chicken with the onion, lemon, thyme, and rosemary.
    • OPTIONAL: but highly recommended, tie the legs up and together. This will help the chicken cook evenly. You can use twine or sewing string.
    • Lastly, add the broth to the bottle of the pan and place it in the oven for 85 minutes. I suggest adding a meat thermometer. The best way to tell if the chicken is done is once it reaches 165 degrees.
    • If you do not have a thermometer you can cut into it and see once the 85 minutes is up; however, I highly suggest getting a meat thermometer.
    • Bast the turkey with the bone broth on the bottom of the pan every 20 minutes to ensure that the turkey does not get dried out.
    • ENJOY! If you make this recipe I would love it if you shared the link to this recipe with a friend, left a comment below or tagged me on instagram with a picture @alliannaskitchen

    Notes

    You can store in the fridge for you to 5 days!
    Crispy, juicy, flavorful over roasted chicken.
    Serving: 5slices | Calories: 519kcal | Carbohydrates: 2g | Protein: 46g | Fat: 35g | Saturated Fat: 10g | Cholesterol: 163mg | Sodium: 1604mg | Potassium: 431mg | Fiber: 1g | Sugar: 1g | Vitamin A: 487IU | Vitamin C: 9mg | Calcium: 35mg | Iron: 2mg
    Tried this recipe?Tag me on instagram @alliannaskitchen!
    Close up photo of oat flour muffins stacked on top of each other with white chocolate chips on top.

    November 8, 2020 Breakfast

    Oat Flour Pumpkin Muffins

    These Oat Flour Pumpkin Muffins are perfect for Fall and are so simple to make. This recipe takes 15 minutes of hands on time and can be batched baked! The pure maple syrup combined with toe dark chocolate chips and warm spices makes this recipe a huge Fall hit. You can have a batch of these pumpkin oat flour muffins on the table in no time.

    Close up photo of oat flour muffins stacked on top of each other with white chocolate chips on top.

    I love pumpkin season! Every fall I buy a huge case of canned pumpkin from Trader Joe’s to last me all fall long. Pure pumpkin puree  tends to sell out so grab it while they have it in stock. If you love pumpkin like I do or have leftover pumpkin, check out the other pumpkin recipes on my blog like my Pumpkin Baked Oatmeal, Gluten Free Pumpkin Cake, Dairy Free Pumpkin Spice Smoothie, and Gluten Free Pumpkin Muffins.

    If you are obsessed with Fall like I am, check out my Fall Simmer Pot Recipe. It will make your house smell and feel like Fall!

    [feast_advanced_jump_to]

    Why I Love This Recipe

    • These healthy pumpkin muffins requires less than 15 minutes of hands on time. 
    • My healthy pumpkin muffin recipe is naturally dairy free, gluten free, and soy free. It can also be made nut free. 
    • You can make these pumpkin oatmeal muffins using homemade oat flour using a food processor or store bought out flour.
    • No one will know this recipe is made with better for you sweeteners and is naturally refined sugar free!
    • These delicious muffins make for a great afternoon snack once your kids get home from school!

    Simple Ingredients

    Oat flour pumpkin muffin ingredients laid out in bowls on the counter.
    Oat flour.
    • Gluten free oats- The oats will act as the “flour” in this recipe. I have not tested this recipe with any other kind of flour, so I do not suggest substituting for almond flour, or any kind of all purpose gluten free flour as not all flours are created equally.
    • Almond milk- Almond milk is my go to choice of milk for all of my dairy free recipes. You can sub this out for coconut milk. 
    • Egg-To kind the muffins together. 
    • Pumpkin puree and pumpkin pie spice-This is what gives this oat flour pumpkin muffin recipe its pumpkin flavor. 
    • Maple syrup and coconut sugar– These are my sweeteners of choice. You can sub for honey or maple sugar but the taste will be slightly different. 
    • Baking powder and baking soda- Helps these muffins rise! Don’t skip out on this crucial ingredient.
    • Chocolate chips-I love using white chocolate chips in this recipe, but any kind of chocolate will work!

    See the recipe card below with a full list of ingredients and measurements.

    Equitment Needed

    • Baking cups or silicone ones ( you can reuse them!)
    • Cupcake/ muffin pan
    • Mixing bowls
    • Measuring cups

    Step-by-step photos

    Unmixed oat batter for chocolate chip muffins in a large glass bowl.
    Step #1: Preheat the oven to 350 degrees F. Then, add all ingredients to a large bow.
    Oat flour pumpkin batter in a large bowl with white chocolate chips.
    Step #2: Then, mix all ingredients together until well mixed.
    Oat flour pumpkin muffins in a muffin pan.
    Step #3: Evenly add the muffin batter to the muffin cups in a muffin pan and bake for 30 minutes or until you can stick a fork in the center of the muffins and it will come out clean.If you choose to make these into mini muffins, the baking time will vary. For mini muffins check them between 18-22 minutes. Once the muffins are done, place them on a wire rack until they reach room temperature.

    Recipe Tips and Tricks

    • Tip #1: If you want your chocolate chips to be pretty at the top, add a few in half way throughout the baking process that can just sit on top. They won’t sink as much.
    • Tip #2: Allow the muffins to completely cool prior to moving them out of the cooking rack.
    Pumpkin muffins with white chocolate chips stacked on each other with two pumpkins in the back.

    Recipe FAQs

    How should I store these healthy muffins?

    I suggest storing them in an airtight container for up to 5 days in the fridge.

    Can I substitute the pumpkin spice?

    If you don’t have pumpkin spice on hand use 1 tsp cinnamon, 1/4 tsp nutmeg, 1/8 tsp ginger, and 1/8 tsp ground cloves.

    Can you make this recipe into a Gluten Free Pumpkin Loaf?

    Unfortunately you cannot, this recipe will crumble. You can use my Gluten Free Pumpkin Bread recipe to make pumpkin bread.


    Other Gluten Free Fall Dessert Recipes

    • paleo pumpkin muffins on a plate
      Gluten Free Pumpkin Muffins
    • Orange cake on a scalloped white platter with white chocolate and orange slices on top.
      Gluten Free Orange Cake
    • stacked gluten free pumpkin bread on a cutting board
      Gluten Free Pumpkin Bread
    • gluten free pumpkin chocolate chip cookies
      Gluten Free Pumpkin Cookies

    Are you interested in a list of my go to healthy alternatives?

    Download your FREE guide below.

    Download the guide.
    Close up photo of oat flour muffins stacked on top of each other with white chocolate chips on top.

    Oat Flour Pumpkin Muffins

    Course Breakfast, Dessert, Snack
    Cuisine American
    Diet Gluten Free
    Prep Time 10 minutes minutes
    Cook Time 30 minutes minutes
    Total Time 40 minutes minutes
    Servings 12 muffins
    Author Allianna Moximchalk
    148kcal
    Cost $4
    Print Recipe Pin Recipe

    Equipment

    • muffin liners
    • muffin pan
    • Large mixing bowl
    • measuring cups

    Ingredients

    • 2 cups oat flour
    • 3/4 cup pumpkin pure
    • 1 cup coconut sugar
    • 2 eggs
    • 1 tsp cinnamon
    • 1/2 tsp ground ginger Dried.
    • 1/2 tsp nutmeg
    • 1 tsp vanilla extract
    • 1 tsp baking soda
    • 1/2 cup milk I like dairy free almond milk.
    • 1/2 cup chocolate chips I like white chocolate chips

    Instructions

    • Preheat the oven to 350. Mix all ingredients in a mixing bowl. Line a muffin pan with muffin liners. Evenly divide up the batter in the pan. Bake for 30 minutes.
    • Let them sit for 10 minutes before touching.

    Notes

    Servings: This recipe yields approximately 10 muffins.
    Nutrition: The nutrition on this recipe is just an estimate and cannot be guaranteed. 
    Storage: You can store this recipe in the fridge for up to 5 days. You can store in the freezer for up to 1 month.
    These gluten free oat flour muffins are perfect for fall!
    Serving: 1muffin | Calories: 148kcal | Carbohydrates: 27g | Protein: 4g | Fat: 3g | Saturated Fat: 1g | Polyunsaturated Fat: 1g | Monounsaturated Fat: 1g | Trans Fat: 0.003g | Cholesterol: 29mg | Sodium: 136mg | Potassium: 134mg | Fiber: 2g | Sugar: 10g | Vitamin A: 2440IU | Vitamin C: 1mg | Calcium: 34mg | Iron: 1mg
    Tried this recipe?Tag me on instagram @alliannaskitchen!
    Butternut squash on a brown plate.

    November 7, 2020 Air Fryer

    Butternut Squash In Air Fryer

    This Butternut Squash in Air Fryer dish makes for a perfect side dish and egg free breakfast.  The combination of apples, bacon, and squash makes this dish oh so flavorful. The natural juices from the bacon nicely complement is delicious vegetable. This great side dish is a staple for nearly all of our Fall family and holiday season functions. 

    Butternut squash on a brown floral plate.

    I love a good side dish! Especially a savory yet sweet one. This recipe has especially become a perfect Thanksgiving side dish along with my Cranberry BBQ Meatballs,  Dairy Free Green Bean Casserole, Dairy Free Gravy, Gluten Free Mashed Potatoes, Roasted Cauliflower and Carrots, and my Sautéed Kale and Mushrooms. If you are looking for a good cozy cocktail or mocktail to serve this recipe with, check out my Pear Cocktail Recipe.

    Why I Love This Recipe

    • This healthy side dish can take as little as 10 minutes if you buy the pre-cut squash.
    • The size of your squash dictates how much you will get from this recipe. You can really cater this recipe to how many servings you need. 
    • While this winter squash is mostly used for side dishes, you can also use this recipe to make an egg free breakfast. 
    • If you have a lot leftover of this leftover squash, you can use the rest of it to make my amazing Butternut Squash Feta Salad. 
    • This delicious butternut squash recipe is naturally dairy free, gluten free, soy free, nut free, egg free, AIP, Paleo and Whole30 friendly. 
    • If you are obsessed with squash season like I am every Fall, check out my Butternut Squash Curry and my Air Fryer Spaghetti Squash.
    • If you want to meal prep this recipe, I suggest using larger squashes. 

    Simple Ingredients

    Air fryer squash ingredients laid out on the counter.
    • Pre-cut butternut squash- you can buy the precut stuff which will save you a ton of time or you can buy a large size one and cut it yourself. Cut the squash into 1 inch cubes. 
    • Coconut sugar-This helps bring out the sweetness with the apples and squash. While the natural sugars add some sweetness, I love adding a tad of coconut sugar.
    • Paprika & garlic powder- give this recipe more flavor. If you are doing AIP omit the paprika. 
    • Avocado oil- is my go to cooking oil for roasting the squash and sautéing the apples and onions. 
    • Apples-Apples are the perfect addition to help enhance the sweet flavor.
    • Squash-A must, make sure it is a butternut squash! I highly suggest buying the pre-cut squash so you do not have to use a vegetable peeler here which are a pain to use.
    • To garnish- This recipe is not complete without adding the fresh parsley on top.

    See the recipe card below with a full list of ingredients and measurements.

    Recipe Substitutions and Variations

    • Coconut sugar-While coconut sugar is my go to, you can also use brown sugar or maple syrup in its place.
    • Flavor variations-You can use other spices to enhance the flavor of this recipe like chili powder or black pepper. 
    • Other vegetables-You can toss other veggies into the mix to give this recipe more flavor if you would like! Sweet potatoes would be a nice addition. 

    This recipe has not been tested with other substitutions or variations. If you replace or add any ingredients, please let us know how it turns out in the comments below!

    Recipe Instructions

    Squash, fresh parsley, coconut sugar, sea salt and chopped apple in a bowl.
    Step #1: Take your pre-cut butternut squash and place it in a bowl. The squash should be cut in 1-inch cubes. Using a sharp knife, slice up your onions, bacon and apples. Now, add all ingredients to a large bowl.
    Butternut Squash In Air Fryer 5
    Step #2: Then, place the ingredients in an air fryer basket and place the air fryer on 375 degrees F and bake for 20 minutes, then toss the ingredients and bake for an additional 15 minutes or until the squash has crispy edges and slightly golden brown. You should be able to know if the squash is done by noticing if it is fork tender and you can easily stick a fork in it, The total cook time may vary slightly based on how thick the squash is.
    • You can also make this recipe in the regular oven if you would prefer. Follow all instructions with the same as above except lay the squash out on a sheet tray. Just like the air fryer version, the cooking time may vary slightly based on how thick and dense the squash cubes are.

    Recipe Tips and Tricks

    • Tip #1: I cannot stress this enough, buy the pre-cut butternut squash! It will save you so much time.
    • Tip #2: If you do not like the spice, skip the paprika.

    Recipe FAQS

    Do I need to peel butternut squash before roasting?

    Yes! You absolutely do, however, please buy the pre-cut squash. I will save you so much time and the headache of having to cut it.

    How do you cut a butternut squash?

    For best results, first peel the squash using a veggie peeler. Then, cut off the bottom of the squash then cut off the top. Now, slice the squash in half and scoop out the middle of the squash. Lastly, cube up the squash into 1 inch cubes. 

    Butternut squash in a large brown bowl with parsley on top.

    Easy Vegetable Recipes

    • roasted bok choy on a sheet pan with red pepper flakes on top
      Roasted Bok Choy
    • Blanched broccoli in a bowl with red pepper flake garnish.
      Blanching Broccoli
    • instant pot zucchini with red pepper flakes in a bowl
      Instant Pot Zucchini
    • Lemon garlic asparagus on a serving dish.
      Lemon Garlic Asparagus

    Are you interested in a list of my go to healthy alternatives?

    Download your FREE guide below.

    Download the guide.


    Butternut squash on a brown plate.

    Butternut Squash In Air Fryer

    Course Breakfast, Side Dish
    Cuisine American
    Diet Gluten Free
    Prep Time 15 minutes minutes
    Cook Time 45 minutes minutes
    Total Time 1 hour hour
    Servings 6 servings
    Author Allianna Moximchalk
    59kcal
    Cost $6
    Print Recipe Pin Recipe

    Equipment

    • Air fryer or baking sheet

    Ingredients

    • 1 large butternut squash Some stores like Trader Joe's sell the fresh pre cut squash, that will totally work too and save you a lot of time! If you go the pre packaged route, I suggest 2 pounds.
    • 1 whole green apple Washed and cubed.
    • 2 cloves garlic Minced
    • 1 tsp coconut sugar
    • 2 tsp extra virgin olive oil (divided) I like using the Trader Joe's olive oil spray, super simple!
    • 1/4 cup fresh parsley Washed and chopped
    • 1/4 tsp sea salt

    Instructions

    For the air fryer version:

    • Take your pre-cut butternut squash and place it in a bowl. The squash should be cut in 1-inch cubes. Using a sharp knife, slice up your onions, bacon and apples. Now, add all ingredients to a large bowl and toss. Then, place the ingredients in an air fryer basket and place the air fryer on 375 degrees F and bake for 20 minutes, then toss the ingredients and bake for an additional 15 minutes or until the squash has crispy edges and slightly golden brown. You should be able to know if the squash is done by noticing if it is fork tender and you can easily stick a fork in it, The total cook time may vary slightly based on how thick the squash is.

    For the oven version:

    • You can also make this recipe in the regular oven if you would prefer. Follow all instructions with the same as above except lay the squash out on a sheet tray. Just like the air fryer version, the cooking time may vary slightly based on how thick and dense the squash cubes are.

    Notes

    Servings: This recipe yields approximately 3 servings.
    Nutrition: The nutrition on this recipe is just an estimate and cannot be guaranteed. 
    Storage: You can store this recipe in the fridge for up to 5 days. 
    This easy prep recipe is the perfect side dish that can double as a breakfast.
    Serving: 1serving | Calories: 59kcal | Carbohydrates: 15g | Protein: 1g | Fat: 0.2g | Saturated Fat: 0.03g | Polyunsaturated Fat: 0.1g | Monounsaturated Fat: 0.01g | Sodium: 104mg | Potassium: 460mg | Fiber: 3g | Sugar: 3g | Vitamin A: 13524IU | Vitamin C: 31mg | Calcium: 65mg | Iron: 1mg
    Tried this recipe?Tag me on instagram @alliannaskitchen!
    week 6 meal plan

    November 6, 2020 Blog

    Complete Paleo Meal Plan Week 6

    This is week 6 of putting together meal plans for you guys and I have received a lot of great feedback so I am going to continue to create them. This week’s meal plan is paleo friendly, some of the recipes are whole30 friendly too. If they are whole30 friendly it will say in the description. Feel free to use previous week’s meal plans that can be found here.  If you would like to get the complete shopping list be sure to sign up for my newsletter below and I will send you your grocery list weekly. All you have to do is shop 🙂 

    Complete Paleo Meal Plan Week 6 | Alliannas Kitchen 

    If meal prepping your food in advance is your thing I highly suggest getting meal prep containers or containers like these so your meals are ready to eat. 


    Included in this post are 7 meals and 1 breakfast. When making the meals for dinner I suggest making an extra portion so you can eat it for lunch. Keep in mind these are an inspiration, so feel free to swap things out. If you have questions or need assistance please comment below. If you make one of my recipes I would so grateful if  you left a comment and a star rating review on the recipe in my blog or took a picture and tagged me in it on instagram @alliannaskitchen

    I hope this is helpful as you begin to plan out your week. -Allianna


    This Weeks Menu


    Breakfast: AIP Breakfast Muffins With Bacon & Apples


    Dinner Monday: Pumpkin Chicken Almond Butter Instant Pot Soup

    Lunch Tuesday: Pumpkin Chicken Almond Butter Instant Pot Soup

    Dinner Tuesday: Pumpkin Ravioli w/ Sage Apple Bacon Sauce 

    Lunch Wednesday: Pumpkin Ravioli w/ Sage Apple Bacon Sauce 

    Dinner Wednesday: Cilantro Lime Chicken Wings w/ Creamy Mashed Potatoes 

    Lunch Thursday:  Cilantro Lime Chicken Wings w/ Creamy Mashed Potatoes 

    Dinner Thursday: Herb Crusted Salmon w/ Lemon Dill Green Beans

    Lunch Friday: Herb Crusted Salmon w/ Lemon Dill Green Beans

    Dinner Friday: Chicken Curry Meatballs

    Lunch Saturday: Chicken Curry Meatballs

    Dinner Saturday: Cucumber Apple Salsa Over Salmon

    Lunch Sunday: Cucumber Apple Salsa Over Salmon

    Dinner Sunday:  Creamy Chicken Curry Gnocchi Soup

    Lunch Monday: Creamy Chicken Curry Gnocchi Soup


    Do not forget to tag me on instagram @alliannaskitchen with your yummy meals. I am excited to cook with you 🙂


    If you are looking for more Whole30 weekly meal plans, check out week 1’s meal plan.

    far away muffins

    November 5, 2020 Breakfast

    Paleo Pumpkin Muffins

    These most Paleo Pumpkin Muffins are the perfect treat for any fall occasion. They are loaded with flavor and oh so moist. With only taking 10 minutes to prepare, you can have a batch of 18 muffins ready to go in no time. These muffins freeze perfectly which means they are perfect to make ahead of time for the holidays or simply so you can have a paleo breakfast that is prepped and ready to go at all times, all you need to do is heat these muffins up!

    If you enjoy this recipe, you will also enjoy my Gluten Free Pumpkin Cake, Dairy Free Pumpkin Spice Smoothie, and Gluten Free Pumpkin Muffins as well.

    Ingredients:

    • Almond flour- my go to flour for paleo baking. Do not substitute! 
    • Baking soda & baking powder- these two ingredients are a must. Both baking soda and baking powder help the muffins rise. 
    • Pumpkin- I like canned pumpkin from Trader Joe’s. I bought a ton of it at the beginning of the season (like 3 cases, because it sells out so fast) but any brand will work. I like to be sure that the only ingredient is pumpkin. A lot of brands will add in ingredients like sugar which is not necessary for this recipe. 
    • Coconut sugar- This is by far my favorite paleo sweetener. I use it in almost all of my baking recipes. You can absolutely substitute it for maple sugar if you prefer. 
    • Pumpkin spice- While I am a huge fan of pumpkin spice you can make this recipe without it or substitute it for cinnamon. I always buy an extra jar or two so I have it all year round. 
    • Vanilla- adds extra flavor.
    • Eggs- don’t forget the eggs! This will help everything stay together! 
    • Coconut oil- coconut oil is what keeps these muffins moist.

    How to make:

    • First thing first, preheat the oven to 375. Then, add muffin liners to your pan. Since these are a larger batch of muffins, you can choose to make two batches (12 muffins, then 6 muffins) or you can buy this big muffin pan. I also like to use this pan when I batch cook my egg muffins for breakfast. 
    • Next, insert the baking cup in the muffin pan. You will need 18 liners. Now it is time to mix the batter! Add all ingredients to a large mixing bowl and mix with a spatula. Be sure not to over-mix, it will prevent the batter from rising. Lastly, evenly divide the batter into the muffin cups. 
    • It is time to bake the muffins! Bake them for 30 minutes or until they pass the fork trick (put the fork in the muffin, once you pull it out be sure no batter is present.)

    How To Store Paleo Pumpkin Muffins

    • You can store these muffins in the fridge for up to a week or freeze them. If you choose to freeze them, be sure to remove the liners and lay them in a single layer in a ziplock bag.

    Keywords: Gluten free muffins, grain free muffins, pumpkin paleo, paleo pumpkin dessert, paleo snack, paleo halloween treat, gluten free halloween treat, paleo breakfast, refined sugar free baking, paleo gluten free muffins

    If you like this recipe, you will LOVE:

    • Chocolate ganache tarts
    • Protein loaded banana blueberry zucchini muffins 
    • Protein loaded pancakes
    • Gluten Free Chocolate Donuts With Pumpkin Maple Frosting
    • Paleo Chocolate Chip Muffins
    • Paleo Apple Cinnamon Protein Muffins
    far away muffins

    Pumpkin Muffins

    Course Dessert
    Cuisine American
    Prep Time 10 minutes minutes
    Cook Time 30 minutes minutes
    Servings 18 muffins
    Author Allianna Moximchalk
    356kcal
    Cost $7
    Print Recipe Pin Recipe

    Equipment

    • mixing bowls
    • muffin liners
    • muffin pan
    • spatula
    • electric mixer

    Ingredients

    • 4.5 cup almond flour
    • 3/4 tsp baking soda
    • 1 1/2 tsp baking powder
    • 3/4 cup coconut sugar
    • 1 1/2 cup pumpkin
    • 2 tsp pumpkin spice
    • 3 tsp vanilla extract
    • 3 tbsp coconut oil
    • 3 Eggs

    Instructions

    • Preheat oven to 375 F and place liners in muffin pan.
    • In a large mixing bowl, add all ingredients and use a spatula to combine. Be sure not to over-mix or the muffins won't rise. Just mix enough so you do not see the separated ingredients.
    • Spoon batter into liners until each liner is about 3/4 of the way full. Place in oven for 30 minutes.
    • You can store these muffins in the fridge. If you want to freeze them, remove the liners.
    • ENJOY! If you make this recipe I would love it if you shared the link to this recipe with a friend, left a comment below or tagged me on instagram with a picture @alliannaskitchen

    Notes

    You can store the muffins in the fridge for up to a week.
    These muffins are a delicious blend of warm spices and rich pumpkin flavor. They would be perfect to enjoy on a crisp fall morning with a cup of coffee, or as a sweet dessert.
    Serving: 1muffin | Calories: 356kcal | Carbohydrates: 28g | Protein: 10g | Fat: 25g | Saturated Fat: 5g | Cholesterol: 41mg | Sodium: 195mg | Potassium: 64mg | Fiber: 5g | Sugar: 15g | Vitamin A: 1294IU | Vitamin C: 1mg | Calcium: 133mg | Iron: 2mg
    Tried this recipe?Tag me on instagram @alliannaskitchen!
    week 5 meal plan

    October 30, 2020 Blog

    Week 5 Complete Whole30 & Paleo Meal plan

    This is week 5 of putting together meal plans for you guys and I have received a lot of great feedback so I am going to continue to create them. This weeks meal plan is both whole30 and paleo friendly. Feel free to use previous week’s meal plans that can be found here. If you are new to the Whole30, check out the post I did on how to have a successful round of whole30.


    If meal prepping your food in advance is your thing I highly suggest getting meal prep containers or containers like these so your meals are ready to eat. 


    Feel free to switch up the order or switch the menu options up, as this is only meant to be a guide. This menu contains 7 meals and one breakfast. I like to make extra at dinner for the next day to eat for lunch. I hope this is helpful as you begin to plan out your week. -Allianna

    What Is On The Menu


    Breakfast: Egg Muffins

    Monday dinner: Crispy Chicken Tenders w/ Brussels sprouts, bacon, and pomegranate (my new favorite)

    Tuesday lunch: Crispy Chicken Tenders w/ Brussels sprouts, bacon, and pomegranate (my new favorite)

    Tuesday dinner: Creamy Thai Chicken Soup

    Wednesday lunch: Creamy Thai Chicken Soup

    Wednesday dinner: Chicken Nuggets w/ Lemon Dill Green Beans

    Thursday lunch: Chicken Nuggets w/ Lemon Dill Green Beans

    Thursday dinner: Curry Chicken Salad Served Over Greens

    Friday lunch:  Curry Chicken Salad Served Over Greens

    Friday dinner: Chicken Teriyaki Bowls

    Saturday lunch: Chicken Teriyaki Bowls

    Saturday dinner: Fajita Steak Salad

    Sunday lunch: Fajita Steak Salad

    Sunday dinner: Everything Bagel Seasoned Chicken Wings w/ Mashed Potatoes

    Monday lunch: Everything Bagel Seasoned Chicken Wings w/ Mashed Potatoes 

    Do not forget to tag me on instagram @alliannaskitchen with pictures of your yummy meals. I am to see everything you make!


    You can check out previous weeks meal plans here.


    IMG 3764

    October 29, 2020 Air Fryer

    Air Fryer Frozen Brussel Sprouts

    These Air Fryer Frozen Brussel Sprouts have become a staple in our home! This recipe goes great with just about anything. In under 20 minutes you will have the most perfect side dish. You can keep this recipe simple with just some seasonings or add in some bacon to spice it up. These Air Fryer Frozen Brussels Sprouts have become a staple in our home. 

    Air Fryer Brussel Sprouts With Bacon And Pomegranate | Alliannas Kitchen

    I love having easy delicious side dish recipes on hand that can go well with just about anything. If you like easy vegetable recipes like this one, be sure to check out my Blanched Broccoli Recipe, Lemon Garlic Asparagus, Roasted Beets and Carrots, and Dairy Free Green Bean Casserole on my blog too! They all have become my go to’s especially for weeknight cooking. 

    [feast_advanced_jump_to]

    Why I Love This Recipe

    • These Crispy Brussels Sprouts are loaded with flavor and so easy to make!
    • You can spice up this recipe by adding some maple syrup and make my Balsamic Maple Brussel Sprouts,
    • You can meal prep this recipe at the beginning of the week so all you need to do is reheat during those busy weeknights. 
    • The simple seasonings in this recipe make it so versatile, it goes great with just about anything! You can also spice it up by adding your favorite seasonings. 
    • This recipe is naturally low carb, keto, paleo, gluten free, dairy free, soy free and nut free.
    • If you are a salty lover like me but trying to be mindful of what you put in your body, I love making brussel sprouts with crispy edges as an alternative to french fries. 
    •  

    Simple Ingredients

    • Cooking oil-A little oil goes a long way. This is the key to getting crispy sprouts golden brown! My go to cooking oil is avocado oil for this recipe. 
    • Frozen brussel sprouts-A must for this recipe! I like buying the ones that are already cut in half. 
    • Garlic powder, black pepper, onion powder, and a little salt-This little bit of seasoning goes a long way. 
    • Bacon-While you don’t need bacon in this recipe, I feel like it is what makes this recipe so tasty!

    See the recipe card below with a full list of ingredients and measurements.

    Substitutions and Variations

    • Parmesan cheese– This adds some extra flavor to the recipe. 
    • Oil-While avocado oil is my go to favorite, you can also use extra virgin olive oil, olive oil spray, coconut oil or ghee. I have a Homemade Ghee recipe on my blog if that is your thing!
    • Squeeze of lemon juice-This can add some acid/ flavor to your dish. Totally not needed, but if you have it on hand, it can add a little flavor.
    • Fresh brussels sprouts-You can also fresh sprouts in this recipe if you would prefer. Some grocery stores have shaved ones or ones already cut in half. Those are great options since it will require less prep on your end. 
    • Other seasonings-Everything bagel seasoning, Italian seasoning and red pepper flakes make great additions to this recipe!
    • Dipping sauce-My Homemade Garlic Aioli goes so well with this side!
    •  

    Equitment Needed

    • Air fryer-I have had the same air fryer for years and love it. It has multiple functions on it which means my kitchen appliances now take up less space. Air frying is my go to when it comes to making an easy side dish! It makes your vegetables oh so crispy. 
    • Baking sheet-If your air fryer is in use or you do not have one, you can also use a baking sheet.  

    Simple Steps

    First, chop up the bacon into 1/2 inch pieces. Then, add all ingredients to the air fryer at 375 degrees F for 15 minutes. Toss every 5 minutes. Timing may depend on how big your brussels are. Cook until brussels are desired crispiness and bacon is fully cooked.

    Recipe Tips and Tricks

    • Tip #1: Do not over cook your brussels or they will burn! I like to pause the air fryer half way through and toss them. This helps them cook evenly.
    • Tip #2: If you are adding bacon to this dish, make sure your chop your bacon into 1/2 inch pieces or less so the bacon needs cooked for the same amount of time as the brussels.

    Recipe FAQs

    How can I make brussel sprouts in the oven?

    You can make them the same way you would if you were making them in the air fryer. Lay out the brussel sprouts in a single layer and bake at 375 degrees F for 20 minutes or until lightly brown.

    What serves well with brussel sprouts?

    The thing I love most about this recipe is that is goes great with just about anything! A few of my favorites to serve it with is Crispy Gluten Free Fried Chicken, Gluten Free Fish and Chips, Air Fryer Turkey Burgers, and easy Dutch Oven Ribs.

    How long do brussel sprouts last in the refrigerator?

    Uncooked brussel sprouts can last for up to a week, if they are cooked they can last for up to 5 days in an airtight container.

    Paleo AIP Brussel Sprouts With Bacon And Pomegranate| Alliannas Kitchen

    Other Easy Vegetable Recipes

    • roasted bok choy on a sheet pan with red pepper flakes on top
      Roasted Bok Choy
    • Blanched broccoli in a bowl with red pepper flake garnish.
      Blanching Broccoli
    • instant pot zucchini with red pepper flakes in a bowl
      Instant Pot Zucchini
    • Lemon garlic asparagus on a serving dish.
      Lemon Garlic Asparagus

    Are you interested in a list of my go to healthy alternatives?

    Download my FREE swap guide.

    Download here.


    side of brussles

    Air Fryer Frozen Brussel Sprouts

    Course Appetizer, Breakfast, Side Dish
    Cuisine American
    Diet Gluten Free
    Prep Time 10 minutes minutes
    Cook Time 25 minutes minutes
    Total Time 35 minutes minutes
    Servings 4 servings
    Author Allianna Moximchalk
    592kcal
    Cost $8
    Print Recipe Pin Recipe

    Equipment

    • Air fryer Or baking sheet.

    Ingredients

    • 1 pound brussels sprouts frozen
    • 1 tbsp garlic powder
    • 1 pinch sea salt
    • 1 tsp olive oil spray or oil of choice (around 1 tsp, quickly coat the brussels with the spray_)

    Optional:

    • 1/2 pound bacon I like to cook the bacon in small 1/2 inch pieces with the brussels.
    • 1/2 cup pomegranate seeds I like to buy the seeds already in a cup, but you can also buy a whole pomegranate and pull out the seeds. First cut the fruit in half and pull out the seeds one by one. The seeds are a fun garnish to add a pop of color and more flavor.

    Instructions

    • Add all ingredients to the air fryer at 375 degrees F for 15 minutes. Toss every 5 minutes. Timing may depend on how big your brussels are. Cook until brussels are desired crispiness.

    Notes

    Servings: This recipe yields approximately 4 servings.
    Nutrition: The nutrition on this recipe is just an estimate and cannot be guaranteed. 
    Storage: You can store this recipe in the fridge for up to 5 days in an airtight container.
    Easy and delicious Air Fryer Frozen Brussel Sprouts that go well with any dish!
    Serving: 4g | Calories: 592kcal | Carbohydrates: 16g | Protein: 5g | Fat: 58g | Saturated Fat: 22g | Cholesterol: 54mg | Sodium: 126mg | Potassium: 518mg | Fiber: 5g | Sugar: 5g | Vitamin A: 855IU | Vitamin C: 98mg | Calcium: 48mg | Iron: 2mg
    Tried this recipe?Tag me on instagram @alliannaskitchen!
    cranberry sauce in bowl with towel

    October 26, 2020 Autoimmune Protocol

    Whole30 Cranberry Sauce

    This Whole30 Cranberry Sauce is exactly what you need on your thanksgiving table. The combination of orange, maple, cinnamon and cranberries makes this cranberry sauce tart but yet so sweet. It is the perfect side to meet all of your holiday needs. With this side dish only taking 10 minutes to prep it is not only a delicious clean thanksgiving recipe, but it is easy and quick!

    Cooked cranberry sauce garnished with orange zest and orange sliced in a white baking dish.

    There is something about cranberries and oranges that scream winter. I love the cranberry orange combination. If you love this recipe you will love the other cranberry and orange recipes on my blog like my Gluten Free Orange Cake and Cranberry BBQ Meatballs. This recipe is a great addition to your Thanksgiving spread with my Dairy Free Green Bean Casserole as well.

    [feast_advanced_jump_to]

    Why This Recipe Works

    • This Paleo Cranberry Sauce is full of flavor and so easy to make around the holidays.
    • You can prepare this recipe ahead of time which means it is one less thing you have to do on actual Thanksgiving!
    • This recipe is naturally paleo, vegan, Whole30, dairy free, gluten free, grain free and autoimmune protocol (AIP) friendly.
    • While this recipe is so easy to make, if you would prefer to have it delivered to you-check out my meal prep delivery service based in Pittsburgh.
    • This recipe only takes 5 minutes to prep.
    • I love pairing this recipe with just about anything. From paleo mashed potatoes to turkey, it is the best sauce!

    Ingredients

    Whole30 cranbery sauce ingredients laid out in clear bowls.

    Cranberries– Cranberries are known for being one of nature’s superfoods! They are loaded with antioxidants. While they typically aren’t eaten alone because of their tart flavor, they pair super well with anything sweet. In this recipe I like to use fresh cranberries. 

    Oranges- The natural sugars from the oranges naturally cut the tart flavor of the cranberries. 

    Maple syrup- Since cranberries natural flavor is pretty tart it is important to pair that tart flavor with something sweet, this is where the maple syrup comes into play! However, if you are following the whole30 you can omit the maple syrup and use the dates and orange juice alone. 

    Dates– The dates add an additional layer of sweet to these muffins. Dates are naturally whole30 compliant and one of my favorite ways to sweeten whole30 dishes. 

    Cinnamon- Adds a nice layer of warmth to this recipe.

    Recipe Substitutions

    You can substitute honey for the maple syrup.

    Fresh cranberries in a pot.
    Step 1: Place the cranberries in a pot to cook on the stove.
    Fresh cranberries, orange zest, orange juice and dates in a pot.
    Step 2: Add the orange juice, zest, dates and optional maple syrup to the pot.
    Cooked cranberry sauce in a gray pan.
    Step 3: Mix around the sauce in a pan over medium heat on the stovetop until it reaches a boil for 12 minutes.
    Hand holding an orange zesting it over a lemon zester over a white casserole dish filled with cooked cranberry sauce.
    Step 4: Zest optional additional orange zest over top to garnish.

    How To Make

    • First things first, you want to soak the dates in boiling hot water for 10 minutes. This will allow the dates to be a lot softer and easier to dice up. 
    • Next, you want to zest the oranges. This will add the additional flavor to this paleo orange cranberry sauce. Then, you will cut the orange in half and juice it by squeezing it with our hands. 
    • Now, you should add all other ingredients to a large saucepan and bring to a boil on medium heat for 12 minutes. It is important for the refined sugar free cranberry sauce to be continuously mixed or it could burn on the bottom. So mix it up!
    • Once the cranberry sauce is cooked, I like to garnish it with additional orange zest to make it pretty.
    Close up photo of cooked cranberry sauce in a casserole dish with orange zest and orange sliced on top.

    Recipe FAQ’s

    Can I Prep In Advance?

    Absolutely! You can prepare this recipe up to 5 days prior to eating it.

    Can I Use Canned Cranberries?

    I suggest using fresh or frozen. Canned cranberries tend to be more like a jelly.

    How Long Does Cranberry Sauce Last?

    This recipe will last for up to 5 days.

    How Should I Store It?

    I suggest storing it in an air tight glass container.

    What Goes Well With Cranberry Sauce?

    I am obsessed with pairing cranberry sauce with mashed potatoes! My Whole30 Mashed Potatoes are my favorite!

    Other Paleo Thanksgiving Side Dishes

    • Dairy free gravy in a bowl with a piece of fresh thyme on top.
      Dairy Free Gravy
    • dairy free green bean casserole on plates
      Dairy Free Green Bean Casserole
    • side view of turkey
      Turkey Breast Dutch Oven Recipe
    • Close up photo of mashed potatoes in a bowl with gravy, parsley and red pepper flakes on top.
      Gluten Free Mashed Potatoes

    Did you try this recipe?

    Leave a rating and review below. Be sure to tag me on instagram @alliannaskitchen

    instagram
    cranberry sauce in bowl with towel

    Whole30 Cranberry Sauce

    Course Side Dish
    Cuisine American
    Prep Time 12 minutes minutes
    Cook Time 12 minutes minutes
    Total Time 24 minutes minutes
    Servings 5 servings
    Author Allianna Moximchalk
    128kcal
    Cost $5
    Print Recipe Pin Recipe

    Equipment

    • large saucepan

    Ingredients

    • 4 cups fresh cranberries
    • 2 whole oranges zested and juiced.
    • 1/2 cup maple syrup Make sure it is pure maple syrup. Omit for whole30.
    • 8 whole dates Soaked in hot/ boiling water.
    • 1/2 cup filtered water
    • 1/2 tsp cinnamon

    OPTIONAL: to garnish

    • orange zest

    Instructions

    • Mince the pitted dates. Wash the cranberries and add them to the saucepan with the dates. Zest the oranges, then cut them in half and squeeze to juice. Add the zest and juice to the pan. Add the (optional if doing Whole30) maple syrup and filtered water. Bring the saucepan to medium heat and cook for 12 minutes. Mix the cranberry sauce with a metal spoon throughout (it will stain wood.) Now, after the 12 minutes is up remove from the pan and add the addition orange zest on top if desired.
      If you enjoyed this recipe it would mean the world to me if you rated it and left a comment below. It helps others find it on google.

    Notes

    Storage: You can store this cranberry sauce in a glass container. 
    Nutrition: The calorie count for this recipe is an estimate not an exact. 
    Servings: This recipe should yield 5 servings. 
    This paleo and whole30 cranberry sauce is the perfect combination between sweet and tart.
    Serving: 1serving | Calories: 128kcal | Carbohydrates: 33g | Protein: 1g | Fat: 1g | Saturated Fat: 1g | Sodium: 6mg | Potassium: 151mg | Fiber: 4g | Sugar: 24g | Vitamin A: 48IU | Vitamin C: 11mg | Calcium: 41mg | Iron: 1mg
    Tried this recipe?Tag me on instagram @alliannaskitchen!
    week 4 meal plan

    October 23, 2020 Blog

    Week 4 Paleo & Whole30 Meal Plan

    This week 4 paleo & whole30 meal plan should take all of the stress of planning out of your hands. The key to being successful on the Whole30 is planning ahead. While I am a big fan of meal prepping for the week all at once, you can prep and cook as you go. If meal prepping is your thing I highly suggest getting meal prep containers or containers like these so your meals are ready to eat. If you are new here, check out the blog I did about How To Have A Successful Whole30 here.  Check out the meal plan below for the Whole30 that started on October 5th below. It is never too late to start 🙂 If you are interested in the shopping lists be sure to subscribe to my newsletter to receive the complete shopping list.  

    How The Whole30 Meal Plan Works


    Included in this post are 7 meals and 1 breakfast. When making the meals for dinner I suggest making an extra portion so you can eat it for lunch. Keep in mind these are an inspiration, so feel free to swap things out. If you have questions or need assistance please comment below. If you make one of my recipes I would so grateful if  you left a comment and a star rating review on the recipe in my blog or took a picture and tagged me in it on instagram @alliannaskitchen

    What Is On The Menu


    Breakfast: Egg Frittata 

    Monday dinner: Middle Eastern Nut Crusted Chicken Bowl

    Tuesday lunch: Middle Eastern Nut Crusted Chicken Bowl

    Tuesday dinner: Creamy Curry Chicken Gnocchi Soup

    Wednesday lunch: Creamy Curry Chicken Gnocchi Soup

    Wednesday dinner: Acorn Squash Grape Apple Salmon Salad

    Thursday lunch: Acorn Squash Grape Apple Salmon Salad

    Thursday dinner: Cilantro Chicken Wings & Mashed Potatoes

    Friday lunch:  Cilantro Chicken Wings & Mashed Potatoes

    Friday dinner: The Best Italian Meatballs Ever and Zoodles

    Saturday lunch: The Best Italian Meatballs Ever and Zoodles

    Saturday dinner: Almond Butter Pumpkin Soup

    Sunday lunch: Almond Butter Pumpkin Soup

    Sunday dinner: Chicken Curry Meatballs

    Monday lunch: Chicken Curry Meatballs


    If you are interested in the shopping lists be sure to subscribe to my newsletter to receive the complete shopping list.


    Do not forget to tag me on instagram @alliannaskitchen with your yummy meals. I am excited to do the Whole30 with you!


    You can check out previous weeks meal plans here.

    Slice of red velvet cake on a plate with white chocolate on top of the icing.

    October 20, 2020 Dairy free

    Gluten Free Red Velvet Cake Recipe

    This Gluten Free Red Velvet Cake Recipe is super easy to make and is one of my go to’s for hosting! While this cake is my go to for Valentine’s Day, it is perfect for any special occasion. The velvety crumb combined with the classic cream cheese frosting is oh so delicious. This recipe only requires 15 minutes of hands on time and can be prepared and made in advance. 

    Slice of red velvet cake on a plate with white chocolate on top of the icing.

    This easy red velvet cake recipe has become a staple in our home along with a few of my other favorite gluten-free cakes on my blog like my Gluten Free Apple Cake, Gluten Free Banana Cake, Gluten Free Carrot Cake, Gluten Free Orange Cake, Mini Dairy Free Chocolate Cakes, and my Gluten Free Pumpkin Cake. I often turn this into a gluten-free birthday cake every year for my one friend because she loves all things red velvet! If you are making this recipe for the holidays it pairs so well with my Pretzel Christmas Crack.

    [feast_advanced_jump_to]

    Why I Love This Recipe

    • This recipe is naturally gluten free, soy free, grain free and refined sugar free. It can also be made dairy free too by using vegan cream cheese frosting!
    • You can make this recipe in advance to your gathering or celebration so you are not running around the day of. 
    • You can make this homemade gluten-free cake into red velvet cupcakes too!
    • This gluten-free cake recipe is also grain free too!
    • The tender crumb sets this cake apart from just about any other treat.
    • Unlike a lot of baking recipes, this recipe is super easy to make and follow!
    • I love red velvet cakes because they are the perfect mix between a chocolate cake and a vanilla cake!

    Simple Ingredients

    For the cake-

    Red velvet cake ingredients laid out in small glass bowls.
    • Red food coloring-This gives the red velvet cake its color. 
    • Almond flour-This is the base flour in this recipe. This tends to be my go to gluten-free flour when it comes to baking! I like Bob’s red mill or the Coscto brand!
    • Arrowroot powder-This acts as the cornstarch in this recipe. For people like me who are gluten free often times cannot tolerate corn which is why arrowroot is a go to in my recipes. This also helps act as the gum in the recipe. I cannot tolerate xanthan gum, which is why I always go for arrowroot instead of corn starch or gums!
    • Baking powder & baking soda-This helps the cake rise and expand. 
    • Coconut sugar-This is my go to sweetener for this recipe. 
    • Maple syrup-This helps sweeten this recipe as well as keep it moist. 
    • Apple cider vinegar-This combined with the baking soda and baking powder helps things rise. 
    • Coconut oil-My go to fat for this recipe. 
    • Egg-To help bind everything together.
    • Vanilla extract and cocoa powder-For flavor. 
    • Cooking oil spray-This will prevent the cake from sticking to the pan.

    For the frosting–

    Frosting cake ingredients laid out in small glass bowls on the counter.
    • Cream cheese-This is the base of the frosting. 
    • Maple syrup-This makes for the perfect frosting sweetener. It makes the frosting sweet but not too sweet.

    See the recipe card below with a full list of ingredients and measurements.

    Recipe Substitutions

    • Red food coloring-If you are like me and are sensitive to food dyes, you can also use beet powder or beet juice to give this cake its red color. 
    • Coconut sugar-You can also use maple sugar or brown sugar. 
    • Oil-While coconut oil is my go to, you can use vegetable oil, canola oil or even avocado oil if you would like. 
    • Cream cheese-If you are dairy free like myself, you can also use dairy free cream cheese. I like the Kite Hill brand for the dairy-free option!
    • Maple syrup for the frosting-You can also use powdered sugar if you would prefer that. I try to eat a refined sugar free diet so I like prefer sweeteners like honey, maple syrup and coconut sugar more!

    This recipe has not been tested with any other substitutions or variations. If you try something else out please let me know how it turns out in the comments below!

    Step-By-Step Photos

    Red velvet cake dry ingredients in a bowl with a whisk.
    Step #1: First, preheat the oven to 350 degrees F. Then, in a medium bowl add all of the dry ingredients into a bowl and mix well. 
    Red velvet cake wet ingredients in a large glass bowl.
    Step #2: In a separate bowl, add all of the wet ingredients and mix well. 


    Bowl of the wet and dry cake ingredients being mixed together.
    Step #3: Then, spray the cake pan with cooking spray oil. Now in a large mixing bowl, mix the dry and wet ingredients until well mixed throughout. 
    Cake ingredients in a silicone bundt pan.
    Step #4: Now, pour the cake mixture into the cake pan. Bake the cake for 55 minutes. Now allow the cake to settle and set for at least 20 minutes before flipping it out of the mold.
    Cream cheese and maple syrup in a blender.
    Step #5: While the cake is baking add the frosting ingredients in a large bowl. using a hand held electric mixer at medium speed, blend the ingredients together to create your frosting. You can also use a food processor. Set the frosting side and cover it in plastic wrap. Wait to frost the cake until the cake is cool enough. 

    Bakers Tips

    • Tip #1: Stick a fork in the center of the cake to ensure it is done prior to pulling it out of the oven. 
    • Tip #2: Allow the cake to fully cool prior to frosting it. I like setting it on a wire rack to help it cool faster.
    • Tip #3: Use a silicone baking pan. They are so much easier to clean. I use a bundt cake pan and love it!

    Recipe FAQs

    Can I turn this recipe into Gluten Free Red Velvet Cupcakes?

    Yes! Absolutely! Just note, the baking time will beed adjusted a little bit. You will likely only need to cook the cupcakes for half of the time. You will know the cupcakes are done by sticking a fork in them and pulling the fork out and it coming out clean. 

    Can I make this into a layer cake?

    Yes! Depending on the size of the cake you are trying to make, you make need to double the recipe. You will want to prepare you cake pans and fill them separately for however many layers you would like. The baking time will need adjusted based off of how thin or trick you make your cake. The best way to figure out if your cake is done is by sticking a fork in the middle and seeing if it comes out clean. 

    How long does this recipe last?

    You can store it in the fridge for up to 5 days in an airtight container. 

    Slice of red velvet cake on a platter with candy canes on top.

    Other Gluten Free Desserts

    • Orange cake on a scalloped white platter with white chocolate and orange slices on top.
      Gluten Free Orange Cake
    • dairy free chocolate truffles 6 scaled
      Vegan Chocolate Truffles
    • Pumpkin cake with chocolate sauce on top on a blue plate.
      Gluten Free Pumpkin Cake
    • mint cookie bars on a baking sheet
      Healthy Mint Chocolate Bars

    Are you interested in a guide of my go to healthy alternatives?

    Download your FREE guide below.

    Download your free guide.
    Slice of red velvet cake on a plate with white chocolate on top of the icing.

    Gluten Free Red Velvet Cake

    Course Dessert
    Cuisine American
    Diet Gluten Free
    Prep Time 10 minutes minutes
    Cook Time 55 minutes minutes
    Total Time 1 hour hour 5 minutes minutes
    Servings 10 servings
    Author Allianna Moximchalk
    334kcal
    Cost $10
    Print Recipe Pin Recipe

    Equipment

    • mixing bowls
    • electric mixer
    • spatula
    • 9 inch bundt cake mold I love the silicone ones!
    • sheet pan (to place mold on)
    • cutting board or large plate (for flipping cake)
    • frosting piping bag or spoon

    Ingredients

    • 3 3/4 cup almond flour
    • 3/4 cup arrowroot flour or tapioca flour Either can be used interchangeably for the sake of this recipe.
    • 1 1/2 tsp baking powder
    • 3/4 tsp baking soda
    • 1 tbsp cocoa powder
    • 3/4 cup coconut sugar
    • 3/4 cup maple syrup
    • 1 tbsp apple cider vinegar
    • 2 tbsp coconut oil
    • 6 whole eggs
    • 1 tsp vanilla
    • 0.5 fluid oz Red food coloring You can use a plant based dye free food coloring, but just note that the color may not be as bright.
    • olive oil (for spraying bundt cake mold)  I love Trader Joes Extra Virgin Spanish Olive oil spray! Any kind of cooking oil spray will work.

    For the cream cheese frosting:

    • 8 ounces cream cheese If you are dairy free, you can use dairy free cream cheese.
    • 1/4 cup pure maple syrup

    Optional cake toppings:

    • Crushed candy canes
    • White chocolate chips

    Instructions

    • Preheat oven to 350 F and spray the silicone baking mold with olive oil spray or your nonstick spray of choice.
    • In a large mixing bowl, mix all of the dry ingredients. In a separate bowl mix the wet ingredients, then combine gently.
    • Place the bundt mold on a sheet pan for support prior to pouring any batter in. Slowly and evenly pour the batter into the mold.
    • Place in the oven and bake for 55 minutes.
    • Upon removing from the oven, allow the cake to sit for 20 minutes to set.
    • Place a cutting board or large plate on top of the silicone mold and flip the cake over, allowing it to separate from the mold.

    For the frosting:

    • Add the ingredients in a bowl and mix with a hand mixer until well mixed throughout. Put the frosting in a piping bag and drizzle over the cake. If you do not have a pipping bag you can use a spoon.

    Notes

    Servings: This recipe yields approximately 10 slices of cake. 
    Nutrition: The nutrition on this recipe is just an estimate and cannot be guaranteed. 
    Storage: You can store this recipe in the fridge for up to 5 days in an airtight container.
    This delicious Gluten Free Red Velvet Cake is perfect for almost any occasion!
    Serving: 1slice | Calories: 334kcal | Carbohydrates: 34g | Protein: 7g | Fat: 21g | Saturated Fat: 6g | Cholesterol: 18mg | Sodium: 179mg | Potassium: 75mg | Fiber: 3g | Sugar: 20g | Vitamin A: 203IU | Calcium: 127mg | Iron: 1mg
    Tried this recipe?Tag me on instagram @alliannaskitchen!
    • « Go to Previous Page
    • Page 1
    • Interim pages omitted …
    • Page 31
    • Page 32
    • Page 33
    • Page 34
    • Page 35
    • Interim pages omitted …
    • Page 38
    • Go to Next Page »

    Primary Sidebar

    Allianna Headshots

    Hi, I'm Allianna! Allianna's Kitchen started by accident after battling an undiagnosed autoimmune disease for nearly my whole life.

    More about me →

    GLUTEN FREE DINNER RECIPES

    • steak date night dinner 1
      Steak Date Night Dinner with Garlic Aioli
    • gluten free fried shrimp 3 scaled
      Gluten Free Fried Shrimp
    • cooked frozen pork chops with chives on top on a white plate with a gold fork
      Easy Frozen Pork Chops In The Air Fryer
    • halibut fish tacos on a pale blue plate
      Halibut Fish Tacos

    EASY WHOLE30 RECIPES

    • Beetroot dip on a plate with crackers and fresh parsley on top.
      Simple Beetroot Dip Recipe
    • close up photo of ginger apple pork in a bowl
      Apple Ginger Pulled Pork
    • dairy free lobster bisque in a bowl with a gold spoon and garnished with lemon, fresh green herbs, and red pepper flakes.
      Dairy Free Lobster Bisque
    • juicy filet mignon on a plate
      Air Fryer Filet Mignon

    GLUTEN FREE APPETIZERS

    • peanut butter and jelly chicken wings on a plate with limes
      Peanut Butter And Jelly Wings
    • Stuffed mushrooms on a brown and white plate with fresh parsley on top.
      Gluten-Free Stuffed Mushrooms
    • Gluten free pigs in a blanket in a pile on a plate.
      Gluten Free Pigs In A Blanket
    • Pretty french onion dip in a silver bowl with potato chips and chives on top.
      Vegan French Onion Dip Recipe

    EASY MOCKTAIL RECIPES

    • honey simple syrup 2
      Honey Simple Syrup
    • orange lime cranberry mocktail 4
      Cranberry Mocktail Recipe
    • Clear glass with a brown drink and a cinnamon stick in it.
      Pear Cocktail Recipe
    • Grapefruit mocktail in a glass with jalapeño slice and grapefruit slice.
      Easy Grapefruit Mocktail Recipe

    Footer

    • Recipes
    • My Courses
    • Meal Prep Services
    • Accessibility Policy
    • Contact
    • About Me
    • Blog
    • Privacy Policy
    • Pinterest
    • Instagram
    • Facebook
    • Twitter

    Allianna’s Kitchen 2025 - All Rights Reserved

    Rate This Recipe

    Your vote:


    A rating is required
    A name is required
    An email is required