• Skip to primary navigation
  • Skip to main content
  • Skip to primary sidebar
  • Spring Recipes
  • Recipes
  • Order Meal Prep
  • Healthy Gut Baby Food Course
  • About

Allianna's Kitchen

menu icon
go to homepage
  • Spring Recipes
  • Recipes
  • Order Meal Prep
  • Healthy Gut Baby Food Course
  • About
    • Facebook
    • Instagram
    • Pinterest
    • Twitter
  • search icon
    Homepage link
    • Spring Recipes
    • Recipes
    • Order Meal Prep
    • Healthy Gut Baby Food Course
    • About
    • Facebook
    • Instagram
    • Pinterest
    • Twitter
  • ×
    Allianna's Kitchen » Recipes

    Blog

    whole30 meal plan week 8

    January 3, 2021 Blog

    Whole30 Week 8 Complete Meal Plan (Paleo)

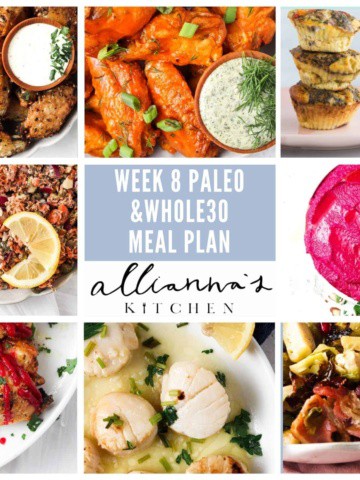
    This is the whole30’s week 8 meal plan. I have received a lot of great feedback so I am going to continue to create them. All of this weeks recipes are paleo and whole30 friendly. If they are AIP and keto friendly it will say in the description. Feel free to use previous week’s meal plans that can be found here.  If you would like to get the complete shopping list be sure to sign up for my newsletter below and I will send you your grocery list weekly. All you have to do is shop!

    whole30 meal plan photo collage

    How The Whole30 Week 8 Meal Plan Works:

    If meal prepping your food in advance is your thing I highly suggest getting meal prep containers or containers like these so your meals are ready to eat.

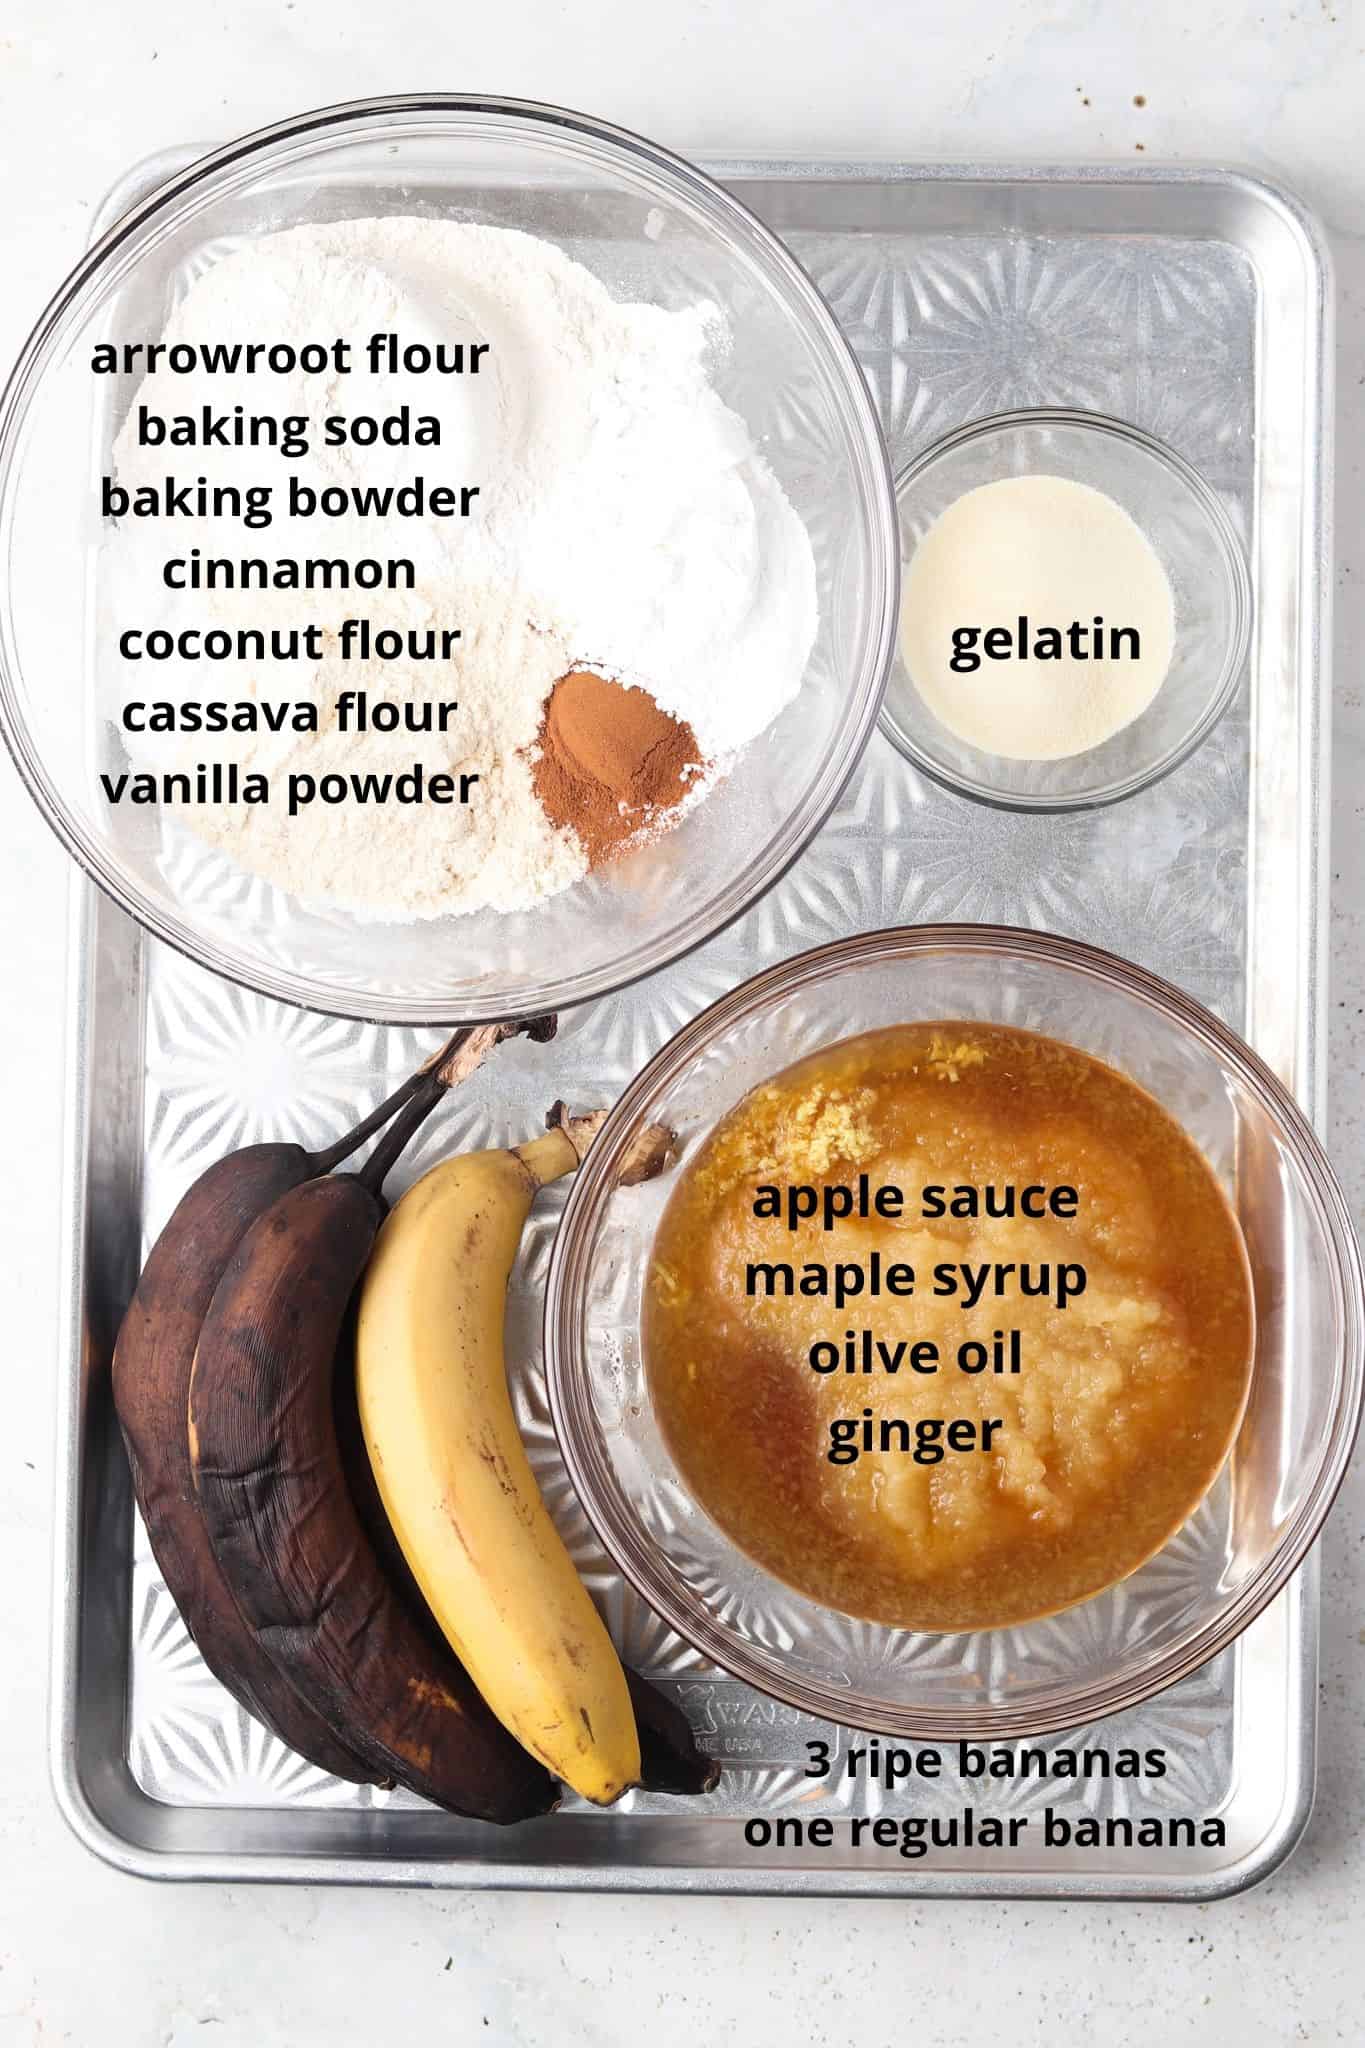
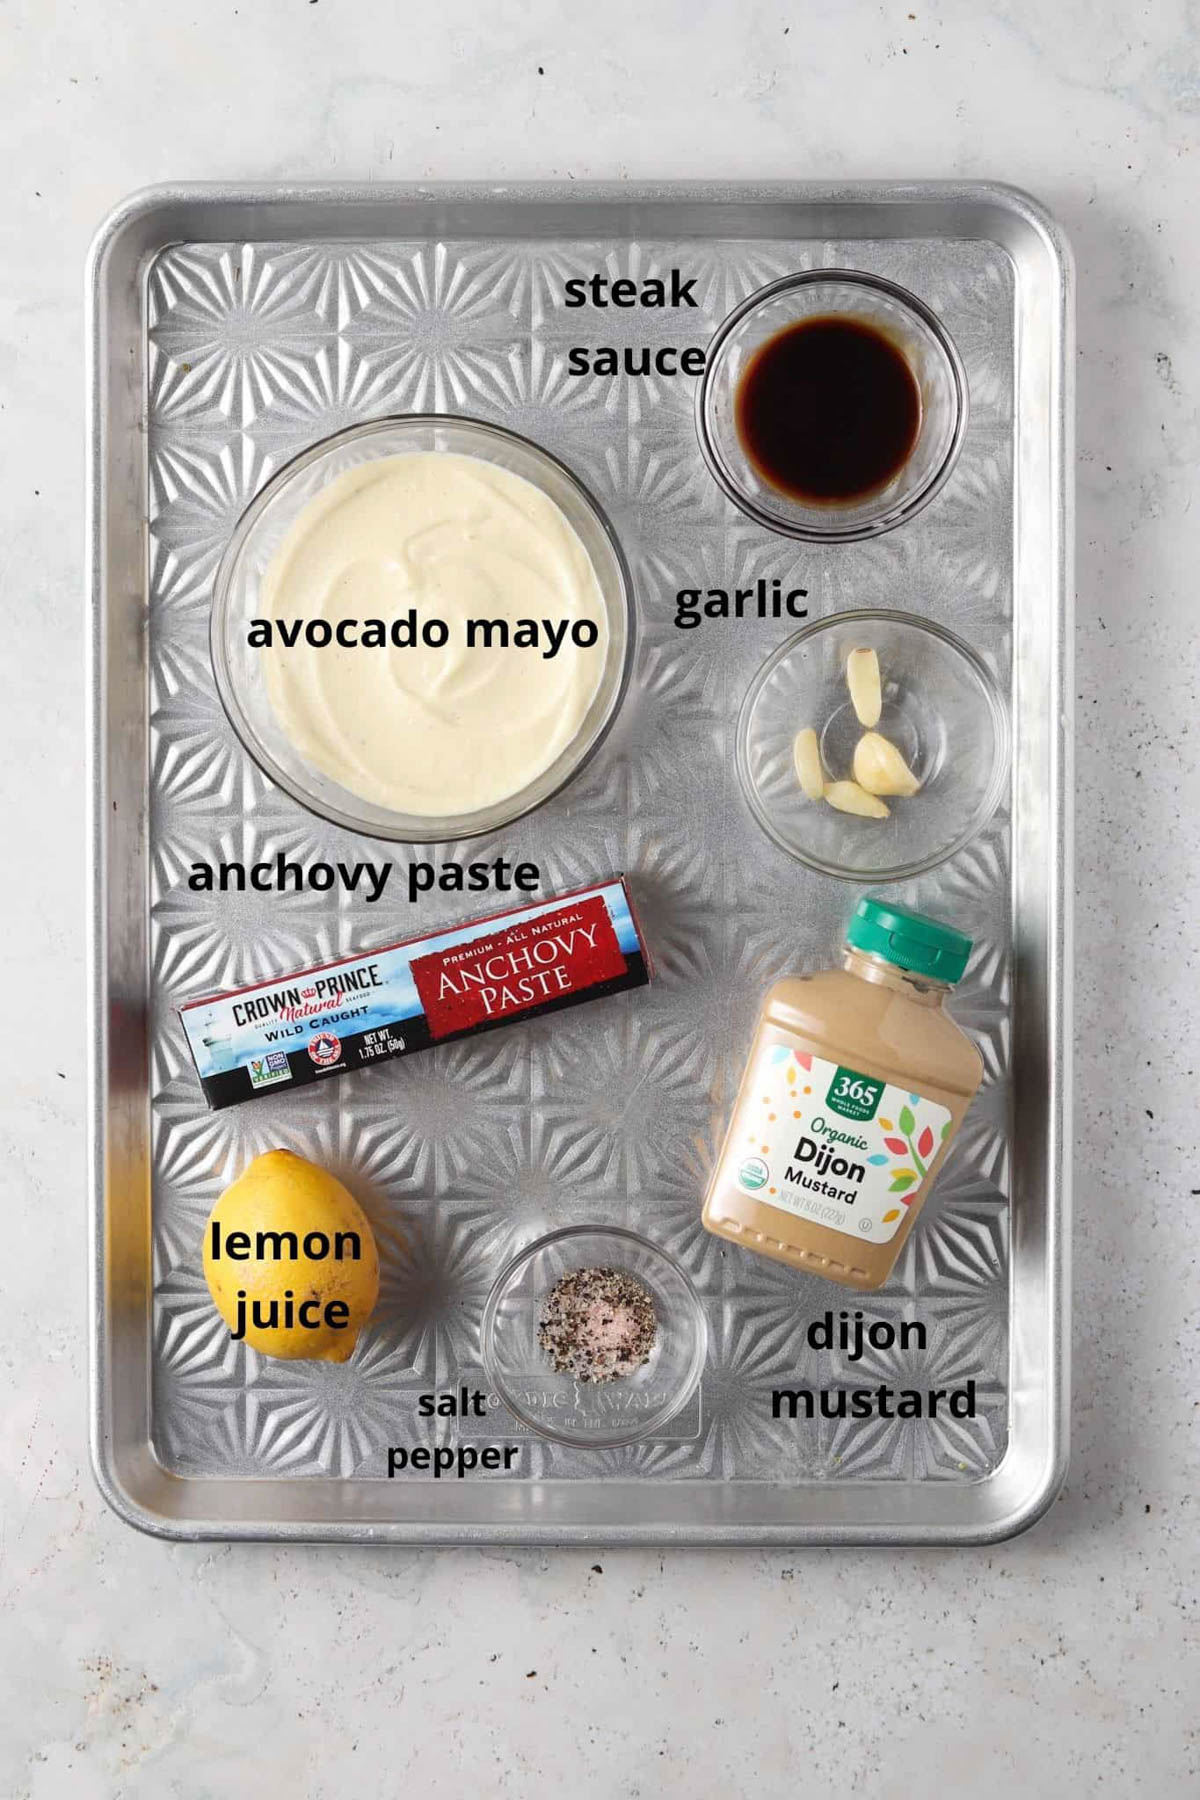
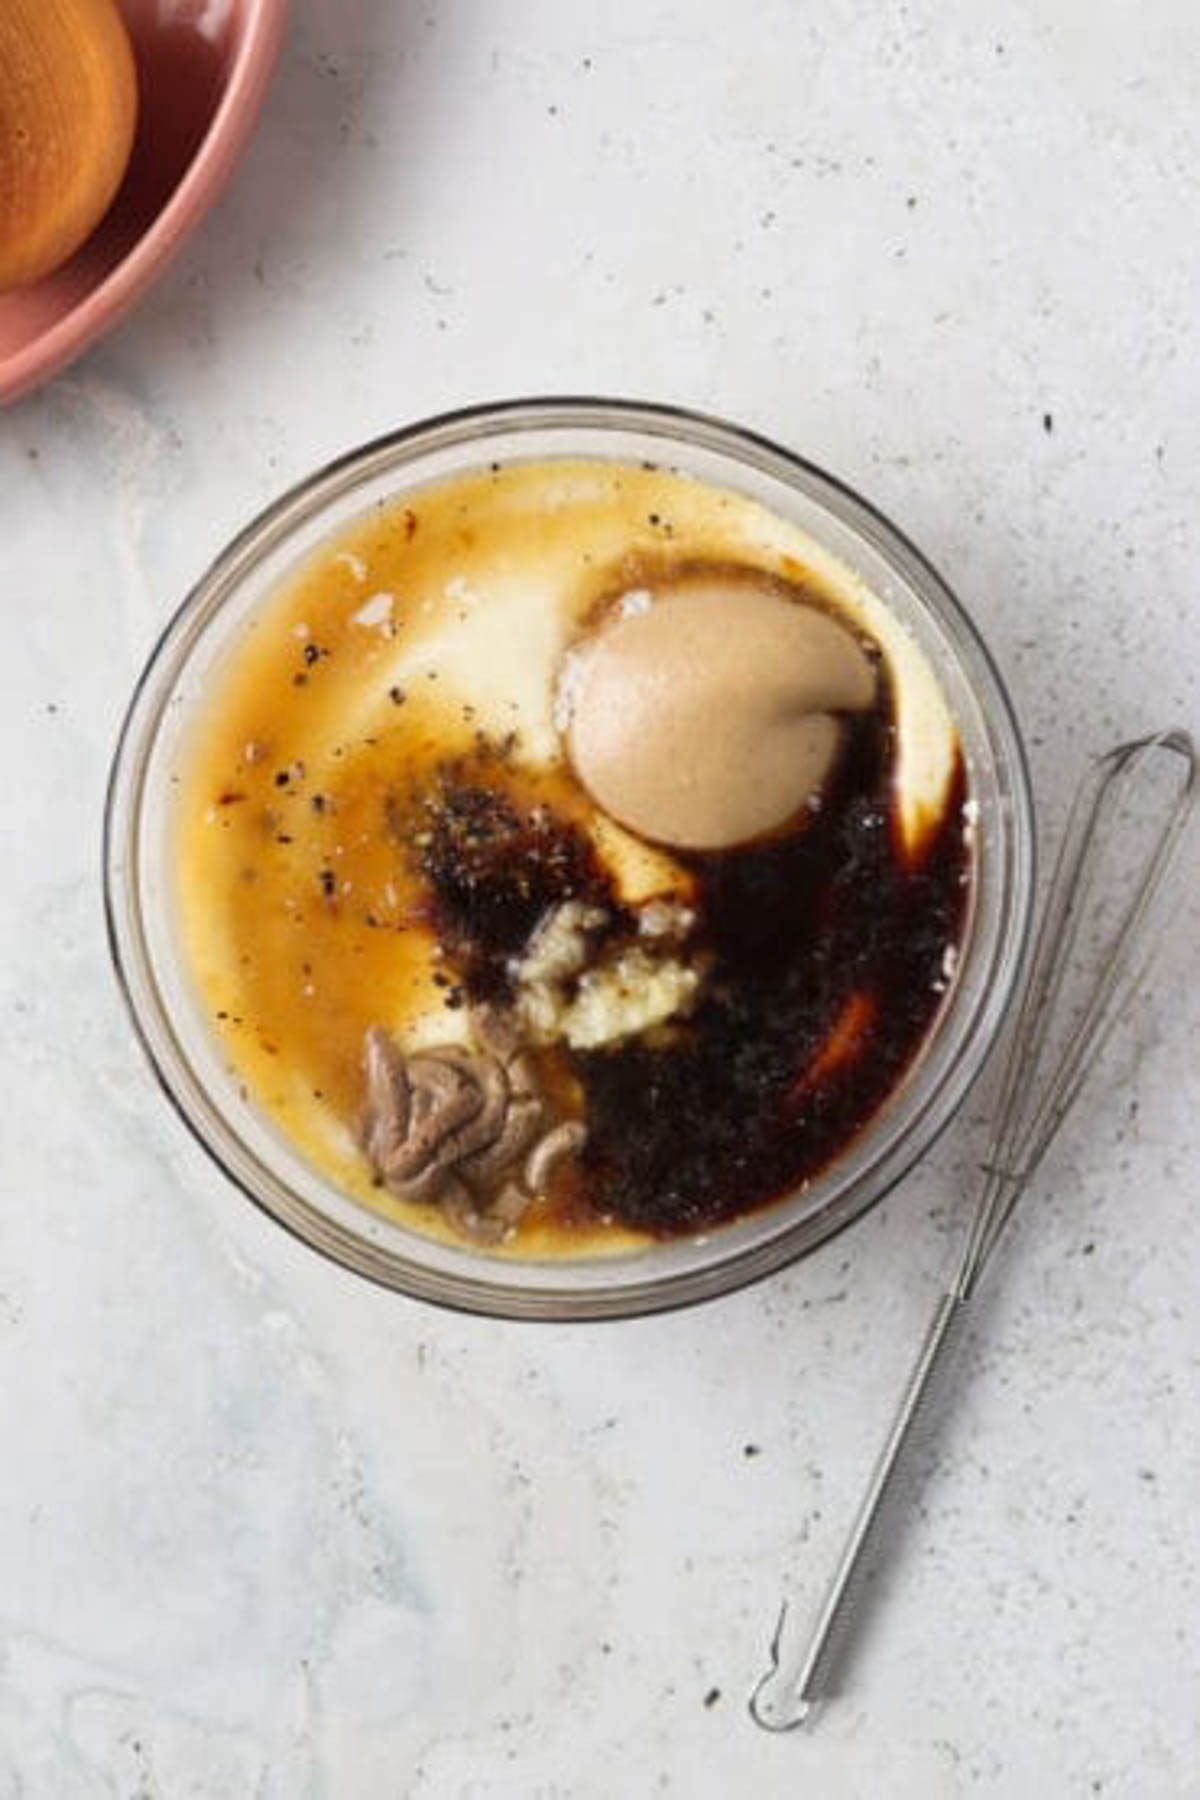
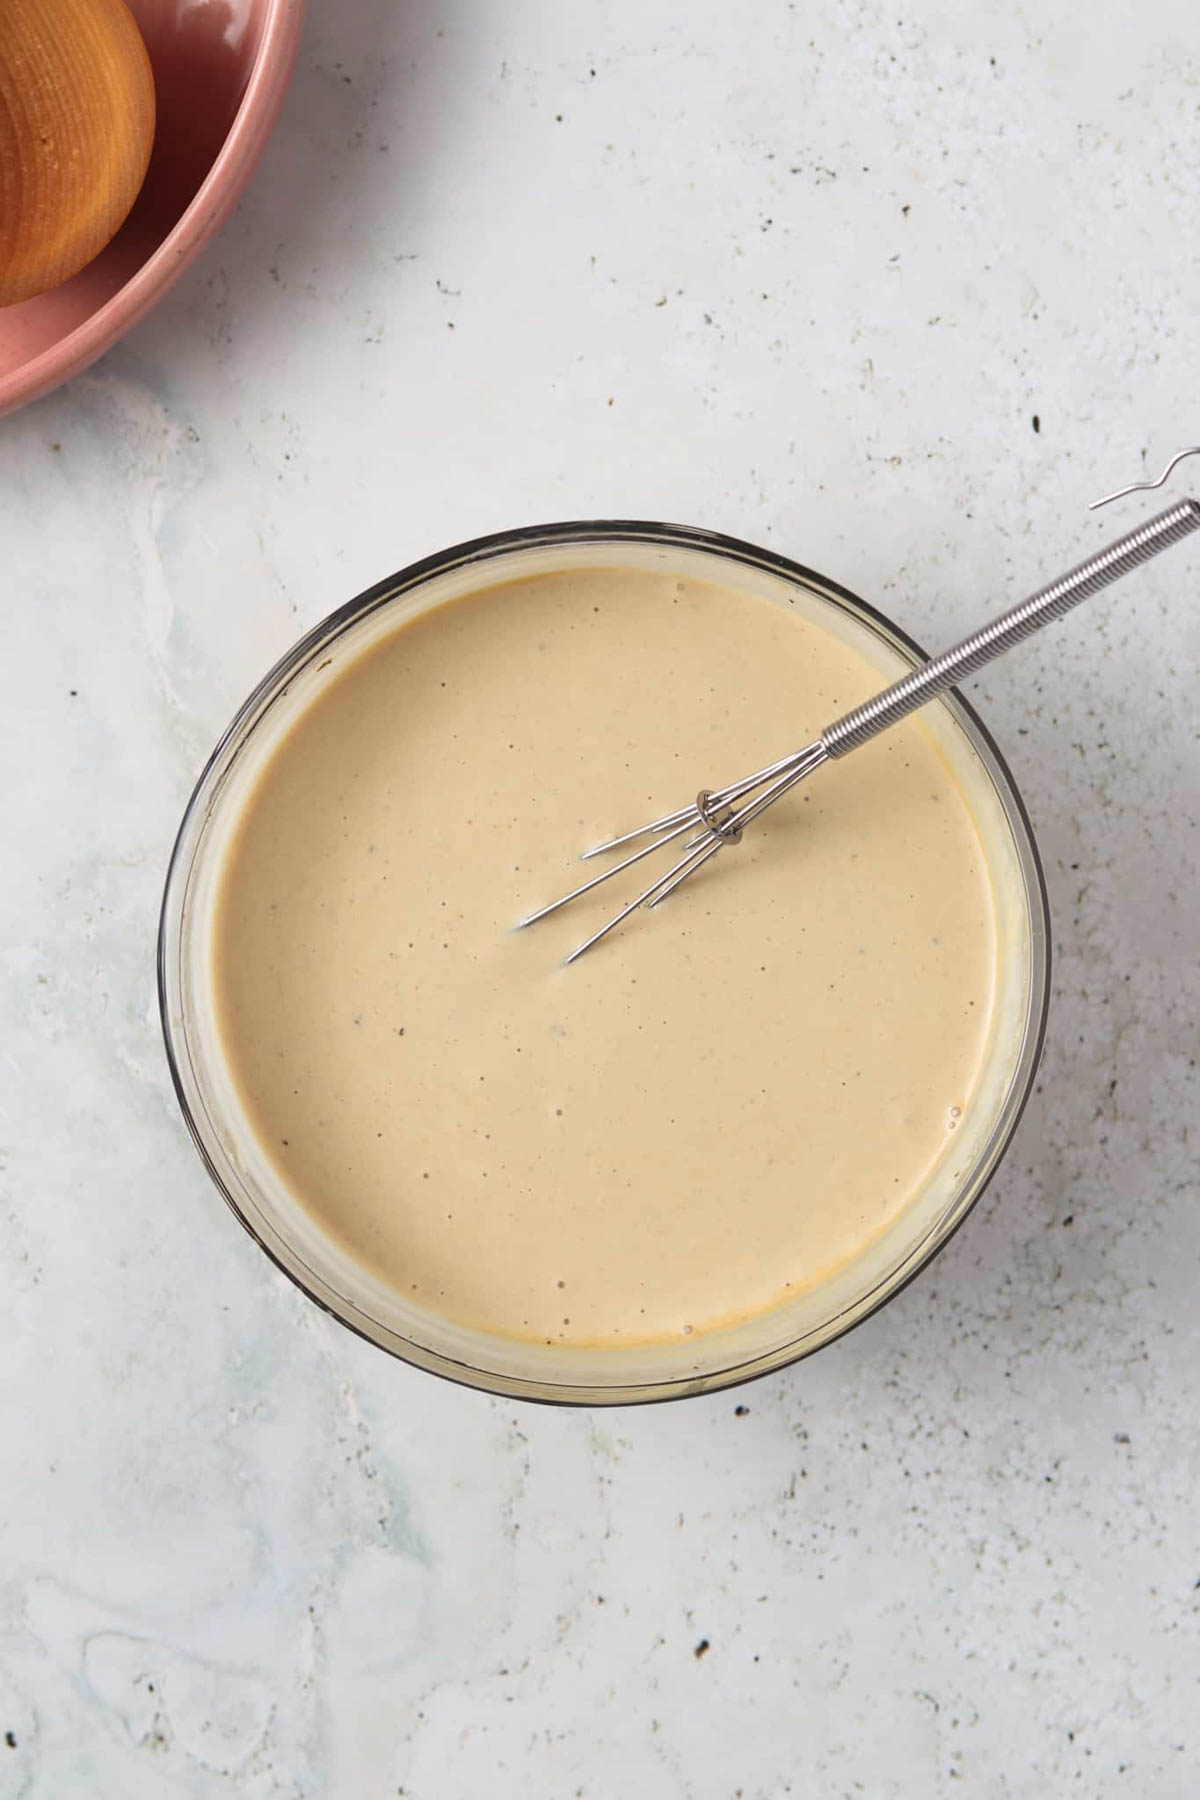
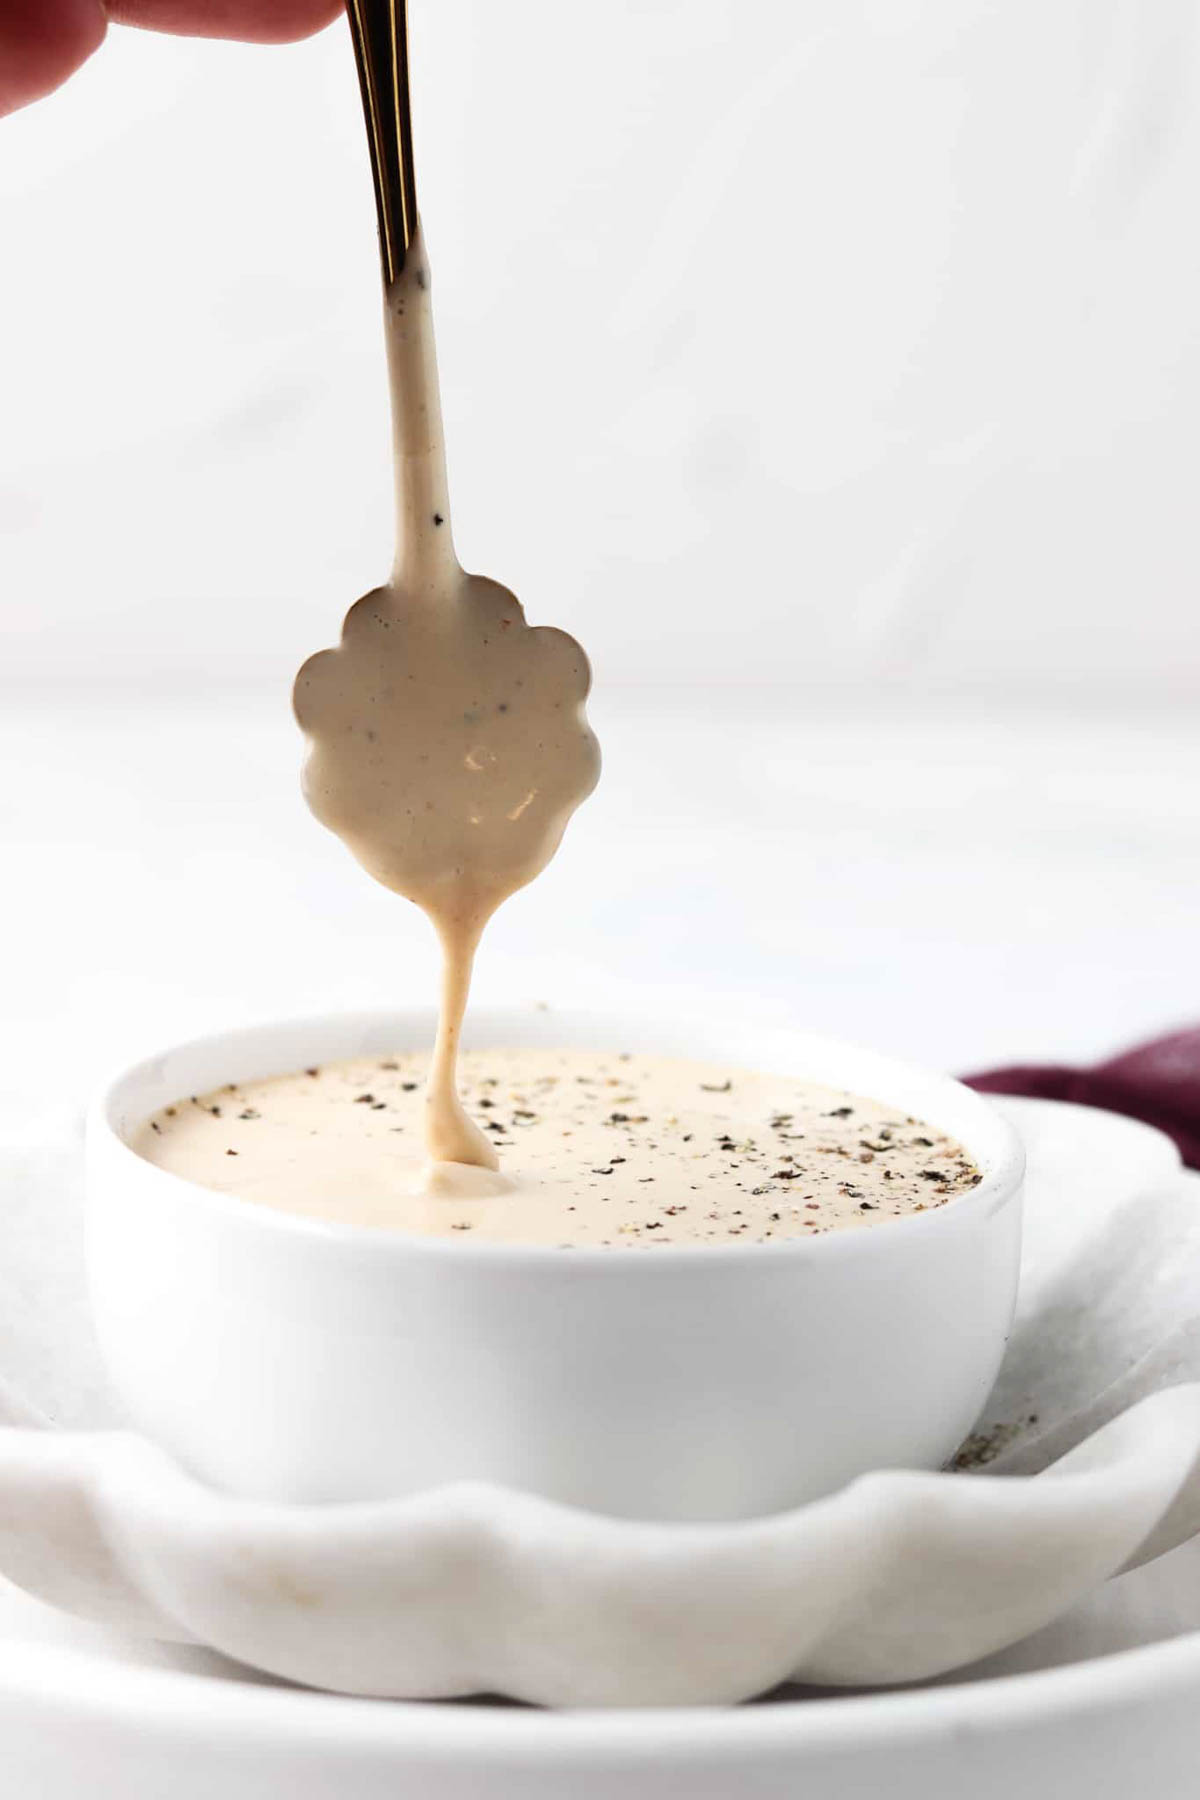
    Included in this post are 7 meals, 1 snack and 1 breakfast. When making the meals for dinner I suggest making an extra portion so you can eat it for lunch. Keep in mind these are an inspiration, so feel free to swap things out. Each recipe contains the meal only, feel free to add a side. We love roasting veggies to go with our meals. If you would like the full complete shopping list that goes with my meal plan, be sure to subscribe to my email list. If you have questions or need assistance please comment below. If you make one of my recipes I would so grateful if  you left a comment and a star rating review on the recipe in my blog or took a picture and tagged me in it on instagram @alliannaskitchen

    I hope this is helpful as you begin to plan out your week. -Allianna

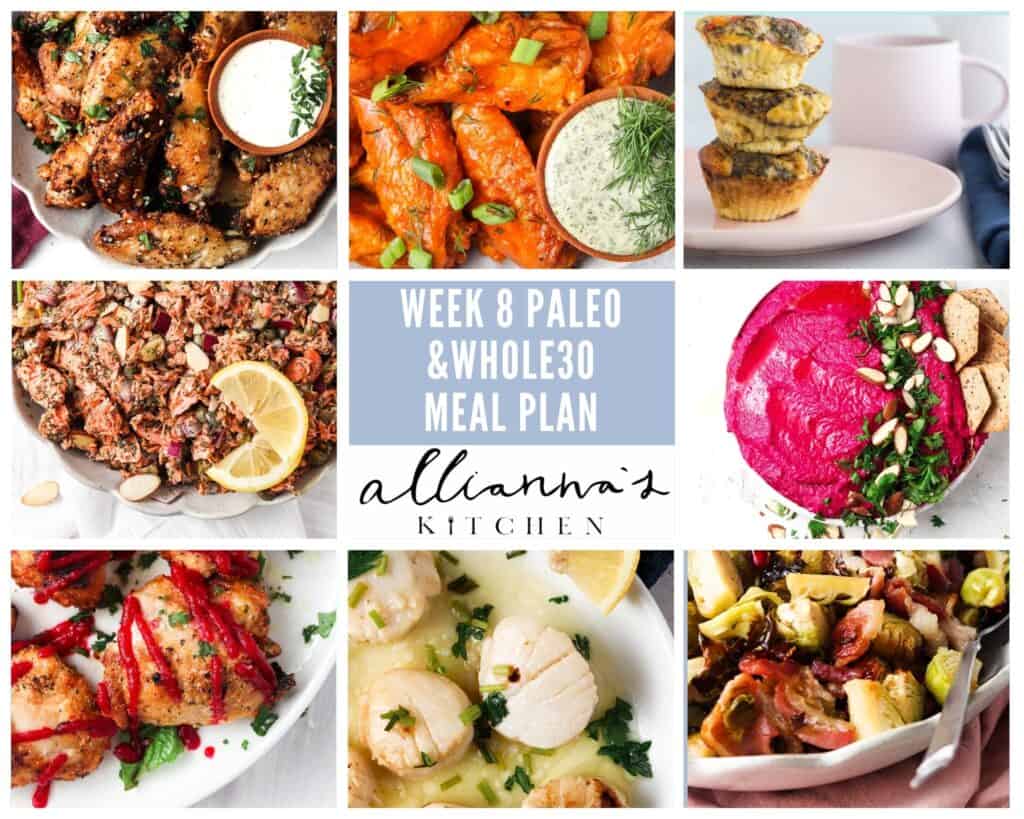
    Whole30 Week 8 Meal Plan Menu Options:

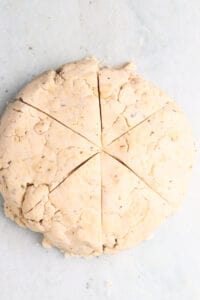
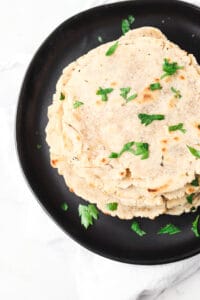
    • Breakfast-Egg Bacon Sausage Muffins
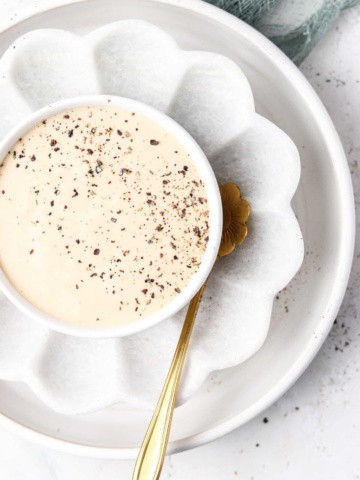
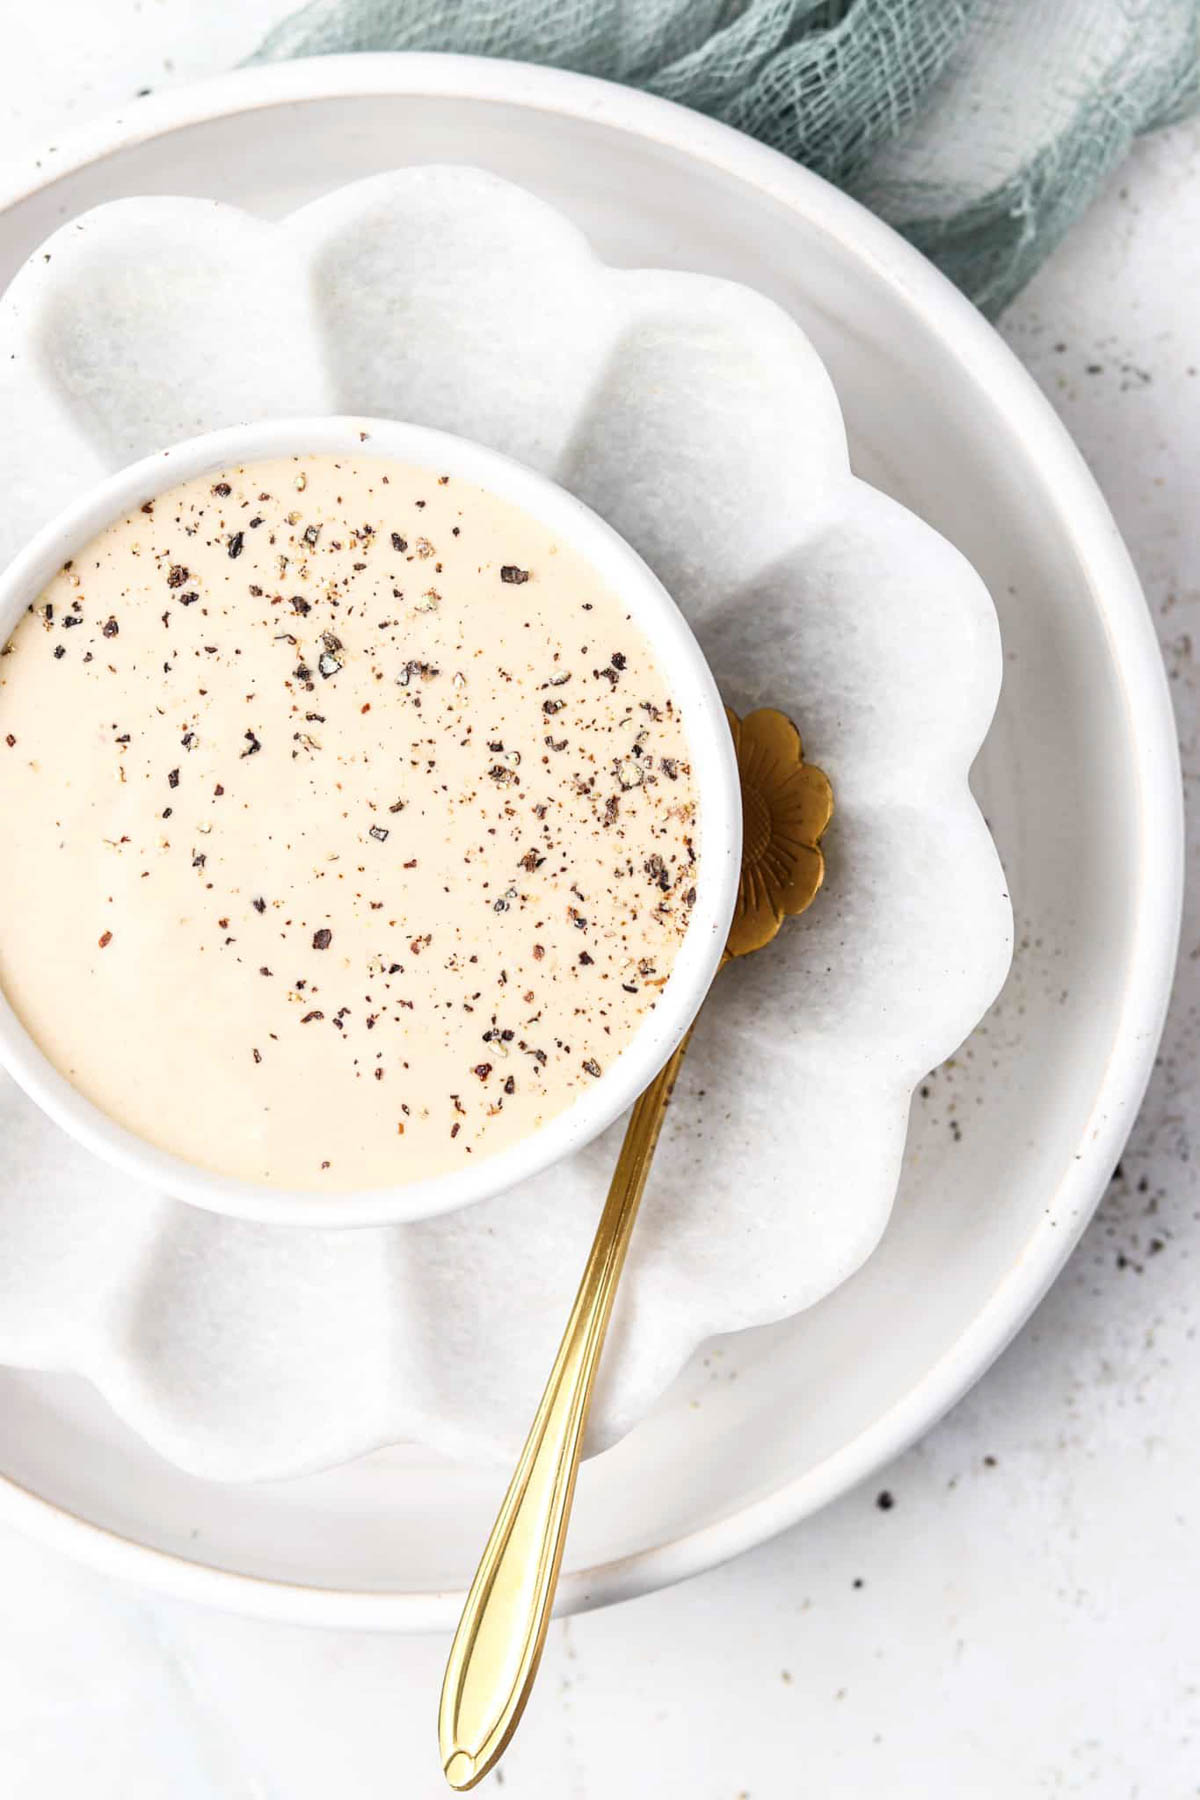
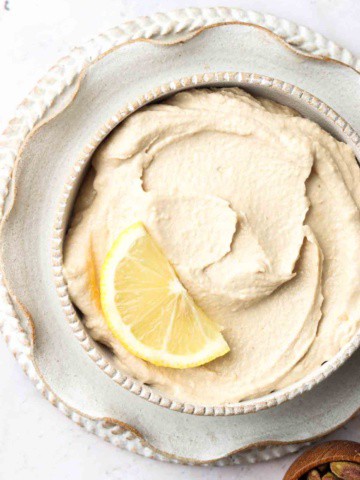
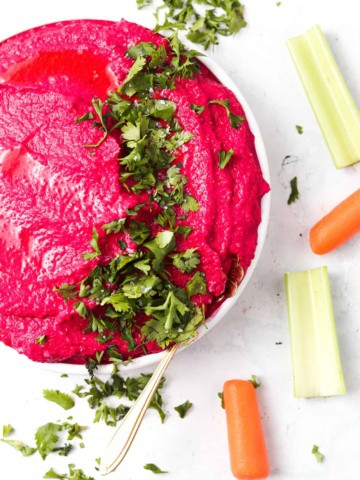
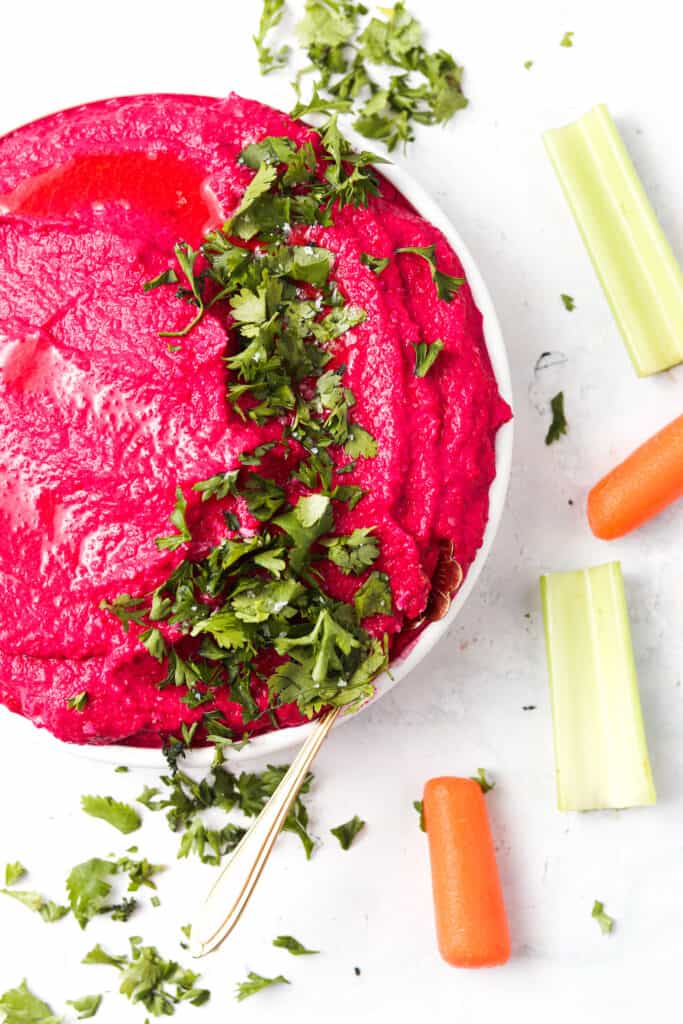
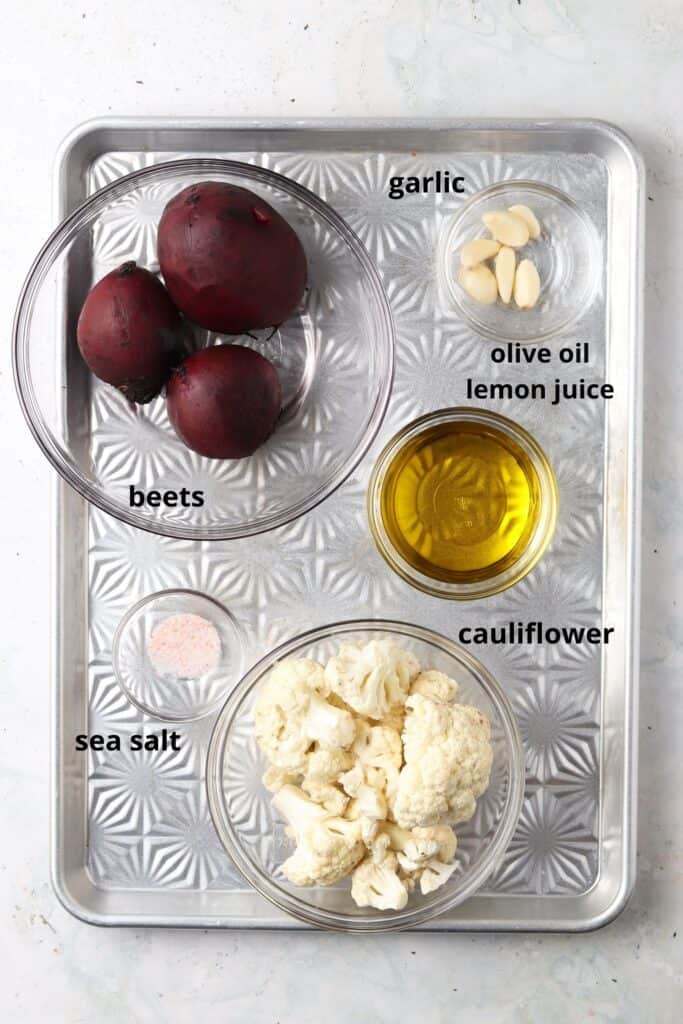
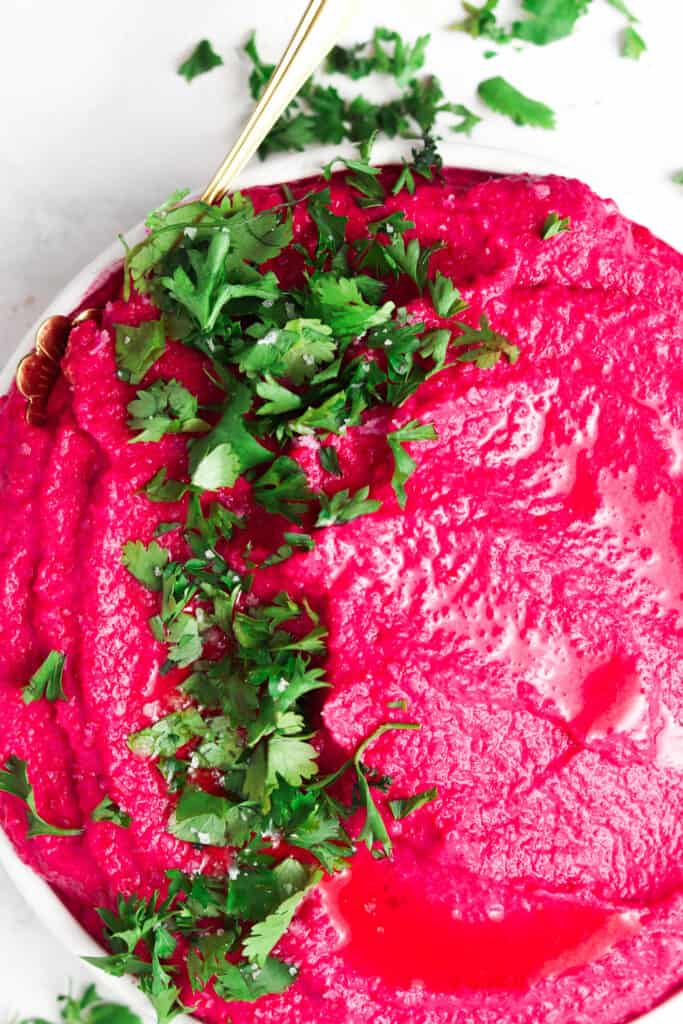
    • Snacks-Beet & Cauliflower Hummus
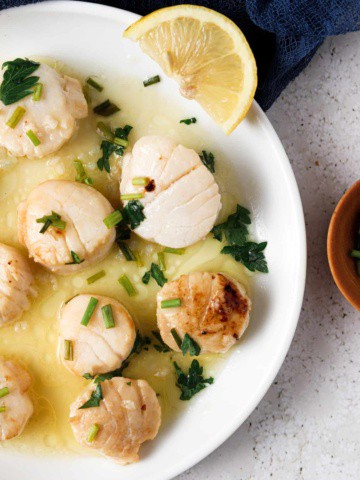
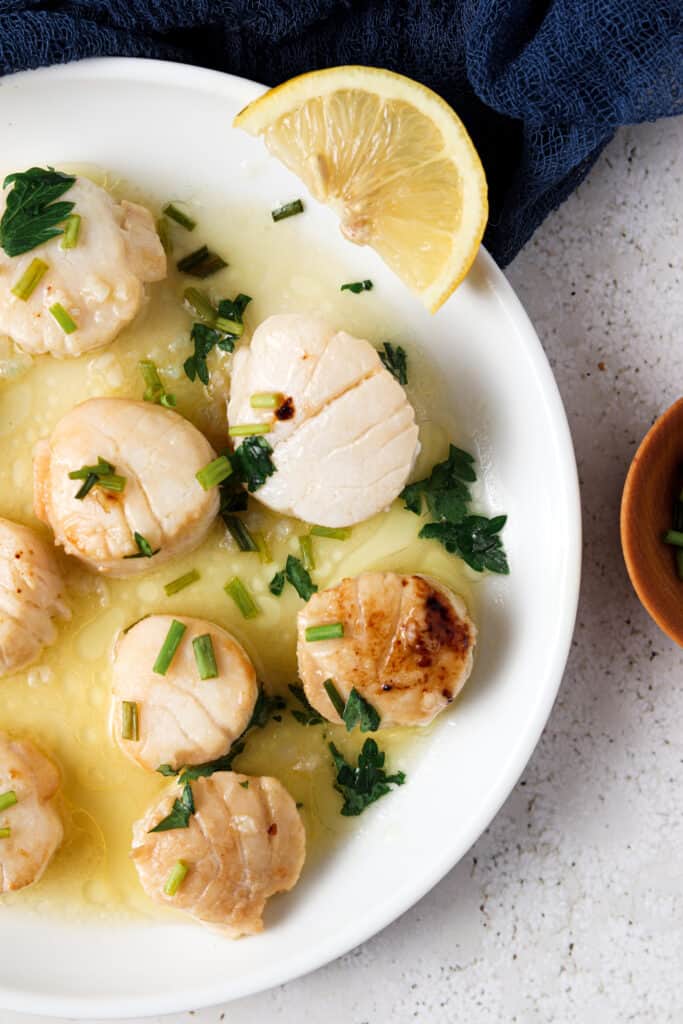
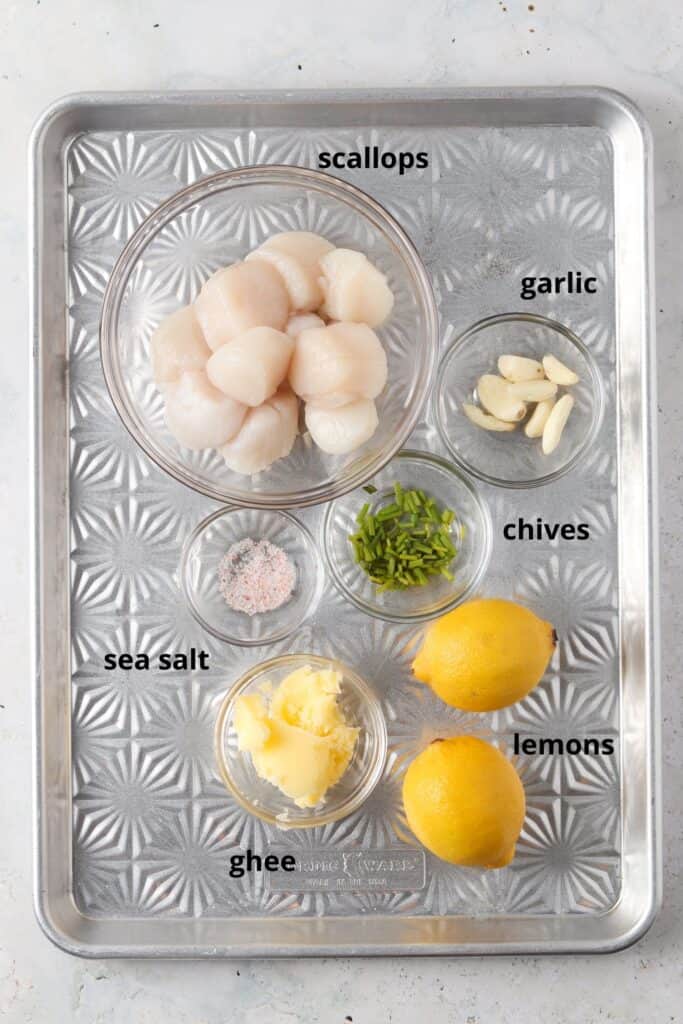
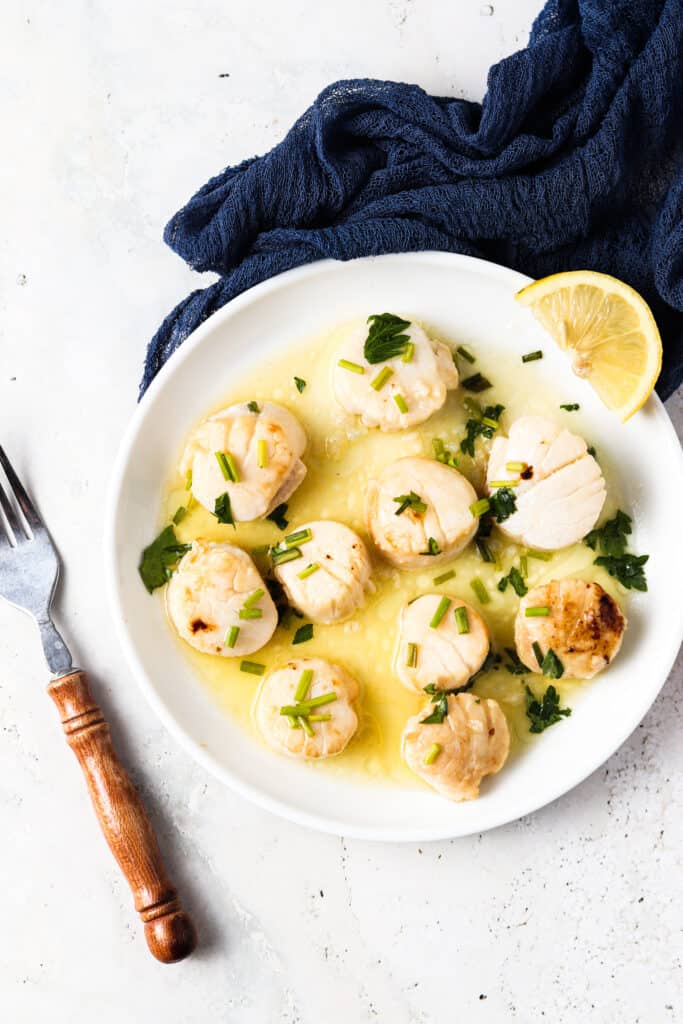
    • Monday-Lemon Garlic Chive Scallops
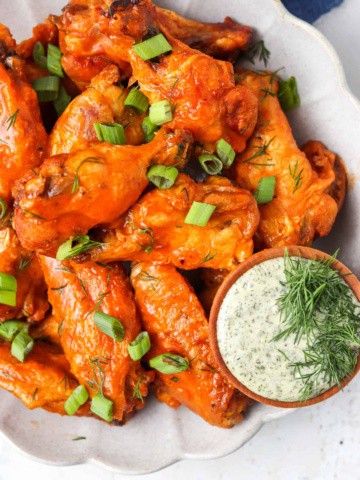
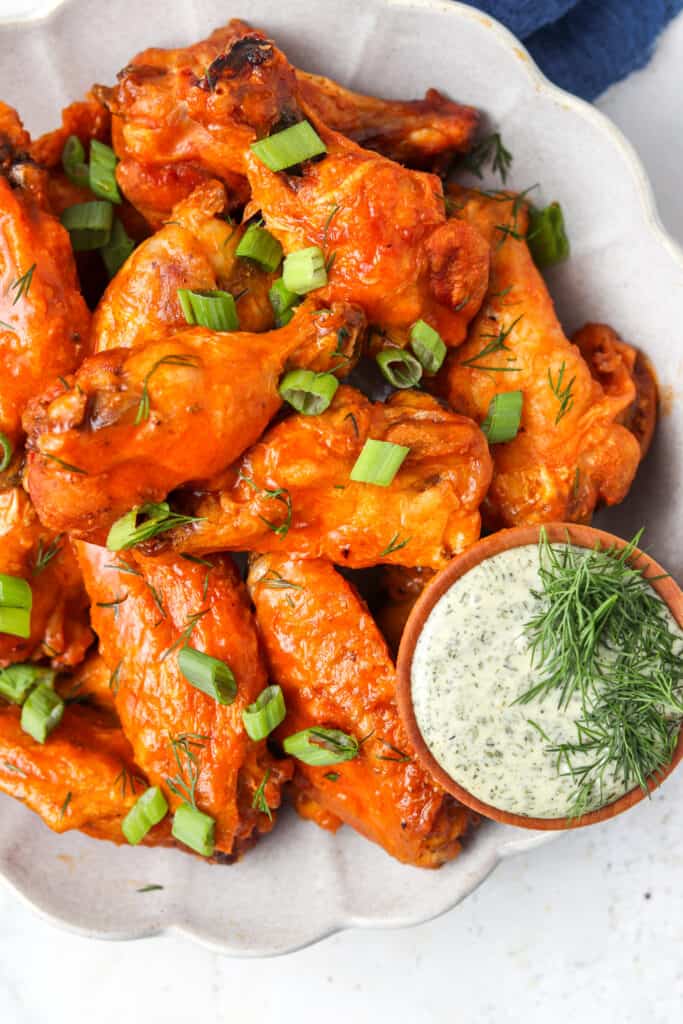
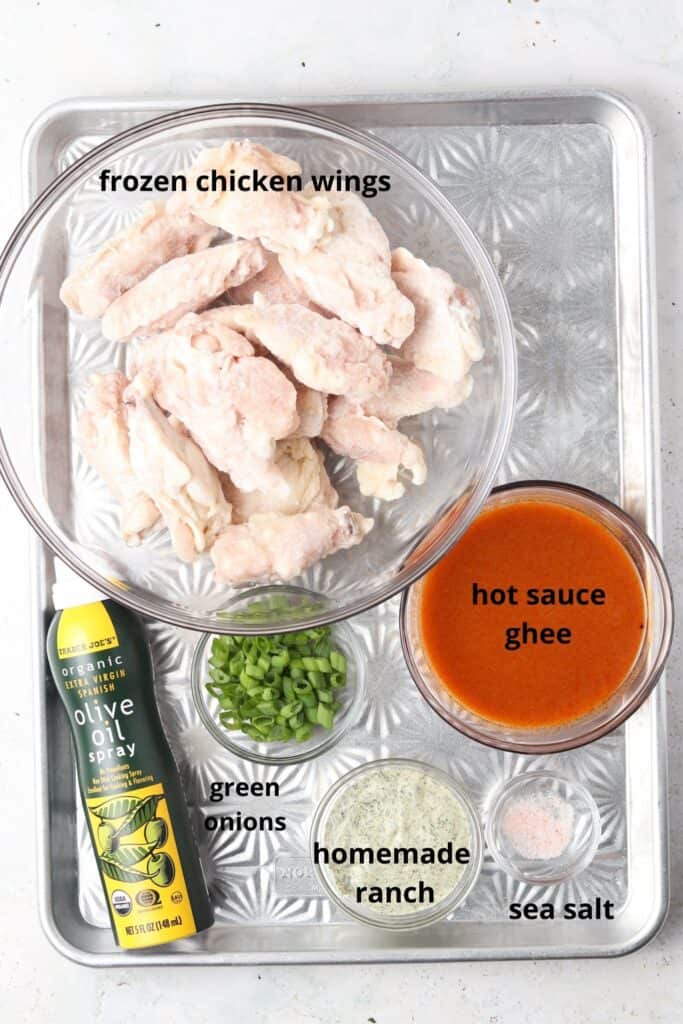
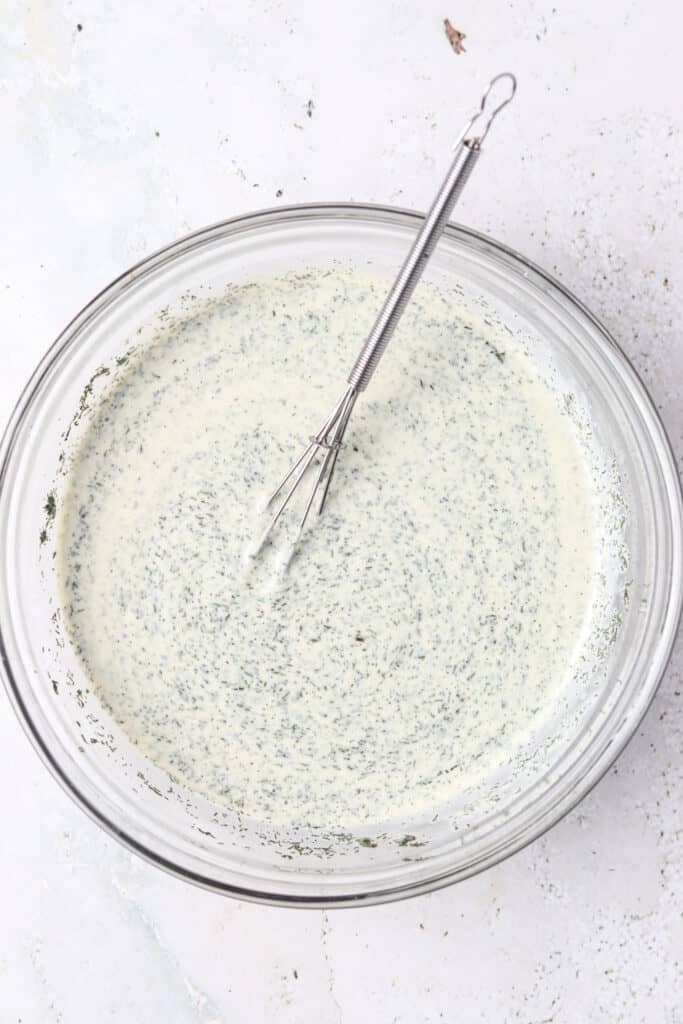
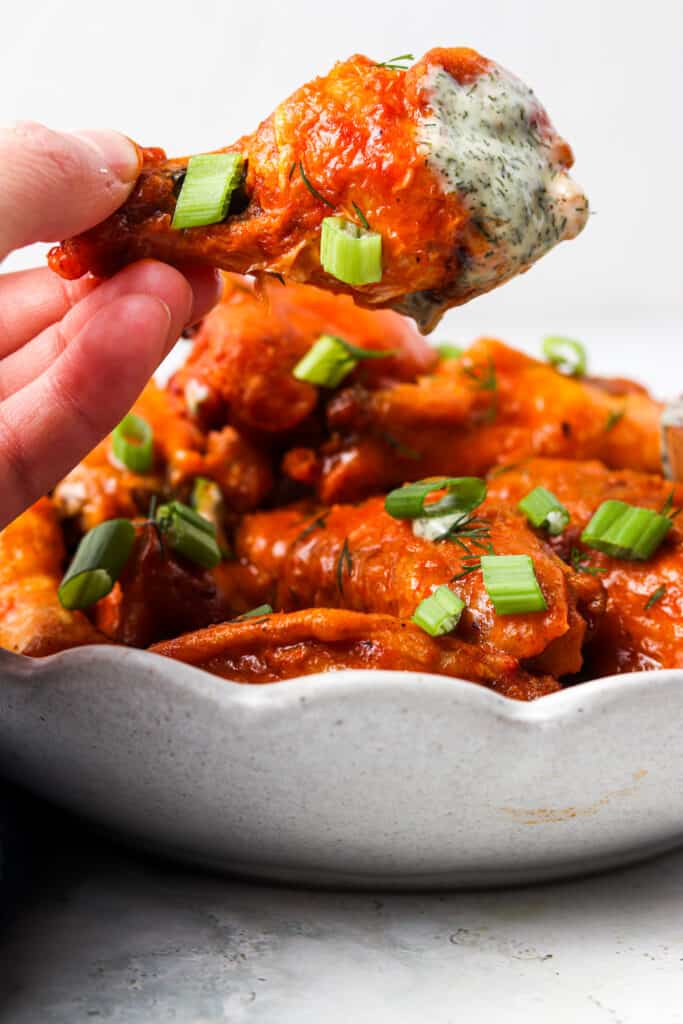
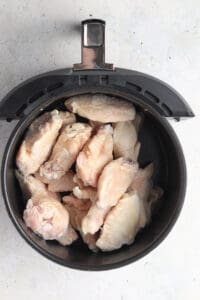
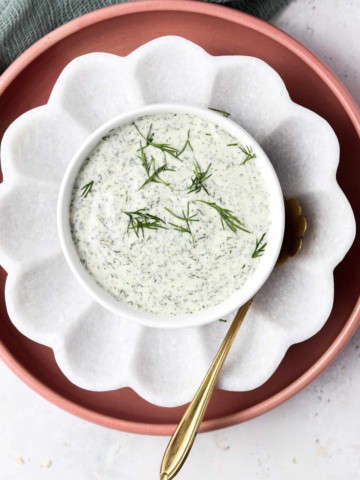
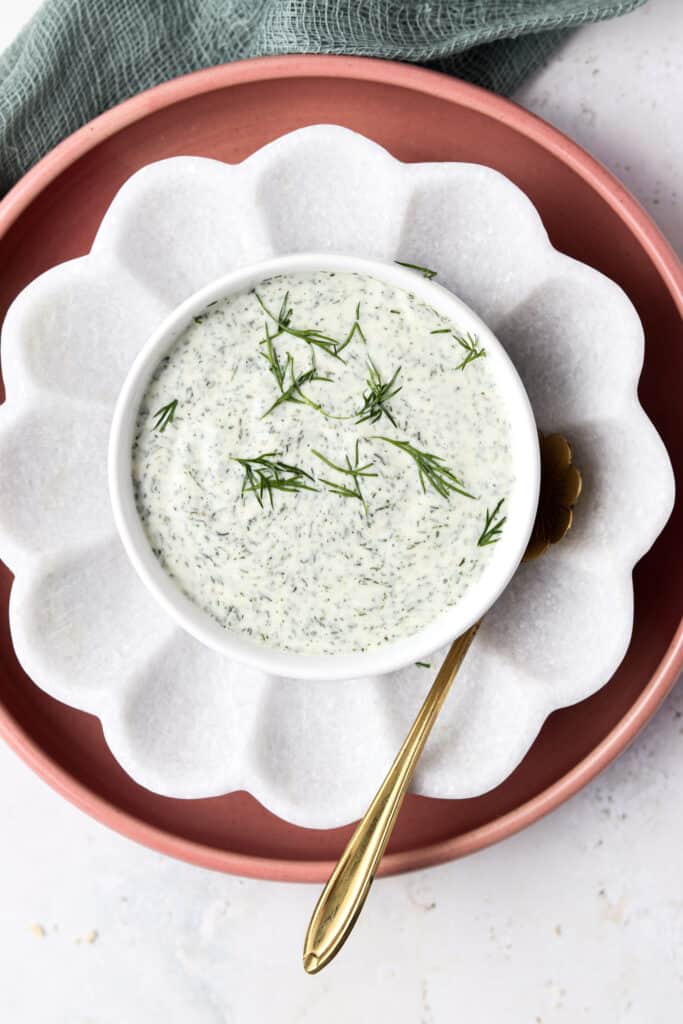
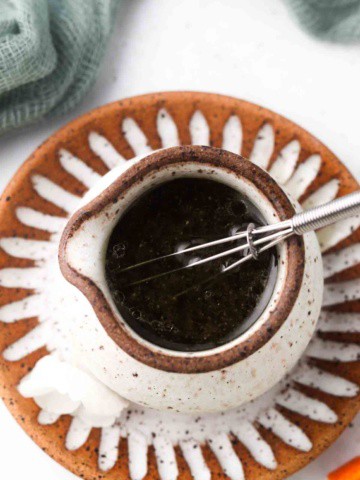
    • Tuesday-Buffalo Chicken Wings
    • Wednesday-Thai Creamy Chicken Soup
    • Thursday-Crispy Garlic Breaded Chicken Thighs
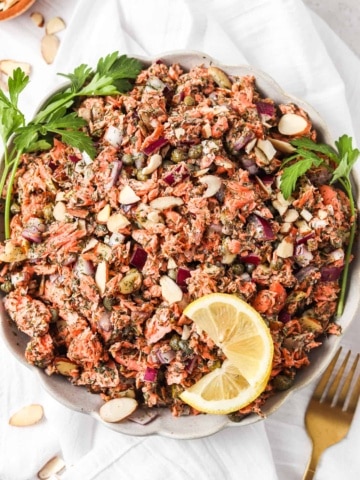
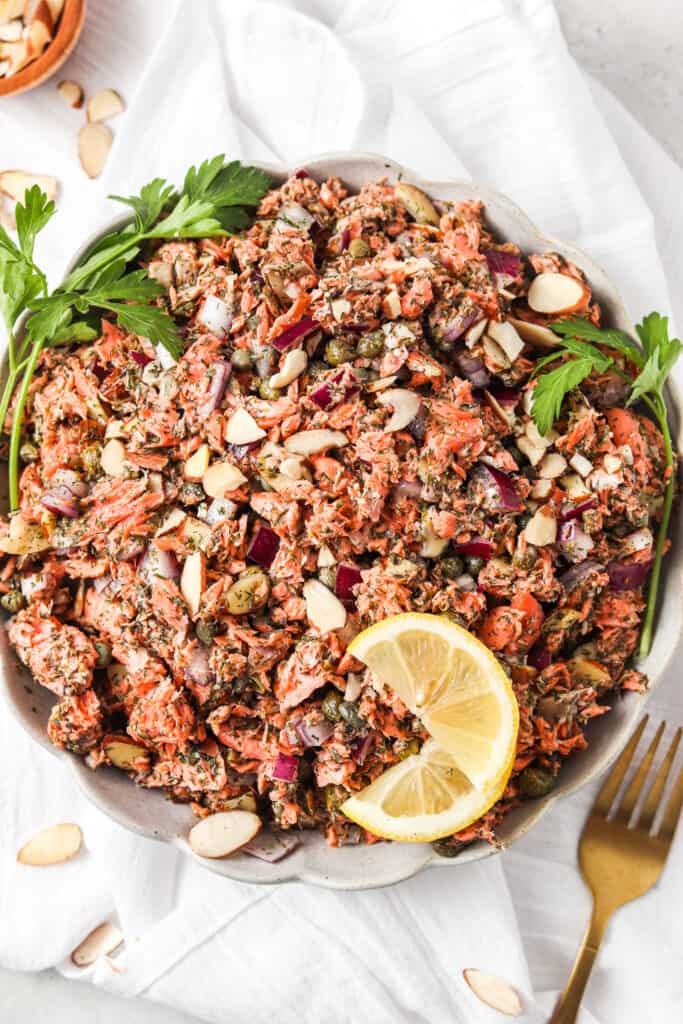
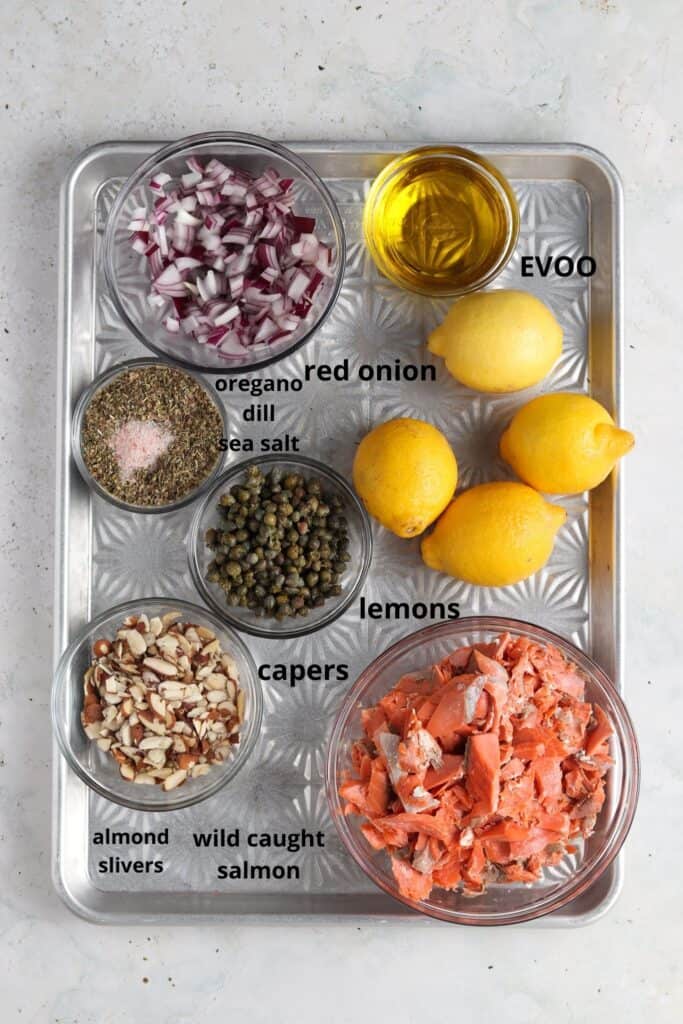
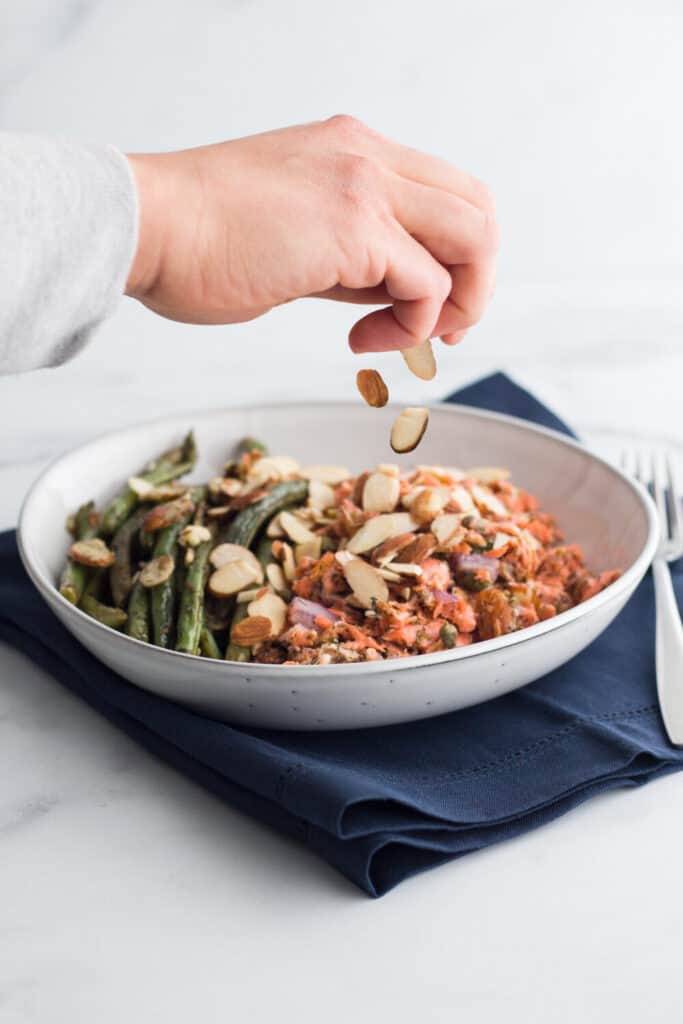
    • Friday-Shredded Lemon Dill Salmon Salad
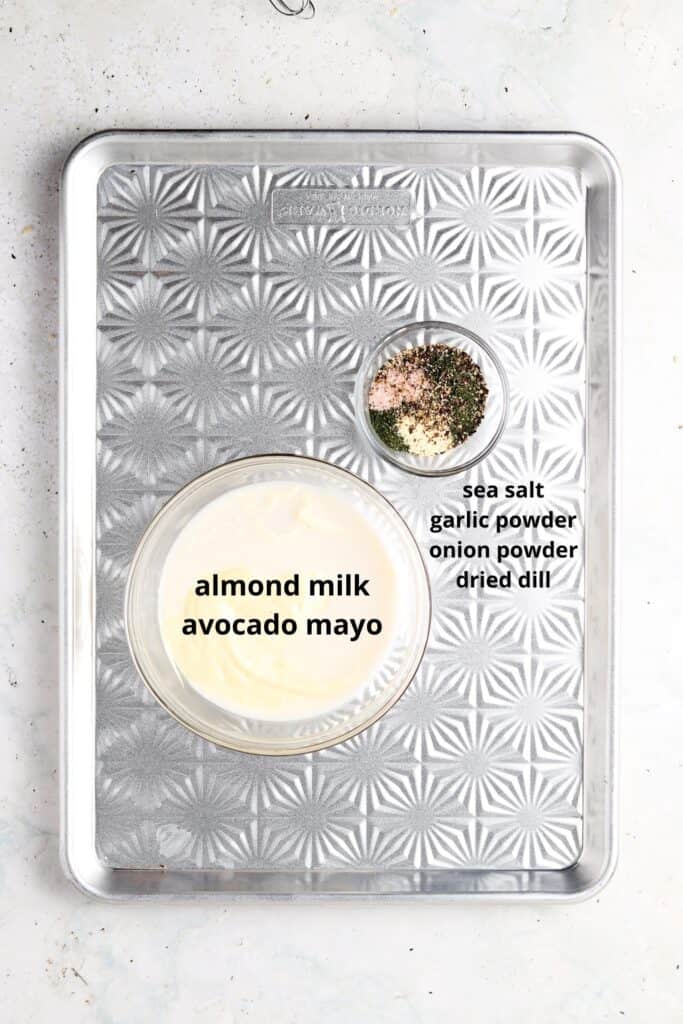
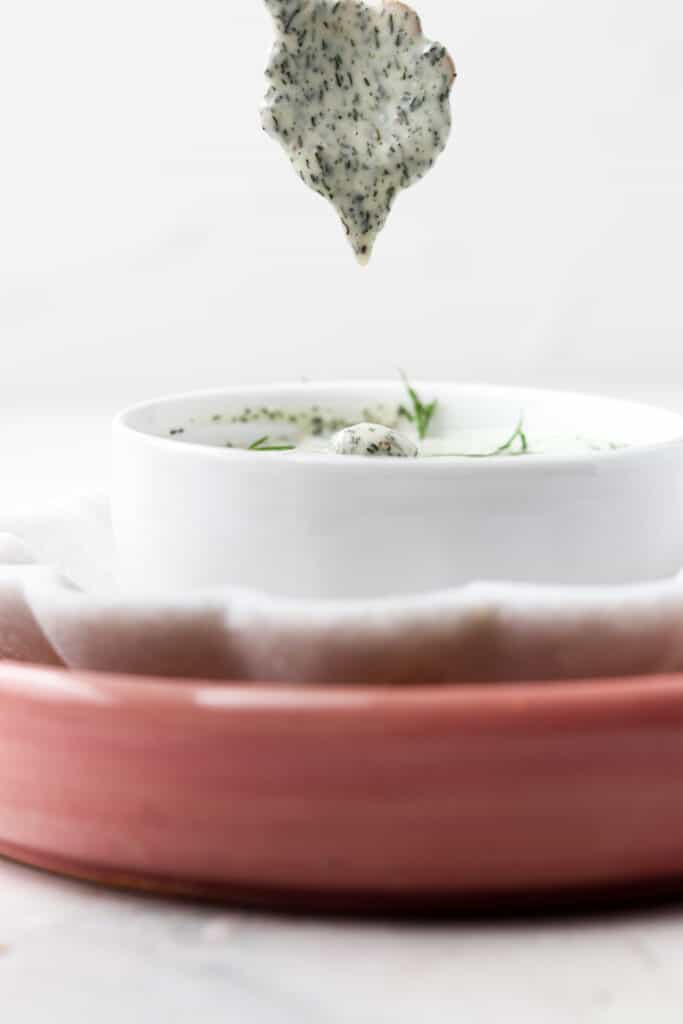
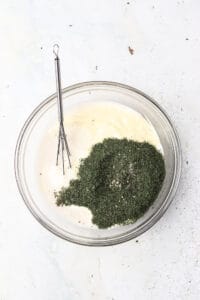
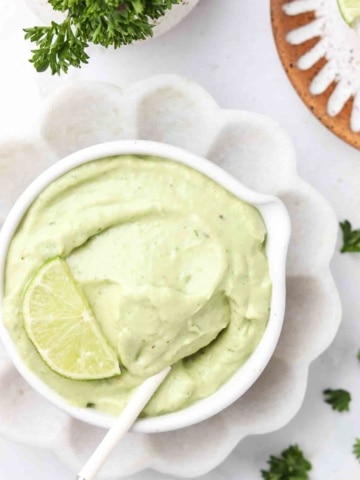
    • Saturday-Everything Bagel Seasoned Wings w/ Garlic Aioli
    • Sunday-Chicken Piccata

    January 3, 2021 Autoimmune Protocol

    AIP Banana Bread

    This AIP Banana Bread is both paleo and allergen friendly. Crispy on the outside and smooth and soft on the inside. This banana bread recipe is perfect for breakfast or an after school snack. This is a great recipe to use up your overripe bananas so they don’t go to waste!

    AIP Banana Bread on white wax paper on a wood cutting board with a green cloth.

    Drizzling a little bit of honey overtop makes it even more beautiful and delicious!

    [feast_advanced_jump_to]

    Why You Will Love This Recipe

    • This recipe is paleo, allergen friendly, gluten free, dairy free, and soy free.
    • Kids will love this recipe!
    • This recipe has very little prep to it.
    • A great way to use up over ripe or frozen bananas so they don’t go to waste.
    • This is a great meal prep item so that you have an easy after school snack for the week.
    • Bananas are always in season at your local grocery store or market.

    Ingredients

    AIP Banana Bread ingredients in small glass bowls on a silver tray.
    • Arrowroot, coconut, and cassava flour-Do not substitute out this flour blend! Not all gluten free flours are created equally.
    • Applesauce-The applesauce in combination with the gelatin egg is what replaces the egg in this recipe.
    • Maple syrup-Maple syrup is my go to sweetener in this recipe, you can use honey if you would like but the flavor will not be as dense. 
    • Ripe bananas-Make sure your bananas are ripe! I like to make sure the bananas are black on the outside and nice and soft. 
    • Regular banana-The regular banana (not over-ripe) is to be used for the garnish.
    • Ginger-The fresh ginger gives this banana bread some spice. 
    • Olive oil-I love using olive oil in baking rather than any other oil. You may substitute this recipe with coconut oil if desired. 
    • Cinnamon-This adds an additional layer of zest to the recipe when paired with the fresh ginger.
    • Vanilla powder-Vanilla powder is used in place of vanilla extract in AIP cooking. There is no alcohol in it. When choosing a brand, make sure the powder is brown and isn’t mixed with anything. It should not be white, if it is, that means it is mixed with sugar. 
    • Gelatin-Gelatin is used in many AIP recipes as an egg alternative. 
    • Baking soda & powder-These two ingredients are responsible for helping this bread rise.

    See the recipe card below for a full list ingredients and measurements.

    Substitutions and Variations

    • A fun variation would be to add dairy free chocolate chips to this recipe for an added fun treat.
    • You could shred and add zucchini to the recipe to add vegetables for your kids. You will just need to add additional cassava flour to compensate for the added moisture.

    This recipe has not been tested with any other substitutions or variations. If you try something else out please let me know how it turns out in the comments below!

    Step By Step Instructions

    Bananas, cassava flour, arrowroot flour, coconut flour, applesauce, maple syrup, ground ginger, cinnamon, vanilla powder, baking soda, baking powder, and extra virgin olive oil in a silver mixing bowl with a pink spatula in it.
    First, preheat the oven to 350 degrees F. Place all dry ingredients in a bowl, whisk, and set aside. In a separate bowl, mix all wet ingredients. Slowly combine the two bowls.
    Gelatin egg mixture in a glass mixing bowl with a small whisk in it.
    In the meantime, whisk up your gelatin egg. Slowly add the hot water to the gelatin and whisk together. Be sure to move fast or the egg alternative will stick and you will have to start over. Add the egg to the mixture and whisk together.
    Banana bread mixture in a loaf pan lined with wax paper and topped with halved banana.
    Line the bread pan with wax paper on both side. Spray the wax paper with the cooking oil spray. Gently pour in the batter. Cut the remaining banana in half long ways and lay on top to garnish. Cook the banana bread in the oven for 1 hour and 30 minutes.

    Equipment

    • Bread Pan
    • Whisk
    • Mixing Bowl
    • Measuring Cups
    • Measuring Spoons
    • Mini Whisk

    Expert Tips

    • Tip # 1: Do not be alarmed if the bread still looks soft on the inside when you cut into it. It is supposed to be super moist.
    • Tip # 2: The ripeness of the bananas will determine how sweet the bread is.
    • Tip # 3: Save all of your over ripe bananas in a container in the freezer, and pull them out as needed to make this recipe.
    AIP Banana Bread cut and stacked on a white plate with a honey comb as garnish.

    Recipe FAQ

    What Can I Top This Recipe With?

    You can eat this recipe plain, drizzle with honey, or spread with your favorite jam.

    What Can I Serve With This Dish?

    This dish can be eaten on its own as a snack or can be paired with my Winter Fruit Salad.

    Can I Make This Recipe As Muffins Instead of a Bread Loaf?

    Yes! If you make this recipe in a muffin tin instead, just adjust the cooking time so that they do not over bake.

    AIP Banana Bread on white wax paper on a wood cutting board with a green cloth.

    Storage Instructions

    • This recipe can be stored in the refrigerator in an air tight container for up to 5 days.

    Are you interested in a list of my go to healthy alternatives?

    Download your FREE guide below

    download here

    Other Bread Recipes You Will Love

    • stacked gluten free pumpkin bread on a cutting board
      Gluten Free Pumpkin Bread
    • stacked up zucchini bread
      Gluten Free Zucchini Bread
    • steacked banana bread
      Whole30 Chocolate Banana Bread (Paleo)
    • close up photo of biscuits stacked on top of each other
      The Best Gluten Free Biscuits


    AIP Banana Bread (Paleo, AIP, Allergy Friendly)

    Course Appetizer, Bread, Dessert, Snack
    Cuisine American
    Prep Time 10 minutes minutes
    Cook Time 1 hour hour 30 minutes minutes
    Total Time 1 hour hour 40 minutes minutes
    Servings 8 slices
    Author Allianna Moximchalk
    289kcal
    Cost $5
    Print Recipe Pin Recipe

    Equipment

    • Bread pan
    • Bowl
    • whisk
    • measuring cups
    • measuring spoons
    • Mini whisk or fork

    Ingredients

    • 4 whole bananas 3 really ripe, 1 just ripe to garnish
    • 1 cup cassava flour
    • 1/2 cup arrowroot flour
    • 1/2 cup coconut flour
    • 1 cup applesauce
    • 1/3 cup maple syrup
    • 1/2 tsp ground ginger
    • 1 tsp cinnamon
    • 1/4 tsp vanilla powder
    • 2 tsp baking soda
    • 1/2 tsp baking powder
    • 1/2 cup extra virgin olive oil

    For the gelatin egg:

    • 2 tbsp gelatin I like this brand
    • 1/3 cup hot water

    Instructions

    • Preheat the oven to 350 degrees F. Place all dry ingredients in a bowl and whisk, set aside. In a separate bowl, mix all wet ingredients. Slowly combine the two bowls.
    • In the meantime, whisk up your gelatin egg. Slowly add the hot water to the gelatin and whisk together. Be sure to move fast or the egg alternative will stick and you will have to start over. Add the egg to the mixture and whisk together.
    • Line the bread pan with wax paper on both side. Spray the wax paper with the cooking oil spray. Gently pour in your batter. Cut the remaining banana in half long ways and lay on top to garnish. Cook the banana bread in the oven for 1 hour and 30 minutes. Do not be alarmed if the bread still looks soft on the inside when you cut into it. It is supposed to be super moist.

    Notes

    Storage: This recipe can be stored for up to 5 days in the refrigerator in an air tight container. 
    Nutrition: The nutrition for this recipe is an estimate and the calorie count is not guaranteed.  It is based on 8 servings.
    Serving Size: This recipe should yield 8 slices
     
    Easy banana bread alternative that is autoimmune protocol friendly
    Serving: 1slice | Calories: 289kcal | Carbohydrates: 37g | Protein: 3g | Fat: 15g | Saturated Fat: 3g | Sodium: 322mg | Potassium: 53mg | Fiber: 4g | Sugar: 12g | Vitamin A: 9IU | Vitamin C: 1mg | Calcium: 58mg | Iron: 1mg
    Tried this recipe?Tag me on instagram @alliannaskitchen!
    crispy buffalo wings 3

    January 3, 2021 Air Fryer

    Crispy Buffalo Chicken Wings (Paleo, Whole30)

    These crispy buffalo chicken wings are crispy on the outside, juicy on the inside, flavorful and spicy. My partner jokes that they are copycat sports bar wings, yet they are whole30 and paleo friendly. These wings only require 10 minutes of hands on time. We like to make them in place of take out on the weekends. These healthy chicken wings make the perfect meal and snack.

    crispy buffalo chicken wings on a plate with ranch dressing

    These chicken wings are a staple in my house. I love making them for game day with my Crockpot Gluten Free Mac and Cheese.

    What Do I Need To Make These Crispy Buffalo Chicken Wings?

    • 1 pound chicken wings-I like the frozen one from Trader Joe’s. I keep at least 3 or 4 bags in my freezer all of the time. They are perfect for meals that do not require a lot of hands on time. 
    • Sea salt & olive oil cooking spray-This is what keeps the wings nice and crispy while cooking.

    For the buffalo sauce:

    • Hot sauce-This is the base for the buffalo sauce. See below about the store bought paleo buffalo sauce.
    • Ghee-This is what makes the sauce nice and smooth.
    • Onion & garlic powder-Add even more flavor to this whole30 buffalo sauce. 

    To Garnish:

    • We love to use fresh dill and green onions. 

    For The Ranch:

    • Check out my dressing recipe here or see below on the store bought brand I like.
    crispy buffalo chicken wings ingredients on a metal tray

    The Secret For Cooking Crispy Wings:

    • The number one secret is waiting until AFTER you cook the wings to add the sauce. If you add the sauce beforehand, the wings will get soggy.
    whole30 ranch dressing ingredients in a mixing bowl

    How To Save Money On The Whole30

    • The biggest concern I hear from people doing the Whole30 is the cost of all of the bottled sauces and dressings. We can fix that! The easiest ways to save money while doing the Whole30 is by making your own condiments! 
    • In this recipe, you can either make your own or buy it. This is my go to recipe for homemade ranch to dip these crispy wings in. If you would prefer to buy a bottle, I like this brand. 
    • You can use the homemade buffalo sauce recipe listed below or you can buy this Whole30 approved buffalo sauce. 
    crispy buffalo chicken wings with ranch

    If you enjoyed this recipe, you will LOVE:

    • Paleo Buffalo Chicken Dip
    • Paleo & Whole30 Buffalo Chicken Meatballs
    • Buffalo Chicken Nuggets 

    Hey-you’ve made it this far! If you make this recipe, I would love for you to give it a star ★ rating and review below. Make sure you are following me on Instagram, Pinterest, and Facebook too!

    crispy buffalo wings 3

    Crispy Buffalo Chicken Wings

    Course Appetizer, Main Course, Meals, Snack
    Cuisine American
    Prep Time 10 minutes minutes
    Cook Time 40 minutes minutes
    Total Time 50 minutes minutes
    Servings 14 wings
    Author Allianna Moximchalk
    142kcal
    Cost $10
    Print Recipe Pin Recipe

    Equipment

    • air fryer or cooking tray
    • small bowl
    • whisk
    • Saucepan

    Ingredients

    For the wings

    • 1 pound frozen chicken wings I like Trader Joe's brand
    • 1/2 tsp sea salt
    • cooking oil spray I like Trader Joe's olive oil spray

    For the ranch

    • 1 cup homemade paleo ranch dressing

    For the buffalo sauce

    • 3/4 cup hot sauce
    • 2 tbsp ghee
    • 1/4 tsp onion powder
    • 1/4 tsp garlic powder

    Instructions

    For the buffalo sauce:

    • Place all ingredients in a saucepan and whisk gently with a mini whisk or fork. Do this until the sauce is brought to a simmer.

    For the wings:

    • Pre-heat the oven or air fryer to 350. (I prefer the air fryer.) Place all the wings in the air fryer or on a baking sheet. It is ok if they are overlapping in the air fryer. Spray with the cooking oil spray and coat with the sea salt. Bake for 20 minutes. After the 20 minutes is up, turn up the oven or air fryer to 400 degrees and cook for an additional 20 minutes.
      crispy buffalo wings 5
    • Toss the chicken wings with the buffalo sauce and garnish with the green onions.

    Notes

    Hey-you’ve made it this far! If you make this recipe, I would love for you to give it a star ★ rating and review below. Make sure you are following me on Instagram, Pinterest, and Facebook too!
    Quick and easy chicken wing alternative that is Whole30 friendly!
    Serving: 1wing | Calories: 142kcal | Carbohydrates: 1g | Protein: 3g | Fat: 14g | Saturated Fat: 3g | Trans Fat: 1g | Cholesterol: 25mg | Sodium: 623mg | Potassium: 57mg | Fiber: 1g | Sugar: 1g | Vitamin A: 53IU | Vitamin C: 10mg | Calcium: 9mg | Iron: 1mg
    Tried this recipe?Tag me on instagram @alliannaskitchen!
    whole30 ranch dressing 1

    January 2, 2021 Featured Home

    Whole30 Ranch Dressing (Paleo, Dairy Free)

    One of the best ways to save money while doing the Whole30 is by making all of your own condiments. This Whole30 Ranch Dressing is everything ranch dressing should be: tangy, creamy, and dilly. This homemade paleo dressing only takes 5 minutes to prep and lasts for weeks in the fridge meaning it is perfect for all of your meal prepping needs.

    whole30 ranch dressing in a white flower bowl

    If you enjoy this dairy free ranch dressing, you will also enjoy my Whole30 Caesar Dressing as well!

    Ingredients: 

    • Avocado mayo-Avocado mayo is mayo that is derived from avocado oil instead of canola oil which is extremely inflammatory.
    • Dried dill-dill is what makes ranch, ranch dressing! If you are using fresh dill you will want to double the amount. 
    • Onion & garlic powder- This adds even more flavor to the dressing. 
    • Salt & pepper- Add to the rich taste. You can omit the pepper if you are sensitive to nightshades.
    whole30 ranch dressing ingredients on a metal tray

    How To Make Homemade Whole30 Ranch Dressing:

    • This is going to sound too good to be true, but you seriously just put all ingredients in a bowl and whisk!
    dressing ingredients in a mixing bowl

    Why Should I Make My Own Vs. Buy Store Bought Ranch? 

    • If you have ever bought homemade paleo and whole30 dressings, you know that they are expensive! You can buy all of the ingredients for the same amount as it would cost to buy the store bought but make 5 times more!

    How Long Does This Homemade Dressing Last?

    • I have only tested it out two weeks in the fridge. I suggest storing it in an airtight dressing bottle. You can buy one like this one here or use a recycled dressing bottle.
    whole30 ranch dressing ingredients dripping off of a spoon

    If you like this recipe, you will LOVE my other homemade dressings:

    • Paleo/ Whole30 Kale Pomegranate Salad With Lemon Tahini Dressing
    • Chickpea Kale Salad
    • Sweet Potato Blackberry Fig Fall Salad
    • Whole30 Caesar Dressing
    • Cold Brussels Sprout Salad
    • Shaved Steak Salad

    Hey-you’ve made it this far! If you make this recipe, I would love for you to give it a star ★ rating and review below. Make sure you are following me on Instagram, Pinterest, and Facebook too!

    whole30 ranch dressing 1

    Whole30 Ranch Dressing

    Course Dressing
    Cuisine American
    Prep Time 5 minutes minutes
    Total Time 5 minutes minutes
    Servings 10 servings
    Author Allianna Moximchalk
    291kcal
    Cost $3
    Print Recipe Pin Recipe

    Equipment

    • mixing bowl
    • measuring spoons
    • measuring cups
    • whisk or fork

    Ingredients

    • 2 cups avocado mayo
    • 1/3 cup almond milk
    • 1 tbsp dried dill I love a ton of dill, you can cut back if you aren't as big of a dill fan as me.
    • 1/4 tsp garlic powder
    • 1/4 tsp onion powder
    • 1/2 tsp sea salt
    • 1/2 tsp pepper omit if nightshade free

    Instructions

    • Mix all ingredients in a bowl with a fork or mini whisk until mix throughout. Keep the dressing in a bowl in the fridge for up to 2 weeks***
      whole30 ranch dressing 4

    Notes

    ****I have not tested this dressing past the two week mark. 
    Hey-you’ve made it this far! If you make this recipe, I would love for you to give it a star ★ rating and review below. Make sure you are following me on Instagram, Pinterest, and Facebook too!
    Quick and easy dairy free ranch alternative.
    Serving: 2tbsp | Calories: 291kcal | Carbohydrates: 4g | Protein: 1g | Fat: 29g | Saturated Fat: 3g | Sodium: 384mg | Potassium: 20mg | Fiber: 1g | Sugar: 1g | Vitamin A: 35IU | Vitamin C: 1mg | Calcium: 21mg | Iron: 1mg
    Tried this recipe?Tag me on instagram @alliannaskitchen!
    AIP tortillas 1

    January 1, 2021 Autoimmune Protocol

    AIP Tortillas Made With Cassava Flour (Paleo, Whole30)

    These AIP Tortillas Made From Cassava Flour are every gluten and dairy free eater’s dream come true. These gluten free tortillas are moist and durable. They go great with just about anything, from tacos to chicken caesar wraps! With these tortillas lasting up to a week in the fridge, they are a great idea for all of your weekly meal prepping needs.

    aip tortillas on a black plate with fresh herbs

    When I was first introduced to the paleo diet in college I tried making my own homemade tortillas by making cassava flour from scratch! Talk about a project. This was before there was so much information on the internet about paleo/ AIP substitutes. I had no idea you could buy cassava flour in the grocery store. 

    If you enjoy this recipe, you will also enjoy my AIP Bread Rolls as well.

    What is Cassava Flour?

    • Cassava flour is made from the cassava plant. It is a root plant and when it is peeled, dried, and ground up a flour forms. 
    • There is a lot of fiber in cassava flour vs. other AIP flours which makes it a good candidate for making tortillas with!
    • Out of all of the gluten free flours, cassava is most similar to wheat flour. It easily sticks together when it is combined with water and oil due to the fiber. 
    • Lastly, cassava is high in carbs which means it is not low carb. 

    Which brand of cassava flour should I use? 

    • NOT all brands are created equally. I only use Otto’s. I have tried many other brands and the recipe has not worked out, therefore stick to this brand for this recipe. You can find it here.
    aip tortillas ingredients on a metal tray

    What Do I Need To Make AIP Tortillas?

    • Cassava-this acts as your flour in this recipe. This recipe has only been best with cassava, so use cassava flour and only cassava! I like this brand. I do not feel that all cassava flours are made equally so I would stick to the Otto’s brand.
    • Water & oil- The water and oil combined is what acts as the binding agent for these wraps. You can substitute the olive oil for avocado oil.
    • Sea salt, basil, and garlic powder-The combination of these spices give the tortillas flavor! Feel free to have fun here and add your own flavors/ spices.
    aip tortillas step by step photos

    How To Make AIP Tortillas:

    • This recipe is simple, while it does require an hour of rest time, there is only 35 minutes of hands on time. 
    • First, add all ingredients to a bowl and mix together. Form the dough into a ball and then set it out on the counter for one hour.  
    • Once the dough has rested, form it into a disc like shape. Then you will want to cut the dough into 6th. Next, roll the sixths into small little balls. Once you do that you will want to cut each ball into two’s, so now you should have 12 balls. 
    • Roll out each ball with a rolling pin.
    • While rolling, put a non-stick skillet on medium high heat on your stovetop. The pan needs to be hot.
    • Add a little bit of cooking spray to the pan. I love Trader Joe’s olive oil cooking spray brand. 
    • Cook each tortilla for 2-3 minutes on each side until bubbles or brown spots form.
    • Do this with all 12 tortillas!
    • See troubleshooting steps below if needed.

    What If My Dough Is too Crumbly?

    • You need to add more water. Add one tablespoon at a time until the dough is smooth enough for you to roll it out without it breaking.

    How Long Do These Last?

    • I suggest storing the tortillas in an air tight container for up to a week in the fridge. See below about re-serving.

    Can I Reheat?

    • These tortillas have a completely different texture cold and are best served warm. Be sure to reheat in the microwave for 20-30 seconds.
    aip tortillas stacked on a black plate

    If you like this recipe, you will LOVE:

    • Paleo Pumpkin Ravioli
    • Paleo Mexican Lasagna

    Hey-you’ve made it this far! If you make this recipe, I would love for you to give it a star ★ rating and review below. Make sure you are following me on Instagram, Pinterest, and Facebook too!

    AIP tortillas 1

    AIP Tortillas (Whole30, Paleo)

    Course Bread
    Cuisine American
    Prep Time 15 minutes minutes
    Cook Time 20 minutes minutes
    Resting time 1 hour hour
    Total Time 1 hour hour 35 minutes minutes
    Servings 12 tortillas
    Author Allianna Moximchalk
    190kcal
    Cost $3
    Print Recipe Pin Recipe

    Equipment

    • Rolling Pin
    • knife
    • cutting board
    • mixing bowl
    • measuring cups
    • measuring spoons
    • non-stick pan

    Ingredients

    • 2 cups cassava flour I only use Otto's
    • 1 1/3 cup water
    • 3/4 cup olive oil
    • 2 tsp sea salt
    • 1 tsp dried oregano
    • 1 tsp dried parsley
    • 1 tsp garlic powder
    • Cooking oil spray I like Trader Joe's Olive oil.

    Instructions

    • Place all ingredients in a bowl and mix. Roll the dough into a ball and let it sit for one hour at room temperature.
      AIP tortillas 10
    • Next, form the dough in a disc shape. Now, cup the dough into 6th (see picture.) Roll the dough into 6 small balls, then cut that dough in half so you should have 12 small balls. (If the dough is falling apart/ has a lot of crumbs, add a tablespoon of water, until the dough sticks together)
      AIP tortillas 7
    • Flatten the balls out with the rolling pin. The tortillas should be about 1/6 of a inch thick. It is okay if the balls are not all the same shape. While you do this to all of the remaining dough balls, heat up a medium size non-stick pan. The pay needs to be hot before you add the tortillas.Spray the pan with your cooking oil spray.
    • Cook each tortilla for 2-3 minutes on each side or until it begins to bubble and brown spots form. Do this with the remaining tortillas.
      AIP tortillas 4

    Notes

    Hey-you’ve made it this far! If you make this recipe, I would love for you to give it a star ★ rating and review below. Make sure you are following me on Instagram, Pinterest, and Facebook too!
    You can use these tortillas for all things: wraps and tacos!
    You can store the tortillas in the fridge for up to a week, see notes above about reheating. These tortillas do not have the same texture when cold. 
    Easy quick gluten free tortilla alternative.
    Serving: 1tortilla | Calories: 190kcal | Carbohydrates: 17g | Protein: 1g | Fat: 14g | Saturated Fat: 2g | Sodium: 390mg | Potassium: 7mg | Fiber: 1g | Sugar: 1g | Vitamin C: 1mg | Calcium: 30mg | Iron: 1mg
    Tried this recipe?Tag me on instagram @alliannaskitchen!
    whole30 ceasar dressing 6

    December 31, 2020 Featured Home

    Whole30 Caesar Dressing

    This Whole30 Caesar Dressing is perfect for all of your whole30 and clean eating needs. One of the best ways to save money when doing the whole30 is by making your own condiments. This recipe is tangy, salty, and oh so rich in flavor. You can have yourself homemade caesar dressing in less than 10 minutes.

    Whole30 caesar dressing in a flower bowl with a spoon and pepper.

    This dressing can pair well with any greens or proteins. It is also great as is with some fresh raw vegetables to dip into it. I love to use this dressing in salads and wraps as well.

    [feast_advanced_jump_to]

    Why You Will Love This Recipe

    • It is simple! You just dice the garlic cloves, stir all of the ingredients together, and serve.
    • This dressing is paleo, whole30, keto friendly, diary free, and soy free.
    • I love to use this recipe in my Paleo Chicken Caesar Wraps. It is the perfect pairing!
    • This recipe is kid friendly as well! The anchovy paste does not have an overwhelming flavor that would turn kids away from the dressing.
    • This is a great dressing to make in advance and keep in the refrigerator for the week ahead or make in advance and serve at your next dinner party.
    • We also have this Caesar Dressing recipe listed on my local weekly meal prep menu that delivers all over Pittsburgh, PA.

    Ingredients

    Whole30 caesar dressing ingredients on a silver metal tray.
    • Anchovy paste– Embrace the anchovies! This is what gives this dressing its tangy, salty and rich taste. You can find the paste near the canned tuna in the grocery store. Be sure to get wild caught!
    • Lemon juice-This enhances the tangy taste, do not skip!
    • Steak sauce–Typical caesar dressing calls for Worcestershire sauce but that is not whole30 compliant. I use this whole30 steak sauce in place of it and it does the trick!
    • Dijon mustard–This adds another layer of tangy-ness to this recipe. It is also a natural emulsifier meaning it holds everything together.
    • Fresh garlic-Second to anchovy paste, fresh garlic is the second most important ingredient. Garlic is what makes caesar dressing, caesar dressing!
    • Avocado mayo-Avocado mayo is mayo that is derived from avocado oil instead of canola oil which is extremely inflammatory.
    • Salt & pepper– Add to the rich taste. You can omit the pepper if you are sensitive to nightshades.

    See the recipe card below for a full list of ingredients and measurements.

    Substitutions and Variations

    • Anchovy paste has its own salt content as well. When you make this dish for the first time, you may need to taste test prior to adding additional salt to ensure the dressing isn’t overly salty.
    • If you are not dairy free, you can use your mayo of choice.

    This recipe has not been tested with other substitutions or variations. If you replace or add any ingredients, please let us know how it turned out in the comments below!

    Step by Step Instructions

    Whole 30 caesar dressing ingredients in a glass mixing bowl unmixed with a small whisk next to it.
    Photo 1: First, you will place all of your ingredients in a mixing bowl.
    Whole 30 caesar dressing ingredients mixed together with a whisk in a small glass mixing bowl.
    Photo 2: Once ingredients are combined, you can place in an air tight container in the refrigerator or serve.

    Expert Tips

    • Tip # 1: If you don’t like to hand chop fresh garlic, I love a garlic mincer! You can also use a hand grater as well.
    • Tip # 2: It is a great opportunity to prepare fresh garlic and lemon juice in advance. You can use a food processor to bulk mince fresh garlic and a lemon juicer to juice bulk lemons in advance and keep in the refrigerator for any recipe.
    • Tip # 3: I recommend using mason jars for storing dressings in the refrigerator.

    Recipe FAQs

    How long does this homemade dressing last?

    I have only tested it out two weeks in the fridge. I suggest storing it in an airtight dressing bottle. You can buy one like this one here or use a recycled dressing bottle.

    Can I freeze extra dressing?

    I don’t recommend freezing this dressing. It will change the consistency of the dressing. I have not tested this though.

    What can I serve with this dressing?

    I love to make a simple caesar salad with fresh greens and add salmon or chicken to it as well as homemade croutons.

    How long does this dressing last?

    This recipe can be stored in an air tight container for up to 2 weeks in the refrigerator.

    Whole30 caesar dressing with a spoon dripping into a bowl.

    Other Dressing Recipes You Will Love

    • orange poppyseed salad dressing in a bowl with a whisk
      Orange Poppyseed Dressing
    • whole30 ranch dressing 1
      Whole30 Ranch Dressing (Paleo, Dairy Free)
    • lemon tahini dressing in a bowl
      Lemon Tahini Dressing (Whole30, Dairy Free, Vegan)
    • avocado lime ranch dressing in a bowl with a lime on top
      Healthy Avocado Lime Ranch Dressing

    Are you interested in my list of go to healthy alternatives?

    Download your FREE guide below

    download HERE
    whole30 ceasar dressing 6

    Whole30 Caesar Dressing (Paleo & Keto Friendly)

    Course Dressing
    Cuisine American
    Diet Gluten Free
    Prep Time 10 minutes minutes
    Total Time 10 minutes minutes
    Servings 16 servings
    Author Allianna Moximchalk
    93kcal
    Cost $3
    Print Recipe Pin Recipe

    Equipment

    • Bowl
    • Small whisk or fork

    Ingredients

    • 4 cloves garlic minced
    • 1 cup avocado mayo
    • 1 whole lemon juiced
    • 1 tsp anchovy paste near the canned tuna in the grocery store
    • 1 tsp dijon mustard
    • 1 tsp steak sauce
    • 1 pinch sea salt
    • 1/2 tsp black pepper omit if you are avoiding nightshades

    Instructions

    • Mix all ingredients in a bowl with a small whisk or fork. Keep the dressing in an air tight container for up to 2 weeks.

    Notes

    Storage: This dish can be stored in the refrigerator for up to 2 weeks in an air tight container.  I have not tested this dressing past the two week mark.
    Nutrition: The nutrition for this recipe is an estimate and the calorie count is not guaranteed.  It is based on 16 servings. 
    Servings: This recipe should yield 16 servings. 
    Quick and easy alternative to conventional salad dressing.
    Serving: 2tbsp | Calories: 93kcal | Carbohydrates: 1g | Protein: 1g | Fat: 9g | Saturated Fat: 1g | Cholesterol: 1mg | Sodium: 104mg | Potassium: 3mg | Fiber: 1g | Sugar: 1g | Vitamin C: 1mg | Calcium: 2mg | Iron: 1mg
    Tried this recipe?Tag me on instagram @alliannaskitchen!
    whole30 scallops

    December 29, 2020 Appetizers

    Whole30 Scallops w/ Ghee, Chives, Lemon & Garlic (AIP, Paleo)

    These buttery Whole30 scallops can be on your table in less than 15 minutes! They are crispy, buttery and full of flavor. The lemon, garlic and chives make these silky scallops oh so flavorful. This recipe is naturally paleo, keto, and AIP friendly.  overhead shot of whole30 scallops on a white plate

    What Do I Need To Make These Whole30 Scallops?

    • Scallops-always wild caught! Make sure they are defrosted. I like to remove mine from the freezer the night before if they are frozen and thaw them out overnight in the fridge. We get our scallops from Butcher Box. I look forward to getting a box every month of my favorite grass fed and wild caught meats from them.
    • Ghee-Ghee is what gives these scallops the buttery taste. If you are new here, Ghee is simply just purified butter. Ghee is a great butter alternative for those who have a dairy sensitivity because the casein and lactose are removed, which are the two most common proteins that people tend to have issues with. 
    • Chives-Chives add even more flavor to this buttery dish.
    • Lemon-Lemon juice combined with garlic is in my opinion an award winning combo!
    • Garlic-Don’t skip out on this. This is what makes these scallops oh so flavorful.
    • Sea salt-Adds to the flavor.

    How To Make These Lemon Garlic Scallops:

    • First off, the key with this recipe is getting your non-stick pan super hot!
    • But before you begin anything you want to pat dry your scallops with a paper towel and season with the salt. 
    • Next, add only one tablespoon of ghee to your pan. 
    • Now, add the scallops to the skillet and do not move for 2 minutes, then flip and cook for an additional 2 minutes. 
    • Once the scallops are cooked remove them from the pan and make the sauce. 
    • For the sauce you will want to add all ingredients to the pan and bring to a simmer. 
    • Once the sauce is brought to a simmer, pour the sauce over the scallops.

    overhead shot of whole30 scallop ingredients on a metal tray

    Can I Reheat Cooked Scallops?

    • Technically you can but they may turn out a bit rubbery. Since the recipe does not take long to make, I suggest making them as you are ready to eat them. If you do want to reheat them I suggest doing so on the stovetop.

    What Should I Eat These Keto Scallops With?

    • You can eat them as an appetizer or you can eat them as a full meal. I love to eat mine with creamy whole30 garlic mashed potatoes.

    whole30 scallops overhead shot on a white plate with a tan fork

    If you like this recipe, you will LOVE my other fish recipes:

    • Whole30 & Paleo Dijon Salmon
    • Paleo Herb Crusted Salmon
    • Whole30 & AIP Shredded Salmon Salad

    Hey-you’ve made it this far! If you make this recipe, I would love for you to give it a star ★ rating and review below. Make sure you are following me on Instagram, Pinterest, and Facebook too!

    whole30 scallops

    Whole30 Scallops w/ Ghee, Chives, Lemon & Garlic (AIP, Keto, Paleo)

    Course Appetizer, Dinner, Main Course
    Cuisine American
    Prep Time 8 minutes minutes
    Cook Time 6 minutes minutes
    Total Time 14 minutes minutes
    Servings 10 scallops
    Author Allianna Moximchalk
    42kcal
    Cost $10
    Print Recipe Pin Recipe

    Equipment

    • non-stick pan

    Ingredients

    • 15 whole scallops defrosted, patted dry
    • 3 tbsp ghee can sub EVOO If desired
    • 1 tbsp fresh chives
    • 6 cloves garlic
    • 2 whole lemons juiced

    Instructions

    • Pat dry the scallops with a wet paper towel. Sprinkle the sea salt over the scallops. Heat up a non-stick skillet on medium high heat with only a tablespoon of the ghee. Add the scallops to the skillet and cook for 2 minutes. After 2 minutes is up, flip the scallops and cook for another 2 minutes. After the total of 4 minutes is up remove the scallops from the pan.
      whole30 scallops 6
    • Add the remaining ghee, garlic, lemon juice, and chives to the pan. Bring to a simmer and then pour over the scallops. ENJOY!
      whole30 scallops 2

    Notes

    Hey-you’ve made it this far! If you make this recipe, I would love for you to give it a star ★ rating and review below. Make sure you are following me on Instagram, Pinterest, and Facebook too!
    Quick and easy dinner or appetizer.
    Serving: 1scallop | Calories: 42kcal | Carbohydrates: 1g | Protein: 1g | Fat: 4g | Saturated Fat: 3g | Cholesterol: 12mg | Sodium: 6mg | Potassium: 5mg | Fiber: 1g | Sugar: 1g | Vitamin A: 13IU | Vitamin C: 1mg | Calcium: 2mg | Iron: 1mg
    Tried this recipe?Tag me on instagram @alliannaskitchen!

    lemon dill salmon salad 4

    December 27, 2020 Autoimmune Protocol

    Shredded Lemon Dill Salmon Salad (Paleo, AIP, Whole30, Keto)

    This shredded lemon dill salmon salad is one of my most requested items from my weekly private chef clients. The combination of the lemon and dill with the crunchy almonds and onions is oh so delicious. This recipe only requires 10 minutes of hands on time and makes for the most perfect light lunch or dinner. This shredded salmon salad is naturally Whole30, paleo, and keto friendly. It can be made AIP friendly without the almonds.

    close up overhead shot of shredded lemon dill salmon salad in a scalloped bowl

    This recipe was originally published on March 10th 2020 and updated on December 27th 2020 to better user experience. If you love this recipe, you will love my Gluten Free Salmon Cakes and my Keto Turkey Meatloaf.

    How To Make Shredded Lemon Dill Salmon Salad?

    • Salmon-I only use wild caught. I don’t think the farm raised salmon tastes good and it does lack some of the nutritional value. It is okay to use the pre-frozen salmon. Just be sure that you thaw it well before cooking. 
    • Dill & Oregano-The spices are what makes this recipe! If you are doing AIP and are in the elimination phase, be sure to avoid the dill. You will want to add extra oregano to replace the dill for this recipe. 
    • Sea salt-A little bit of salt goes a long way. Do not skip!
    • Red onion-The red onion adds a nice crunch to this recipe. Be sure you chop up the onion real finely. 
    • Almond slivers-With the red onion crunch the almond slivers add a nice crunch. If you are doing AIP and are in the elimination phase, be sure to omit the almonds. 
    • Capers-Capers add even more texture to this recipe and oh my they are so good. Do not skip!
    • Lemon-Every recipe needs some sort of acid and lemon gives it just that. 
    • EVOO-Olive oil is my go to oil when it comes to paleo cooking. However, you can substitute for avocado oil if you would prefer. shredded lemon dill salmon salad ingredients on metal tray

    How Do I Make This Shredded Lemon Dill Salmon Salad?

    • First, Preheat the oven to 350. Next, lay down the salmon with the skin side down and drizzle with EVOO. Bake for 20 minutes. Most people like their salmon well done, the 20 minutes is well done. 
    • Note, if you like your salmon really well done, cook it for 23 minutes. If you like it less well done, cook it for 18.
    • Lastly, once the salmon is done, remove the skin. Shred the salmon using 2 forks and mix in all other ingredients.
    • Pro tip-You can also use frozen salmon for this recipe. I have a whole blog post talking about Frozen Salmon In The Air Fryer. The nice thing about this recipe is you do not need to wait for it to thaw!

    What Should I Serve This with?

    • We love to eat this salmon salad over mixed greens or paired with my lemon dill green beans. 

    How Long Will This Dish Last?

    • I like to only keep salmon in the fridge for 3-4 days.
    moving shot of almonds of shredded lemon dill salmon salad in bowl with blue napkin

    If you like this salmon recipe, you will also LOVE:

    • Dijon Salmon
    • Herb Crusted Salmon
    • Sweet Potato Blackberry Fig Salad

    Hey-you’ve made it this far! If you make this recipe, I would love for you to give it a star ★ rating and review below. Make sure you are following me on Instagram, Pinterest, and Facebook too!

    lemon dill salmon salad 4

    Lemon Dill Salmon Salad (Whole30, Paleo, AIP)

    Course Dinner, Lunch, Main Course, Meals
    Cuisine American
    Prep Time 10 minutes minutes
    Cook Time 20 minutes minutes
    Total Time 30 minutes minutes
    Servings 4 servings
    Author Allianna Moximchalk
    542kcal
    Cost $15
    Print Recipe Pin Recipe

    Equipment

    • baking sheet

    Ingredients

    • 2 pounds salmon wild caught
    • 4 whole lemons juiced
    • 1/2 cup capers
    • 1/2 cup almond slivers omit for elimination phase of AIP
    • 1/2 cup purple onion diced
    • 3 tbsp dried dill weed
    • 2 tbsp dried oregano
    • 2 pinches sea salt
    • 4 tbsp EVOO plus a little extra for drizzling salmon

    Instructions

    • Preheat the oven to 350. Lay the salmon out on a baking sheet and drizzle with olive oil (approx 1 tbsp.) Cook the salmon for 20 minutes for well done. Once the salmon is cooked, shred the salmon with a fork and remove the skin.
    • Mix the salmon with all other ingredients. I like to prep this recipe in advance and serve cold with greens. ENJOY!

    Notes

    You can store this dish in the fridge for up to 3 days. 
    Hey-you’ve made it this far! If you make this recipe, I would love for you to give it a star ★ rating and review below. Make sure you are following me on Instagram, Pinterest, and Facebook too!
    Quick and easy nutrient dense lunch.
    Calories: 542kcal | Carbohydrates: 7g | Protein: 49g | Fat: 35g | Saturated Fat: 5g | Cholesterol: 125mg | Sodium: 905mg | Potassium: 1310mg | Fiber: 3g | Sugar: 1g | Vitamin A: 253IU | Vitamin C: 4mg | Calcium: 116mg | Iron: 4mg
    Tried this recipe?Tag me on instagram @alliannaskitchen!
    aip beet hummus 6

    December 25, 2020 Appetizers

    AIP Beet Hummus With Cauliflower

    This nutrient dense and delicious aip beet hummus is made from beets and cauliflower. This recipe is simple and only requires 15 minutes of hands on time. This pretty dip is loaded with flavor and is a crowd pleasing snack. It is perfect for all of your hosting needs as well as a healthy snack alternative.

    aip hummus with green parsley and fresh veggies

    What Do I Need To Make AIP Beet Hummus?

    • Beets-I love beets but always struggle with what to add them to. In this Whole30 hummus it adds the perfect natural coloring as well as the earthly taste of beets. You can buy your beets already steam/ baked. If you choose this option they are more than likely to be smaller than regular sized beets. If that is the case, you will need 5-6 small beets.
    • Cauliflower-Is what gives this recipe the hummus texture. I don’t like to waste the stems, so we include the stems in the food processor.
    • Olive Oil-This is my oil of choice for this recipe, you can sub olive oil with avocado oil but it will slightly impact the taste. Do not use vegetable oils!
    • Garlic-Is hummus even hummus without garlic? We do not take the garlic lightly. This recipe calls for at minimum 6 cloves.
    • Lemon-Adds even more flavor to this recipe.

    aip hummus ingredients on a metal tray

    How Do I Make AIP Beet Hummus?

    • First, we want to make the beets. In this recipe I have included two ways to make the beets nice and soft. You can use an instant pot or also cook the beets in the oven. Personally I prefer the instant pot. Cooking the beets in the oven takes longer and I am constantly checking to see if they are soft enough due to the fact some beets will take longer to cook due to the size. In terms of the instant pot, regardless of the size of the beets, you will set the setting on 15 minutes HIGH pressure with the vent on top closed. One the time is up, carefully open the vent on top. I like to use a hand towel to prevent myself from burning my hand. Let them cool, then peel them. In the oven you will cook them for at least an hour.
    • For the cauliflower, I like to steam it on the stovetop with a little bit of water. You want to be sure not to add too much water or it will become mushy. Add just enough that it doesn’t burn it. Place the cauliflower and water on medium high heat on the stovetop with a lid on for 7 or so minutes until the cauliflower is soft. If needed, you can add more water.
    • Once the veggies are made you will place all ingredients in your high speed blender for 30-60 seconds until a dip like substance forms.

    How Can You Make Hummus Without Tahini?

    • Tahini is not allowed on AIP. Once you add seeds back into your diet, you can add tahini.

    How Should I Eat With This?

    • We love eating this dip with traditional veggies like carrots and celery.
    • To serve, we enjoy eating it with fresh herbs like parsley.

    How Long Does This Dip Last?

    • You can store this dip in an airtight container for up to a week in the fridge.

    aip hummus with fresh parsley on top in a white bowl

    If you like this recipe, you will love my other AIP recipes:

    • Crispy Crack AIP Chicken
    • Turkey Blueberry Maple Breakfast Sausage
    • Bacon Pomegranate Brussels Sprouts

    Hey-you’ve made it this far! If you make this recipe, I would love for you to give it a star ★ rating and review below. Make sure you are following me on Instagram, Pinterest, and Facebook too!

    aip beet hummus 6

    AIP Beet Hummus

    Course Appetizer, Snack
    Cuisine American
    Prep Time 15 minutes minutes
    Cook Time 1 hour hour
    Total Time 1 hour hour 15 minutes minutes
    Servings 6 people
    Author Allianna Moximchalk
    271kcal
    Cost $5
    Print Recipe Pin Recipe

    Equipment

    • baking sheet or instant pot
    • Garlic mincer
    • frying pan
    • high speed blender

    Ingredients

    • 3 medium sized beets
    • 6 cloves garlic minced
    • 1 head cauliflower washed & chopped, you can include the stems
    • 1/3 cup olive oil
    • 1 whole lemon juiced
    • 1/2 tsp sea salt

    Instructions

    For the oven option:

    • For the oven option: Preheat the oven to 425. Wrap the washed beets in foil and 1 tablespoon olive oil. Bake for 1 hour or until soft. Once the beets cool, peel the beets.

    For the instant pot option: (my favorite)

    • Place the beets in an instant pot on pressure cook HIGH for 15 minutes with 2 cups of water with the vent on top closed. When the time is up open the vent VERY carefully or you will burn yourself. I like to open it with a hand towel. Once the beets cool peel them.
      aip beet hummus 2
    • While the beets are cooking add the chopped cauliflower into a sauce pan with 1/2 cup of water and steam the cauliflower for 7 minutes on medium high heat with a lid. You want to cook the cauliflower just enough so that it is soft, but not mushy. If you need more water, you can slowly add 1 tablespoon at a time to prevent the cauliflower from drying out.
    • Once the beets and cauliflower cook, place all ingredients in a high speed blender for 30 seconds. To serve, you can add fresh chopped parsley or almond slivers to garnish.
      aip beet hummus 3

    Notes

    You can store this dip in the fridge for up to 1 week.
    Hey-you’ve made it this far! If you make this recipe, I would love for you to give it a star ★ rating and review below. Make sure you are following me on Instagram, Pinterest, and Facebook too!
    Tasty and nutrient dense bean-less hummus. This hummus is perfect for a snack and all of you hosting needs.
    Serving: 1cup | Calories: 271kcal | Carbohydrates: 14g | Protein: 6g | Fat: 23g | Saturated Fat: 3g | Sodium: 262mg | Potassium: 524mg | Fiber: 4g | Sugar: 5g | Vitamin A: 27IU | Vitamin C: 50mg | Calcium: 61mg | Iron: 2mg
    Tried this recipe?Tag me on instagram @alliannaskitchen!

    Cookie dough in a mason jar with a large spoon.

    December 22, 2020 Dairy free

    Gluten Free Edible Cookie Dough

    This Gluten Free Edible Cookie Dough recipe is one of a kind! It is super easy to make, loaded with flavor and no one will even know it is gluten free. This sweet treat is perfect to eat as is, or even pairs well with your favorite ice cream. You can have my gluten-free cookie dough recipe made and ready to go in less than 10 minutes. 

    Cookie dough balls with rainbow sprinkles on a blue and white floral plate.
    [feast_advanced_jump_to]

    I like having a stash of these on stock at all times. They make for the best make ahead treat, plus they freeze so well and kids love them too! If you love a good gluten free no bake treat like I do, check out the other no bake recipes on my blog like my Vegan Pumpkin Mousse, Gluten Free Pumpkin Cheesecake Jars, Vegan Chocolate Truffles, Vegan Date Dip, and Vegan Blueberry Cheesecake Jars. 

    Why I Love This Recipe

    • Unlike traditional cookie dough, this recipe does not contain any raw eggs. 
    • This recipe is naturally dairy free, gluten free, soy free, grain free and egg free. 
    • This gluten free chocolate chip cookie dough recipe can be made as is or you can jazz it up by adding in your favorite sprinkles. 
    • I love this recipe so much that we sometimes have it on my Pittsburgh based meal prep company menu.

    Simple Ingredients

    Cookie dough ingredients laid out in small glass bowls on the counter.
    • Almond flour- I like using almond flour for this recipe because it is dense and holds up well. It is my go to gluten-free flour.
    • Pure maple syrup-I like the Costco Kirkland brand! It is the good stuff and in my opinion the best bang for your buck.. Make sure whatever brand you buy does not have any filler added ingredients. The maple syrup will act as the blinder in this recipe, so do not skip!
    • Coconut oil-This adds to the smoothness of the raw cookie dough.
    • Vanilla extract– This adds flavor. If you cannot tolerate the alcohol, you can use vanilla powder.
    • Sea salt-Who doesn’t like a tad of saltiness with a sweet treat.
    • Dairy free chocolate chips-I am dairy free so dairy free chocolate chips are a must, but you can also use regular chocolate chips. 

    See the recipe card below for a full list of ingredients and measurements.

    Recipe Substitutions and Instructions

    • Sprinkles-Depending on the time of year you are making this, you can use festive colored sprinkles. 

    This recipe has not been tested with other substitutions or variations. If you replace or add any ingredients, please let us know how it turned out in the comments below!

    Step By Step Instructions

    Almond flour, chocolate chips, maple syrup, vanilla, and coconut oil in a large glass bowl.
    ​Step #1: Add all ingredients to a large bowl. 
    Cookie dough well mixed in a large glass bowl.
    Step #2: Mix all ingredients together until they are well mixed throughout. 
    Cookie dough balls scooped on a baking sheet.
    Step #3: If you would like to make this recipe into cookie dough balls, you can use a cookie scoop and place the rolled balls on a baking sheet. 

    Recipe Tips

    • Tip #1: Be sure chill this recipe prior to eating. Eating it cold vs. room temperature tastes a lot better!

    Recipe FAQ

    How can you make cookie dough that you can eat?

    Making it without eggs makes it edible! 

    Can I make this recipe into edible gluten free cookies?

    Unfortunately that will not work because this recipe is missing key ingredients like eggs. 

    Other Gluten Free Recipes You Will Love

    • dairy free strawberry pretzel salad on a plate with whipped cream on top
      Gluten Free Strawberry Pretzel Salad
    • 3 layered cake with chocolate frosting on a cake platter.
      Gluten and Dairy Free Cake
    • Slice of banana cake on a blue and white plate.
      Gluten Free Banana Cake with Almond Flour Recipe
    • Rice crispy treats with chocolate drizzled on top.
      Gluten Free Rice Crispy Treats Recipe

    Are you interested in a list of my go to healthy alternatives?

    Download your FREE guide below

    Download the free guide here.
    Close up photo of gluten free cookie dough with sprinkles in it rolled into balls.

    Gluten Free Edible Cookie Dough

    Course Dessert, Snack
    Cuisine American
    Diet Gluten Free
    Prep Time 10 minutes minutes
    Freeze time 20 minutes minutes
    Total Time 30 minutes minutes
    Servings 12 balls
    Author Allianna Moximchalk
    202kcal
    Cost $3
    Print Recipe Pin Recipe

    Equipment

    • mixing bowl
    • measuring cups
    • measuring spoons
    • Cookie scooper
    • baking sheet

    Ingredients

    • 2 cups almond flour
    • 2/3 cup pure maple syrup Add 1 tbsp more at a time if you would like the cookie dough if the dough is too dry.
    • 1/2 cup chocolate chips I prefer dairy free chocolate chips.
    • 2 tbsp Coconut oil
    • 1 tsp vanilla extract
    • pinch of sea salt

    Instructions

    • Add all ingredients to a large bowl.
    • Mix all ingredients together until they are well mixed throughout.
    • If you would like to make this recipe into cookie dough balls, you can use a cookie scoop and place the rolled balls on a baking sheet. 

    Notes

    Storage: This dish can be stored in the refrigerator in an air tight container for 5 days. 
    Nutrition: The nutrition for this recipe is an estimate and the calorie count can not be guaranteed.  It is based on 12 bites or bite sized servings.
    Servings: This recipe should yield 12 servings.
    Quick, easy and delicious gluten free cookie dough recipe.
    Serving: 1ball | Calories: 202kcal | Carbohydrates: 17g | Protein: 5g | Fat: 14g | Saturated Fat: 3g | Sodium: 1mg | Potassium: 24mg | Fiber: 3g | Sugar: 11g | Calcium: 70mg | Iron: 1mg
    Tried this recipe?Tag me on instagram @alliannaskitchen!
    aip christmas cupcakes 6

    December 18, 2020 Autoimmune Protocol

    AIP Holiday Cupcakes (Paleo, Allergy friendly)

    aip cupcakes on a pink plate with rosemary and pomegranate

    aip cupcake ingredients on a metal tray

    aip cupcakes on a metal serving platter with rosemary and coconut milk

    If you like this recipe, you will LOVE:

    • Paleo Cranberry Orange Lime Mocktails
    • Apple Cider Margarita Mocktail
    • AIP Hot Chocolate

    Hey-you’ve made it this far! If you make this recipe, I would love for you to give it a star ★ rating and review below. Make sure you are following me on Instagram, Pinterest, and Facebook too!

    aip christmas cupcakes 6

    AIP Holiday Cupcakes

    Course Dessert, Snack
    Cuisine American
    Prep Time 10 minutes minutes
    Cook Time 20 minutes minutes
    Total Time 30 minutes minutes
    Servings 8 cupcakes
    Author Allianna Moximchalk
    178kcal
    Cost $7
    Print Recipe Pin Recipe

    Equipment

    • muffin/cupcake pan
    • silicone baking cups
    • mixing bowls
    • measuring cups
    • measuring spoons

    Ingredients

    • 1/3 cup pure maple syrup
    • 3 tbsp vanilla powder
    • 1/4 cup olive oil
    • 3/4 cup un-sweetened applesauce
    • 1/2 cup tapioca flour
    • 1/2 cup tigernut flour
    • 1/2 cup cassava flour
    • 1 tsp baking soda
    • 1 whole lemon zested
    • 1 gelatin egg

    For the gelatin egg: (for vegan, sub for flax egg)

    • 2 tbsp boiling water
    • 1 tbsp gelatin
    • 1 tbsp apple cider vinegar

    For the frosting:

    • 1/4 cup tapioca flour
    • 1 cup palm oil shortening
    • 1/4 cup maple syrup
    • 2 tbsp coconut milk

    To garnish:

    • 8 sprigs fresh rosemary
    • 1/4 cup pomegranate seeds

    Instructions

    For the gelatin egg:

    • Place the gelatin in a bowl and slowly add in the boiling water while whisking the water in. Whisk until an egg like consistency forms (1 min.) Do not stop whisking or one big clump will form and you will have to start over.
      aip christmas cupcakes 3

    For the cupcakes:

    • Preheat your oven to 350. I suggest using silicone muffin liners as paper ones will stick to the cupcake. Mix all dry ingredients, then mix in all wet ingredients. Divide the batter into 8 cupcakes. Place in the oven for 20 minutes.
      aip christmas cupcakes 4

    For the frosting:

    • Mix all ingredients in a bowl with a handheld mixer until a frosting consistency forms.

    To garnish:

    • Frost with a piping bag or spoon and place the rosemary sprigs upside down. Sprinkle the pomegranate seeds to add a fun touch. ENJOY!

    Notes

    Place the cupcakes in the fridge for up to a week. I suggest waiting to frost them prior to eating. 
    This recipe was inspired by Heal Me Delicious. 
    Hey-you’ve made it this far! If you make this recipe, I would love for you to give it a star ★ rating and review below. Make sure you are following me on Instagram, Pinterest, and Facebook too!
    These quick and easy AIP cupcakes are perfect for all of your holiday needs.
    Serving: 1cupcake | Calories: 178kcal | Carbohydrates: 27g | Protein: 1g | Fat: 8g | Saturated Fat: 2g | Sodium: 162mg | Potassium: 83mg | Fiber: 1g | Sugar: 15g | Vitamin A: 7IU | Vitamin C: 1mg | Calcium: 33mg | Iron: 1mg
    Tried this recipe?Tag me on instagram @alliannaskitchen!

    dairy free hot chocolate 1

    December 17, 2020 Allergy Friendly

    Creamy Dairy Free Hot Chocolate (Protein Option)

    This Dairy Free Hot Chocolate with Bone Broth Protein is creamy, chocolatey, and packed with gut friendly nutrients! It’s a cozy, healthy hot cocoa recipe that’s gluten free, paleo, and refined sugar free. You’d never know it has bone broth inside. It is a perfect treat for a cold winter day.

    Dairy free hot chocolate with bells, cinnamon, and whole cloves.

    My Dairy Free Hot Chocolate with Bone Broth Protein has become a winter must-have in our house! My husband Mitchell and I love curling up with a mug of it on chilly Fall and Winter nights. It’s rich, decadent, and loaded with nutrients — and the best part? You’d never guess it has bone broth inside. When I first experimented with this idea, I was skeptical. Bone broth in hot chocolate? But once I tried it, I was hooked. The cocoa completely masks the flavor of the broth, leaving you with a creamy, slightly frothy hot cocoa that’s comforting and nourishing all at once. We are serving it Halloween night with our neighborhood get together with my Homemade Beanless Chili and Gluten Free Apple Crisp for dessert.

    If you love cozy seasonal drinks like I do, check out some of my other seasonal drinks on my blog like my Pear Cocktail and Apple Cider Margarita. 

    [feast_advanced_jump_to]

    Why Add Bone Broth to Hot Chocolate?

    • Bone broth adds a subtle richness and a huge nutrient boost. It’s rich in collagen, amino acids, and minerals that support your gut, skin, and joints, making it the perfect ingredient to sneak into a sweet treat.
    • Gut Health Support: Bone broth helps nourish the gut lining with collagen and gelatin.
    • Protein Boost: A cup of bone broth can add 8–10g of protein and when combined with protein powder or collagen, this becomes a powerhouse drink.
    • Nourishing Comfort: The minerals and amino acids support your immune system, making it perfect for cold weather or post-workout recovery.

    What You Will Love About This Recipe

    • Creamy, rich, and deeply chocolatey.
    • Naturally dairy free, gluten free, refined sugar free, soy free, and paleo friendly.
    • Packed with gut-healing nutrients and protein.
    • Ready in under 10 minutes.
    • Easily customizable-AIP, kid-friendly, or mocha-style.

    Simple Ingredients

    Dairy free hot chocolate ingredients in small glass bowls on a silver tray.
    • Bone Broth – Choose a high-quality, plain chicken or beef bone broth. Homemade or store-bought both work — just make sure it’s not heavily seasoned.
    • Dairy Free Milk – Coconut, almond milk, or cashew milk all make great creamy bases. I love full-fat coconut milk for a richer texture. I have found that the coconut taste is masked with all of the other ingredients. 
    • Unsweetened Cocoa Powder – Gives this hot chocolate its indulgent rich chocolate flavor. You can also use raw cacao powder for extra antioxidants.
    • Pure Maple Syrup – My go to natural sweetener. Naturally sweetens without refined sugar. Honey or coconut sugar also work.
    • Vanilla Extract – Adds depth and sweetness.
    • Sea Salt – A pinch enhances the chocolate flavor.
    • Optional Add-Ins: Cinnamon, chocolate chips, mini marshmallows, peppermint extract, shaved chocolate bars, candy canes (Christmas) espresso powder, or dairy-free whipped cream on top.

    See recipe card below for full measurements and ingredient amounts.

    Ingredient Substitutions

    • No Bone Broth? Replace with a scoop of collagen protein, you’ll still get a protein boost.
    • ​Dairy free milk: oat milk, soy milk, rice milk, while they are notify favorites, you can use them!
    • For AIP: Use carob powder instead of cocoa and a compliant milk like coconut.
    • For Kids: Omit protein powder and reduce sweetener slightly.
    • Low Sugar: Use monk fruit or stevia instead of maple syrup.

    Step-by-Step Instructions

    • Step #1: Warm the liquids. In a small saucepan, add your bone broth and dairy-free milk. Warm over medium heat but don’t boil. If you are making multiple batches, use a large saucepan.
    • Step #2: Add the chocolate. Whisk in cocoa powder until fully dissolved. Stir in maple syrup, vanilla, and a pinch of salt.
    • Step #3: Froth and serve. For the ultimate creamy texture, blend your hot chocolate for 20–30 seconds or use a handheld milk frother. Pour into your favorite mug and top with dairy-free whipped cream, coconut cream, or a sprinkle of cinnamon.
    Set of two dairy free hot chocolates in clear mugs with fresh whipped cream.

    Expert Tips

    • Blend, don’t stir – Blending creates that café-style froth you’ll love.
    • Don’t boil – Too much heat can make the protein clump.
    • Use a clean broth – Avoid garlic/onion-heavy broths for best flavor.
    • Warm your mug – Pour hot water into your mug before serving, then dump it out to keep your drink warm longer.

    Frequently Asked Questions

    Will I taste the bone broth?

    No! The chocolate, vanilla, and sweetener completely mask it — you’ll only taste creamy cocoa.

    Can I use beef broth instead of chicken broth?

    Yes, but chicken has a more neutral flavor that blends in better.

    Is this safe for kids?

    Absolutely!

    Can I make it in the microwave?

    Yes! Combine all ingredients in a microwave-safe mug, heat for 60–90 seconds, then whisk or froth well.

    How can I store and reheat?

    If you have leftovers, store them in a sealed jar in the fridge for up to 3 days. Reheat on the stove or in the microwave and whisk or blend again before serving.


    Dairy free hot chocolate in a clear mug with fresh garnish.

    Other Fun Festive Drinks To Make

    • Gingerbread cocktail in a brown glass with bells on top and a gingerbread man standing next to the cup.
      Gingerbread Cocktail
    • brown smoothie with a gingerbread cookie on top
      Gingerbread Smoothie (Dairy Free)
    • Clear glass with a brown drink and a cinnamon stick in it.
      Pear Cocktail Recipe
    • orange lime cranberry mocktail 4
      Cranberry Mocktail Recipe

    Are you trying to eat better?

    Download your FREE anti-inflammatory guide to get all of my latest recipes and favorite healthy swaps.

    Download your free guide.
    dairy free hot chocolate 1

    Creamy Dairy Free Hot Chocolate (Protein Option)

    Course Drinks
    Cuisine American
    Diet Gluten Free
    Prep Time 5 minutes minutes
    Cook Time 5 minutes minutes
    Total Time 10 minutes minutes
    Servings 2 servings
    Author Allianna Moximchalk
    108kcal
    Cost $3
    Print Recipe Pin Recipe

    Equipment

    • measuring cups
    • measuring spoons
    • Saucepan
    • coffee mugs

    Ingredients

    • 1 cup Bone broth You can swap with more milk if desired.
    • 1/2 cup Dairy free milk Can use regular milk if you are not dairy free.
    • 2 tbsp Unsweetened Cocoa Powder Use carob powder for AIP.
    • 2 tbsp Pure maple syrup
    • 1/4 tsp Vanilla extract Omit for AIP.
    • 1 pinch Sea salt
    • OPTIONAL toppings if desired

    Instructions

    • Step #1: Warm the liquids. In a small saucepan, add your bone broth and dairy-free milk. Warm over medium heat but don’t boil. If you are making multiple batches, use a large saucepan.
    • Step #2: Add the chocolate. Whisk in cocoa powder until fully dissolved. Stir in maple syrup, vanilla, and a pinch of salt.
    • Step #3: Froth and serve. For the ultimate creamy texture, blend your hot chocolate for 20–30 seconds or use a handheld milk frother. Pour into your favorite mug and top with dairy-free whipped cream, coconut cream, or a sprinkle of cinnamon.

    Notes

    Storage: I do not suggest storing this recipe. It tastes best fresh!
    Servings: This recipe yields approximately 2 servings. 
    How to serve: Serve in a warm mug and top off with your favorite toppings. 
    Warm and cozy dairy free hot chocolate option.
    Serving: 1cip | Calories: 108kcal | Carbohydrates: 18g | Protein: 7g | Fat: 2g | Saturated Fat: 1g | Polyunsaturated Fat: 1g | Monounsaturated Fat: 0.5g | Sodium: 77mg | Potassium: 204mg | Fiber: 2g | Sugar: 14g | Vitamin A: 232IU | Vitamin C: 4mg | Calcium: 111mg | Iron: 1mg
    Tried this recipe?Tag me on instagram @alliannaskitchen!
    • « Go to Previous Page
    • Page 1
    • Interim pages omitted …
    • Page 29
    • Page 30
    • Page 31
    • Page 32
    • Page 33
    • Interim pages omitted …
    • Page 38
    • Go to Next Page »

    Primary Sidebar

    Allianna Headshots

    Hi, I'm Allianna! Allianna's Kitchen started by accident after battling an undiagnosed autoimmune disease for nearly my whole life.

    More about me →

    GLUTEN FREE DINNER RECIPES

    • steak date night dinner 1
      Steak Date Night Dinner with Garlic Aioli
    • gluten free fried shrimp 3 scaled
      Gluten Free Fried Shrimp
    • cooked frozen pork chops with chives on top on a white plate with a gold fork
      Easy Frozen Pork Chops In The Air Fryer
    • halibut fish tacos on a pale blue plate
      Halibut Fish Tacos

    EASY WHOLE30 RECIPES

    • Beetroot dip on a plate with crackers and fresh parsley on top.
      Simple Beetroot Dip Recipe
    • close up photo of ginger apple pork in a bowl
      Apple Ginger Pulled Pork
    • dairy free lobster bisque in a bowl with a gold spoon and garnished with lemon, fresh green herbs, and red pepper flakes.
      Dairy Free Lobster Bisque
    • juicy filet mignon on a plate
      Air Fryer Filet Mignon

    GLUTEN FREE APPETIZERS

    • peanut butter and jelly chicken wings on a plate with limes
      Peanut Butter And Jelly Wings
    • Stuffed mushrooms on a brown and white plate with fresh parsley on top.
      Gluten-Free Stuffed Mushrooms
    • Gluten free pigs in a blanket in a pile on a plate.
      Gluten Free Pigs In A Blanket
    • Pretty french onion dip in a silver bowl with potato chips and chives on top.
      Vegan French Onion Dip Recipe

    EASY MOCKTAIL RECIPES

    • honey simple syrup 2
      Honey Simple Syrup
    • orange lime cranberry mocktail 4
      Cranberry Mocktail Recipe
    • Clear glass with a brown drink and a cinnamon stick in it.
      Pear Cocktail Recipe
    • Grapefruit mocktail in a glass with jalapeño slice and grapefruit slice.
      Easy Grapefruit Mocktail Recipe

    Footer

    • Recipes
    • My Courses
    • Meal Prep Services
    • Accessibility Policy
    • Contact
    • About Me
    • Blog
    • Privacy Policy
    • Pinterest
    • Instagram
    • Facebook
    • Twitter

    Allianna’s Kitchen 2025 - All Rights Reserved

    Rate This Recipe

    Your vote:


    A rating is required
    A name is required
    An email is required