• Skip to primary navigation
  • Skip to main content
  • Skip to primary sidebar
  • Spring Recipes
  • Recipes
  • Order Meal Prep
  • Healthy Gut Baby Food Course
  • About

Allianna's Kitchen

menu icon
go to homepage
  • Spring Recipes
  • Recipes
  • Order Meal Prep
  • Healthy Gut Baby Food Course
  • About
    • Facebook
    • Instagram
    • Pinterest
    • Twitter
  • search icon
    Homepage link
    • Spring Recipes
    • Recipes
    • Order Meal Prep
    • Healthy Gut Baby Food Course
    • About
    • Facebook
    • Instagram
    • Pinterest
    • Twitter
  • ×
    Allianna's Kitchen » Recipes

    Blog

    lemon cucumber pickles 2 scaled

    April 22, 2021 Allergy Friendly

    Lemon Cucumber Pickles

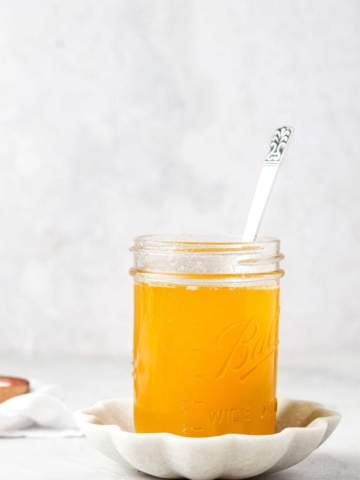
    This quick and easy lemon cucumber pickles  out do store bought pickles. These pickles are garlicy, lemony and have the perfect touch of sweetness!

    lemon cucumber pickles in a mason jar on a wooden plate

    If you like easy vegetable recipes like this one, be sure to check out my Blanched Broccoli Recipe on my blog!
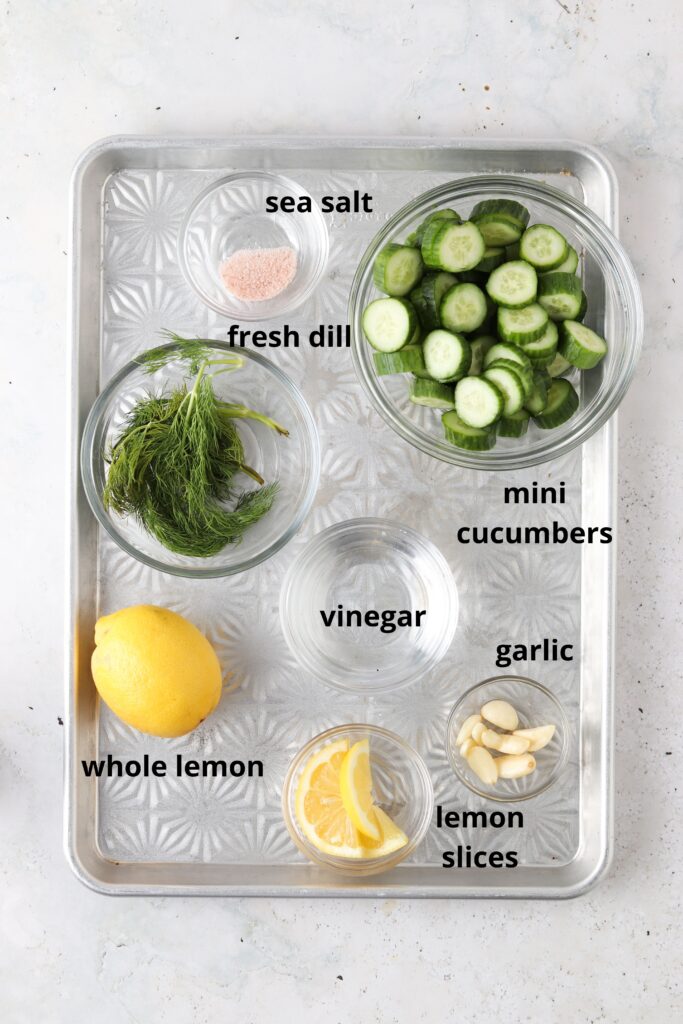
    Ingredients:

    • Mini cucumbers-I like to use mini cucumbers because they are already the perfect size, all you have to do is chop them! You can use larger cucumbers but I would suggest chopping them into spears then. 
    • Garlic-The garlic combined with the lemon is oh so delicious. 
    • Salt-This helps with the fermentation process. 
    • Fresh dill-I love adding dill to just about anything! It adds a nice tangy flavor.
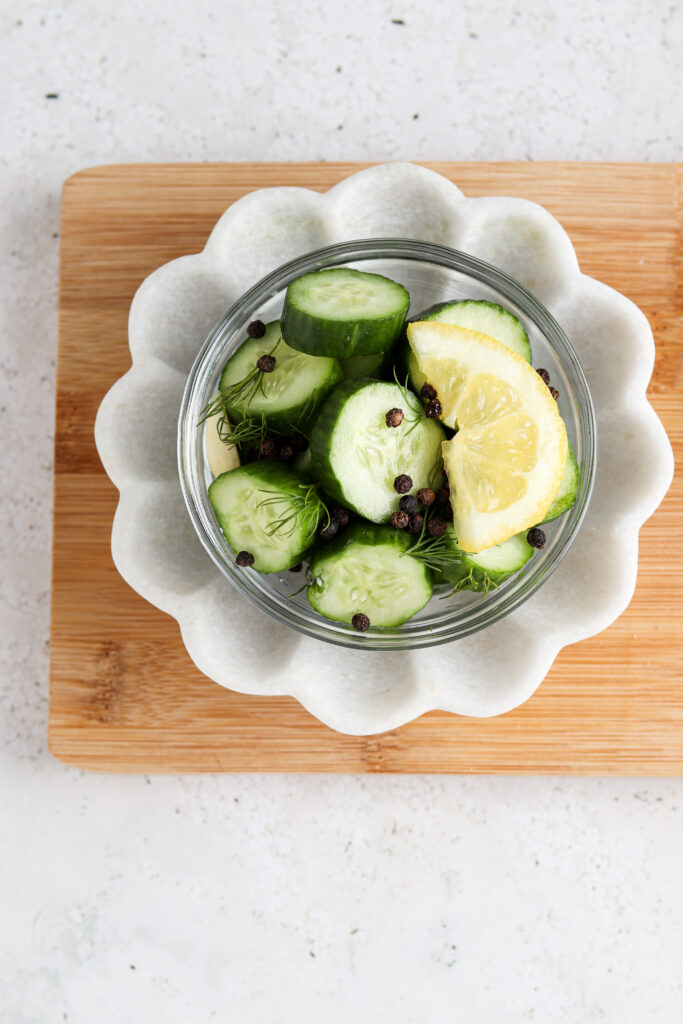
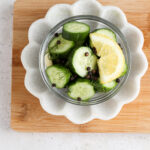
    • Lemons-This is what adds the lemon flavor! I like to add lemon juice as well as adding whole lemon slices to the mason jar to add even more of a lemon flavor.
    • Vinegar-I like apple cider vinegar. This will help with the fermentation process.
    cucumber ingredients on a metal tray

    How To Make This Easy Lemon Cucumbers Pickle Recipe:

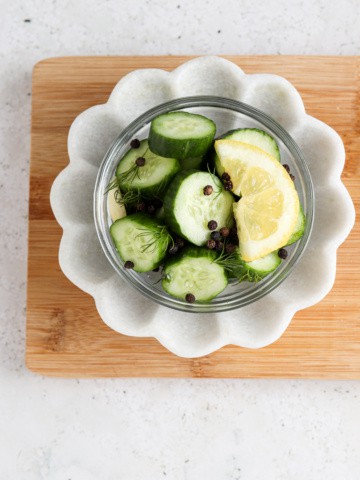
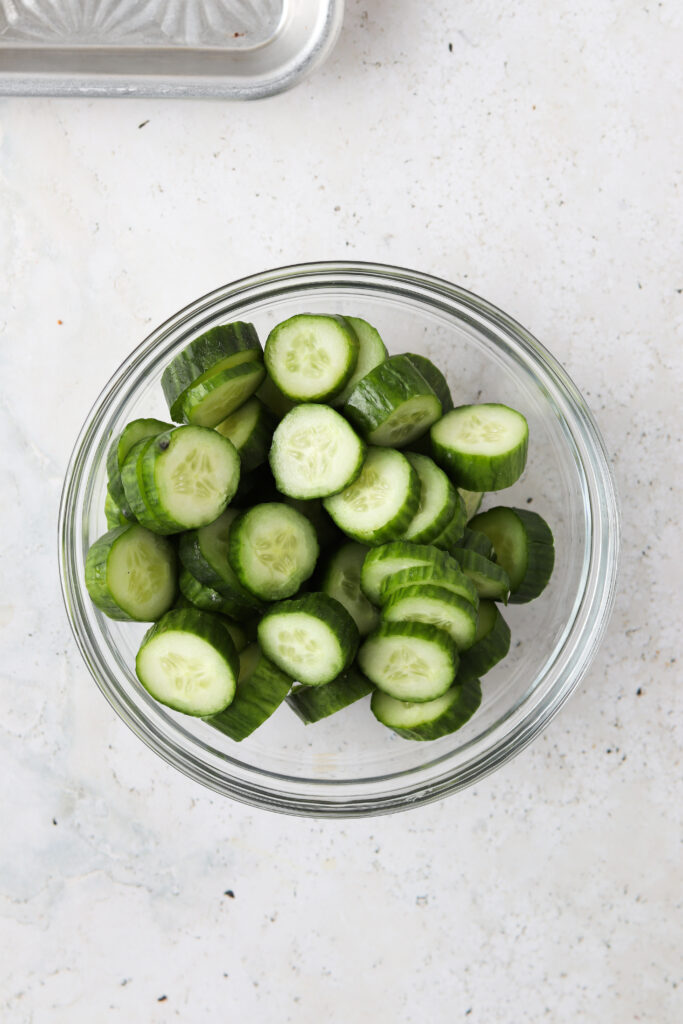
    • First thing is first, wash and chop your pickles!
    • I like to cut my pickles into a coin size shape with the skin on. 
    • Next, mince the garlic with a garlic mincer and juice the lemon with a lemon juicer. 
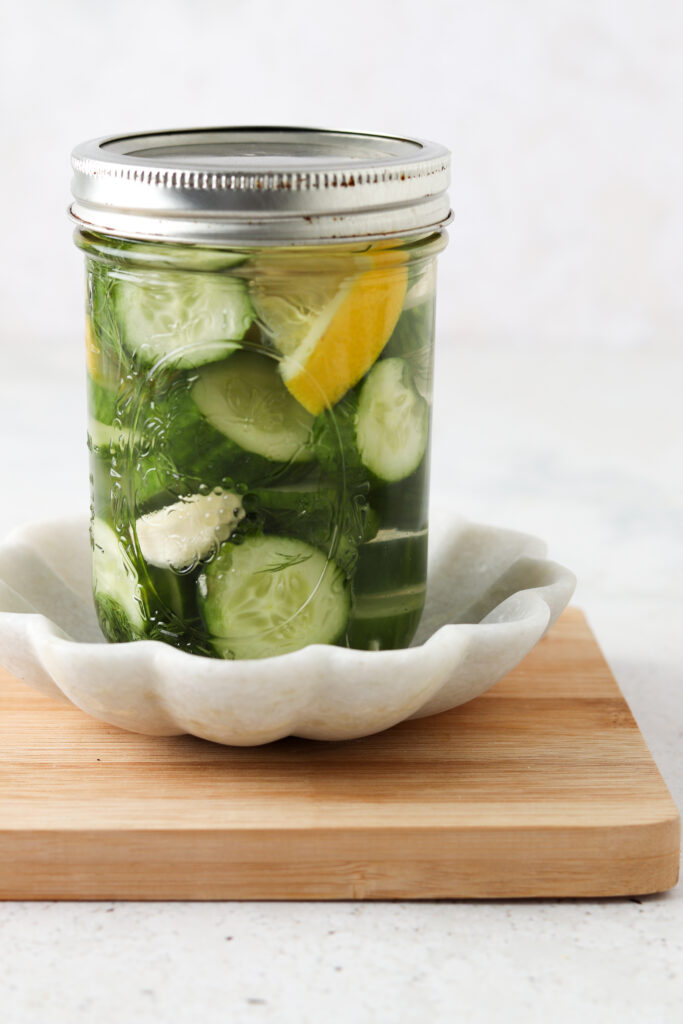
    • Once the cucumbers are chopped, add  all ingredients to the mason jar. Be sure the cucumbers are covered with the liquid completely. 
    • Store the jar on the counter for at least 5 days. Refrigerate once the jar is opened.
    chopped up cucumbers

    How long does it take to turn a cucumber into a pickle?

    • The fermentation process begins as soon as you put seal the cucumbers in the jar! It takes a few days for the fermentation process to peak for the cucumbers to turn into the pickles. 

    What are lemon cucumbers good for?

    • I love using these lemon cucumber sweet pickles on everything! They are especially good on sandwiches or burgers. 

    Should you peel the cucumbers?

    • You do not need to peel these pickles! Keep the skin on.
    pretty picture of lemon cucumber pickles on a plate

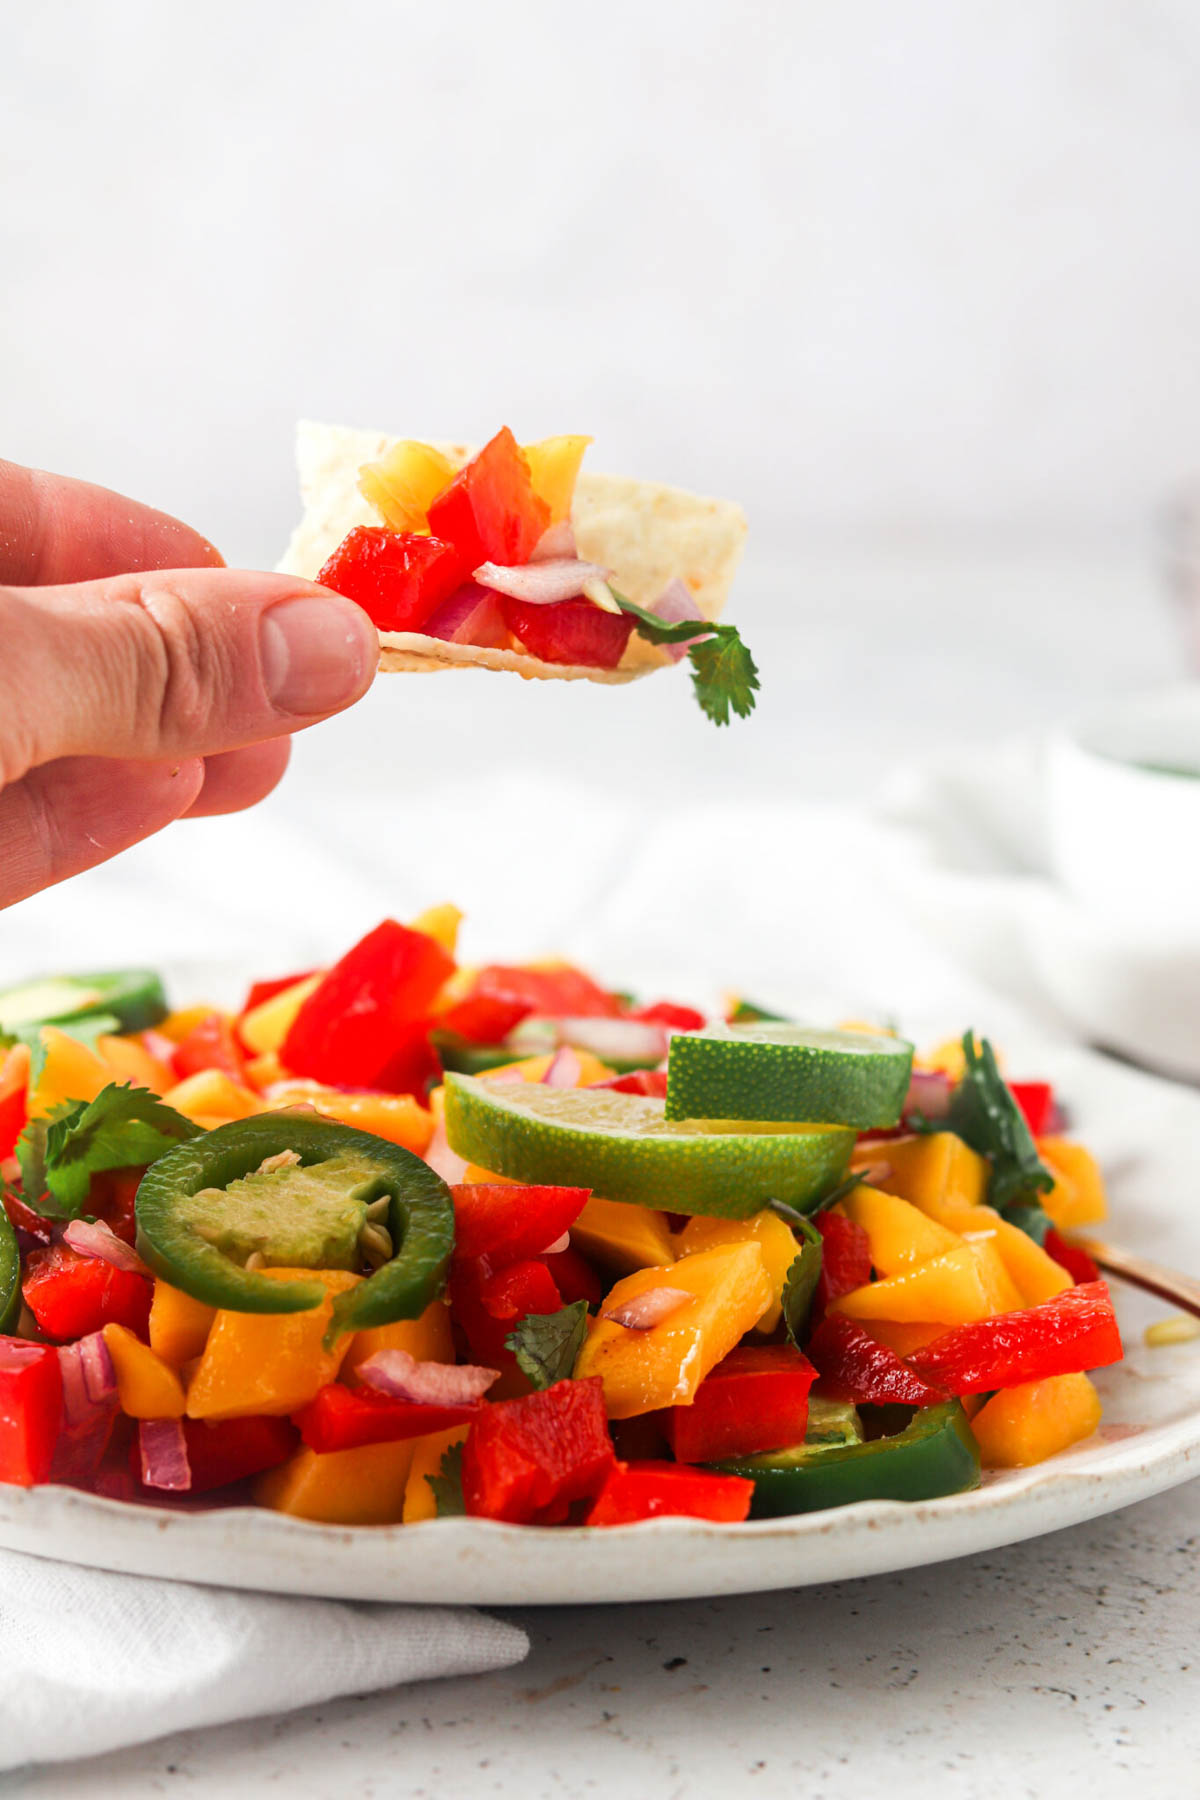
    If you like this recipe, check out my other FAVORITE vegetables:

    • Lemon Dill Green Beans
    • Bacon Brussels Sprouts Pomegranate Dish
    • Crispy Whole 30 Potatoes

    Hey-you’ve made it this far! If you make this recipe, I would love for you to give it a star ★ rating and review below. Make sure you are following me on Instagram, Pinterest, and Facebook too!

    lemon cucumber pickles 2 scaled

    Lemon Cucumber Pickles

    Course Appetizer, Snack
    Cuisine American
    Prep Time 10 minutes minutes
    Fermenting tine 5 days days
    Total Time 5 days days 10 minutes minutes
    Servings 10 servings
    Author Allianna Moximchalk
    3kcal
    Cost $3
    Print Recipe Pin Recipe

    Equipment

    • 1 or 2 mason jars
    • cutting board
    • knife

    Ingredients

    • 1 pound mini cucumbers sliced
    • 1 tbsp sea salt
    • 6 cloves garlic minced
    • 1/4 cup fresh dill
    • 1 whole lemon juiced
    • 1 whole lemon sliced
    • 1/2 cup vinegar I like apple cider vinegar

    OPTIONAL:

    • black peppercorns omit for AIP

    Instructions

    • Slice up the mini cucumbers, then place all ingredients in a large bowl (including lemon slices) and mix. Pour into a mason jar (or two jars depending on how big your jars are.) Fill remaining mason jar space with filtered water to about 1 inch from the top. Sit on the counter for at least 5 days to allow the fermentation process to begin. Store in the fridge after the first use.

    Notes

    Hey-you’ve made it this far! If you make this recipe, I would love for you to give it a star ★ rating and review below. Make sure you are following me on Instagram, Pinterest, and Facebook too!
    Easy alternative to store bought pickles.
    Serving: 1serving | Calories: 3kcal | Carbohydrates: 1g | Protein: 1g | Fat: 1g | Saturated Fat: 1g | Sodium: 1mg | Potassium: 16mg | Fiber: 1g | Sugar: 1g | Vitamin A: 91IU | Vitamin C: 2mg | Calcium: 6mg | Iron: 1mg
    Tried this recipe?Tag me on instagram @alliannaskitchen!
    banana cream smoothie 4 scaled

    April 18, 2021 Allergy Friendly

    Banana Cream Smoothie (Dairy Free Option)

    This Banana Cream Smoothie tastes like dessert! It is super easy to make and even has an added protein option by using collagen peptides. This smoothie is great for breakfast and all of your snacking needs.

    banana cream smoothie on a plate

    if you love this recipe, you will love the other smoothie recipes on my blog like my Mango and Pineapple Smoothie and Dairy Free Pumpkin Spice Smoothie as well.

    Ingredients:

    • Bananas-This is what makes the smoothie!
    • Coconut yogurt-You can use regular yogurt if you can tolerate dairy. If you are not doing the autoimmune protocol you can use almond milk also. 
    • Coconut milk-This helps the smoothie not get thick! Again, if you can tolerate dairy you can use regular milk.

    OPTIONAL:

    • Gluten free graham crackers on top.
    • Coconut whip cream. 
    ingredients for banana cream smoothie on a tray

    Instructions:

    • Place all ingredients in a blender and blend. 
    • If you are adding the optional whipped cream, add the whipped cream on top and sprinkle the graham crackers. 
    smoothie in a blender

    How long does this last?

    • I suggest drinking the smoothie as soon as you make it but it can last for up to 3 days in the fridge. Be sure to shake it up prior to drinking. 

    Can I Use Frozen Bananas?

    • Yes! Frozen bananas will make it thicker and give it much more of a milkshake like texture.
    banana smoothie on a blue plate

    If you like this smoothie recipe, you will LOVE my other smoothie recipes:

    • Paleo Mint Smoothie
    • Strawberry Banana Smoothie Bowl
    • Orange Creamsicle Smoothie

    Hey-you’ve made it this far! If you make this recipe, I would love for you to give it a star ★ rating and review below. Make sure you are following me on Instagram, Pinterest, and Facebook too!

    banana cream smoothie 2 scaled

    Banana Cream Smoothie

    Course Breakfast, Snack
    Cuisine American
    Prep Time 5 minutes minutes
    Total Time 5 minutes minutes
    Servings 2 people
    Author Allianna Moximchalk
    464kcal
    Cost $3
    Print Recipe Pin Recipe

    Equipment

    • high speed blender

    Ingredients

    • 2 whole bananas ripe
    • 1 cup coconut yogurt regular yogurt ok if you are not dairy free
    • 1 cup coconut milk regular milk ok if you are not dairy free

    Optional:

    • 4 scoops vital proteins collagen peptides for extra protein
    • coconut whipped cream
    • crushed graham crackers

    Instructions

    • Place all ingredients in a blender and blend. Add whipped cream and graham crackers on top if desired.

    Notes

    Hey-you’ve made it this far! If you make this recipe, I would love for you to give it a star ★ rating and review below. Make sure you are following me on Instagram, Pinterest, and Facebook too!
    A quick and easy healthy treat.
    Serving: 1glass | Calories: 464kcal | Carbohydrates: 9g | Protein: 52g | Fat: 28g | Saturated Fat: 22g | Cholesterol: 100mg | Sodium: 105mg | Potassium: 432mg | Fiber: 1g | Sugar: 4g | Vitamin A: 161IU | Vitamin C: 1mg | Calcium: 216mg | Iron: 8mg
    Tried this recipe?Tag me on instagram @alliannaskitchen!
    orange creamsicle smoothie 4 scaled

    April 17, 2021 Allergy Friendly

    Orange Creamsicle Smoothie

    This orange creamsicle smoothie is everything you need on a warm summer day, but you will also want to drink it all winter long. The freshly squeezed orange juice combined with the ripe banana is oh so delicious. This recipe can be made dairy free, Whole30 friendly and autoimmune protocol friendly.

    two orange creamsicle smoothies in a glass with oranges on top and a blue napkin

    If you like this smoothie recipe, you will love the other smoothie recipes on my blog like my Mango and Pineapple Smoothie.

    Ingredients:

    • Yogurt- I love using coconut yogurt, but if you prefer dairy you can use regular yogurt. If you are doing the autoimmune protocol be sure to use an AIP friendly coconut yogurt. 
    • Orange juice- I like making my own OJ using my favorite juicer but you can totally buy store bought OJ if you would prefer. 
    • Banana- Make sure it is ripe! You can also use frozen bananas. This will add texture and some sweetness to your smoothie. 
    • Collagen peptides or protein powder-You can use either! I prefer collagen peptides because they are naturally paleo and AIP friendly, but you can for sure use a protein powder of your choice too. I like this brand of collagen peptides. 

    ingredients on a metal tray

    Instructions:

    • Place all ingredients in the blender and blend!
    • If you are making your own OJ, be sure to juice the oranges beforehand. 

    What Kind Of Juicer Do You Use?

    • I use THIS one! I have been using it for almost a decade and love it. You can totally juice your citrus fruits with a much simpler citrus juicer like this one too. 
    smoothie ingredients in a blender

    How Long Does This Last?

    • My smoothies taste best fresh but you can for sure store them in the fridge for 3 days. I suggest shaking them up prior to eating. If you want to prepare your smoothie in advance, I suggest putting all the ingredients in a bag, then putting them in your freezer. You can store them in the freezer for months!
    orange creamsicle smoothie in a glass with an orange on it and blue napkin

    If you like this smoothie recipe, you will LOVE my other smoothie recipes:

    • Paleo Mint Smoothie
    • Strawberry Banana Smoothie Bowl

    Hey-you’ve made it this far! If you make this recipe, I would love for you to give it a star ★ rating and review below. Make sure you are following me on Instagram, Pinterest, and Facebook too!

    orange creamsicle smoothie 4 scaled

    Orange Creamsicle Smoothie

    Course Snack
    Cuisine American
    Prep Time 10 minutes minutes
    Total Time 10 minutes minutes
    Servings 4 servings
    Author Allianna Moximchalk
    191kcal
    Cost $5
    Print Recipe Pin Recipe

    Equipment

    • High powered food processor

    Ingredients

    • 2 cups orange juice about 8 oranges, juiced
    • 2 whole bananas ripe, frozen is ideal
    • 2 cups yogurt I use coconut yogurt for the autoimmune protocol, whole30 and for dairy free.
    • 1 whole orange to garnish
    • 2 scoops vital proteins collagen peptides

    Instructions

    • Place all ingredients in a blender and blend. Garnish with orange slices. Enjoy!

    Notes

    Hey-you’ve made it this far! If you make this recipe, I would love for you to give it a star ★ rating and review below. Make sure you are following me on Instagram, Pinterest, and Facebook too!
    Quick and easy refreshing smoothie with a dairy free option!
    Serving: 1glass | Calories: 191kcal | Carbohydrates: 20g | Protein: 18g | Fat: 5g | Saturated Fat: 3g | Cholesterol: 41mg | Sodium: 80mg | Potassium: 485mg | Fiber: 1g | Sugar: 17g | Vitamin A: 410IU | Vitamin C: 63mg | Calcium: 211mg | Iron: 1mg
    Tried this recipe?Tag me on instagram @alliannaskitchen!
    Buffalo marinated shrimp on tortilla shells with slaw and limes on top.

    April 12, 2021 Dairy free

    Buffalo Shrimp Tacos

    These Buffalo Shrimp Tacos make for an easy recipe to make during those busy weeknights or lazy weekends. The crispy shrimp combined with the green cabbage slaw is oh so delicious. With this recipe you can have dinner on the table in under 15 minutes. 

    buffalo shrimp tacos 8

    If you are like my family Taco Tuesday and Taco Thursdays are taken very seriously in our house! This recipe has become a staple along with my Halibut Fish Tacos and my Baja Shrimp Tacos recipe. We love topping off any kind of delicious tacos with my favorite toppings like my Mexican Pickled Onions, Gluten Free Coleslaw, and my Pineapple Pico de Gallo and Avocado Crema. 

    [feast_advanced_jump_to]

    Why I Love This Recipe

    • This easy shrimp tacos recipe is one of those quick meals for busy families that you will keep making over and over because it is so simple and everyone loves it. 
    • While we eat this recipe all year round, it is definitely my go to on cinco de mayo. 
    • It is an easy meal you can even prepare in advance so all you have to do is bake the shrimp when you are ready to eat. 
    • This recipe can be made dairy free, gluten free, soy free, nut free, egg free and paleo friendly. 
    • If you have leftover buffalo sauce from this recipe, you can make it into my other favorite things like my Dairy Free Buffalo Chicken Dip, Crispy Buffalo Chicken Wings, Gluten Free Buffalo Chicken Meatballs, and Chicken Nuggets in the Air Fryer. 

    Recipe Ingredients

    Buffalo shrimp taco ingredients laid out in small glass bowls.


    • Shrimp-I like getting mine from Butcher Box. Use this code for $30 off!
    • Butter-This makes the buffalo sauce nice and creamy. You can also use the homemade Ghee Recipe on my blog. This recipe also calls for additional butter to cook the shrimp in.
    • Garlic powder& onion powder-To add even more flavor to the buffalo sauce. 
    • Hot sauce-The hot sauce in combination with the ghee is what makes buffalo sauce!
    • Tortillas-Any kind of tortillas will work, but I like my Homemade Cassava Flour Tortillas best where my husband on the other hand loves corn tortillas with his tacos. 

    Optional Coleslaw Topping

    Creamy coleslaw ingredients laid out in small glass bowls on the counter.
    • Shredded cabbage bag-I like to buy the shredded cabbage bag from Trader Joe’s. It is already partially shredded and saves a bunch of time! You can use whole cabbages, but you would have to cut them with a knife or shred them in the food processor.
    • Avocado mayonnaise– Avocado mayonnaise is a great alternative for regular store bought mayonnaise. It is creamy and made from avocado oil instead of canola oil which is extremely inflammatory. You can also use regular mayo.
    • Apple cider vinegar-This adds a nice tangy touch. 
    • Dill-I love adding dried dill to add to the tangy apple cider vinegar flavor.
    • Dijon Mustard-The mustard combined with the avocado mayo makes for an even more smooth and creamy taste as well as adding some flavor.

    See the recipe card below with a full list of ingredients and measurements.

    Recipe Substitutions and Variations

    • Cheese-While this recipe does not need any added cheese, you can add blue cheese crumbles on top or shredded cheddar cheese for flavor. 
    • Ranch dressing-I love dipping these tacos in ranch! You can use store bought ranch or my better for you Dairy Free Ranch Recipe on my blog. 
    • Sour cream-To dip the tacos in if you are not using ranch. 
    • Creamy blue cheese dressing-To dip in. This is my husbands personal favorite. 
    • Taco bowls-You can make this recipe into a taco bowl by using brown rice and greens as the base. 
    • Red onion-You can sauté some red onion to add on top, so good!
    • Green onions-To garnish.

    This recipe has not been tested with any other substitutions or variations. If you try something else out please let me know how it turns out in the comments below!

    Recipe Instructions

    Shrimp, butter, buffalo sauce, and spices in a pan.
    Step #1: Add the butter to a large skillet on medium heat, then add in the shrimp and cook for approx 3 minutes on each side.

    Then, mix the buffalo sauce with the melted butter, hot sauce, garlic powder and onion powder. Mix in with the shrimp as you serve.

    Coleslaw ingredients mixed in a large glass bowl.

    Step #2: Toss all ingredients together to mix the coleslaw.

    Recipe FAQs

    What is a good side dish for tacos?

    Instant Pot Rice is one of my favorites!

    What kind of shrimp do you suggest in shrimp tacos?

    I like using mini shrimp for tacos but any kind will work!

    Marinated buffalo shrimp

    Other Gluten Free Dinner Recipes

    • Close up picture of crispy chicken on a white scalloped plate.
      Crispy Gluten Free Fried Chicken Recipe
    • Close up photo of breaded fish on a plate with ketchup, french fries, lemon halves and fresh herbs.
      Easy Gluten Free Fish and Chips Recipe
    • pan seared sea bass on a plate with greens and lemon
      Pan Seared Chilean Sea Bass In Lemon Caper Sauce
    • air fried turkey burger on a plate with french fries
      Air Fryer Turkey Burgers

    Are you interested in a list of my go to healthy alternatives?

    Download your free guide below.

    Download the guide
    Buffalo shrimp tacos with green onions and lime on top.

    Buffalo Shrimp Tacos

    Course Meals
    Cuisine American
    Prep Time 15 minutes minutes
    Cook Time 10 minutes minutes
    Total Time 25 minutes minutes
    Servings 3 people
    Author Allianna Moximchalk
    1053kcal
    Cost $15
    Print Recipe Pin Recipe

    Equipment

    • spatula
    • frying pan
    • bowls

    Ingredients

    For the tacos:

    • 1 pound shrimp, tail off Thawed. Use my link for $30 off Butcher Box.
    • 3/4 cup hot sauce
    • 1/4 cup butter or ghee
    • 1/2 tsp butter for cooking shrimp
    • 1 tsp garlic powder
    • 1 tsp onion powder
    • 6 whole tortillas click for my homemade Whole30 tortilla recipe. You can also use lettuce wraps for keto and whole30. I am gluten free so I just like to make sure I buy gluten free tortillas.

    For the slaw:

    • 1 bag shredded slaw I like trader joe's brand. It is a mix of cabbage and carrots.
    • 1/2 cup avocado mayo Or regular mayo will work.
    • 1/4 cup apple cider vinegar
    • 1/4 cup dijon mustard
    • 1 tsp dill

    Optional to serve:

    • green onions
    • ranch

    Instructions

    For the slaw:

    • Chop up the cabbage into even smaller bite size pieces. Add the cabbage to a bowl with the dijon mustard, avocado mayo, apple cider vinegar, and dill. Mix until mixed throughout.

    For the tacos:

    • Add the 1/2 tsp of butter to a pan and cook the shrimp for 3 minutes on each side for a total of 6 minutes. Slowly add in the hot sauce, garlic powder, onion powder, ghee and mix. Remove the shrimp from the heat.
    • Add the slaw to the bottom of the taco, then add the shrimp with the optional green onions and ranch on top.

    Notes

    Servings: This recipe yields approximately 6 tacos. 
    Nutrition: The nutrition on this recipe is just an estimate and cannot be guaranteed. 
    Storage: You can store this recipe in the fridge for up to 5 days. I suggest waiting to assemble the tacos until you are ready to serve. 
    Creamy and full of flavor buffalo shrimp tacos.
    Serving: 2tacos | Calories: 1053kcal | Carbohydrates: 14g | Protein: 33g | Fat: 91g | Saturated Fat: 18g | Trans Fat: 1g | Cholesterol: 422mg | Sodium: 3654mg | Potassium: 302mg | Fiber: 1g | Sugar: 1g | Vitamin A: 134IU | Vitamin C: 52mg | Calcium: 252mg | Iron: 4mg
    Tried this recipe?Tag me on instagram @alliannaskitchen!
    halibut fish tacos on a pale blue plate

    April 7, 2021 Allergy Friendly

    Halibut Fish Tacos

    These Halibut Fish Tacos are one of our weekly go to recipes. They are loaded with flavor, light, easy, and oh so delicious. You can make the halibut multiple ways in this recipe. We like to pair these tacos with our fresh mango salsa and crispy homemade tortillas. The fish is light and the pico de gallo gives it a a fresh crunch. Halibut is a lighter tasting fish so the sweetness from the mango and bite from the fresh onion make this a complete flavorful dish.

    Halibut fish tacos lined up in a blue bowl and garnished with fresh green herbs and jalapeños.

    This dish screams summer to me. I love light dishes on a hot day so that I don’t feel weighed down with carbs and heavy vegetables. You can grill the fish to give it even more flavor as well. I love to make these tacos with my homemade AIP Tortillas with Cassava Flour, Mexican Pickled Onions, Mango Pico de Gallo, Crema Avocado, or Pineapple Pico de Gallo. This recipe and my Homemade Fish and Chips, Buffalo Shrimp Tacos, Gluten Free Salmon Cakes are also favorites in my home! If you love Mexican themed food like I do, check out our Dairy Free Enchiladas recipe too! If you are making this recipe during the summer, try pairing it with my Cantaloupe Melon Salad. It is so delicious and easy to make.

    [feast_advanced_jump_to]

    Why You Will Love This Recipe

    • This dish is so simple! This dish can be ready start to finish in 15 minutes including your prep time and will be packed full of flavor.
    • This dish is naturally gluten free, dairy free, soy free, and can be made paleo and whole30 friendly.
    • Kids will love this dish as well! The halibut is not an overpowering fish and the pico de gallo helps to add additional flavor.
    • This dish would also taste great with my pineapple pico de gallo in place of the mango pico de gallo.
    • You can cut down on even more prep time by preparing your pico de gallo earlier in the week and having it in your refrigerator so that you only have to cook your fish and get ready to enjoy.
    • This dish has a nice spice from the raw onion and jalapeños, but the fresh sweet mango helps to add a nice balance to the dish.

    Ingredients: 

    Halibut fish taco ingredients in glass bowls on a silver tray.

    For the fish

    • Halibut-I like using halibut for my fish tacos because it is such a versatile fish and super durable. It is easy to cook with and you do not have to worry about it falling apart. 
    • Lime-Lime adds a nice tangy touch to drizzle on top. It is also a great garnish on your plate so that you can add an additional fresh squeeze of lime to your taco before eating.
    • Cayenne-Adds a nice zest without being overpowering!
    • Ghee-I like to pan sear in ghee over oil because it gives the fish a buttery taste. 
    • Cumin-Adds some nice flavor and is what helps to give the fish a taco flavor in combination with the cayenne.
    • Salt & pepper-To season. 

    For the mango pico de gallo

    The mango pico de gallo is what makes this recipe! 

    • Fresh mango-Make sure it is ripe! When mangos are ripe they form a similar texture as avocados, they become a bit soft. 
    • Red pepper-red pepper is the perfect mix of sweetness between yellow and orange peppers but a bit spicy like green peppers. They go perfect in this pico, however if you do not have red at home, you can for sure substitute for something else!
    • Limes-Lime adds a nice citrus twist while keeping the fruits and vegetables from becoming dry.
    • Purple onion-Adds the most perfect crunch! I prefer purple over yellow because they are not as sweet.
    • Jalapeños– Add a touch of spice. If you do not like too much spice, make sure to take out the membranes and seeds of the pepper.
    • Fresh cilantro-I love fresh herbs and this fresh cilantro adds the most perfect touch. 
    • Sea salt-A little bit of salt with this sweet pico!

    For the tortilla

    • Obviously you can buy store bought but I like making my own from cassava flour! Check out this recipe HERE. These tortillas are naturally paleo, AIP & Whole30 friendly. 

    See the recipe card below for a full list of ingredients and measurements.

    Substitutions and Variations

    • You can substitute the mango in the pico de gallo for another fresh fruit like pineapple.
    • If you prefer a different white fish other than halibut, such as tilapia, cod, or mahi mahi, you can substitute the white fish of your choice.

    This recipe has not been tested with other substitutions or variations. If you replace or add any ingredients, let us know how it turned out in the comments below!

    Step by Step Instructions

    Mango pico de gallo in a white bowl with a gold spoon.
    For the pico, you will want to chop up the mango, purple onion, and jalapeño finely. Add to a bowl and juice the limes on top. Sprinkle the sea salt and add the fresh cilantro.
    Halibut fish taco on a plate with fresh green herbs and a slice of lime.
    For the fish, you will want to pat dry the fish. Add the ghee to the pan and get the pan real hot. Coat the fish with salt and pepper. Add the fish to the pan and cook for 4 minutes, flip and cook for an additional 4 minutes. To assemble, add the fish to a taco shell and top with pico and squeeze fresh lime juice on top.

    Equipment Needed

    • Non-stick pan

    Expert Tips

    • Tip # 1: When purchasing fish for tacos, you will want to make sure that you are choosing boneless and skinless. You can use fish that still has the skin attached, you will just want to shredded the fish from the skin so that it is separated prior to assembling your taco.
    • Tip # 2: The seeds and membranes of the jalapeños is where the heat is housed. If you want to have less spicy pico de gallo, you will want to remove the seeds and membranes prior to chopping.
    • Tip # 3: Mangos have a large pit in the middle. You will want to cut around the pit and then either scoop the mango out of the skin or trim the skin off before cutting the mango.

    Recipe FAQ’s

    What kind of fish is best to use for fish tacos?

    I love using halibut. It is extremely versatile and goes great with just about any toppings. Not to mention it is a durable fish therefore it is very easy to cook with.

    How many pounds of fish do you need for tacos?

    I like to allow for a half pound of fish per person.

    What should I serve with fish tacos?

    The mango pico de gallo is what makes these tacos! You could also serve it with a creamy crunchy slaw, like this one. Halibut is versatile, so it goes great with just about anything.

    How can I cook this dish?

    You can either pan sear or grill the halibut for this dish!

    Halibut fish tacos in a line on a platter with fresh cilantro, avocado, and jalapeño slices.

    Storage Instructions

    • This recipe can be stored in the refrigerator in an air tight container for up to 5 days.

    Other Fish Recipes You Will Love

    • pan seared sea bass on a plate with greens and lemon
      Pan Seared Chilean Sea Bass In Lemon Caper Sauce
    • pan seared sea bass 1 scaled
      Pan Seared Sea Bass With Tropical Pico De Gallo
    • whole30 salmon 1 scaled
      Whole30 Salmon w/ Lemon Dill Dijon Sauce (Keto, Paleo)
    • honey sriracha salmon 8 scaled
      Honey Sriracha Salmon (Paleo, Gluten Free)

    Want a free guide to my go to healthy alternatives?

    download your FREE guide
    halibut fish tacos 6 scaled

    Halibut Fish Tacos

    Course Appetizer, Meals, Snack
    Cuisine American
    Prep Time 10 minutes minutes
    Cook Time 10 minutes minutes
    Total Time 20 minutes minutes
    Servings 5 people
    Author Allianna Moximchalk
    192kcal
    Cost $20
    Print Recipe Pin Recipe

    Equipment

    • Either grill or non-stick pan

    Ingredients

    For the fish:

    • 5 pieces halibut I like wild caught. Allow for 1/2 pound per person.
    • oil of choice I like ghee
    • 1/4 tsp sea salt
    • 1/2 tsp black pepper

    For the pico de gallo-

    • 2 whole mangos ripe, peeled, and diced
    • 1 red pepper diced, omit for AIP
    • 1 purple onion chopped
    • 3 whole limes juiced
    • 1 cup fresh cilantro
    • 1 whole jalapeno sliced, omit for AIP
    • 1 pinch sea salt

    To serve:

    • limes squeezed
    • avocado slices
    • 10 tortillas see notes above about my homemade grain free tortillas

    Instructions

    For the pico:

    • Chop up the mango, purple onion, red pepper, and jalapeno finely. Add to a bowl and juice the limes on top. Sprinkle the sea salt and add the fresh cilantro. Store in the fridge.

    For the fish: PAN SEAR VERSION-

    • Pat dry the fish. Add the ghee to the pan and get the pan real hot. Coat the fish with salt and pepper. Add the fish to the pan and cook for 4 minutes, flip and cook for an additional 4 minutes. Remove the fish from the pan.

    For the fish: GRILL VERSION

    • Melt the ghee, add the ghee and spices to a bowl and brush over the fish. Heat up the grill to 350. Add the fish directly on to the grill racks. Cook for 5 minutes, then flip and cook for an additional 5 minutes or until the fish reaches 145 degrees F. Remove from the grill.

    To assemble:

    • Add the fish to the taco shell, with the pico. Squeeze lime on top.

    Notes

    Storage: This recipe can be stored in the refrigerator for up to 5 days in an air tight container.
    Nutrition: The nutrition for this recipe is an estimate and the calorie count is not guaranteed.  It is based on 5 servings.  
    Servings: This recipe should yield 5 servings. 
    Easy and versatile halibut recipe.
    Serving: 1taco | Calories: 192kcal | Carbohydrates: 33g | Protein: 5g | Fat: 4g | Saturated Fat: 1g | Cholesterol: 1mg | Sodium: 422mg | Potassium: 149mg | Fiber: 2g | Sugar: 4g | Vitamin A: 225IU | Vitamin C: 3mg | Calcium: 72mg | Iron: 2mg
    Tried this recipe?Tag me on instagram @alliannaskitchen!
    Mango Pico de Gallo 1 scaled

    April 2, 2021 Allergy Friendly

    Mango Pico de Gallo

    This Mango Pico de Gallo recipe has the perfect amount of sweetness and spice. The mango and cilantro compliment the pop of jalapeno peppers oh so nicely and bring on a nice tropical twist. This fresh pico de gallo goes great with just about anything: fish tacos, tortilla chips, burrito bowls, chicken, salads and more!

    Mango pico de gallo on a plate with a spoon.

    This salsa fresca recipe was inspired from a trip I took with my husband a few years ago to Greece. The fresh ingredients are loaded with flavor. This recipe is so versatile and goes with just about anything! If you like this recipe you will also love my Pineapple Pico de Gallo. 

    [feast_advanced_jump_to]

    Why I Love This Recipe

    • There is nothing better than fresh salad filled with fresh ingredients! This recipe just screams freshness!
    • You may want to consider serving this with my other favorite appetizers like my Whole30 Guacamole, Panera Inspired Strawberry Poppyseed Salad, Gluten Free Pigs in A Blanket, Gluten Free Salmon Cakes and Easy Keto Crab Cakes.
    • This recipe is naturally dairy free, gluten free, soy free, nut free, egg free, paleo, Whole30 friendly and vegan.
    • With all of the bright colored fruits and vegetables in this colorful salsa, this recipe is loaded with vitamin c!
    • Unlike classic pico de gallo, this recipe does not have fresh tomatoes in it. 
    • This fresh salsa only requires simple ingredients!

    Mango Pico de Galo Ingredients

    Mango pico de gallo ingredients in small glass bowls on a silver tray.
    • Ripe mangoes-Make sure it is ripe! When mangos are ripe they form a similar texture as avocados, they become a bit soft.The sweet mango in this recipe add the perfect amount of sweetness.
    • Red bell pepper-red pepper is the perfect mix of sweetness between yellow and orange peppers but a bit spicy like green peppers. They go perfect in this pico, however if you do not have red at home, you can for sure substitute for something else!
    • Fresh limes-The tangy lime juice adds a nice citrus twist while keeping the fruits and vegetables from becoming dry.
    • Purple onion-Adds the most perfect crunch! 
    • Jalapeños– Add a touch of spice.
    • Fresh cilantro-I love fresh herbs and this fresh cilantro adds the most perfect touch. 
    • Pinch of salt-A little bit of sea salt with this sweet pico!

    See the recipe card below for a full list of ingredients and measurements.

    Recipe Substitutions and Variations

    • Fresh lime juice-You can also use lime juice in place of fresh limes with this recipe.
    • Onions-I prefer purple over yellow onion, red onion, or white onion because they are not as sweet.
    • Spicy flavors-You can add in more jalapeño peppers or serrano pepper if you would like!

    ​This recipe has not been tested with any other substitutions or variations. If you try something else out please let me know how it turns out in the comments below!

    How To Make

    Pico de gallo in a large mixing bowl.

    Step #1: First, using a sharp knife and cutting board, chop up all ingredients except the lime and cilantro in small pieces. The smaller the better. The smaller the pieces, the more flavors you can fit in a bite, which means the better taste! Once the vegetables and fruits are chopped, juice the lime and pull pieces off of the cilantro bunch. Finally, mix all ingredients together in a large bowl and serve!

    Recipe FAQs

    What is the difference between pico and salsa?

    Traditional salsa is more liquidy, and pico tends to be more solids than liquids. Pico is thicker and salsa is much thinner.

    What should I eat this with?

    I love to eat this recipe with siete chips, corn chips, fresh fish and even put it on top of my salads. Lately we have been making this recipe when we make Shrimp Tacos. 

    When is mango season?

    Mango season runs May through October. This is the best time to find juicy fresh mangoes!

    How long will homemade pico de gallo last?

    This recipe lasts 3-4 days in the fridge in an airtight container. 

    When is mango season?

    Mango season runs May through October. This is the best time to find juicy fresh mangoes!

    Chef’s Tips

    • Tip #1: If chopping onions bothers your eyes, place a bowl of water next to the onions. It will prevent tears! Onions contain a substance that is drawn to water, and tear ducts are typically the closest source of water. This is why we cry when cutting onions! 
    • Tip #2: For best results, allow this fresh mango pico de gallo to sit for a few hours prior to eating. This allows the flavors to soak in. 
    Mango pico de gallo on a chip.

    Other Summer Recipes You Will Love

    • Gluten free pigs in a blanket in a pile on a plate.
      Gluten Free Pigs In A Blanket
    • grilled pork belly 1 2 scaled
      Pork Belly On The Grill
    • Cucumber and watermelon salad on a plate with limes, pepper and honey drizzled on top.
      Cucumber Watermelon Salad
    • Pasta salad with olives, peppers and onions in a blue bowl with a white napkin under it.
      Easy Gluten Free Pasta Salad

    Hey-you’ve made it this far! If you make this recipe, I would love for you to give it a star ★ rating and review below. Make sure you are following me on Instagram, Pinterest, and Facebook too!

    Are you looking to eat healthier?

    Want a free guide of my go to healthy alternatives?

    Download your free guide.
    Mango Pico de Gallo 3 scaled

    Mango Pico de Gallo

    Course Appetizer, Snack
    Cuisine American
    Prep Time 10 minutes minutes
    Total Time 10 minutes minutes
    Servings 6 servings
    Author Allianna Moximchalk
    11kcal
    Cost $5
    Print Recipe Pin Recipe

    Equipment

    • cutting board
    • knife

    Ingredients

    • 2 whole mangos ripe, peeled, and diced
    • 1 whole red pepper chopped
    • 1 whole purple onion chopped
    • 3 limes juiced
    • 1 cup fresh cilantro
    • 1 whole jalapeño sliced
    • 1 pinch pink sea salt

    Instructions

    • Chop up the mango, purple onion, red pepper, and jalapeno finely. Add to a bowl and juice the limes on top. Sprinkle the sea salt and add the fresh cilantro. Store in the fridge.

    Notes

    Storage: This recipe can be stored in an air tight glass container for up to 3-4 days in the refrigerator.
    Nutrition: The nutrition for this recipe is an estimate and the calorie count is not guaranteed.  
    Servings: This recipe should yield 6 servings. 
    Quick and easy pico recipe that goes great with just about anything!
    Serving: 1serving | Calories: 11kcal | Carbohydrates: 4g | Protein: 1g | Fat: 1g | Saturated Fat: 1g | Sodium: 8mg | Potassium: 49mg | Fiber: 1g | Sugar: 1g | Vitamin A: 206IU | Vitamin C: 11mg | Calcium: 13mg | Iron: 1mg
    Tried this recipe?Tag me on instagram @alliannaskitchen!
    Weekly Meal Plan Photo Collage

    March 20, 2021 Blog

    Paleo & Gluten Free Week 11 Complete Meal Plan

    This is the paleo week 11 meal plan. I have received a lot of great feedback so I am going to continue to create them. All of this weeks recipes are paleo and gluten free friendly. If they are AIP and keto friendly it will say in the description. Feel free to use previous week’s meal plans that can be found here.  If you would like to get the complete shopping list be sure to sign up for my newsletter below and I will send you your grocery list weekly. All you have to do is shop!

    How The Paleo Week 11 Meal Plan Works:

    If meal prepping your food in advance is your thing I highly suggest getting meal prep containers or containers like these so your meals are ready to eat.

    Included in this post are 8 meals, 7 dinners and 1 breakfast. When making the meals for dinner I suggest making an extra portion so you can eat it for lunch. Keep in mind these are an inspiration, so feel free to swap things out. Each recipe contains the meal only, feel free to add a side. We love roasting veggies to go with our meals. If you would like the full complete shopping list that goes with my meal plan, be sure to subscribe to my email list. If you have questions or need assistance please comment below. If you make one of my recipes I would so grateful if  you left a comment and a star rating review on the recipe in my blog or took a picture and tagged me in it on instagram @alliannaskitchen

    I hope this is helpful as you begin to plan out your week. -Allianna

    For Breakfast:

    paleo-weekly-meal-plan-2

    • Blueberry Maple Turkey Breakfast Sausage ( Paleo, AIP)

      • These AIP breakfast sausage patties are perfect for meal prep. The combination of nutty and minty tasting fresh sage leaves with the cinnamon, pure maple syrup, and blueberries make these patties oh so delicious. This egg free breakfast option is naturally low carb. With these patties taking less than 30 minutes to make we love making them at the start of the week so we have breakfast planned and ready to go

    For Lunch & Dinner:

    paleo-weekly-meal-plan-3

    • Shrimp Fried Cauliflower Rice (Paleo, Keto, AIP, Whole30)

      • This shrimp fried cauliflower rice dish tastes just like Chinese take out yet it is made with cauliflower instead of brown rice. This recipe is super simple and kid friendly. The fresh ginger combined with the green onions makes this dish oh so delicious. This recipe is naturally paleo, Whole30 and keto friendly. It can also be made AIP friendly with just a few modifications.

    • Garlic Butter BWW Copycat Wings (Paleo, Whole30, AIP)

      • These crispy Buffalo Wild Wings copycat garlic butter wings are my fiance’s favorite. They are the perfect date night alternative to take out. With these crispy wings only requiring 5 minutes of hands on time, they are also perfect for all of your weeknight cooking needs! These garlic butter wings are naturally Whole30, paleo, keto and AIP friendly.

    • Honey Sriracha Salmon (Paleo, Gluten Free)

      • This sriracha honey salmon is oh so delicious and the most perfect weeknight meal. This dish is something the whole family can enjoy. The combination of honey and sriracha is quite the winning combo. When you make this recipe you can have dinner on the table in less than 30 minutes!

    • Paleo Gnocchi Bolognese (Whole30, Lower Carb)

      • This paleo gnocchi bolognese is a healthy spin on the traditional Italian dish. It is loaded with flavor and nutrient dense, you will have no idea that the gnocchi is actually made from cauliflower! This dish only requires 5 minutes of hands on time and 15 minutes of cook time making it the perfect weeknight meal for days you are in a rush. This dish is simple yet mouthwatering good. The fresh basil on the top adds the most perfect touch.

    • Paleo Mexican Lasagna With Chicken (Grain Free)

      • Looking for an easy weeknight dinner that’s full of flavor and only takes minutes to prep? This paleo Mexican chicken lasagna is dairy free, gluten free, and always a crowd pleaser! You can even add all your favorite toppings like guacamole, cilantro, and more. With this lasagna only taking 15 minutes to prep and 4 ingredients total, it’s a delicious and healthy option that’s perfect for even the busiest weeknights.

    • Crispy Garlic AIP Chicken Thighs (Paleo, Whole30)

      • These crispy garlic AIP chicken thighs are the perfect dinner that both you and your family will love to eat. The arrowroot powder acts as the breading and makes these chicken thighs oh so delicious. This recipe is naturally Whole30 and Paleo friendly. This crowd pleasing dish takes less than 10 minutes to prepare which makes it an easy to go for all of your weekly dinner needs.

    • Paleo & Whole30 Banh Mi Steak Bowl

      • This Paleo & Whole30 Steak bowl is one of my go to steak dinners. It is quick, easy, and nutrient dense. The quick pickled carrots combined with the ginger lime aioli top this steak bowl off oh so nicely. This dish reheats so nicely making it perfect for weekly meal prep. This dish was inspired by Conflict Kitchen On Pitt’s campus. During my time at Pitt I would hit up this restaurant weekly where they would change the menu to represent different countries. At the time, I was not following the paleo protocol but remember eating this Vietnamese steak banh mi sandwich, it was delightful. 


    Untitled 307 scaled

    March 20, 2021 Blog

    6 Things That Have Helped My Digestion

    If you have been following along on instagram for awhile you know that I experienced stomach issues ever since I was a child. From hurtful burps to even sometimes accidents, my digestion struggled for years. It was so bad as a kid that I ended up getting my stomach tied off to help food stay down and not come up. Luckily over the years I have tried many different things to help with this and finally figured it out for myself. 

    picture of me eating a kale salad to help with digestion

    Below I put together 5 things that I do that have helped my digestion. Note, this is not medical advice, I am simply just sharing what has worked for me.

    close up picture of food that has helped me with digestion

    6 Things That Have Helped With My Digestion

    I stopped drinking water or any liquids with my meals:

    • This one is HUGE! I would find myself way too often burping loudly after eating and even sometimes throw up a little in my mouth (so gross!) It turns out the liquid would help my food slide back up in my throat. Now I do not drink any liquid 20 minutes prior and 20 minutes after eating. 

    I started using bitters:

    • Bitter tonics have been known to help with digestion. I use a dropper full of them prior to eating. I use this BRAND. This has helped my stomach stimulate my natural digestive enzymes. Even eating more bitter foods has helped me. I love incorporating foods like arugula, ginger (in so many of my recipes), dill, kale, and dandelion greens. These foods are naturally bitter. I sometimes switch the bitters off with digestive enzymes. I use these ones HERE.

    I chew my food:

    • Prior to doing what I do now, I was a paramedic. Working in EMS you sometimes do not have much time to eat which meant that I learned to chow down my food in between calls or even when I was driving to calls! Chewing helps stimulate natural digestive enzymes. I like to chew my food until it becomes a puree, like baby food. I found that when I was not chewing my food enough I was extremely gassy. My doctor then told me the gas was probably the undigested food rotting in my stomach, YUCK!

    I take a good probiotic:

    • I only use this BRAND. Note that not all brands are created equally so it is important to buy supplements that come from a reputable brand.  

    I avoid foods I am sensitive to:

    • As life changes, you change. While I will always be gluten free because of celiac disease and mostly dairy free because it makes me bloat, I will go through seasons where I avoid other things if I am experiencing digestive issues. Right now I am avoiding all grains because they were giving me issues. Aside from the celiac diagnosis, the best way I found to figure out what I was sensitive to was by doing an elimination diet. 

    I eat regular meals:

    • As someone who used to be an avid intermittent faster, this one came shocking to me. I still fast 12-14 hours(ish) by not eating after dinner but I eat regular meals throughout the day. As much as I like the idea of intuitive eating it does not work for me and my body. I have tried it in the past and would find myself missing meals because things got busy, then I would eat a really big meal which my stomach would not agree with. My meal schedule is as follows:
      • Breakfast: protein, grain free carb (sweet potatoes, cassava noodles) and a vegetable
      • Mid morning snack: kale salad with fruit and nuts
      • Late lunch: protein, grain free carb, and vegetable 
      • Dinner: protein and vegetable 
      • This is what I have found that works for me for both my digestion and weight management.

    If you liked this post, be sure to check out my other lifestyle posts here and follow along on instargam. 

    clarified butter in cup

    March 19, 2021 Allergy Friendly

    How To Make Clarified Butter (Ghee)

    This recipe will teach you how to make clarified butter. This tastes just like store bought, yet is half the cost!

    clarified butter in a mason jar in a spoon

    What kind of butter should I use? 

    • I always use pure Irish butter, it is made from grass fed cows. I like the unsalted kind, but you can for sure use the salted version. Keep in mind if you are doing the autoimmune protocol, Whole30 or are following the paleo diet it must be grass fed. Speaking from experience the grass fed makes a huge difference. My body cannot tolerate non-grass fed dairy. 

    kind of butter to use to make clarified butter

    How to make clarified butter:

    • First, cut a stick of butter in half longways then cut into 1 inch squares. 
    • Next, add the butter to a pan and bring to a simmer. You will start to see the milk proteins come to the top.
    • Once the milk proteins rise (foam) to the top, use a spoon and skim them off. 
    • Remove from the heat and let the ghee cool for 10 minutes. 
    • Once the ghee cools, add a cheesecloth over a bowl and pour in the ghee. This is an added step to ensure all of the milk proteins are removed. 
    • Store the ghee in a mason jar in the refrigerator for months. 

    How to make clarified butter without a cheesecloth?

    • Technically once you boil the butter it kills off the milk proteins (lactose and casein) however I am super sensitive and always like to triple check by adding the cheese cloth step. 

    How long will this ghee last?

    • The milk solids in butter is what makes butter go rancid. Because we are removing the milk solids, ghee lasts a lot longer. I like to keep it in the fridge for up to a few months. However, It never lasts that long in my house. We use this recipe for everything!

    How to make clarified butter in the microwave:

    • You can make this in the microwave. Depending on how much butter you are using I suggest starting off by placing the chopped up butter in the microwave for 5 minutes. At this point it should be brought to a boil and you should be able to see the separate layers. Once you see the layers, skim the top like you would if you were making the ghee on the stove. 

    straight on shot of clarified butter in a jar with a spoon

    What recipe can I use ghee in?

    • Gluten Free Chicken Piccata 
    • Gluten Free Fried Shrimp
    • Buttery Scallops

    Hey-you’ve made it this far! If you make this recipe, I would love for you to give it a star ★ rating and review below. Make sure you are following me on Instagram, Pinterest, and Facebook too!

    How To Make Clarified Butter 2 scaled

    How To Make Clarified Butter

    Course Condiment
    Cuisine American
    Prep Time 5 minutes minutes
    Cook Time 15 minutes minutes
    Total Time 20 minutes minutes
    Servings 20 servings
    Author Allianna Moximchalk
    203kcal
    Cost $5
    Print Recipe Pin Recipe

    Equipment

    • Saucepan
    • Mason jar

    Ingredients

    • 5 sticks grass fed butter I like pure Irish

    Instructions

    • Cut the butter in half long ways then chop into 1 inch cubes. Add the butter to a sauce pan on medium heat and bring to a boil. You will see a foam form on the top. Using a spoon skim the foam.
      How To Make Clarified Butter 3 scaled
    • Once you skim the foam let the ghee cool for 10 minutes. Use a cheesecloth and lay it over a bowl, pour the clarified butter over the cheesecloth and then pour in a mason jar. Store in the fridge.

    Notes

    Hey-you’ve made it this far! If you make this recipe, I would love for you to give it a star ★ rating and review below. Make sure you are following me on Instagram, Pinterest, and Facebook too!
    How to save money when cooking with ghee, make your own!
    Serving: 1serving | Calories: 203kcal | Carbohydrates: 1g | Protein: 1g | Fat: 23g | Saturated Fat: 15g | Trans Fat: 1g | Cholesterol: 61mg | Sodium: 202mg | Potassium: 7mg | Sugar: 1g | Vitamin A: 706IU | Calcium: 7mg | Iron: 1mg
    Tried this recipe?Tag me on instagram @alliannaskitchen!

    gluten free donuts 10 scaled

    March 18, 2021 Allergy Friendly

    Gluten Free Donuts

    These Gluten Free Donuts with chocolate ganache melt in your mouth! Unlike most gluten free donuts, these donuts are light and fluffy. The chocolate ganache combined with the light and fluffy gluten free donut batter makes this gluten free treat oh so delicious. 

    If you love this recipe, you will also love my Chocolate Covered Oranges, Gluten Free Chocolate Tart, and Gluten Free Orange Cake recipe.

    gluten free donuts lined up on the counter with chocolate frosting

    If you like this recipe, you will LOVE:

    • Paleo Pumpkin Donuts With Maple Cream Frosting
    • Dairy Free Chocolate Peanut Butter Buckeyes

    Hey-you’ve made it this far! If you make this recipe, I would love for you to give it a star ★ rating and review below. Make sure you are following me on Instagram, Pinterest, and Facebook too!

    gluten free donuts 8 scaled

    Gluten Free Donuts

    Course Breakfast, Dessert, Snack
    Cuisine American
    Prep Time 10 minutes minutes
    Cook Time 16 minutes minutes
    Total Time 26 minutes minutes
    Servings 6 donuts
    Author Allianna Moximchalk
    439kcal
    Cost $5
    Print Recipe Pin Recipe

    Equipment

    • donut molds

    Ingredients

    For the donuts:

    • 2 cups almond flour
    • ½ cup maple syrup
    • 1 tsp baking soda
    • 4 whole eggs
    • 1 teaspoon cinnamon

    For the chocolate:

    • 1 cup chocolate chips. I like Enjoy Life Chocolate Chips because they are dairy free.
    • ½ cup almond milk
    • Optional: sprinkles

    Instructions

    • Preheat the oven to 350.Place all of the donut ingredients in a food mixer and mix thoroughly. Spray the donut molds with the olive oil. Evenly divide the donut mixture among the 6 donuts. Bake for 16 minutes. Let the donuts cool for 10 minutes.
    • Once the donuts have cooled, remove donuts from the pan and place on a cooling rack and refrigerate for 10 minutes. Place the almond milk in a small egg frying pan on medium, once the milk is boiling add the chocolate and continually whisk until it makes a smooth chocolate syrup. Dip the donuts in the chocolate and place back on the lined cookie sheet in the refrigerator. Refrigerate until serving!
      vegan buckeyes 3

    Notes

    Hey-you’ve made it this far! If you make this recipe, I would love for you to give it a star ★ rating and review below. Make sure you are following me on Instagram, Pinterest, and Facebook too!
    Quick and easy gluten free donut alternative.
    Serving: 1donut | Calories: 439kcal | Carbohydrates: 44g | Protein: 10g | Fat: 29g | Saturated Fat: 7g | Cholesterol: 2mg | Sodium: 213mg | Potassium: 63mg | Fiber: 6g | Sugar: 31g | Vitamin A: 5IU | Vitamin C: 1mg | Calcium: 175mg | Iron: 4mg
    Tried this recipe?Tag me on instagram @alliannaskitchen!

    meat muffins 2 scaled

    March 18, 2021 Allergy Friendly

    AIP Breakfast Muffins

    meat muffins overheat shot in a baking tray

    This recipe was originally posted on August 20th, 2020 and updated on March 18th, 2021 to improve user experience.

    meat muffins in a bowl stacked on each other

    If you enjoy this recipe, you will also enjoy my AIP Pancakes as well.

    If you like this recipe, you will LOVE:

    • AIP Turkey Blueberry Breakfast Sausage
    • Paleo & AIP Waffles
    • AIP Pancakes

    Hey-you’ve made it this far! If you make this recipe, I would love for you to give it a star ★ rating and review below. Make sure you are following me on Instagram, Pinterest, and Facebook too!

    meat muffins 2 scaled

    Apple Bacon Chicken Breakfast Muffins

    Course Breakfast
    Cuisine American
    Prep Time 10 minutes minutes
    Cook Time 30 minutes minutes
    Total Time 40 minutes minutes
    Servings 6 muffins
    Author Allianna Moximchalk
    121kcal
    Cost $5
    Print Recipe Pin Recipe

    Ingredients

    • 1 pound ground chicken sausage ground chicken will work
    • 1 teaspoon cinnamon
    • 5 pieces bacon cooked
    • 1/2 green apple chopped

    Instructions

    • Preheat the oven to 350. Mix all ingredients in a bowl. Line a muffin tin with silicone baking liners (these allow for easy clean up!) Divide the muffin mixture up amongst the 6 muffin liners. Bake for 30 minutes.

    Notes

    Hey-you’ve made it this far! If you make this recipe, I would love for you to give it a star ★ rating and review below. Make sure you are following me on Instagram, Pinterest, and Facebook too!
    Quick and easy AIP breakfast alternative.
    Serving: 1muffin | Calories: 121kcal | Carbohydrates: 2g | Protein: 14g | Fat: 6g | Saturated Fat: 2g | Trans Fat: 1g | Cholesterol: 66mg | Sodium: 60mg | Potassium: 416mg | Fiber: 1g | Sugar: 2g | Vitamin A: 9IU | Vitamin C: 1mg | Calcium: 9mg | Iron: 1mg
    Tried this recipe?Tag me on instagram @alliannaskitchen!
    Peanut butter and almond butter buckeyes wrapped in chocolate on a plate.

    March 8, 2021 Dairy free

    Vegan Buckeyes

    These Vegan Buckeyes are a staple in my house on game day. The combination of the smooth peanut butter topped off with the dairy free chocolate ganache makes these buckeyes oh so delicious. This recipe is super simple to follow and is quite a crowd pleaser. If you enjoy these, you will also enjoy my Chocolate Covered Oranges, Gluten Free Pumpkin Cookies, and Vegan Chocolate Truffles.

    vegan buckeyes lined up on a sheet

    Ingredients For These Vegan Buckeyes:

    • Almond flour-The almond flour helps thicken the peanut butter allowing it to be rolled. Do not substitute this as not all gluten free flours are made equally. 
    • Peanut butter-Be sure to buy pure peanut butter that does not contain any added oils, sugars and other processed ingredients. 
    • Coconut milk-This is what we will use to make the nice and smooth chocolate ganache. 
    • Coconut oil-The coconut oil helps smooth out these peanut butter balls. 
    • Vanilla-The vanilla adds the perfect touch. You can skip if you do not have it.
    • Maple syrup-The maple syrup sweetens these peanut butter balls as well as helps hold them together. 
    • Sea salt-I love the sweet and salty combo, you can skip if you would like. 
    • Dairy free chocolate- I like this brand. I would like to think any dairy free chocolate brand would work, but I have not tested it out. 
    vegan buckeye ingredients

    How To Make Vegan Buckeyes:

    • First, combine all ingredients in a large bowl except the chocolate and coconut milk. Mix all ingredients throughout. Place the bowl in the freezer for 2 hours to allow the mixture to harden. 
    • Next, once the two hours comes up, place the coconut milk in a saucepan and bring to a boil. Once the coconut milk starts boiling, remove the coconut milk from the heat and continuously mix in the chocolate until smooth. Now that the chocolate is smooth, use a 1 inch cookie scoop and scoop the peanut butter into 1 inch balls. Once you scoop them be sure to roll the balls. Add toothpicks to the ball and dip in the chocolate. 
    • Note: if the chocolate starts to get hard, place it in the microwave for 15-30 seconds. 
    • Once all of the buckeyes are dipped, place the tray in the fridge or freezer until ready to serve. 

    Can I Freeze These Buckeyes?

    • You sure can! I have kept a stash of buckeyes in the freezer for months. Still be sure to get the chocolate and peanut butter hard again by placing them in the freezer for an hour or so on a metal tray, then transfer to a sealed storage container. 
    vegan buckeyes with a glass of dairy free milk and chocolate

    If you like this recipe, you will LOVE:

    • Vegan Chocolate Truffles
    • Paleo Olive Oil Cookies
    • Paleo Pumpkin Bundt Cake With Chocolate Ganache

    Hey-you’ve made it this far! If you make this recipe, I would love for you to give it a star ★ rating and review below. Make sure you are following me on Instagram, Pinterest, and Facebook too

    vegan buckeyes 4 scaled

    Vegan Buckeyes

    Course Dessert
    Cuisine American
    Prep Time 30 minutes minutes
    Freeze time 2 hours hours
    Total Time 2 hours hours 30 minutes minutes
    Servings 15 buckeyes
    Author Allianna Moximchalk
    400kcal
    Cost $8
    Print Recipe Pin Recipe

    Equipment

    • 1 inch cookie scooper
    • baking sheet
    • soup pot
    • toothpicks

    Ingredients

    • 1/2 cup almond flour
    • 1/2 cup maple syrup
    • 1 tsp vanilla
    • 2 cups peanut butter
    • 1 pinch sea salt
    • 1/3 cup coconut oil

    For the ganache:

    • 1/2 cup coconut milk
    • 1 1/2 cup dairy free chocolate I like enjoy life

    Instructions

    • Place all of the ingredients except the coconut milk and chocolate in a bowl and mix. Place the batter in the freezer for 2 hours to stiffen.
      vegan buckeyes 1 scaled
    • Take the batter out of the freezer and set aside and add the coconut milk to sauce pan and bring to a boil. Once the coconut milk boils, turn off the heat and add the chocolate. Whisk the chocolate continuously until it is melted throughout.
      vegan buckeyes 3
    • Using a 1 inch scooper, scoop the batter into 15 small balls. Once you scoop the balls, roll them. Add a toothpick to the top and dip the balls in the batter. Place the balls on a baking sheet for the ganache to harden. Once you are done dipping, place the sheet in the fridge or freezer until ready to eat.
      vegan buckeyes 5 scaled

    Notes

    Hey-you’ve made it this far! If you make this recipe, I would love for you to give it a star ★ rating and review below. Make sure you are following me on Instagram, Pinterest, and Facebook too
    Dairy & gluten free buckeye dessert alternative.
    Serving: 1buckeye | Calories: 400kcal | Carbohydrates: 26g | Protein: 11g | Fat: 32g | Saturated Fat: 13g | Sodium: 162mg | Potassium: 264mg | Fiber: 4g | Sugar: 18g | Vitamin C: 1mg | Calcium: 59mg | Iron: 2mg
    Tried this recipe?Tag me on instagram @alliannaskitchen!
    • « Go to Previous Page
    • Page 1
    • Interim pages omitted …
    • Page 26
    • Page 27
    • Page 28
    • Page 29
    • Page 30
    • Interim pages omitted …
    • Page 38
    • Go to Next Page »

    Primary Sidebar

    Allianna Headshots

    Hi, I'm Allianna! Allianna's Kitchen started by accident after battling an undiagnosed autoimmune disease for nearly my whole life.

    More about me →

    GLUTEN FREE DINNER RECIPES

    • steak date night dinner 1
      Steak Date Night Dinner with Garlic Aioli
    • gluten free fried shrimp 3 scaled
      Gluten Free Fried Shrimp
    • cooked frozen pork chops with chives on top on a white plate with a gold fork
      Easy Frozen Pork Chops In The Air Fryer
    • halibut fish tacos on a pale blue plate
      Halibut Fish Tacos

    EASY WHOLE30 RECIPES

    • Beetroot dip on a plate with crackers and fresh parsley on top.
      Simple Beetroot Dip Recipe
    • close up photo of ginger apple pork in a bowl
      Apple Ginger Pulled Pork
    • dairy free lobster bisque in a bowl with a gold spoon and garnished with lemon, fresh green herbs, and red pepper flakes.
      Dairy Free Lobster Bisque
    • juicy filet mignon on a plate
      Air Fryer Filet Mignon

    GLUTEN FREE APPETIZERS

    • peanut butter and jelly chicken wings on a plate with limes
      Peanut Butter And Jelly Wings
    • Stuffed mushrooms on a brown and white plate with fresh parsley on top.
      Gluten-Free Stuffed Mushrooms
    • Gluten free pigs in a blanket in a pile on a plate.
      Gluten Free Pigs In A Blanket
    • Pretty french onion dip in a silver bowl with potato chips and chives on top.
      Vegan French Onion Dip Recipe

    EASY MOCKTAIL RECIPES

    • honey simple syrup 2
      Honey Simple Syrup
    • orange lime cranberry mocktail 4
      Cranberry Mocktail Recipe
    • Clear glass with a brown drink and a cinnamon stick in it.
      Pear Cocktail Recipe
    • Grapefruit mocktail in a glass with jalapeño slice and grapefruit slice.
      Easy Grapefruit Mocktail Recipe

    Footer

    • Recipes
    • My Courses
    • Meal Prep Services
    • Accessibility Policy
    • Contact
    • About Me
    • Blog
    • Privacy Policy
    • Pinterest
    • Instagram
    • Facebook
    • Twitter

    Allianna’s Kitchen 2025 - All Rights Reserved

    Rate This Recipe

    Your vote:


    A rating is required
    A name is required
    An email is required