• Skip to primary navigation
  • Skip to main content
  • Skip to primary sidebar
  • Spring Recipes
  • Recipes
  • Order Meal Prep
  • Healthy Gut Baby Food Course
  • About

Allianna's Kitchen

menu icon
go to homepage
  • Spring Recipes
  • Recipes
  • Order Meal Prep
  • Healthy Gut Baby Food Course
  • About
    • Facebook
    • Instagram
    • Pinterest
    • Twitter
  • search icon
    Homepage link
    • Spring Recipes
    • Recipes
    • Order Meal Prep
    • Healthy Gut Baby Food Course
    • About
    • Facebook
    • Instagram
    • Pinterest
    • Twitter
  • ×
    Allianna's Kitchen » Recipes

    Blog

    gluten free fried shrimp 3 scaled

    February 26, 2021 Allergy Friendly

    Gluten Free Fried Shrimp

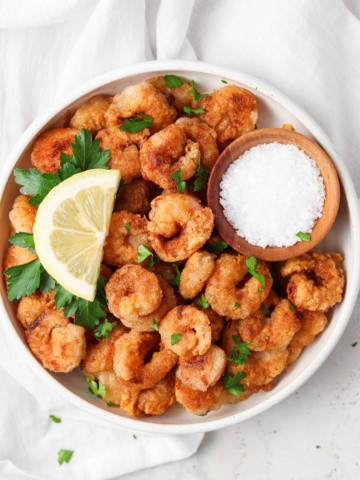
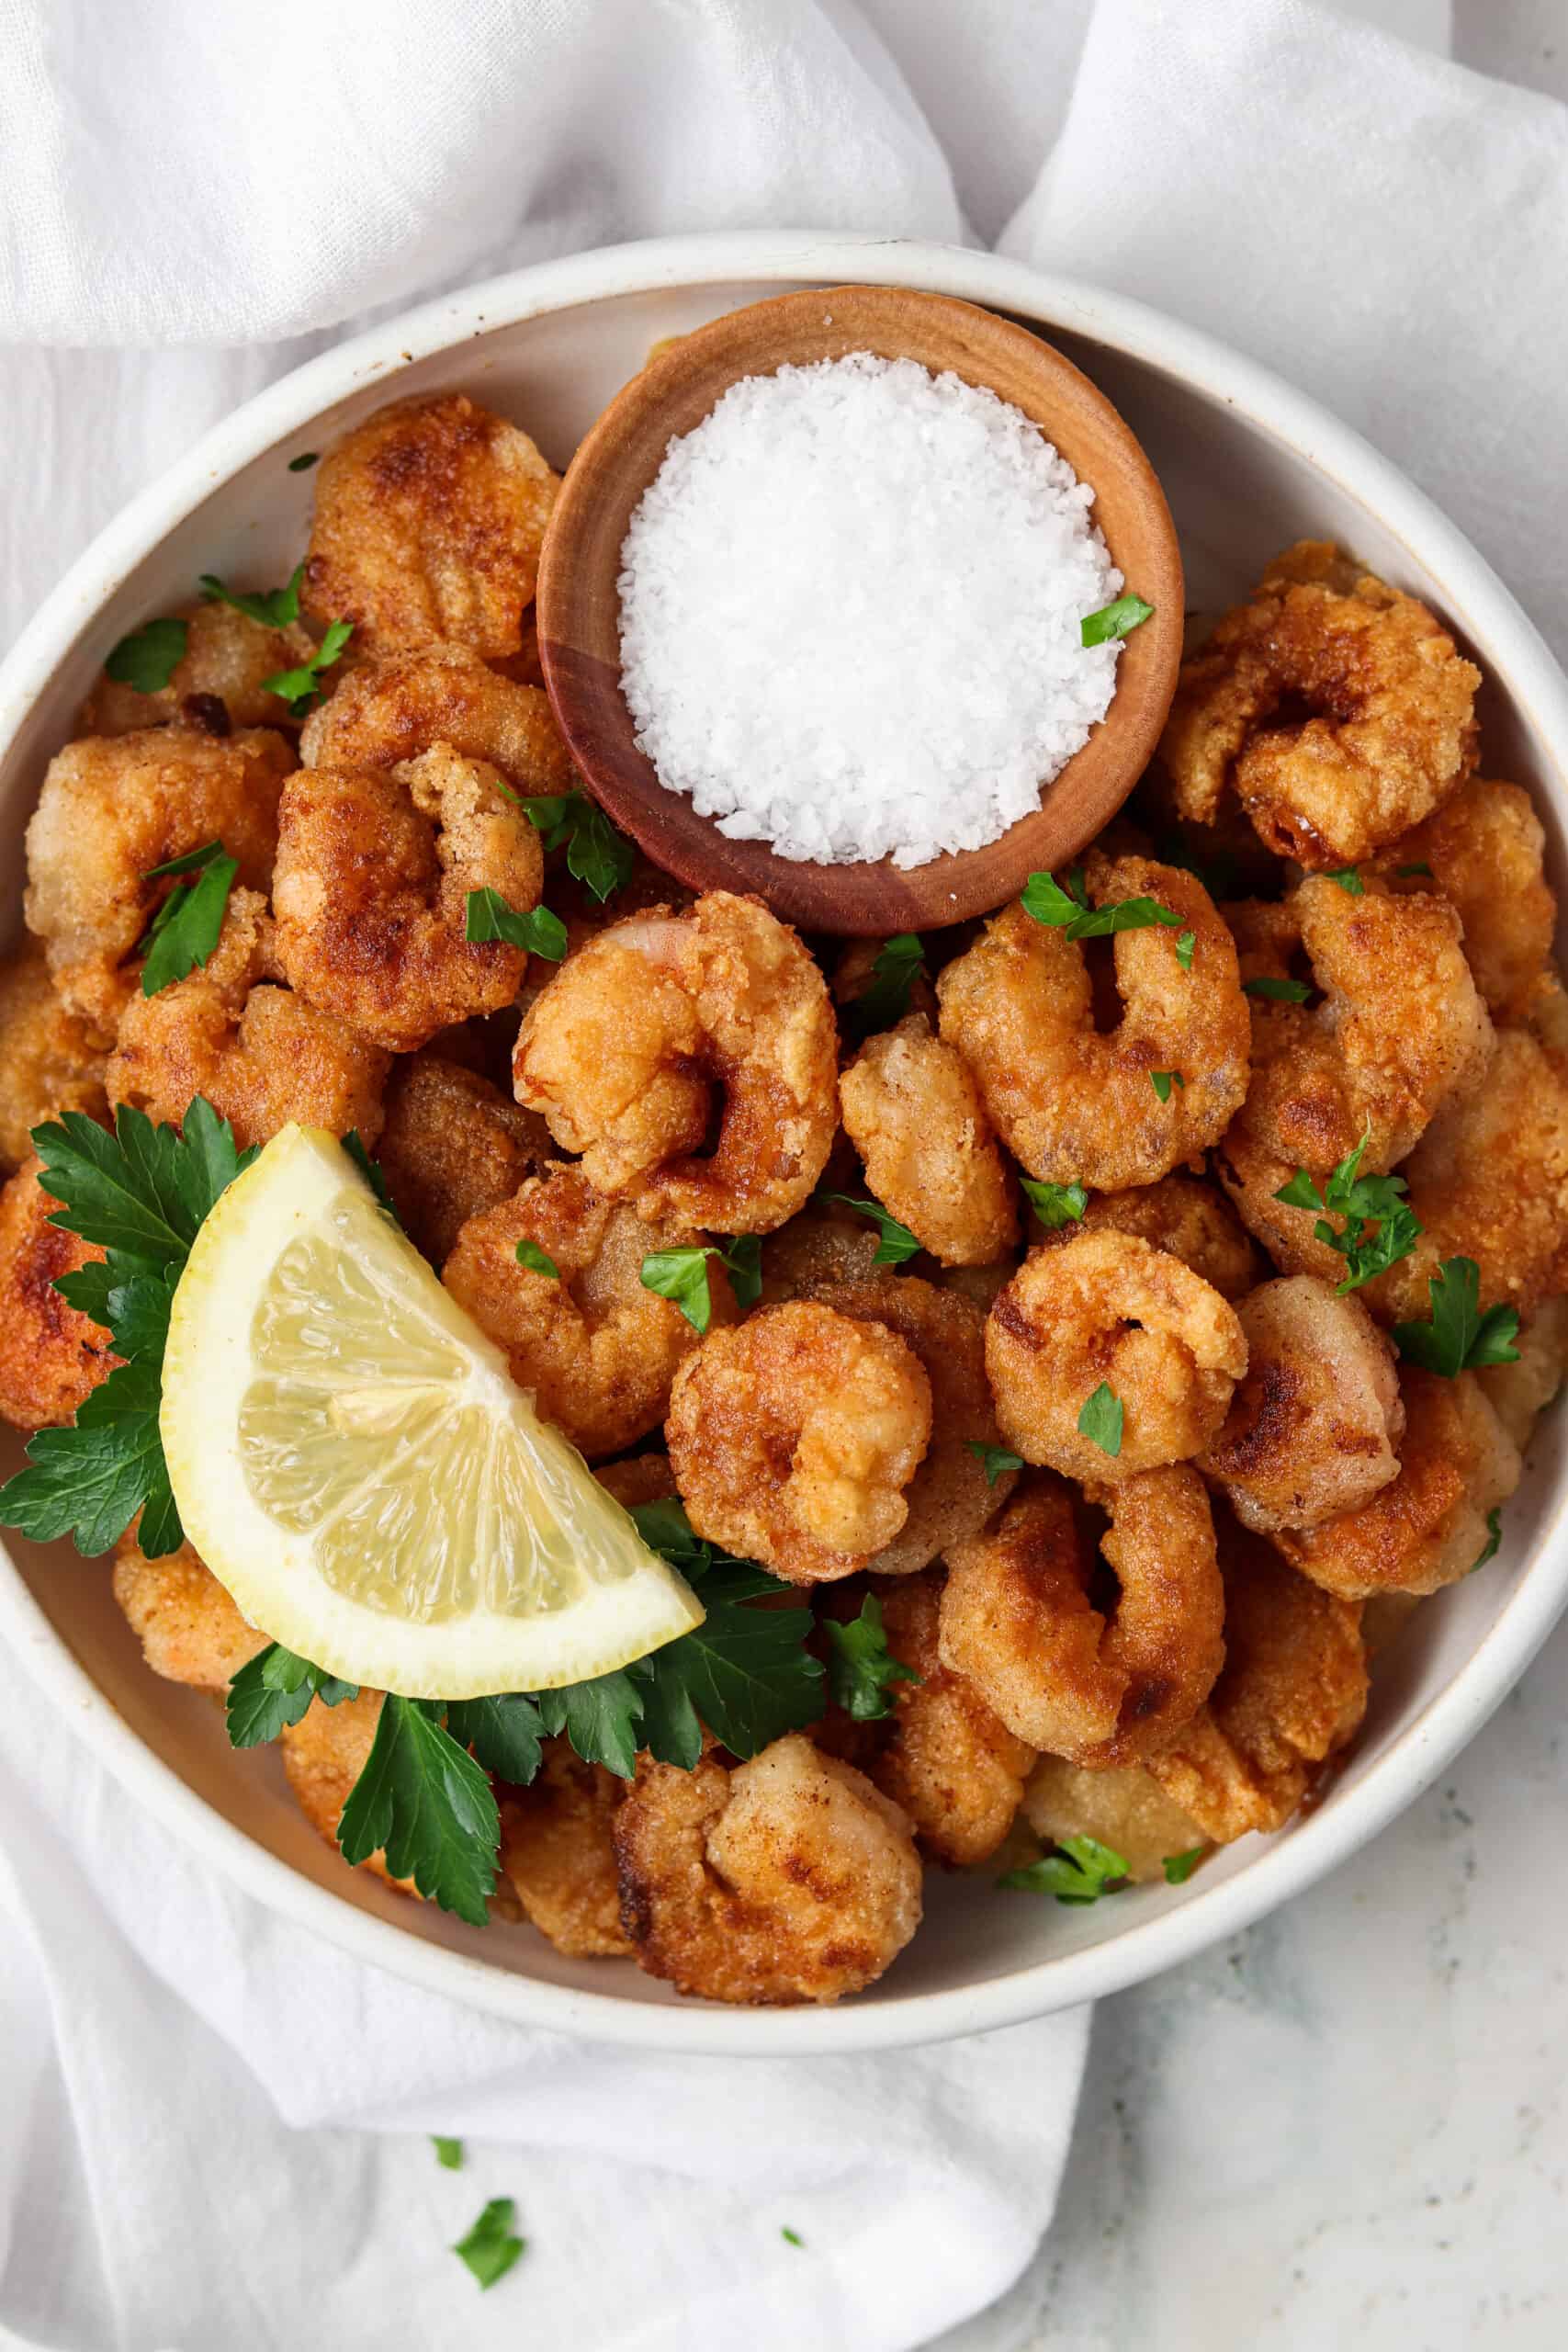
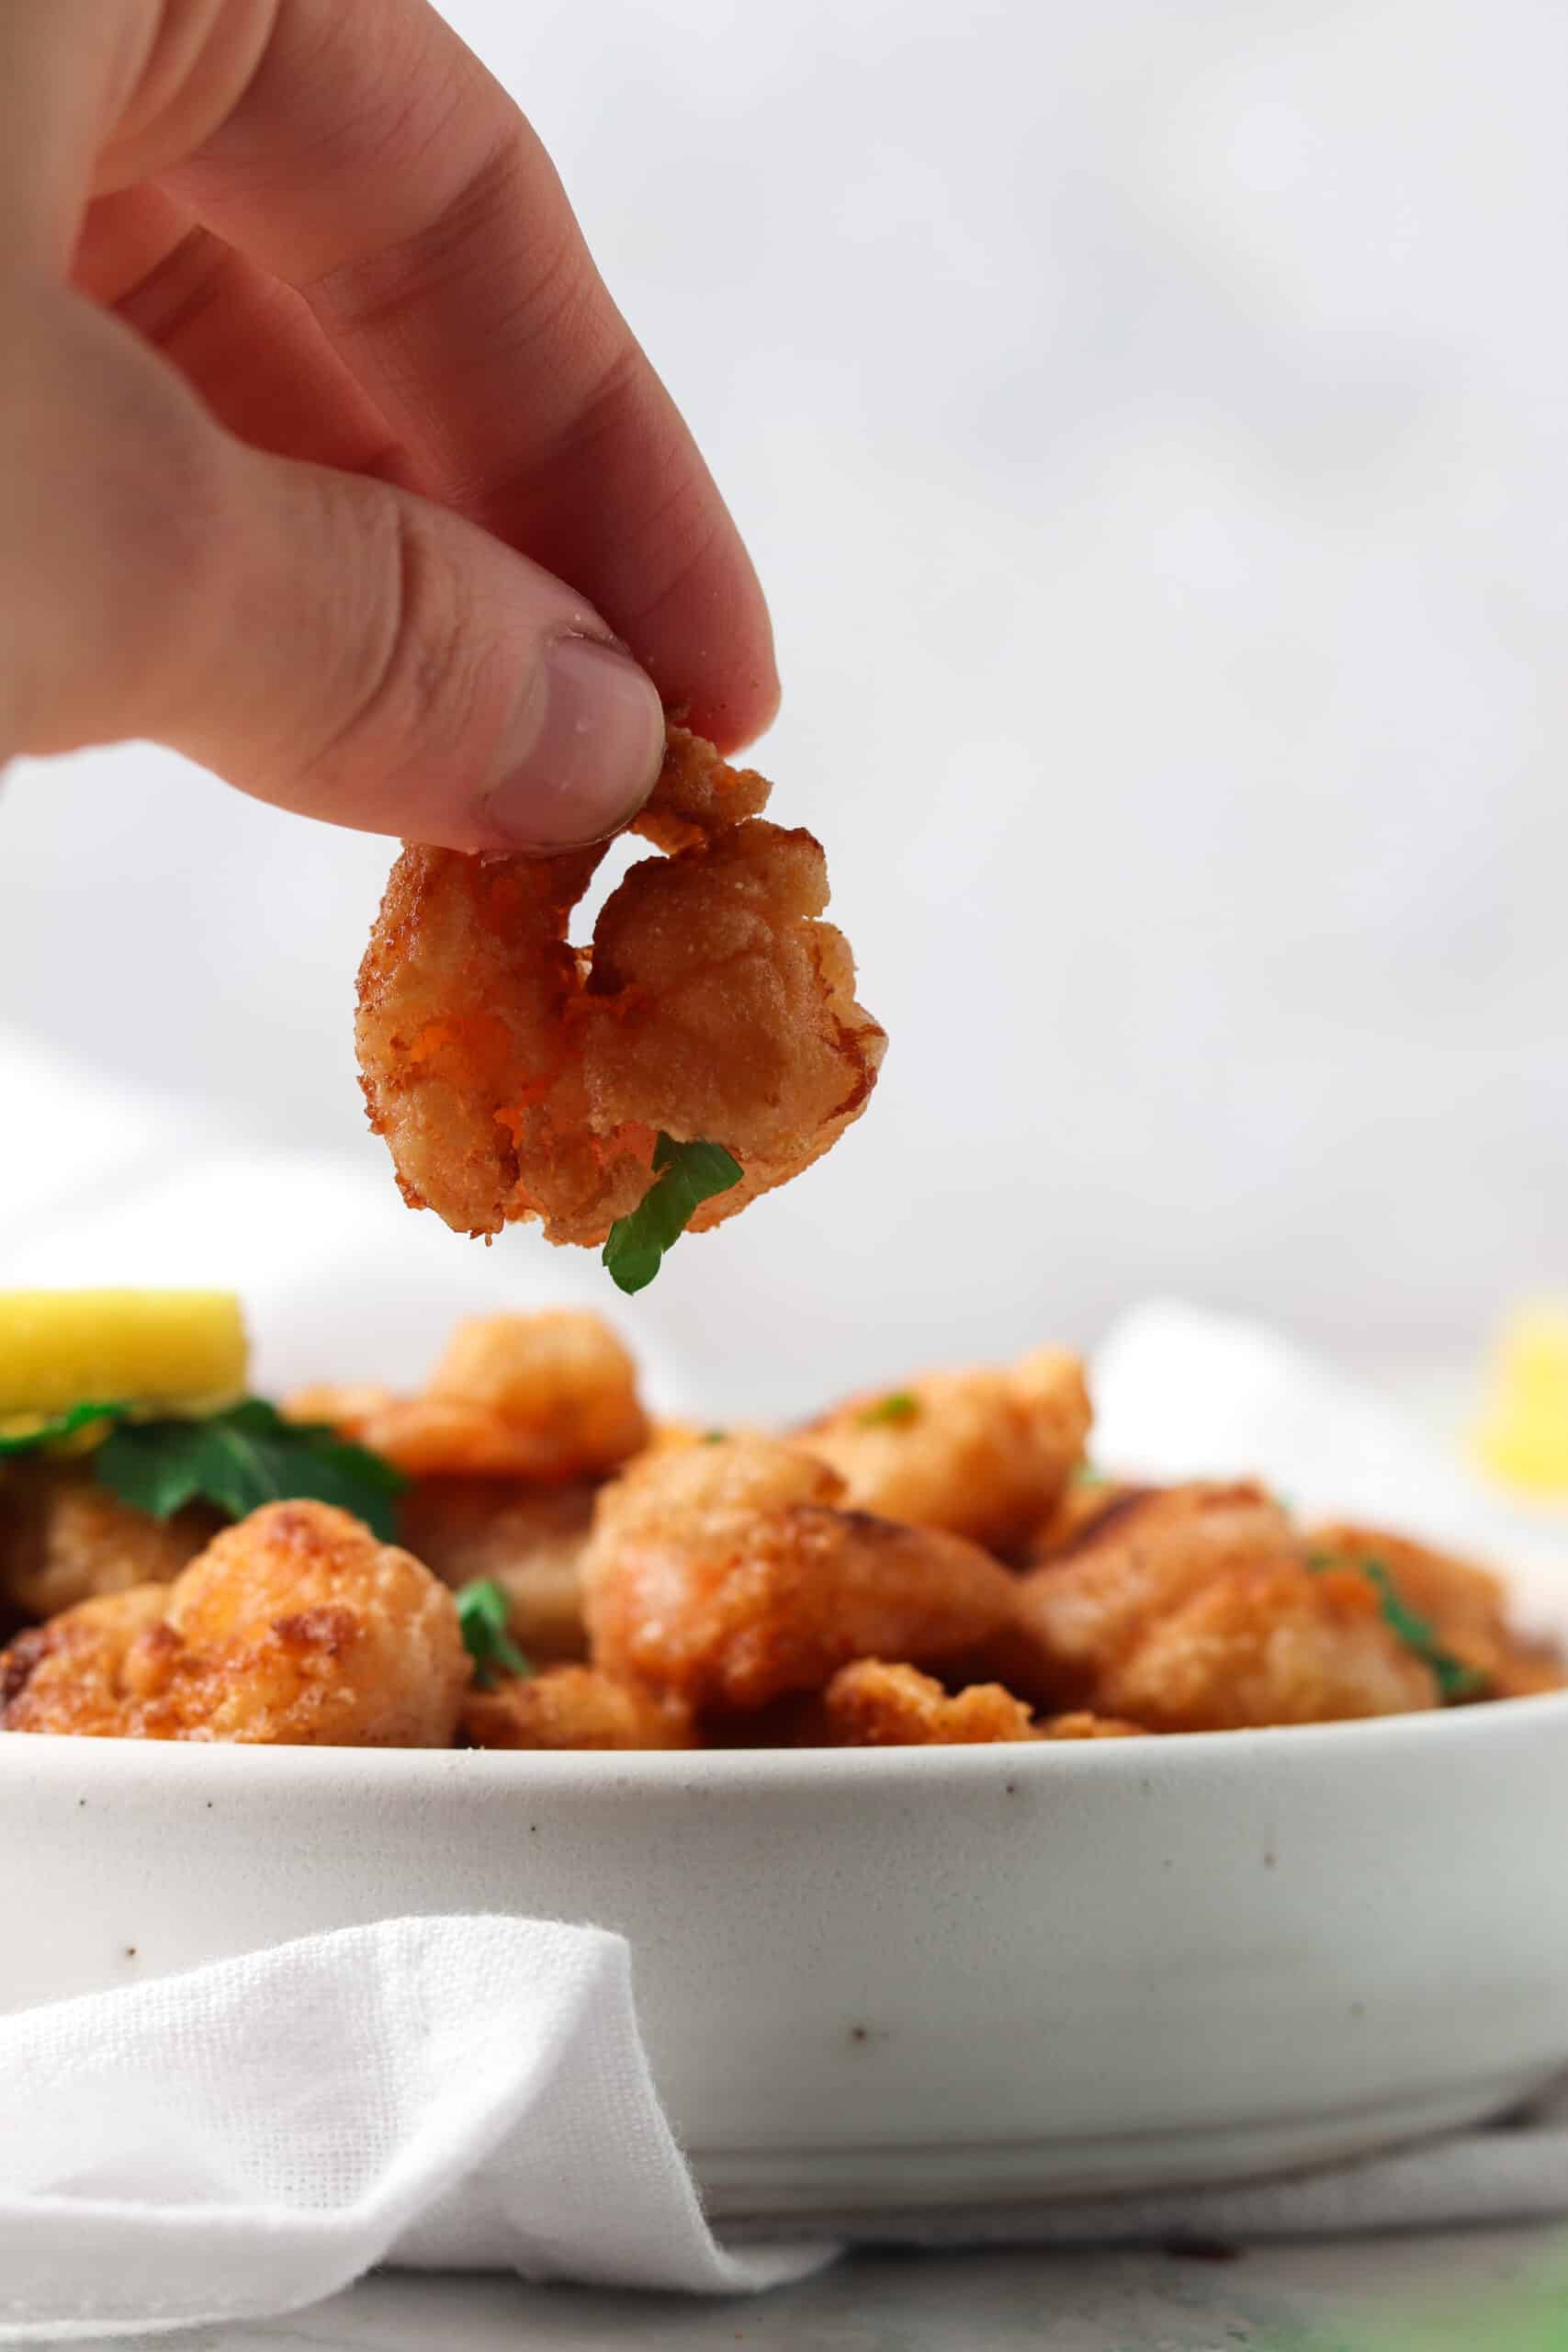
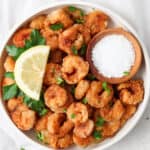
    We all love those healthy recipes that you would never know are healthy, that is how I feel about this Gluten Free Fried Shrimp recipe. This recipe reminds me of my youth! The gluten free breading is crispy yet full of flavor. This recipe is naturally gluten free, paleo, Whole30 and AIP friendly.

    Gluten free crispy shrimp on a white plate with lemons and fresh parsley.

    These are a delicious dish that even on a busy evening you can have ready in under 30 minutes! If you enjoy this recipe, you will also enjoy my AIP Turkey Breast in a Maple Garlic Sauce as well.

    [feast_advanced_jump_to]

    Why You Will Love This Recipe

    • This recipe is simple to make and can be ready for dinner in no time.
    • Kids love this recipe.
    • You can pair this shrimp with just about anything for a meal or serve it as an appetizer.
    • This recipe is naturally gluten free, paleo, Whole30, nut free, autoimmune protocol (AIP) friendly, and dairy free.
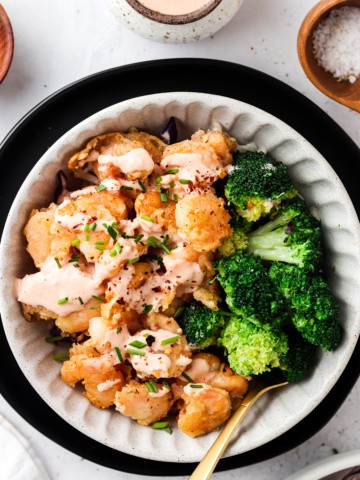
    • It is such a versatile recipe, I love to make it in my Whole30 Bang Bang Shrimp Recipe.
    • You can make this recipe even simpler by purchasing tail off shrimp so you can just pop it all into your mouth!

    Ingredients

    Gluten free fried shrimp ingredients in small glass bowls on a silver tray.
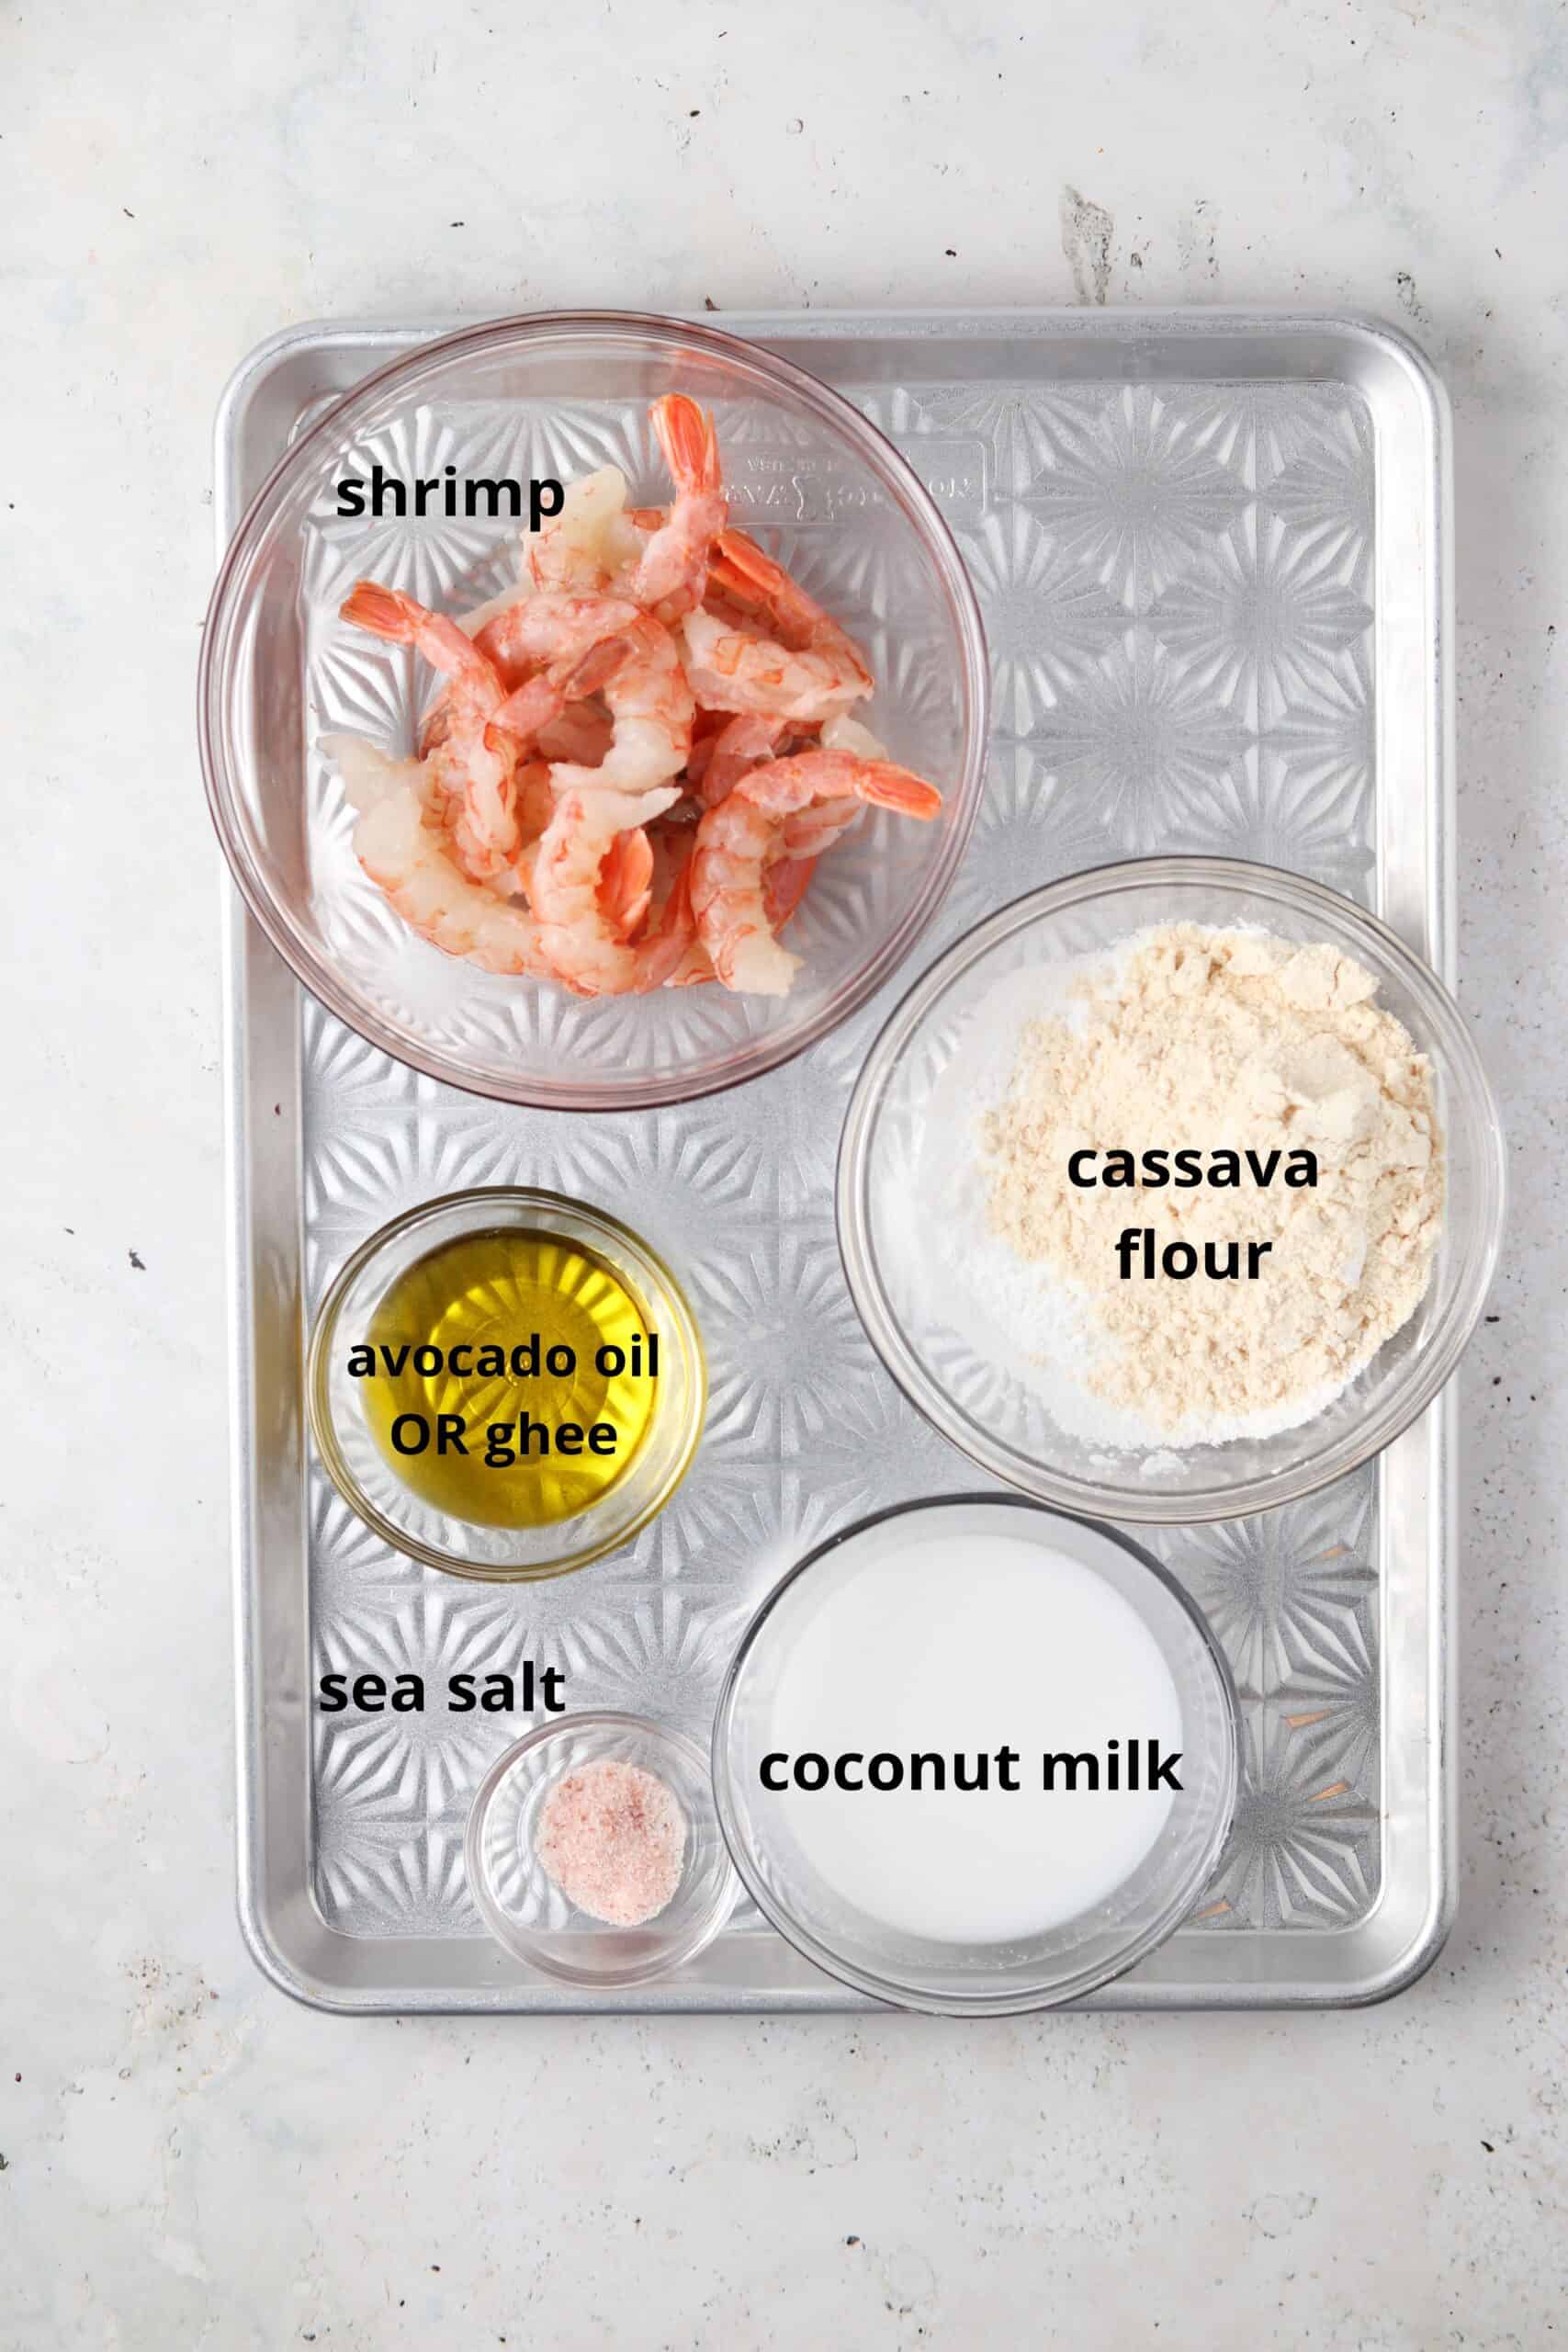
    • Cassava flour-I only use Otto’s cassava flour. Not all cassava flours are made equally. 
    • Mini shrimp-I like to buy the ones with the tails removed. I also like to order Butcher Box. They have the best wild caught and grass fed protein. If you use my code HERE you can get $30 off your first box.
    • Sea salt, onion powder & garlic powder-This seasoning combo adds flavor to these crispy shrimps.
    • Old bay seasoning-I love a nice kick to this recipe. Be sure to omit this optional ingredient if you are following the autoimmune protocol as it contains nightshades. 
    • Coconut milk-The coconut milk is in place of eggs for this recipe. It helps the flour stick. 
    • Ghee-I love using ghee as a fat of choice here because it gives these shrimp a buttery flavor, however, if you are in the elimination phase of AIP you will want to use avocado oil.

    See the recipe card below for a full list of ingredients and measurements.

    Substitutions And Variations

    • You can pair these shrimp with different dipping sauces to create different flavor profiles when you make it.
    • You could serve this all in a dish to serve as a meal or turn it into an appetizer by sticking them with toothpicks.

    This recipe has not been tested with any other substitutions or variations. If you try something else out please let me know how it turns out in the comments below!

    Step By Step Instructions

    Breaded shrimp in a frying pan.
    First, place the ghee (or oil) in a large non-stick frying pan on medium heat. While the pan is heating up, mix the cassava flour, sea salt, garlic powder, and onion powder in a bowl. Pour the coconut milk into a separate bowl. Next, once the pan in hot, dip the shrimp into the coconut milk bowl, then into the flour bowl. Let the shrimp sit on a cutting board once it is coated for 5 minutes to allow the mixture to harden and re-dip the shrimp into the cassava flour mixture. This will help the breading stick. Add to the pan after you double coat it. Cook the shrimp for 3 minutes, then carefully flip. If the breading starts to pull off, cook for an additional minute.

    Equipment Needed

    • Non-stick frying pan
    • Two bowls
    • Tongs
    • Cutting Board or plate for shrimp to rest on after first flour coating

    Expert Tips

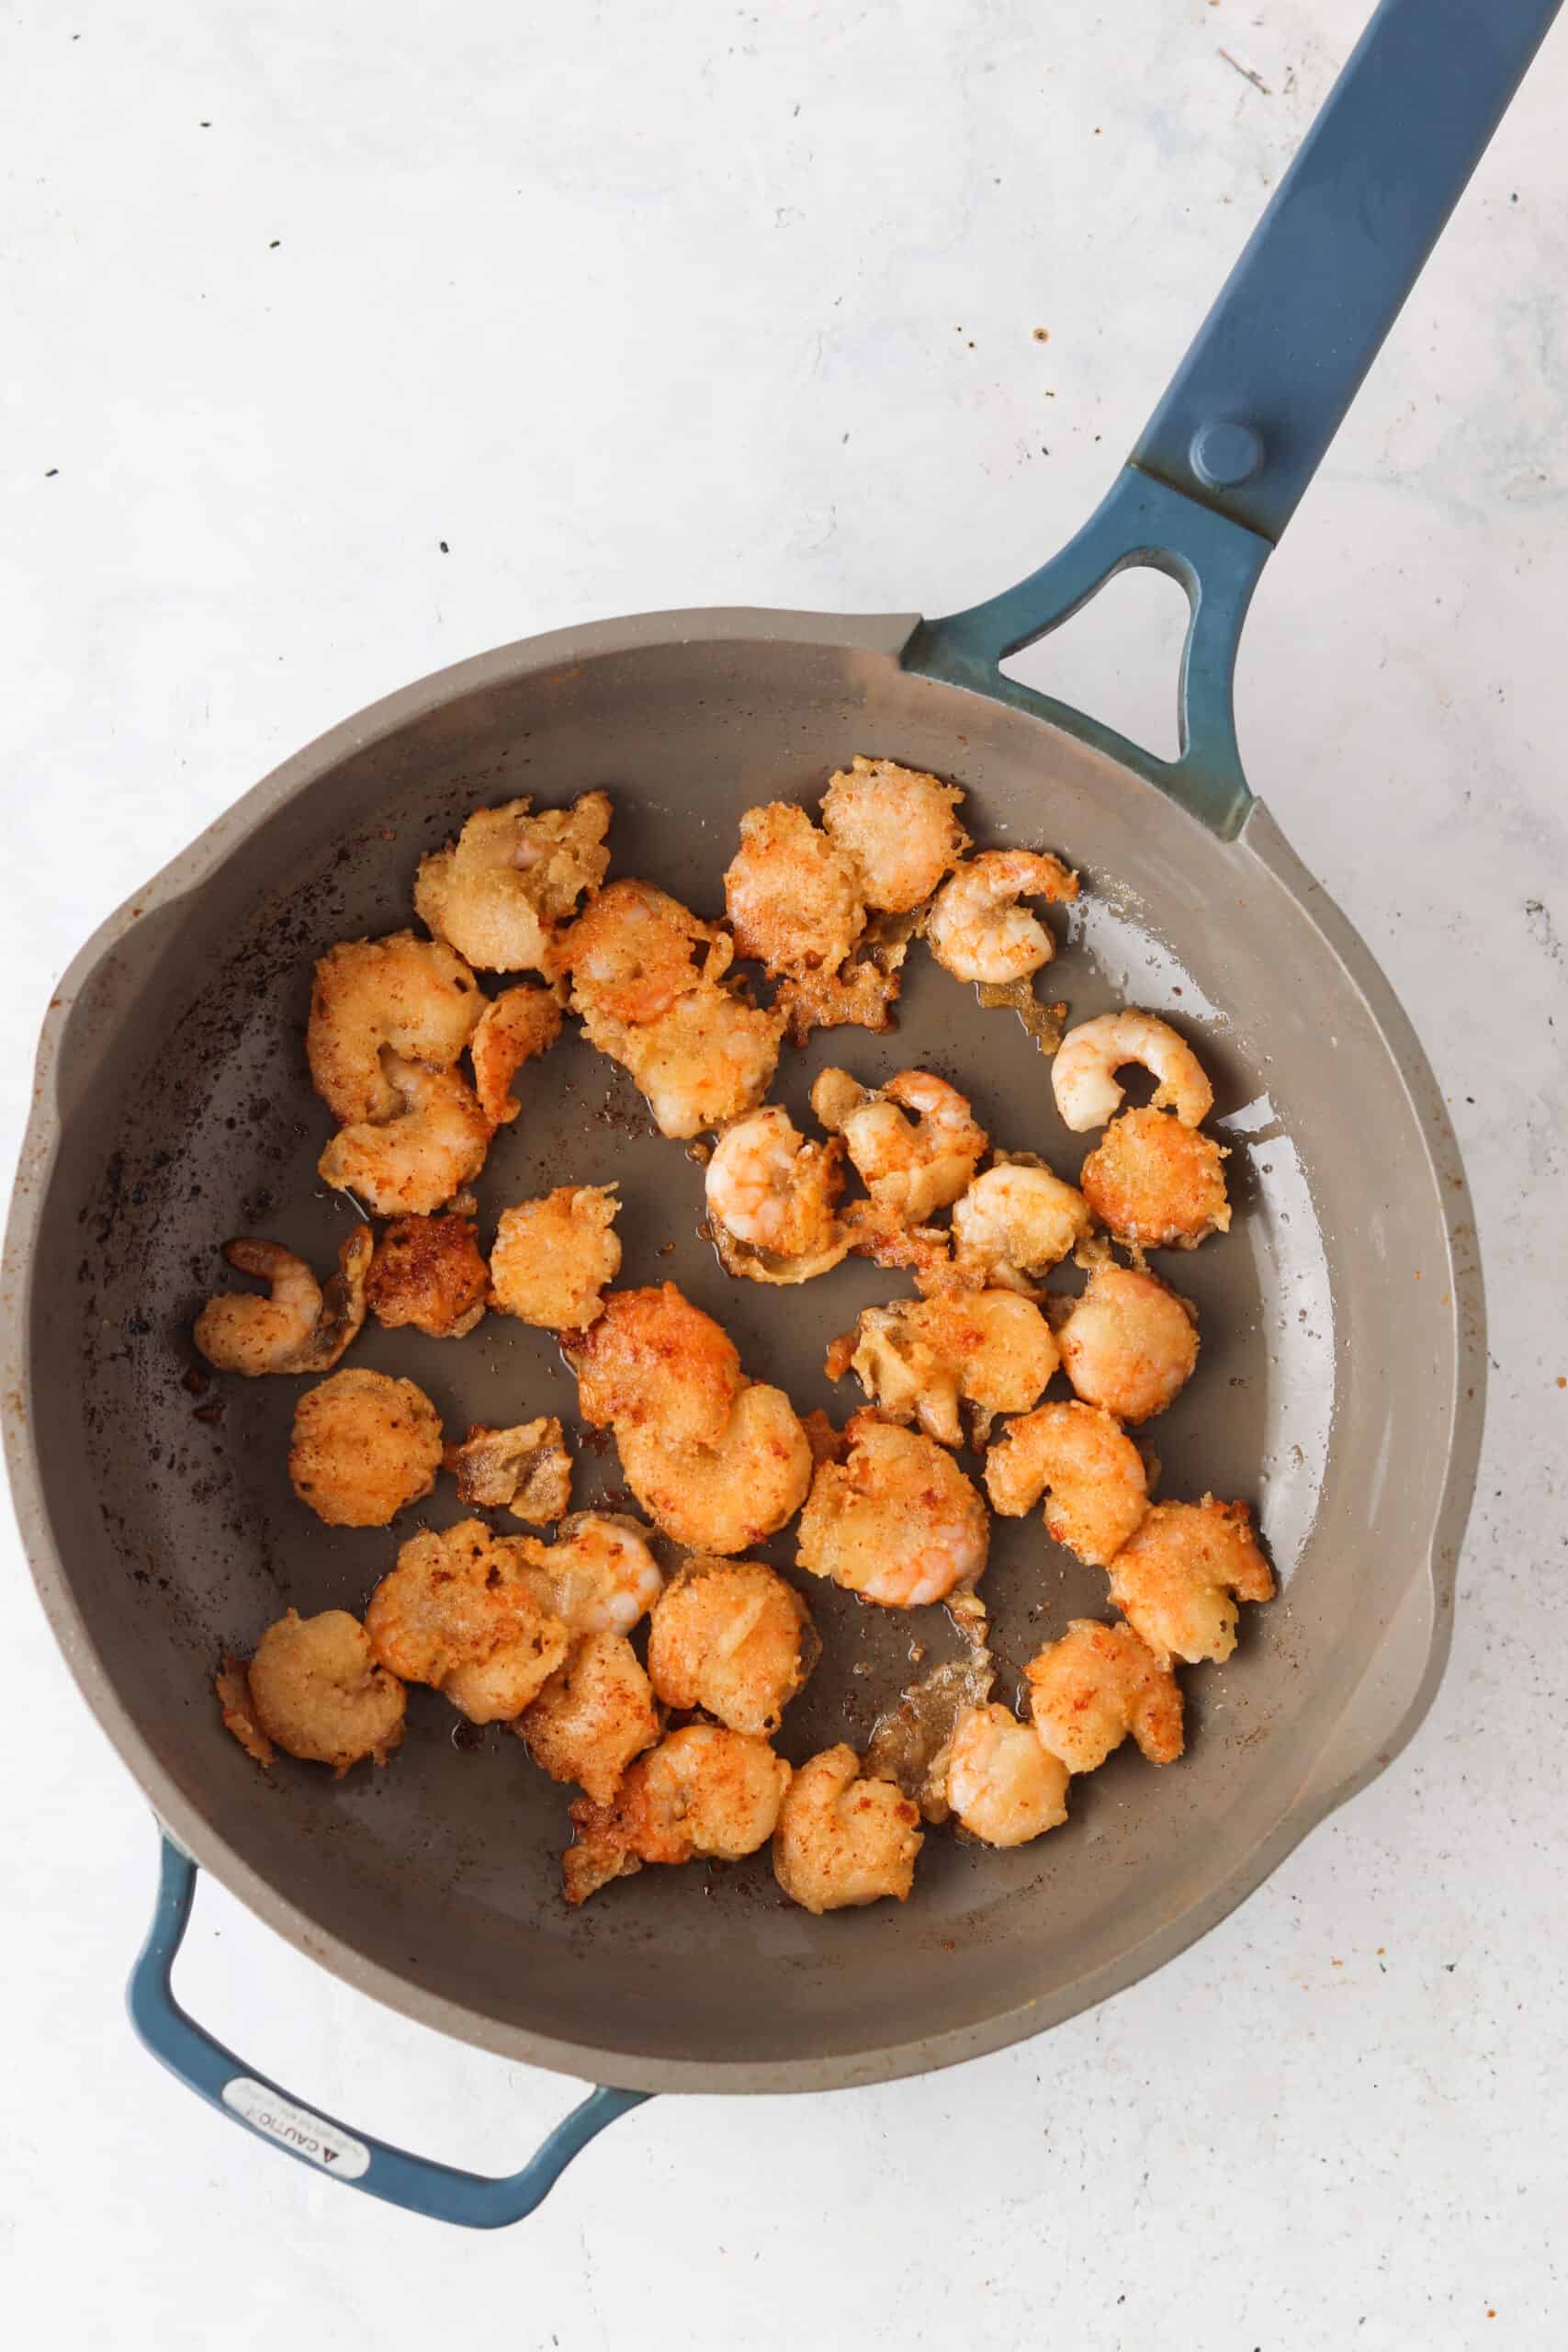
    • Tip # 1: If you run out of space in the pan, you can fry the shrimp in batches to make sure you don’t overcrowd the pan. Overcrowding will cause the temperature of the ghee or oil to lower which will effect the crispness of the coating.
    • Tip # 2: Make sure to add in more ghee or oil into the pan if it run low.
    • Tip # 3: While the ghee or oil is heating up make sure to move it around the pan to ensure it is evenly distributed.
    • Tip # 4: If frying in batches, you will want to scoop out the loose breading so that it does not burn and change the coloring of the breading of future batches.

    Recipe FAQ

    Can I Use Olive Oil As My Go To Fat?

    I do not like to use olive oil for frying as it has a low smoke point. It becomes toxic after it reaches a specific temperature. I like to use ghee or avocado oil.

    How Can I Reheat This?

    You can reheat on the stove with a little bit of ghee/avocado oil or you can reheat in the oven on 350 degrees F for 5-10 minutes.

    What Can I Serve This With?

    This recipe is versatile what it can be served with. I love serving it with my lemon garlic asparagus or air fried green bean recipes.

    Person holding a piece of gluten free fried shrimp over a white plate.

    Storage Instructions

    • This recipe can last up to 3 days in the refrigerator in an air tight container.

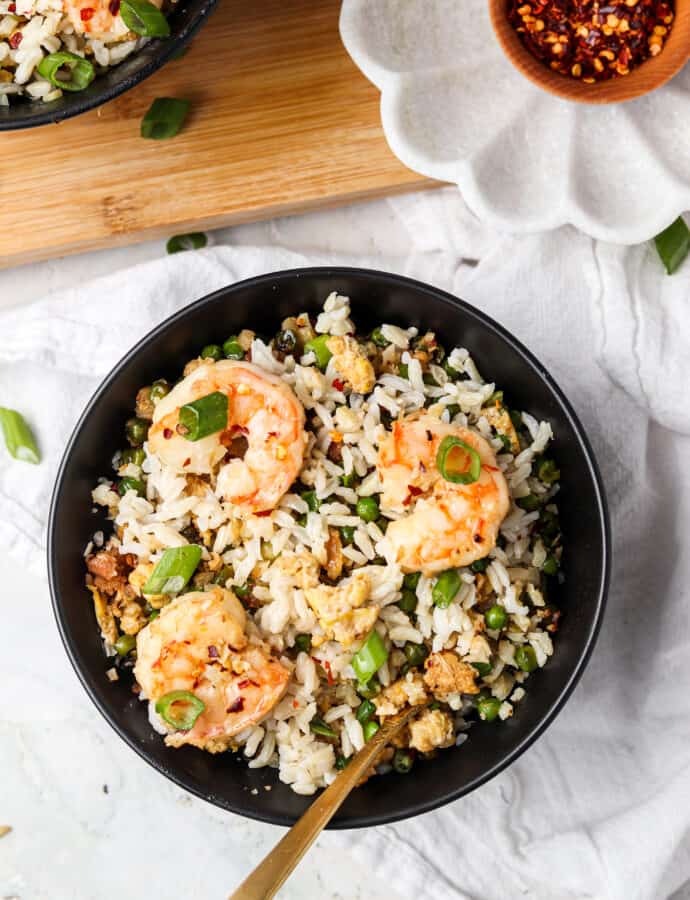
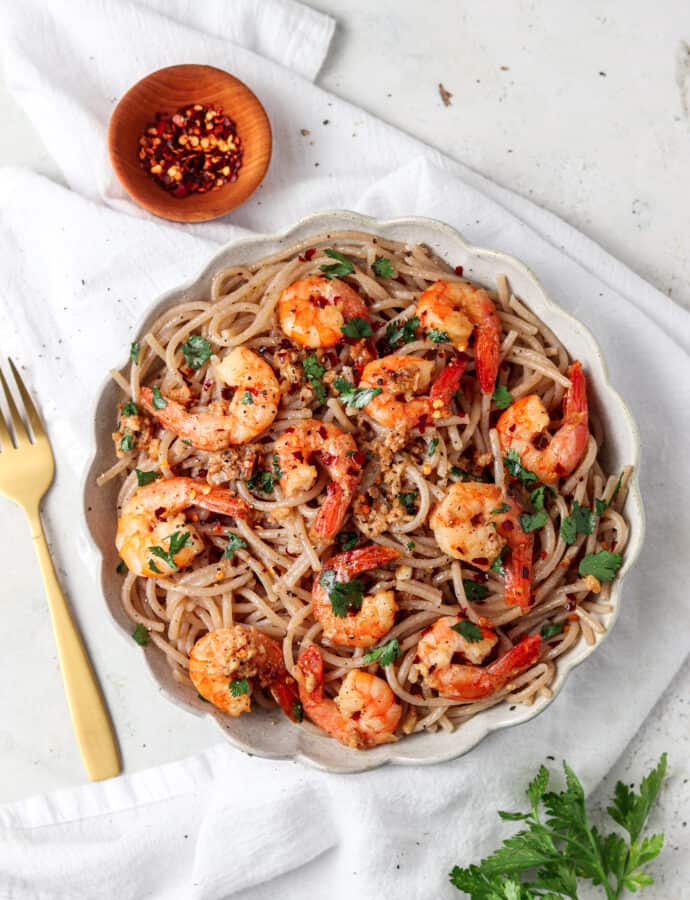
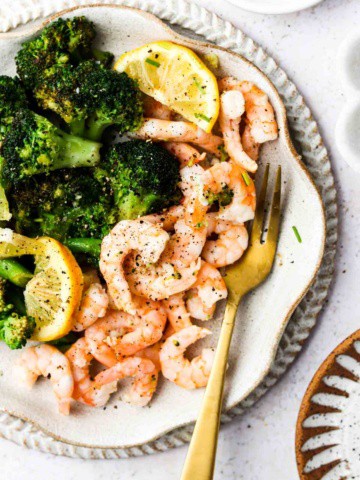
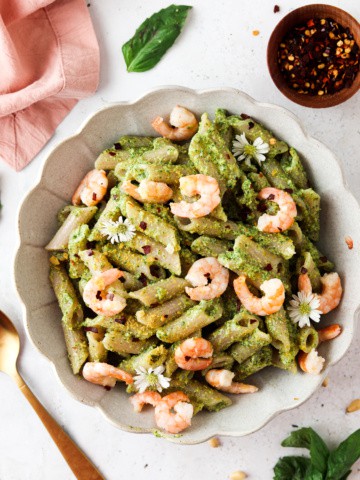
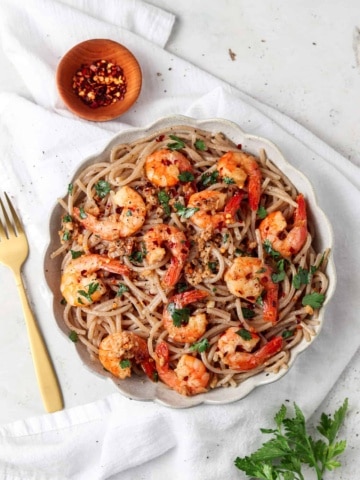
    More Gluten Free Shrimp Recipes You Will Love

    • lemon and shrimp with broccoli on a plate with a gold fork
      Lemon Garlic “Butter” Shrimp (Sheet Pan Meal)
    • paleo bang bang shrimp with dairy free bang bang sauce in a bowl with broccoli
      Whole30 Bang Bang Shrimp
    • overhead shot of pasta in a bowl
      Gluten Free Chicken Pesto Pasta (Shrimp Option)
    • gluten free shrimp scampi 1
      Gluten Free Shrimp Scampi (Dairy Free Option)

    Are you interested in a list of my go to healthy alternatives?

    Download your FREE guide below

    download here
    gluten free fried shrimp 3 scaled

    Gluten Free Fried Shrimp

    Course Meals
    Cuisine American
    Prep Time 5 minutes minutes
    Cook Time 10 minutes minutes
    Total Time 15 minutes minutes
    Servings 2 people
    Author Allianna Moximchalk
    865kcal
    Cost $10
    Print Recipe Pin Recipe

    Equipment

    • frying pan
    • 2 bowls

    Ingredients

    • 1 pound mini wild caught shrimp, tail off I like butcher box. Use my link for $30 off.
    • 1 cup cassava flour I only use Otto's.
    • 1 cup coconut milk
    • 1 pinch sea salt
    • 1 tsp garlic powder
    • 1 tsp onion powder
    • 1/4 cup ghee Use avocado oil if avoiding all dairy on AIP.

    OPTIONAL:

    • 1/2 tsp old bay seasoning Do not use for AIP.

    Instructions

    • Place the ghee (or oil) in a large non-stick frying pan on medium heat, make sure the fat is evenly spread throughout the pan. While the pan is heating up, mix the cassava flour, salt, garlic powder and onion powder in a bowl.
    • Pour the coconut milk in a separate bowl. Once the pan is hot, dip the shrimp in the coconut milk bowl, then in the flour bowl. Let the shrimp sit on a cutting board once it is coated for 5 minutes to allow the mixture to harden and re-dip the shrimp in the cassava flour mixture. This will help the breading stick. Add to the pan after you double coat it. Cook the shrimp for 3 minutes, then carefully flip. If the breading starts to pull off, cook for an additional minute. If you run out of space on your pan, do this in batches. You may need more ghee or oil with each batch.

    Notes

    Storage: This dish can be stored in an air tight glass container for up to 3 days.
    Nutrition: The nutrition for this recipe is based on an estimate and the calorie counts are not guaranteed.  It is based on a half pound serving.
    Servings: This recipe should yield 2 servings.
    Quick and easy gluten free shrimp alternative that the whole family will love.
    Serving: 0.5pound | Calories: 865kcal | Carbohydrates: 54g | Protein: 51g | Fat: 50g | Saturated Fat: 36g | Cholesterol: 629mg | Sodium: 900mg | Potassium: 470mg | Fiber: 1g | Sugar: 2g | Vitamin C: 14mg | Calcium: 444mg | Iron: 12mg
    Tried this recipe?Tag me on instagram @alliannaskitchen!
    aip waffles 6 scaled

    February 22, 2021 Allergy Friendly

    AIP Waffles (Egg Free, Paleo, Allergy Friendly)

    These AIP Waffles are the most perfect breakfast treat. They are naturally paleo and autoimmune friendly. This AIP breakfast goes great with my fresh paleo raspberry jam and pure maple syrup, it is oh so delicious!

    aip waffles staked up on a plate

    If you enjoy this recipe, you will also enjoy my AIP Pancake recipe as well. If you want to spice up this recipe even more, you can drizzle my Seedless Raspberry Jam on top too!

    Ingredients for AIP Waffles

    • Cassava flour-Cassava flour is a staple in AIP baking. It has a similar texture to gluten so it does get quite sticky when mixed with the right ingredients. With that said, this ingredient cannot be substituted out. I only use Otto’s brand as not all brands are made equally.
    • Arrowroot-The arrowroot in this recipe works as a binding agent, holding all of the ingredients together. 
    • Coconut milk-The coconut milk is my go to dairy free milk alternative. This helps pull all of the ingredients together. 
    • Coconut oil-The coconut oil keeps these waffles nice and moist. 
    • Collagen peptides-Collagen is so soothing for the gut. You can read more about that in my bone broth recipe. We use them in this recipe to add some extra protein to the pancakes. 
    • Apple cider vinegar-Helps bind all of the ingredients together. 
    • Pure maple syrup-This ingredient is optional however it does add some sweetness to the pancakes. Without it these pancakes are not sweet.
    ingredients laid out by a metal tray

    How To Make These AIP Waffles:

    • These waffles are super simple!
    • First, mix all of the dry ingredients. Then, add all of the wet ingredients. 
    • In the meantime, turn on the waffle machine. If it is non-stick, be sure to spray it with oil. I like this avocado oil.
    • Add the batter to the waffle marker. You should make about 6 waffles in this recipe, so don’t be alarmed if you have leftover batter from the first batch. 
    • I like this waffle machine because you can make four waffles at once!
    • Close the waffle lid and wait until it turns green. Once it turns green remove the waffles with tongs.

    What Should I Serve With These Waffles?

    • I am not even a big sweets person but I am obsessed with my AIP raspberry jam. It is oh so good. 
    • I like to top off the jam with fresh berries, bananas, and pure maple syrup.

    What Kind Of Waffle Maker Do You Use? 

    • I love this four compartment waffle maker. 

    Do These Waffles Reheat Well?

    • I like eating them fresh, but if you do want to reheat them be sure to reheat them without the toppings.
    • Reheating them in the oven is best at 350 for 5-10 minutes.
    aip waffles overhead shot on a plate

    If you like this recipe, you will LOVE:

    • AIP Pancakes
    • Paleo AIP Raspberry Jam
    • Paleo & AIP Crispy Crack Chicken
    • AIP Tortillas

    Hey-you’ve made it this far! If you make this recipe, I would love for you to give it a star ★ rating and review below. Make sure you are following me on Instagram, Pinterest, and Facebook too

    aip waffles 6 scaled

    AIP Waffles

    Course Breakfast
    Cuisine American
    Prep Time 10 minutes minutes
    Cook Time 10 minutes minutes
    Total Time 20 minutes minutes
    Servings 6 waffles
    Author Allianna Moximchalk
    431kcal
    Cost $5
    Print Recipe Pin Recipe

    Equipment

    • waffle maker

    Ingredients

    • 2 cups cassava flour I only use Otto's.
    • 1/4 cup arrowroot powder
    • 2 scoops collagen peptides I like this brand.
    • 1/2 tsp baking soda
    • 2 cups coconut milk
    • 1/3 cup coconut oil melted
    • 2 tbsp apple cider vinegar
    • 2 tbsp maple syrup

    Toppings (OPTIONAL)

    • raspberry jam
    • fresh berries
    • pure maple syrup

    Instructions

    • Heat up a waffle maker. Spray it with avocado oil if it is non-stick. Place all dry ingredients in a bowl, then mix in all wet ingredients with a whisk. Pour in 1/3 cup of batter into each waffle slot. Cook into the green light comes on the waffle maker. Remove the waffles with tongs.

    Notes

    Hey-you’ve made it this far! If you make this recipe, I would love for you to give it a star ★ rating and review below. Make sure you are following me on Instagram, Pinterest, and Facebook too
    Quick and easy autoimmune protocol friendly waffle recipe.
    Serving: 1waffle | Calories: 431kcal | Carbohydrates: 44g | Protein: 3g | Fat: 28g | Saturated Fat: 25g | Sodium: 104mg | Potassium: 193mg | Fiber: 1g | Sugar: 5g | Vitamin C: 3mg | Calcium: 83mg | Iron: 5mg
    Tried this recipe?Tag me on instagram @alliannaskitchen!
    Beef liver pate in a white bowl with a spoon.

    February 22, 2021 Appetizers

    Beef Liver Pate

    This beef liver pate recipe is a go to in my house for hosting. This recipe makes for a delicious appetizer all year round. We love to serve this starter as a dip with carrots and celery on the side.

    Beef liver pate in a flower white bowl with a gold spoon.

    This recipe is naturally autoimmune protocol friendly as well as keto, paleo, and Whole30 friendly. Liver is great food for anyone with autoimmune disorders.

    [feast_advanced_jump_to]

    Why You Will Love This Recipe

    • I was first introduced to liver when I did Sarah Ballentyne’s Paleo Autoimmune Protocol (AIP.) It is one of the most nutrient dense foods out there. Nutrient density of foods is important for those doing the AIP diet.
    • I was worried about the taste when I first started to read about all of its benefits, but I soon found that when liver is seasoned properly, it is quite delicious!
    • Liver is really healing to the body, especially for people that are anemic or that have an autoimmune disorder.
    • Pate can be served with any kind of veggies or crackers. My favorite brand of almond crackers is Simple Mills.
    • This recipe is AIP friendly, keto, paleo, and Whole30 friendly.
    • I’m always looking for appetizers to take along to gatherings, and this recipe is simple and easy to make!

    Ingredients

    Pate ingredients in glass bowls on a metal tray.
    • Beef liver– You can use calf or beef liver. Calf liver is just a baby cow while beef liver is from a grown cow. If you cannot find this at the grocery store, ask the butcher. Sometimes they have it behind the counter in the butcher’s area. 
    • EVOO-I like using olive oil to mix dips once they are cooked. It compliments the liver nicely.
    • Avocado oil-Avocado oil is used to sear the liver. If you are not doing AIP, you can use ghee. 
    • Sea salt-sea salt brings out the natural flavor of the liver. 
    • Oregano-adds some extra flavor.
    • Fresh parsley-adds some texture to the dish.
    • Pomegranate seeds-adds a nice sweet crunch.

    See recipe card below for a full list of ingredients and measurements.

    Substitutes and Variations

    • Liver- You can use either beef or calf liver. If you have trouble finding liver, ask the butcher where it is located in your grocery store.
    • Avocado oil- If you don’t have health restrictions, ghee can be used in place of avocado oil.
      •  

    This recipe has not been tested with other substitutions or variations. If you replace or add any ingredients, please let us know how it turned out in the comments below!

    Step by Step Instructions

    Beef liver pate ingredients on a metal tray.
    Step #1: Pan sear the garlic and liver in a pan with the avocado oil. Sear the liver for 2 minutes on each side for 4 minutes total.
    Beef liver pate ingredients in a blender.
    Step #2: Add the liver, garlic, and remaining ingredients in the food processor, and press until smooth.
    Beef liver pate in a white bowl with a spoon.
    Step #3: Serve with fresh vegetables or crackers, or you can eat it alone.

    Equipment Needed

    • skillet
    • food processor

    Expert Tips

    • Tip #1: Be sure that you don’t overcook liver as it will become tough. Only cook it for a few minutes on each side.
    • Tip #2: Garnish your pate with fresh parsley for some texture or use pomegranate seeds to add a little crunch to your dish.
    • Tip #3: Liver can be hard to find, so be sure to ask a butcher for help!

    Recipe FAQs

    Is liver healthy for me?

    Yes! Liver is a gut healthy recipe that is perfect for anyone but especially those with autoimmune disorders.

    What can I serve with pate?

    My favorite foods to serve alongside my beef liver pate are carrots, celery, or almond crackers.

    Do I need to season the liver before I cook it?

    Liver tastes delicious when it is seasoned properly! I use some sea salt and oregano to bring out the flavor of the liver in this recipe.

    Beef liver pate in a bowl with a spoon hanging out of it.

    Storage Instructions

    • This recipe can last for up to 5 days in an airtight container.

    Other Gut Healing Recipes

    • aip bone broth 9 scaled
      AIP Bone Broth Recipe (Paleo, Whole30, Keto)
    • close up photo of turkey soup in a bowl
      Instant Pot Turkey Soup
    • kale and mushrooms on a pretty plate
      Sauteed Kale And Mushrooms
    • dairy free hot chocolate 1
      Creamy Dairy Free Hot Chocolate (Protein Option)

    Did you try this recipe?

    Leave a rating and a review below.

    Be sure to tag me on Instagram.
    Beef liver pate in a white bowl with a spoon.

    Beef Liver Pate Recipe

    Course Appetizer, Snack
    Cuisine American
    Prep Time 5 minutes minutes
    Cook Time 5 minutes minutes
    Total Time 10 minutes minutes
    Servings 6 people
    Author Allianna Moximchalk
    231kcal
    Cost $5
    Print Recipe Pin Recipe

    Equipment

    • skillet
    • Food processor

    Ingredients

    • 1 pound beef liver calf liver will also work
    • 1 tbsp avocado oil
    • 5 tbsp EVOO
    • 6 cloves garlic minced
    • 1 pinch sea salt
    • 1 tsp oregano

    Instructions

    • Place a non stick skillet on medium heat in a non-stick frying pan. Add the avocado oil, garlic, and liver. Satuee the liver and sear the liver for 2 minutes on each side for 4 minutes total.
    • Once the liver is cooked and the garlic is seared, add all ingredients to the food processor and pure until smooth. Serve with crackers or vegetables.

    Notes

    Storage:  This recipe can be stored in an airtight glass container for up to 5 days.
    Nutrition: The nutrition for this recipe is an estimate, and the calorie count is not guaranteed.  It is based on 6 servings.
    Servings: This recipe should yield 6 servings.
    Quick and easy nutrient dense appetizer that everyone will love.
    Serving: 0.25cup | Calories: 231kcal | Carbohydrates: 4g | Protein: 16g | Fat: 17g | Saturated Fat: 3g | Trans Fat: 1g | Cholesterol: 208mg | Sodium: 59mg | Potassium: 253mg | Fiber: 1g | Sugar: 1g | Vitamin A: 12781IU | Vitamin C: 2mg | Calcium: 15mg | Iron: 4mg
    Tried this recipe?Tag me on instagram @alliannaskitchen!
    aip bone broth 9 scaled

    February 21, 2021 Autoimmune Protocol

    AIP Bone Broth Recipe (Paleo, Whole30, Keto)

    This AIP Bone Broth Recipe is a staple in the paleo autoimmune protocol. It not only tastes amazing but is so soothing for the gut. This recipe is simple, easy, and only requires a few minutes of hands on time. If you enjoy this recipe, you will also enjoy my Homemade Elderberry Syrup as well.

    aip bone broth in a jar being poured into a glass

    Why Is Bone Broth A Staple In The Autoimmune Protocol?

    • Bone broth is nutrient dense. The apple cider vinegar in this recipe pulls the nutrients out of the bones and vegetables. The bones are loaded with collagen which is soothing for both the gut and joints. 

    Ingredients For AIP Bone Broth:

    • Chicken back bones-You can find these in the butcher department at your local grocery store. You can also use beef bones. Make sure they are grass fed if possible. What the chicken eats is most important vs. being organic.
    • Lemons-This will give the broth some flavor.
    • Garlic-The garlic combined with the lemon makes this broth so delicious. 
    • Fresh parsley & cilantro-My go to herbs for bone broth.
    • Onions-Onions are a must in this recipe!
    • Carrots, celery, and leeks are my go to vegetables of choice, however this recipe is super flexible in terms of the vegetables that you add in. 
    • Water-Make sure it is filtered!
    • Apple cider vinegar-The vinegar helps the bones release nutrients which is the thing that makes bone broth so nutrient dense.
    aip bone broth ingredients on a metal tray

    How To Make AIP Bone Broth:

    • First, place all ingredients in the crockpot and fill up the remaining space with filtered water. 
    • Now, set the crockpot to low for 24 hours. Once the 24 hours is up, refill the crockpot to the top. Give the broth a good mix. 
    • Allow the broth to cook for an additional 24-48 hours. 
    • Once the broth is done, use a strainer to remove the bones and veggies. 
    • Let the broth cool, then store in a glass bottle.
    broth in a crockpot with ingredients

    Can I Freeze Bone Broth?

    • Yes you can freeze it, however I like to drink 2-3 glasses a day. Which means it typically doesn’t last long enough to be frozen. If you do freeze it, be sure to allow the broth to completely cool, then pour into a glass mason jar. Make sure to leave about an inch of room on the top without liquid so that the glass does not break. The liquid will expand when it freezes so it is essential to leave the extra room.

    Can I Use The Stove?

    • You could, however I do not like the idea of leaving the stove on for hours. This recipe does best when it is slow cooked, that is why I use the crockpot. THIS is the crockpot I use.
    aip bone broth poured into a glass

    If you like this recipe, you will LOVE:

    • AIP Thai Chicken Soup
    • Paleo AIP Pina Colada
    • AIP Pancakes

    Hey-you’ve made it this far! If you make this recipe, I would love for you to give it a star ★ rating and review below. Make sure you are following me on Instagram, Pinterest, and Facebook too!

    aip bone broth 8 scaled

    AIP Bone Broth

    Course Soup
    Cuisine American
    Prep Time 10 minutes minutes
    Cook Time 3 days days
    Total Time 3 days days 10 minutes minutes
    Servings 8 servings
    Author Allianna Moximchalk
    27kcal
    Cost $5
    Print Recipe Pin Recipe

    Equipment

    • crockpot

    Ingredients

    • 1 pound chicken back bones Ask the butcher.
    • 3 tbsp apple cider vinegar
    • 2 whole lemons juiced
    • 10 cloves garlic
    • 1 bunch fresh cilantro
    • 1 bunch fresh parsley
    • 2 cups leeks diced, see notes above about vegetables
    • 2 whole purple onions cut in half
    • 2 cups rainbow carrots diced, see notes above about vegetables
    • 2 cups celery diced, see notes above about vegetables
    • filtered water enough water to fill the crockpot

    Instructions

    • Place all ingredients in the crockpot and fill up the remaining space with filtered water. Set the crockpot to low for 24 hours. Once the 24 hours is up, refill the crockpot to the top. Give the broth a good mix.  Allow the broth to cook for an additional 24-48 hours. Once the broth is done, use a strainer to remove the bones and veggies. Let the broth cool, then store in a glass bottle. See freezing instructions above.
      AIP BONE BROTH 10 scaled

    Notes

    Hey-you’ve made it this far! If you make this recipe, I would love for you to give it a star ★ rating and review below. Make sure you are following me on Instagram, Pinterest, and Facebook too!
    This bone broth is a must on the AIP diet.
    Serving: 1cup | Calories: 27kcal | Carbohydrates: 6g | Protein: 1g | Fat: 1g | Saturated Fat: 1g | Sodium: 30mg | Potassium: 170mg | Fiber: 1g | Sugar: 1g | Vitamin A: 1152IU | Vitamin C: 15mg | Calcium: 41mg | Iron: 1mg
    Tried this recipe?Tag me on instagram @alliannaskitchen!
    honey sriracha salmon 8 scaled

    February 20, 2021 Dairy free

    Honey Sriracha Salmon (Paleo, Gluten Free)

    This sriracha honey salmon is oh so delicious and the most perfect weeknight meal. This dish is something the whole family can enjoy. The combination of honey and sriracha is quite the winning combo. When you make this recipe you can have dinner on the table in less than 30 minutes!

    What Do I Need To Make Sriracha Honey Salmon?

    • Wild caught salmon-I am obsessed with Butcher Box! They send me a monthly shipment of all of my favorite wild caught meats and seafoods. If you use my link HERE, you can get $30 off your first order. 
    • Coconut aminos-coconut aminos is my go to soy sauce alternative in paleo cooking. Not all brands are created equally. I prefer the Trader Joe’s brand out of all of the ones out there. If you do not have a Trader Joe’s near you, you can order them online HERE.
    • Honey-Typically I say always go for local honey but since you are baking it here any honey brand will do. The combination of the honey and the sriracha is delicious! 
    • Rice vinegar- The rice vinegar adds some tangyness to this sweet salmon.
    • Sriracha-This is what adds the spice! I love Trader Joe’s brand because it is pretty clean.
    • Ginger-Gives this recipe a nice kick!
    • Sesame oil-This is what gives this salmon the Asian like flavor.
    • Garlic-adds even more flavor!
    • OPTIONAL cauliflower rice-to serve the salmon over.

    To garnish (OPTIONAL)

    • Green onions-chopped
    • Red pepper flakes
    • White sesame seeds
    • Lime juice

    sriracha salmon ingredients on a metal tray

    How To Make Sriracha Honey Salmon:

    • First thing is first, mix all ingredients aside from the salmon in a bowl. 
    • Next, pour half of the sauce into a ziplock bag and cut up the salmon into 2-3 pieces. Add the salmon into the bag. Shake up the bag. 
    • Remove the salmon from the bag and place it on a baking sheet. 
    • I love to cook this recipe in my toaster oven because I do not have to heat up the whole oven. Pour the remaining sauce from the bag over the salmon. 
    • Cook the salmon on 350 for 15-20 minutes. If you like your salmon well done stick with 20 minutes, if you like it less well done stick to 15 minutes. 
    • While the salmon is cooking you can cook the optional cauliflower rice or brown rice to make this into a full meal.
    honey sriracha salmon sauce in a bowl

    Can I Use This Honey Sriracha Salmon Dish For Meal Prep?

    • Yes, I suggest eating it within 2-3 days.

    How Can I Reheat Salmon?

    • I like to reheat it in the oven on 350 for 5-10 minutes.
    far away shot of honey sriracha salmon on a plate with rice

    If you like this salmon recipe, you will LOVE:

    • Paleo Herb Crusted Salmon
    • Whole30 & Paleo Lemon Dill Dijon Salmon
    • AIP, Paleo, Keto & Whole30 Friendly Shredded Lemon Dill Salmon Salad

    Hey-you’ve made it this far! If you make this recipe, I would love for you to give it a star ★ rating and review below. Make sure you are following me on Instagram, Pinterest, and Facebook too!

    honey sriracha salmon 8 scaled

    Course Dinner, Lunch, Meals
    Cuisine American, Asian
    Prep Time 10 minutes minutes
    Cook Time 20 minutes minutes
    Total Time 30 minutes minutes
    Servings 3 servings
    Author Allianna Moximchalk
    335kcal
    Cost $10
    Print Recipe Pin Recipe

    Equipment

    • baking sheet (I like using my toaster oven)

    Ingredients

    For the salmon:

    • 1 pound wild caught salmon I like Butcher Box, if you use my code you can get $30 off your first order.
    • 1/4 cup coconut aminos
    • 1 tbsp rice vinegar
    • 1 tbsp sriracha sauce
    • 1/4 cup-1/3 cup honey
    • 1 tbsp freshly grated ginger I like using this tool to grate ginger.
    • 10 cloves garlic minced
    • 2 tbsp sesame oil

    To garnish:

    • red pepper flakes
    • sesame seeds
    • green onions

    OPTIONAL SIDE:

    • 1 bag cauliflower rice

    Instructions

    • Preheat your oven or the toaster over to 350. Mix all ingredients except the salmon and rice in a bowl. Add 1/2 of the sauce to a ziplock bag and add the salmon, move the salmon around so it marinates evenly. Remove the salmon from the bag and add to a baking sheet. Pour the remaining sauce from the bag on to the salmon. Cook the salmon for 15-20 minutes.
      honey sriracha salmon 9 scaled
    • While the salmon is cooking, make the optional cauliflower rice. Once the salmon is done, garnish with green onions, sesame seeds and red pepper flakes if desired. Use the remaining half of the sauce to dip the salmon in.

    Notes

    Hey-you’ve made it this far! If you make this recipe, I would love for you to give it a star ★ rating and review below. Make sure you are following me on Instagram, Pinterest, and Facebook too!
    Serving: 1piece | Calories: 335kcal | Carbohydrates: 8g | Protein: 31g | Fat: 19g | Saturated Fat: 3g | Cholesterol: 83mg | Sodium: 635mg | Potassium: 798mg | Fiber: 1g | Sugar: 1g | Vitamin A: 68IU | Vitamin C: 7mg | Calcium: 37mg | Iron: 1mg
    Tried this recipe?Tag me on instagram @alliannaskitchen!
    aip pie 19 scaled

    February 19, 2021 Autoimmune Protocol

    AIP Pie Crust With Berries (Paleo, Egg Free, Allergy Friendly)

    This AIP pie with a berry filling is oh so delicious yet so easy to make. This recipe is naturally AIP, paleo, egg free, and allergy friendly. This recipe is quick, easy, and no one would ever guess it is paleo friendly. This pie crust is everything pie crust should be: flakey and “buttery.”

    aip pie crust and berries close up in a pie dish

    What You Will Need To Make This AIP Pie:

    For The AIP Pie Crust:

    • Cassava flour-This is the base for the recipe. Cassava is very similar to gluten in the sense that once it gets wet it becomes sticky and holds together well. I ONLY use the Otto’s brand. Not all cassava flour brands are created equally.
    • Gelatin-This is what is going to act as your egg here, gelatin eggs are a staple in AIP baking as eggs are not allowed. 
    • Apple cider vinegar-This will help mesh in the gelatin. 
    • Ghee-this helps hold everything together. 
    • Water-This will help the dough become soft. 
    • Arrowroot flour-This is used to roll out the dough and prevent it from sticking to the wax paper. 

    For the AIP pie filling:

    • Berries of choice-I love using a combination of berries, the more texture, the better!
    • Lemon juice-The lemon juice compliments the berries oh so nicely. 
    • Pure maple syrup-This adds another layer of sweetness to the berries. 
    • Arrowroot-This helps the berries stick together well. Arrowroot often acts like corn starch in AIP and paleo recipes.

    ingredients on a tray

    How To Make This AIP Pie Crust:

    • First thing is first, you want to make the crust. Add the arrowroot, gelatin and lard (or ghee and palm oil shortening) to a bowl and mix. I like to use my hands, you can also use a pastry blender. Now, roll the dough into a ball.
    • Next, add in the water and apple cider vinegar. The dough should be smooth yet a little bit crumbly. Re-roll the dough into a ball, if it crumbles, add a tbsp of water until it is smooth yet not sticky.
    • Now, lay down a piece of wax paper and add the arrowroot to the wax paper. Lay down the ball of dough and roll it out. It is ok if it crumbles, just start over. If you find it crumbling too much, add another tbsp of water. Once the dough is rolled out, spray the pie tray with oil so it does not stick (I like avocado oil) and flip the pie crust on the wax paper.

    aip pie step by step instruction photos

    For the filling:

    • Toss all ingredients together, you will want the arrowroot to be all around the berries. Add the mixture to the pot and bring to a simmer. Once it simmers, remove the mixture from the pot and add the mixture to the pie crust. 
    • Cook the pie in the oven at 350 for 50 minutes.

    How To Prevent The Dough From Sticking:

    • Spray the tray prior to using with oil of choice. I like this brand.
    • Add the arrowroot down to the parchment paper prior to rolling it out.

    How To Store This Pie:

    • Make sure it cools completely at room temperature, then add plastic wrap over top.
    • This pie does best if you serve it right after cooling.aip pie crust in a pie dish with a rolling pin

    If you like this recipe, you will LOVE:

    • AIP Paleo Pina Colada
    • AIP Pancakes
    • Paleo AIP Raspberry Jam
    • AIP Banana Bread

    Hey-you’ve made it this far! If you make this recipe, I would love for you to give it a star ★ rating and review below. Make sure you are following me on Instagram, Pinterest, and Facebook too!

    aip pie 2 1 scaled

    AIP Pie With Berry Filling

    Course Dessert
    Cuisine American
    Prep Time 20 minutes minutes
    Cook Time 50 minutes minutes
    Total Time 1 hour hour 10 minutes minutes
    Servings 8 servings
    Author Allianna Moximchalk
    118kcal
    Cost $10
    Print Recipe Pin Recipe

    Ingredients

    For the filling:

    • 3 tsp maple syrup
    • 3 cups diced berries
    • 1 tbsp arrowroot powder
    • 1 whole lemon juiced

    For rolling the dough:

    • 1/4 cup cassava flour (in addition) to prevent the dough from sticking to the rolling pin.

    For the crust:

    • oil spray prevents the dough from sticking. I like this brand.
    • 1/2 cup purified water
    • 2 cups cassava flour ONLY use Otto's.
    • 3/4 cup ghee or lard
    • 2 tbsp gelatin
    • 2 tbsp apple cider vinegar
    • a pinch sea salt

    Instructions

    For the crust:

    • Preheat the oven to 350. Place the gelatin, cassava flour, sea salt and ghee in a bowl and mix in the lard or ghee. You can use a pastry blender or your hand to do this.
      aip pie 12
    • Now add the apple cider vinegar and water, mix it together and form a ball. Once the ball is formed, grab a piece of parchment paper, and throw down the extra cassva flour powder to prevent it from sticking. Roll out the dough. Once the dough is rolled spray your pan with your oil of choice to prevent it from sticking. Flip the parchment paper over the pie dish and press down GENTLY to form it. If it cracks that is ok, just pull the dough tight or start over. Now poke holes with a fork in the bottom of the crust to prevent it from bubbling when baking.
      aip pie 4 scaled

    For the filling:

    • Toss all filling ingredients in a bowl to make sure the arrowroot is evenly disperse. Add the mixture to the pan and bring to a simmer on medium heat. Once it simmers, remove from the pan and pour on top of the crust. Bake in the oven for 50 minutes.

    Notes

    Hey-you’ve made it this far! If you make this recipe, I would love for you to give it a star ★ rating and review below. Make sure you are following me on Instagram, Pinterest, and Facebook too!
    Quick and easy pie alternative that you won't even know is AIP friendly.
    Serving: 1slice | Calories: 118kcal | Carbohydrates: 25g | Protein: 3g | Fat: 1g | Saturated Fat: 1g | Sodium: 8mg | Potassium: 105mg | Fiber: 2g | Sugar: 5g | Vitamin A: 176IU | Vitamin C: 34mg | Calcium: 56mg | Iron: 2mg
    Tried this recipe?Tag me on instagram @alliannaskitchen!

    gluten free paleo meal plan 10

    February 13, 2021 Blog

    Gluten Free Paleo Meal Plan (Dairy Free)

    This is Week 10 of my Gluten Free Paleo Meal Plan.  I have received a lot of great feedback so I am going to continue to create them. All of this weeks recipes are paleo friendly.  If they are Whole30, AIP and keto friendly it will say in the description. Feel free to use previous week’s meal plans that can be found here.  If you would like to get the complete shopping list be sure to sign up for my newsletter below and I will send you your grocery list weekly. All you have to do is shop!

    gluten free paleo meal plan collage

    How The Week 10 Paleo Gluten Free Friendly Meal Plan Works:

    • If meal prepping your food in advance is your thing I highly suggest getting meal prep containers or containers like these so your meals are ready to eat.
    • Included in this post are 7 meals and 1 breakfast. When making the meals for dinner I suggest making an extra portion so you can eat it for lunch. Keep in mind these are an inspiration, so feel free to swap things out. Each recipe contains the meal only, feel free to add a side. We love roasting veggies to go with our meals.

    Shopping List:

    • If you would like the full complete shopping list that goes with my meal plan, be sure to subscribe to my email list. If you have questions or need assistance please comment below. Be sure when you make one of my recipes to leave a comment and a star rating review on the recipe on my blog or took a picture and tagged me in it on instagram @alliannaskitchen. This helps me figure out what recipes you guys like best!
    • I hope this is helpful as you begin to plan out your week. -Allianna

    For Breakfast:

    3 ingredient protein pancakes

    • 3 Ingredient Paleo Protein Pancakes
      • These 3 ingredient protein pancakes are perfect for the whole family for breakfast. The pureed banana adds the perfect amount of sweetness. The eggs combined with the nut butter makes these pancakes loaded with protein. With these pancakes only taking 5 minutes to prep they are a no brainer for all of your breakfast needs!

    For Lunch & Dinner:

    gluten free paleo meal plan herb crusted salmon

    • Herb Crusted Salmon (Paleo)
      • This naturally gluten free and paleo herb crusted salmon is one of most requested salmon recipes by my personal cheffing clients. The combination of honey mustard and almond flour makes for the most perfect crust. With this recipe only requiring 5 minutes of hands on time, plus 20 minutes of cooking time, you can have dinner on the table within 30 minutes!

    gluten free paleo meal plan fried shrimp rice

    • Shrimp Fried Cauliflower Rice (Paleo, Keto, AIP, Whole30)
      • This shrimp fried cauliflower rice dish tastes just like Chinese take out yet it is made with cauliflower instead of brown rice. This recipe is super simple and kid friendly. The fresh ginger combined with the green onions makes this dish oh so delicious. This recipe is naturally paleo, Whole30 and keto friendly. It can also be made AIP friendly with just a few modifications.

    gluten free paleo meal plan whole30 shrimp scampi

    • Gluten Free Shrimp Scampo (Paleo, Whole30, AIP)
      • This gluten free shrimp scampi is everything shrimp scampi should be: simple, garlic-y, buttery, zesty, and full of flavor. In this recipe, I include multiple pasta options which makes it paleo, keto, AIP, and Whole30 friendly. This crowd pleasing recipe is quick, easy and clean. It be on the dinner table within 15 minutes.

    new york strip steak

    • New York Strip Steak With Garlic Aioli (Paleo, Whole30, Keto)
      • This New York Strip Steak date night dinner makes takeout steaks taste weak. In this recipe, i go through the step by step process on how to get your steak juicy on the inside, yet crispy on the outside. This well seasoned steak combined with the garlic aioli is oh so delicious. This meal is naturally paleo and whole30 friendly and can be modified to be keto friendly.

    honey mustard chicken wings

    • Crispy Honey Mustard Chicken Wings
      • These quick, easy and restaurant styled copycat crispy honey mustard chicken wings are to die for. The honey mustard combined with the fresh green onions is oh so delicious. With this recipe only requiring 5 minutes of hands on time, it is the most perfect date night snack and quick dinner option. 

    paleo beef gnocchi bolognese

    • Paleo Gnocchi Bolognese (Whole30, Low Carb)
      • This paleo gnocchi bolognese is a healthy spin on the traditional Italian dish. It is loaded with flavor and nutrient dense, you will have no idea that the gnocchi is actually made from cauliflower! This dish only requires 5 minutes of hands on time and 15 minutes of cook time making it the perfect weeknight meal for days you are in a rush. This dish is simple yet mouth watering good. The fresh basil on the top adds the most perfect touch.

    paleo buffalo chicken meatballs

    • Buffalo Chicken Meatballs (Paleo, Whole30, Keto)
      • These whole30 and paleo buffalo chicken meatballs are loaded with flavor and quite a crowd pleaser. They are perfect for all of your football game day snack needs as well as an easy paleo dinner. For dinner we like to serve them with roasted broccoli. The homemade buffalo sauce combined with the homemade ranch dressing makes these meatballs oh so delicious.
    Raspberry lemonade poured in a whicker cup on a marble plate with berries on the side.

    February 10, 2021 Autoimmune Protocol

    Healthy Raspberry Lemonade

    This Healthy Raspberry Lemonade with my homemade honey simple syrup is oh so delicious, quick, and easy. It is perfect for the springtime and all of your Valentine’s Day needs. This drink is naturally refined sugar free and made with natural raw honey. We like to prep this recipe in one large batch and drink it throughout the week. While I like to drink it as is, it is also a great mixer for a cocktail.

    Red colored drink in a large mason jar being poured into a small whicker glass with raspberries on the side.

    This drink is super special to me because this is going to be my signature mocktail at my wedding that is taking place this Spring. I still cannot believe Mitchell and I are getting married! We have decided to have the wedding at our house due to the current circumstances in 2020 and honestly I cannot wait! Having it at our home allows us to make everything more customized. Doing it this way feels a lot more symbolic of us, since we are homebodies. I am going to offer this as my signature drink with the added alcohol add in option. 

    If you enjoy this recipe, you will also enjoy my Homemade Elderberry Syrup and Grapefruit Mocktail and my Rosemary Mint Lemonade as well.

    [feast_advanced_jump_to]

    Why This Recipe Works

    • This recipe only takes a few minutes to make.
    • I love making this drink when we have friends over in the summer. It pairs so well with just about anything. I love having this berry drink with my favorite No Bake Vegan Blueberry Cheesecake Cups.
    • My homemade lemonade is naturally dairy free, refined sugar free, paleo, nut free, aip (autoimmune protocol friendly) and free of any processed ingredients.
    • You can batch make this recipe so you can drink it all week long.
    • Kids love this healthier lemonade alternative!

    Ingredients

    Lemonade ingredients laid out in glass bowls on a metal sheet pan.
    • Raspberries: I like buying my raspberries in bulk from Costco when they are out of season, or from a local farm when they are in season!
    • Lemons: We need lemons for lemonade!
    • Raw honey simple syrup–This is what we are using in place of sugar for this lemonade. This is what makes this recipe refined sugar free. I like to keep a batch of this raw honey in my fridge at all times! It lasts for a month in a mason jar. It is just honey and water.
    • Water-I like to use filtered water!

    See the recipe card below for a full list of ingredients and measurements.

    Substitutions and Variations

    • If you want it to be a frozen raspberry lemonade, you can switch out fresh raspberries for frozen.
    • You can also add additional fruits that you have on hand as well.

    This recipe has not been tested with other substitutions or variations. If you replace or add any ingredients, please let us know how it turns out in the comments below.

    Step by Step Instructions

    Raspberry lemonade ingredients in a food processor.
    First, if you are making homemade honey simple syrup, start by making that. Then place all of the ingredients in a food processor and blend until smooth.

    Equipment Needed

    • Blender

    Expert Tips

    • Tip # 1: If you are buying lemon juice from the grocery store, make sure to check the ingredients so that there are not additives such as sugar.
    • Tip # 2: If you don’t like the seeds that are in raspberries, you can strain the liquid when you pour it into your cups or serving pitcher.
    • Tip # 3: If you are making sure honey simple syrup fresh, you will want to make sure to let the liquid cool before adding it to the blender.

    Recipe FAQ

    What should I store the lemonade in?

    I like using these drink storage jars. Make sure to shake before drinking.

    Can I use store bough lemonade?

    Yes! I would just make sure to check the ingredients so that there are not additives.

    How should I serve this recipe?

    I like to serve mine in a nice glass pitcher so that you can see the beautiful color!

    Paleo raspberry lemonade in a clear glass with lemon garnishes.

    Storage Instructions

    • This recipe can be stored in an air tight container in the refrigerator for up to 5 days.

    Other Refined Sugar Free Drinks You Will Love

    • pineapple margarita mocktail 3 scaled
      Pineapple Margarita Mocktails
    • Overhead shot of a blood orange mojito in a glass with a dehydrated blood orange on the edge.
      Blood Orange Mojito Mocktail
    • Blackberry mint mocktail7
      Blackberry Mojito Mocktail
    • Cherry mocktail in a fun pink glass with a lime on top.
      Tart Cherry Juice Mocktail

    Are you interested in a list of my go to healthy alternatives?

    Download your FREE guide below

    download here


    Raspberry lemonade poured into a basket weaved glass with on a marble plate.

    Paleo Raspberry Lemonade

    Course Drinks
    Cuisine American
    Prep Time 5 minutes minutes
    Total Time 5 minutes minutes
    Servings 8 servings
    Author Allianna Moximchalk
    137kcal
    Cost $10
    Print Recipe Pin Recipe

    Equipment

    • Food processor

    Ingredients

    • 6 cups filtered water
    • 1 cup honey simple syrup
    • 3 cups fresh raspberries
    • 10 whole lemons juiced

    Instructions

    • If you have to make the honey simple syrup, make the syrup, then add it in once it cools. Place all ingredients in a food processor and blend until smooth.

    Notes

    Storage: This recipe can be stored in an air tight container in the refrigerator for up to 5 days. 
    Nutrition: The nutrition for this recipe is an estimate and the calorie count is not garunteed.  It is based on 8 servings. 
    Servings:  This recipe should yield 8 servings. 
    Easy refined sugar free pink lemonade alternative.
    Serving: 8g | Calories: 137kcal | Carbohydrates: 36g | Protein: 1g | Fat: 1g | Saturated Fat: 1g | Sodium: 34mg | Potassium: 96mg | Fiber: 3g | Sugar: 33g | Vitamin A: 15IU | Vitamin C: 12mg | Calcium: 22mg | Iron: 2mg
    Tried this recipe?Tag me on instagram @alliannaskitchen!
    herb crusted salmon 2 scaled

    February 4, 2021 Featured Home

    Herb Crusted Salmon (Paleo, Gluten Free)

    This naturally gluten free and paleo herb crusted salmon is one of most requested salmon recipes by my personal cheffing clients. The combination of honey mustard and almond flour makes for the most perfect crust. With this recipe only requiring 5 minutes of hands on time, plus 20 minutes of cooking time, you can have dinner on the table within 30 minutes!

    herb crusted salmon on a baking sheet with a fork and green onions and red pepper 

    This blog post was originally posted on March 10th 2020, and updated on February 4th 2021 to improve user experience. 

    What You Need To Make This Herb Crusted Salmon:

    • I love using Butcher Box! They ship me a monthly supply of all of my favorite wild caught and grass fed proteins. If you use my link HERE you can get $30 off of your first order. 
    • Almond flour-This is what gives the salmon the crusted touch. I like using the Costco almond flour brand. 
    • Honey mustard- I love using the 365 brand from Whole Foods.
    • Fresh parsley-I love using fresh parsley as the herb in this recipe.

    To garnish:

    • Fresh lemon juice is always a good choice. 

    ingredients for herb crusted salmon on a metal tray

    How To Make This Herb Crusted Salmon:

    • This recipe is so simple.
    • First, preheat the oven to 350.
    • Next, mix together all of the sauce ingredients in a bowl. 
    • Now, use a marinating brush and brush the sauce over the salmon.
    • Cook in the oven for 20 minutes for medium well done. 
      • If you like your salmon less well done, cook it for 17 minutes. I prefer mine more well done at the 20 minute mark.

    raw uncooked salmon on a baking dish

    Can I Reheat This Salmon?

    • Yes! I suggest doing so in the oven. Preheat the oven to 350 and reheat for 5-10 minutes. 

    How Long Does It Last?

    • I suggest eating the salmon within 3 days of cooking it. 

    herb crusted salmon on an oven tray with green onions and red pepper

     If you like this recipe, you will LOVE:

    • AIP, Paleo, Keto, Whole30 Lemon Dill Shredded Salmon Salad
    • Whole30 Salmon w/ Lemon Dill Dijon Sauce
    • Whole30, AIP, Keto Shrimp Fried Rice

    Hey-you’ve made it this far! If you make this recipe, I would love for you to give it a star ★ rating and review below. Make sure you are following me on Instagram, Pinterest, and Facebook too!

    herb crusted salmon with a silver fork garnished with green onions

    Herb Crusted Salmon (Paleo, Gluten Free)

    Course Meals
    Cuisine American
    Prep Time 5 minutes minutes
    Cook Time 20 minutes minutes
    Total Time 25 minutes minutes
    Servings 2 servings
    Author Allianna Moximchalk
    679kcal
    Cost $15
    Print Recipe Pin Recipe

    Equipment

    • baking sheet

    Ingredients

    • 1 pound wild caught salmon I love Butcher Box. Use my link for $30 off of your box.
    • 1 cup honey mustard
    • 1/3 cup almond flour
    • 1/4 cup fresh parsley chopped

    To garnish: OPTIONAL:

    • red pepper flakes
    • green onions

    Instructions

    • Preheat the oven to 350. Place the almond flour, honey mustard, and fresh parsley in a bowl and mix together. Coat the salmon with the sauce using a spoon or marinating brush. Bake in the oven for 20 minutes. Add optional garnishes on top if desired. Eat within 3 days of cooking.
      herb crusted salmon 4 scaled

    Notes

    Hey-you’ve made it this far! If you make this recipe, I would love for you to give it a star ★ rating and review below. Make sure you are following me on Instagram, Pinterest, and Facebook too!
    Store in the fridge for 2-3 days. 
    Quick and easy gluten free salmon option that the whole family will love.
    Serving: 1piece | Calories: 679kcal | Carbohydrates: 54g | Protein: 49g | Fat: 24g | Saturated Fat: 3g | Cholesterol: 125mg | Sodium: 726mg | Potassium: 1153mg | Fiber: 2g | Sugar: 26g | Vitamin A: 723IU | Vitamin C: 10mg | Calcium: 77mg | Iron: 3mg
    Tried this recipe?Tag me on instagram @alliannaskitchen!

    pan seared filet mignon 5 scaled

    February 3, 2021 Autoimmune Protocol

    Dairy Free Mushroom Sauce

    This Pan Seared Filet Mignon with Creamy Mushrooms sauce is everything you need for date night. The filet mignon in this recipe is crispy on the outside and oh so juicy on the inside. The creamy white sauce combined with the mushrooms makes this recipe oh so delicious. This recipe is quick and easy, you can have dinner on the table in 30 minutes. This recipe is naturally paleo, Whole30, and keto friendly. It can be made AIP friendly with one simple modification. 

    pan seared filet mignon on a grey plate

    If you enjoy this recipe, you will also enjoy my Steak Date Night Dinner with Garlic Aioli as well.

    What You Need To Make This Pan Seared Filet Mignon With Creamy Mushroom Sauce:

    For the pan seared filet mignon:

    • (2) 6-8 ounces filet mignon steaks- I like using Butcher Box. They ship you a monthly supply of grass fed meats every month. I find their quality is the absolute best. I can taste a difference in the steak too. If you use my link HERE, you can get $30 off your first order.
    • Pink sea salt & pepper- This is what is used to seasoned the steaks. If you are doing AIP, be sure to omit the black pepper. 
    • Ghee- I like using ghee in place of butter to give my dishes the buttery flavor.

    For the Creamy Mushroom Sauce:

    • Mushrooms-This are a necessity! This is what makes the mushroom sauce 🙂
    • Ghee-Again, this is what makes the buttery taste in the sauce. If you can tolerate dairy, you could use regular butter. 
    • Purple onion & garlic- Adds so much flavor! In my opinion, the more garlic the better. 
    • Lemon juice-This is a must. This will add a kick to the sauce. Without this, the sauce is bland. 
    • Bone broth & almond milk-This is what gives that sauce that creamy flavor. If you are doing AIP, you can use full fat coconut milk.
    • Water & arrowroot- Arrowroot is similar to cornstarch in paleo cooking. It is a staple in my house. We use it to thicken up our sauces.
    pan seared filet mignon ingredients on a tray

    How To Make This Pan Seared Filet Mignon With The Creamy Mushroom Sauce?

    For the steak:

    • First, preheat the oven to 400.
    • Next, pat the steaks dry with a paper towel and add the salt and pepper to both sides.
    • Now, put a non-stick pan on the stove to medium heat, let it warm up for 2 minutes. Add the ghee.
    • Add the steaks to the pan and let them cook for 5 minutes on each side for a total of 10 minutes. If you like your steak more pink, stick to a total of 10 minutes. If you like it more well done, do 7 minutes on each side. 
    • Once the steak is done baste it with the ghee sauce and wrap in foil for 5 minutes prior to eating. 

    For The Sauce:

    • Saute the onion and garlic in the ghee in a non-stick pan for 3 minutes. 
    • Next, add the mushrooms, lemon juice, dairy free milk and bone broth to the pan and cook for an additional 5 minutes. 
    • While the mushrooms are cooking make the arrowroot mixture. Add the arrowroot to a bowl of water and whisk together continuously until a white mixture forms. Once the mushrooms are done, turn off the heat and add the mixture to the pan while whisking together. Let the sauce sit and thicken for 5 minutes prior to serving. 

    Additional info for cooking the steak:

    • 5 minutes on each side (10 minutes total) for medium-rare. 
    • 6 minutes on each side (12 minutes total) for medium.
    • 7 minutes on each side (14 minutes total) for medium-well.
    pan seared filet mignon with a fork in the middle of it

    Other Dairy Free Sauce Recipes You Will Love

    • Red chimichurri 1 scaled
      Red Chimichurri Sauce Recipe
    • Orange sauce in a wooden bowl with red pepper flakes and fresh chives on top.
      Breakfast Burrito Sauce
    • paleo hollandaise sauce on toast
      Dairy Free Hollandaise Sauce
    • whole30 bbq sauce in a bowl
      Whole30 BBQ Sauce Recipe (Paleo, Vegan)
    pan seared filet mignon 3 scaled

    Pan Seared Filet Mignon

    Course Meals
    Cuisine American
    Prep Time 10 minutes minutes
    Cook Time 20 minutes minutes
    Total Time 30 minutes minutes
    Servings 2 people
    Author Allianna Moximchalk
    490kcal
    Cost $30
    Print Recipe Pin Recipe

    Equipment

    • non stick skillet or cast iron pan

    Ingredients

    For the steaks:

    • 2 6 oz filet steaks I love Butcher Box. Use my link for $30 off.
    • 1/2 tsp pink sea salt
    • 1/4 tsp black pepper omit for aip
    • 4 tbsp ghee

    For the mushroom sauce:

    • 1 tbsp avocado oil
    • 1 whole yellow onion chopped
    • 3 cloves garlic minced
    • 12 ounces baby bella mushrooms washed and sliced
    • 1/4 cup worcestershire sauce
    • 1/4 cup dijon mustard
    • 3 tbsp fresh thyme
    • 1/4 cup coconut milk
    • 1.5 cup beef stock
    • 1/2 tsp sea salt
    • 1/2 tsp black pepper

    To garnish:

    • fresh thyme
    • fresh garlic
    • pink sea salt
    • pepper omit for aip

    Instructions

    For the mushroom sauce:

    • Add the avocado oil, yellow onion, garlic and mushroom to the pan, cooking until just lightly sauteed. Using the beef stock, deglaze the pan and reduce for 3-4 minutes.
      pan seared filet mignon 9 scaled
    • Add the remaining ingredients (minus Bacon), and bring to a simmer. Crisp Bacon to be sprinkled on top during packaging as a garnish
      pan seared filet mignon 4 scaled

    For the steak:

    • Grab a large oven safe non-stick skillet and add it to the stovetop on medium-high heat. Add the ghee. Pat dry the steaks with a paper towel and coat with the sea salt and pepper on both sides. Add the steaks to the pan and cook for 5 minutes, then flip the steak with tongs and cook for an additional 5 minutes. Once the steak is done, baste again with the ghee in the pan, add additional fresh garlic, salt and pepper to taste. Wrap the steak in foil for 5 minutes after it is cooked and prior to eating. See instructions above and below for cooking times based on how you like your steak cooked.
      pan seared filet mignon 2 scaled

    Notes

    Hey-you’ve made it this far! If you make this recipe, I would love for you to give it a star ★ rating and review below. Make sure you are following me on Instagram, Pinterest, and Facebook too!
    Steak cooking times:
    5 minutes on each side (10 minutes total) for medium-rare. 
    6 minutes on each side (12 minutes total) for medium.
    7 minutes on each side (14 minutes total) for medium-well.
    Quick and delicious paleo alternative restaurant style filet and mushrooms
    Serving: 1filet with mushrooms | Calories: 490kcal | Carbohydrates: 16g | Protein: 6g | Fat: 47g | Saturated Fat: 28g | Cholesterol: 116mg | Sodium: 917mg | Potassium: 590mg | Fiber: 3g | Sugar: 4g | Vitamin A: 4IU | Vitamin C: 13mg | Calcium: 135mg | Iron: 1mg
    Tried this recipe?Tag me on instagram @alliannaskitchen!
    whole30 salmon 1 scaled

    February 2, 2021 Diet

    Whole30 Salmon w/ Lemon Dill Dijon Sauce (Keto, Paleo)

    This whole30 salmon with a lemon dijon dill sauce is perfect for all of your meal prepping needs. The combination of the dijon dressing with the dill and lemon is oh so delicious. You can have dinner prepared in just five minutes and dinner on the table within 30 minutes with this recipe. This recipe is naturally Whole30, keto, and paleo friendly. 

    whole30 salmon with dijon mustard and ghee on top with lemons and a fork

    This recipe was originally published on April 20th 2020 and updated on February 3rd, 2021 to improve user experience.

    What You Will Need For This Whole30 Salmon With A Lemon Dill Dijon Sauce:

    • Wild caught salmon: I love using Butcher Box! They ship me a monthly supply of all of my favorite wild caught and grass fed proteins. If you use my link HERE you can get $30 off of your first order.  
    • Dijon mustard- I like the 365 ground mustard brand.
    • Lemon juice-The lemon juice combined with the dill and mustard is so good. 
    • Dill-I love the lemon dill mustard combo.
    • EVOO-This nicely coats the fish.

    whole30 salmon ingredients

    How To Make This Whole30 Salmon Recipe:

    • This recipe is so simple.
    • First, preheat the oven to 350.
    • Next, mix together all of the sauce ingredients in a bowl. 
    • Now, use a marinating brush and brush the sauce over the salmon.
    • Cook in the oven for 20 minutes for medium well done. 

    salmon on wax paper being prepped for the oven

    Can I Reheat This?

    • Yes, however I like eating it cold once it is cooked. I suggest cooking it in the oven on 350 for 5-10 minutes if you want it to be reheated.

    How Long Is This Recipe Good In The Fridge For?

    • 2-3 days to ensure freshness. 

    If you like this recipe, you will LOVE:

    • AIP, Paleo, Keto, Whole30 Lemon Dill Shredded Salmon Salad
    • Gluten Free, Paleo Herb Crusted Salmon
    • Whole30 Salmon w/ Lemon Dill Dijon Sauce

    Hey-you’ve made it this far! If you make this recipe, I would love for you to give it a star ★ rating and review below. Make sure you are following me on Instagram, Pinterest, and Facebook too!

    whole30 salmon 1 scaled

    Whole30 Salmon w/ Lemon Dill Dijon Sauce (Keto, Paleo)

    Course Dinner, Lunch, Meals
    Cuisine American
    Prep Time 10 minutes minutes
    Cook Time 20 minutes minutes
    Total Time 30 minutes minutes
    Servings 2 people
    Author Allianna Moximchalk
    471kcal
    Cost $15
    Print Recipe Pin Recipe

    Equipment

    • baking sheet

    Ingredients

    • 1 pound wild caught salmon
    • 1 cup dijon mustard I like this brand
    • 1 tbsp dried dill
    • 1 tbsp EVOO
    • 1 whole lemon juiced

    Instructions

    • Preheat oven to 350. Mix the mustard, dill, EVOO, and lemon juice in a bowl. Brush it over the salmon with a spoon or marinate brush. Cook in the oven for 20 minutes.
      whole30 salmon 4 scaled

    Notes

    Hey-you’ve made it this far! If you make this recipe, I would love for you to give it a star ★ rating and review below. Make sure you are following me on Instagram, Pinterest, and Facebook too!
    Quick easy salmon recipe that is paleo, whole30 and keto friendly.
    Serving: 1piece | Calories: 471kcal | Carbohydrates: 8g | Protein: 51g | Fat: 26g | Saturated Fat: 4g | Trans Fat: 1g | Cholesterol: 125mg | Sodium: 1516mg | Potassium: 1333mg | Fiber: 4g | Sugar: 1g | Vitamin A: 267IU | Vitamin C: 3mg | Calcium: 126mg | Iron: 4mg
    Tried this recipe?Tag me on instagram @alliannaskitchen!

    3 Ingredient Protein Pancakes 2 scaled

    February 1, 2021 Breakfast

    3 Ingredient Protein Pancakes (Paleo, Whole30)

    These 3 ingredient protein pancakes are perfect for the whole family for breakfast. The pureed banana adds the perfect amount of sweetness. The eggs combined with the nut butter makes these pancakes loaded with protein. With these pancakes only taking 5 minutes to prep they are a no brainer for all of your breakfast needs!

    3 ingredient protein pancakes stacked on a plate with bananas and maple syrup

    This recipe was originally published on March 20th 2020 and updated on February 2nd 2021 to improve user experience. If you are looking to jazz up this recipe, consider adding my Seedless Raspberry Jam on top!

    What You Need To Make These 3 Ingredient Protein Pancakes:

    • Bananas: The bananas are what is going to sweeten this recipe. Make sure they are ripe!
    • Eggs: The eggs are what makes these pancakes loaded with protein. 
    • Nut butter: The nut butter in combination with the eggs adds even more protein while thickening up the batter.
    • Cinnamon: OPTIONAL- I love the added spice in this recipe, while it is not required I love adding a little bit of cinnamon.

    How To Make These 3 Ingredient Protein Pancakes:

    • This recipe is quick and easy! 
    • First, place all ingredients in a high speed blender. I like using this one.
    • Next, light your stove.
    • Using a nonstick pan, add the pan to the stove. If your pan sticks, spray the pan with oil. 
    • Add ¼ cup of batter to the pan and cook for 2-3 minutes until lightly brown, then flip the pancake and cook for an additional 2-3 minutes.

    Do These Pancakes Reheat Well?

    • Yes, you can put them in the microwave for 20-30 seconds!

    What Should I Add On Top? 

    • We love serving these pancakes with bananas and maple syrup. 
    • You can also serve these pancakes with my homemade paleo raspberry jam, it is AMAZING!
    3 ingredient protein pancakes on a plate with a fork and milk

    If you like this recipe, you will LOVE:

    • AIP Pancakes
    • Chicken Bacon Breakfast Muffins

    Hey-you’ve made it this far! If you make this recipe, I would love for you to give it a star ★ rating and review below. Make sure you are following me on Instagram, Pinterest, and Facebook too

    3 Ingredient Protein Pancakes 2 scaled

    3 Ingredient Protein Pancakes

    Course Breakfast
    Cuisine American
    Prep Time 5 minutes minutes
    Cook Time 10 minutes minutes
    Total Time 15 minutes minutes
    Author Allianna Moximchalk
    326kcal
    Cost $2
    Print Recipe Pin Recipe

    Equipment

    • high speed blender
    • Non stick frying pan.

    Ingredients

    • 4 whole eggs
    • 1 large banana
    • 2 tbsp nut butter I like almond butter

    OPTIONAL:

    • 1/2 tsp cinnamon

    Instructions

    • Place all ingredients in a high speed blender. If your pan is non-stick, spray the pan with cooking oil. Add 1/4 cup of the batter to the pan and cook for 2-3 minutes on each side. Serve with bananas on top!

    Notes

    Hey-you’ve made it this far! If you make this recipe, I would love for you to give it a star ★ rating and review below. Make sure you are following me on Instagram, Pinterest, and Facebook too
    Quick and easy protein pancake alternative.
    Calories: 326kcal | Carbohydrates: 38g | Protein: 9g | Fat: 19g | Saturated Fat: 2g | Cholesterol: 15mg | Sodium: 9mg | Potassium: 736mg | Fiber: 7g | Sugar: 18g | Vitamin A: 112IU | Vitamin C: 12mg | Calcium: 130mg | Iron: 2mg
    Tried this recipe?Tag me on instagram @alliannaskitchen!
    • « Go to Previous Page
    • Page 1
    • Interim pages omitted …
    • Page 27
    • Page 28
    • Page 29
    • Page 30
    • Page 31
    • Interim pages omitted …
    • Page 38
    • Go to Next Page »

    Primary Sidebar

    Allianna Headshots

    Hi, I'm Allianna! Allianna's Kitchen started by accident after battling an undiagnosed autoimmune disease for nearly my whole life.

    More about me →

    GLUTEN FREE DINNER RECIPES

    • steak date night dinner 1
      Steak Date Night Dinner with Garlic Aioli
    • gluten free fried shrimp 3 scaled
      Gluten Free Fried Shrimp
    • cooked frozen pork chops with chives on top on a white plate with a gold fork
      Easy Frozen Pork Chops In The Air Fryer
    • halibut fish tacos on a pale blue plate
      Halibut Fish Tacos

    EASY WHOLE30 RECIPES

    • Beetroot dip on a plate with crackers and fresh parsley on top.
      Simple Beetroot Dip Recipe
    • close up photo of ginger apple pork in a bowl
      Apple Ginger Pulled Pork
    • dairy free lobster bisque in a bowl with a gold spoon and garnished with lemon, fresh green herbs, and red pepper flakes.
      Dairy Free Lobster Bisque
    • juicy filet mignon on a plate
      Air Fryer Filet Mignon

    GLUTEN FREE APPETIZERS

    • peanut butter and jelly chicken wings on a plate with limes
      Peanut Butter And Jelly Wings
    • Stuffed mushrooms on a brown and white plate with fresh parsley on top.
      Gluten-Free Stuffed Mushrooms
    • Gluten free pigs in a blanket in a pile on a plate.
      Gluten Free Pigs In A Blanket
    • Pretty french onion dip in a silver bowl with potato chips and chives on top.
      Vegan French Onion Dip Recipe

    EASY MOCKTAIL RECIPES

    • honey simple syrup 2
      Honey Simple Syrup
    • orange lime cranberry mocktail 4
      Cranberry Mocktail Recipe
    • Clear glass with a brown drink and a cinnamon stick in it.
      Pear Cocktail Recipe
    • Grapefruit mocktail in a glass with jalapeño slice and grapefruit slice.
      Easy Grapefruit Mocktail Recipe

    Footer

    • Recipes
    • My Courses
    • Meal Prep Services
    • Accessibility Policy
    • Contact
    • About Me
    • Blog
    • Privacy Policy
    • Pinterest
    • Instagram
    • Facebook
    • Twitter

    Allianna’s Kitchen 2025 - All Rights Reserved

    Rate This Recipe

    Your vote:


    A rating is required
    A name is required
    An email is required